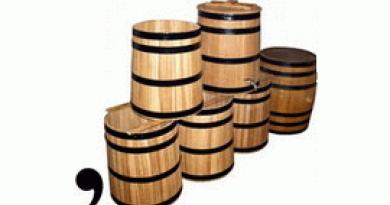
Artificial jewelry is widely used in holiday decorations, interior decoration and in the creation of women's jewelry. Flowers made from foamiran are especially popular; a master class for making them does not require special experience. Such floral decorations are very similar to natural ones, therefore they are very popular among needlewomen. Foamiran is called plastic rubber or suede, but let’s figure out what this material actually is.
What is foamiran and where to buy it
Foamiran is a new synthetic Iranian material recently imported to Russia. Its name comes from the name of the producing company “FoamIran”. Foam is a popular material, because its rich color range allows you to create very realistic compositions and toys. The material easily takes any shape, and volume is added to the workpiece using light heating with an iron. Foamiran is environmentally friendly, and you can purchase it in handicraft stores. At an affordable price, plastic suede is sold in online stores that deliver to any region of Russia.
How to make flowers from foamiran
Plastic suede is a pliable material, so even novice needlewomen can make flowers from foamiran, using the master class as step-by-step instructions. Any crafts will be distinguished by accuracy and realism. With the help of our master classes, you will learn how to make hairpins from foamiran, stencils of flowers and leaves, templates, from which it will be easy to create works of art. So, let's make different flowers from foamiran, and master classes with photos will help you.
Master class on making lilies
To make a flower we will need:
- a sheet of green and white foamiran;
- stamens;
- acrylic paints;
- cardboard;
- felt-tip pen;
- heat gun;
- wire;
- toothpick;
- iron;
- scissors.

Manufacturing method:
- Make a 6 cm cardboard blank of a lily petal and cut it out.
- Using this template, cut out 6 petals on white foam.
- Tint them on both sides with pink-lilac color.
- To make the petals textured, heat them on an iron, drawing veins with a toothpick.
- Heat the edge of the petal too, giving it a waviness.
- Using a brown felt-tip pen, make several dots at the bottom of each petal, giving the flower a natural look.
- For the pistil and stamen, prepare 0.3 mm wire, stamens and small diamond-shaped pieces of plastic suede painted black.
- Glue them to the wire.
- Before assembling the flower, cut out the leaves on green foamiran (foam).
- Give the leaves texture by heating them with an iron.
- Glue the first row of petals (3 pieces) around the glued stamens to the pistil.
- Glue the second row in a checkerboard pattern.
- Glue the leaves as you like at the bottom of the lily.
DIY poppy
Bright flowers made from foamiran turn out very beautiful, and the master class on creating a red poppy will help you see this. Poppies have long won love and attention due to their simplicity, beauty and brightness, and absolutely anyone can handle their production, even those who have picked up plastic suede for the first time. For production we will need:
- red and green foam;
- cardboard;
- bead 2 cm;
- black threads;
- toothpick;
- glue gun;
- scissors;
- wire 20 cm.

Manufacturing method:
- Draw a petal template on cardboard and cut it out.
- Cut out a 6cm circle of green foam.
- Thread a wire into the bead and twist it, forming a stem.
- Heat the green circle and wrap it around the bead, connecting the edges with a wire.
- Secure the foam with black threads with an intersection point in the center.
- Using a toothpick, trace the cardboard templates onto the red foam and cut out with scissors.
- Fold the petals like an accordion, then twist them tightly with your fingers and straighten them - they will acquire a wavy texture.
- Glue the petals in two rows to the base of the ball.
- Cut out two green leaves and score along the entire edge, then curl and straighten for texture.
- Glue the leaves on the back side of the bud by cutting the wire.
MK chamomile
The humble wildflower is recognized as a symbol of family, which is why “daisy” weddings with artificial daisies have become popular. We will tell you how to make these beautiful flowers from foamiran yourself at the master class. To create a flower we will need:
- white foamiran;
- cardboard;
- oil pastel;
- ruler;
- glue;
- pencil;
- protractor.

Manufacturing method:
- Using a compass, draw the contours of 9 cm circles (3 pieces) onto the foam and cut them out.
- Then cut a strip 2 cm wide and 27 cm long to create the middle, paint it yellow.
- Fold the strip in half, glue along the edge, cut the fringe from the fold side.
- Twist the core into a spiral, smearing it with glue.
- Cut out a 9cm cardboard circle, then use a protractor to mark the cuts for the petals.
- Use the resulting pattern to cut out white petals.
- Cut the petals, not reaching 2 mm from the core.
- Heat the tips of the petals with an iron and round them, like a real chamomile.
- Place the blank in the middle and glue it.
- Do the same for 2 more rows of petals, fixing them with glue.
Rose
You will need:
- 2 sheets of foam (green and pink);
- glue;
- foil;
- patterns.

Manufacturing method:
- Cut out two cardboard patterns of different sizes but the same rose petal shape.
- Using a toothpick, trace 5 large and 5 small petals on the foam along the patterns and cut them out.
- Place all the petals against the iron and pull the edge to make them wavy.
- Roll a ball of foil, wrap the first small petal around it into a cone, and secure with glue.
- Make a bud from the remaining small petals, and glue the larger ones on top, making the edges wavy using an iron.
- Cut out 6 leaves from green foam, attach to the iron, then glue to the rose.
Ranunculus
You will need:
- blue foam sheet;
- toothpick;
- scissors;
- glue.

Manufacturing method:
- Make 18 pcs. petals of different shapes and one strip measuring 2x10 cm.
- At the edge of the strip, use scissors to cut a small fringe.
- Glue the fringe to the toothpick so that a roll comes out.
- Glue the larger petals onto the overlapping roll first, and the small ones last.
- Glue it with white foam so that you can paint it with a soft blue color.
Hydrangea and sunflower
Hydrangea made at home using foamiran looks amazing. The work on creating it is very similar to creating a sunflower, but the only difference is the color of the foam. For hydrangeas, pale blue material is used, and for sunflowers, white material is used, which is then tinted in several shades of yellow. We will give one master class on making a sunflower, and make a hydrangea under the same conditions.
You will need:
- white sheet of foam;
- cardboard or thick paper;
- paints;
- floral green tape.

Manufacturing method:
- Draw rectangles in 4 different sizes on cardboard and cut out petals.
- To create the stem, wrap tape around a long toothpick.
- Trace petals of each size 12 times on white foam with an awl and cut out.
- Paint with different shades of yellow (darker from the edge).
- Draw and cut out 4 leaves, paint over them with green paint.
- Cut 1 meter strips, 2 cm wide.
- Paint it black, turning the edge into a fringe.
- Roll the black strip around the base of the stem and glue the end together - this is the middle of the sunflower.
- Heat the yellow petals with an iron and twist them, and then paste over the black roll, first with small ones, then with large ones.
- Also form leaves, securing them to the underside of the bud.
Master class on hairpins and headbands made of foamiran

Women's jewelry is made from roses, sunflowers, peonies, chrysanthemums and other flowers: headbands, hairpins and pendants. These realistic floral decorations are used to decorate books, handbags and refrigerator magnets. You learned how to make a flower from previous master classes. To make a hairpin, brooch or headband, you need to glue one strip of porous foam, 1 cm wide, to the base of the flower and make a loop. Then all you have to do is attach a pin, hairpin or headband to it, and the stylish decoration is ready.
How to make topiary

Topiary is a tree of happiness. When it is made using foamiran, it looks very stylish, elegant and beautiful, creating coziness in any interior. This is an excellent choice for those who do not like to care for indoor plants, and the combination of many bright colors in the composition adds originality to floristry. To create a topiary with your own hands, you will need a bouquet of ready-made flowers, a flowerpot and any decor that you need to fill the flowerpot, securing the stems of the future tree.
Foamiran flowers using figured hole punches for a wreath
MK gerbera brooch
In this master class we will make various decorations from foamiran with our own hands. We will make a hair clip, a wedding boutonniere, a headband, hairpins with roses and a comb... Each decoration will consist of flowers, which will then be collected into a small composition and attached to an automatic hairpin, clip or. Most often they look for instructions on assembling hair decorations, so we’ll start the MK with them.
Hair decorations from foamiran: master class on making automatic hairpins
In this master class we will make from foamiran. This hair clip will decorate any hairstyle. The hairpin can be made using two shades of foamiran. The author of this master class is foamiran master Elena Semanova.
To create an automatic hairpin you will need:
- two shades of purple foamiran;
- iron;
- second glue;
- scissors;
- micro beads;
- PVA glue;
- automatic hairpin
Pattern for hairpin
We will make the flower and buds for the hairpin according to the pattern.

According to the pattern, we cut out blanks from light and dark purple foamiran.
Templates for hair decorations

From a dark shade of purple foamiran we cut out 3 strips - 1.5 cm * 5 cm, 2 cm * 5 cm, 3 cm * 5 cm, triple leaves and sepals. From light purple foamiran we cut out squares 2.5 * 2.5 - 13 pieces and 3.5 * 3.5 - 11 pieces and leaves 6 pieces.

From the squares we cut out petals for the flower and buds in the form of droplets.

We cut strips of 1.5 cm and 2 cm into small fringes, and cut a strip of 3 cm a little wider.

We process the first two strips on an iron, heating it on the iron at silk-wool temperature. We process it so that the fringe bends a little, using our fingers to help.

Grind a fringe 3 cm wide between your fingers.
Step-by-step photo of making hair decorations from foamiran with your own hands

We process all the leaves on the mold using a universal mold. Heat it on an iron at wool-silk temperature and squeeze it well on the mold.

We process all the cut out petals on a Cattleya mold. Heat it on an iron at silk-wool temperature and squeeze it well on the mold.

For tinting we use lilac oil pastel and with a sponge we apply a slight tinting over the entire petal. Highlighting the veins.

On the edge of the iron, we heat the end of the petal and make waves, stretching the edge of the petals.

Along the edges of the leaves we apply tinting with lilac oil pastels, applying tinting on both sides.

We apply notches to the leaves, 3-4 notches on each side of the leaf. And we process it on the edge of the iron so that the notches come off.

Using lilac oil pastels we apply tint along the edges of the petals of the sepals. We apply tint on both sides.

We cut notches on the petals of the sepals. We fold the sepals into one petal and rub them between our fingers, without rubbing the middle.

We take strips of 2 cm and 3 cm and dip them in PVA glue and then in micro beads. Leave to dry.

Take a toothpick and glue a 1.5 cm strip of fringe, forming the center of the flower. We twist the fringe so that the fringe points inward. The middle should be 0.5-0.7 cm. We wind the second strip so that the fringe looks outward. Make 2 turns and cut off the excess.

We take small petals and glue 5 pieces in a circle, glue them to the base of the center and lift them slightly.

We glue 5 large petals in a checkerboard pattern, between the petals of the first row.

Take the sepal and glue it to the flower.

Take a 3 cm fringe and glue it onto a toothpick, making 3 turns. We make 2 pieces of base for large buds.

Take 3 large petals and glue them together like a fan.

Place the base a little higher in the middle of the petals, wrap it and glue it into the petals.

We put on the sepals and glue each petal.

We process the petals of the sepals on the edge of the iron so that the petals are slightly bent.

Take the fringe and make 2 turns on the toothpick. We also glue 3 small petals together like a fan and glue the base into them. This is how the middle buds were formed.

Glue the sepals to the middle buds and process them on the edge of the iron.

We twist the fringe one turn onto a toothpick, then glue the fringe with a petal. And glue the sepals. This is how small buds were formed.

We take an automatic hairpin and paste it with a strip of foamiran.

And glue the leaves to the middle of the hairpin on both sides.

Glue triple leaves on both sides.

Glue a flower in the middle.

Glue 6 buds around the flower in a circle, symmetrically on both sides.

Here is an original hair decoration in the form of a “Caprice” automatic hairpin.
Hair decoration with hairpins with foamiran roses

To create a rose you will need:
- white, olive Iranian foamiran;
- iron;
- wire No. 26-28;
- scissors;
- hairpin.

For a rosette on a stiletto heel we will need 4 petal circles. We cut out petal circles from white foamiran with a diameter of 4.5 cm, 3.5 cm - 2 pieces each.

We process each petal of the five-petal circle separately on an iron at silk-wool temperature, making indentations in the middle of each petal. We process the edges of the petals with a lighter or by turning them on the edge of the iron.

We take a piece of foil 4*4 cm and form a droplet, put it on and glue the droplet onto the wire.

We put the petal circle on the foil base and paste it over one petal at a time, covering the foil.
We take the second petal circle and put it on the base and glue it, lifting the petals.

We also put on and glue another third petal circle, apply glue to the base and a little to the bottom of the petals and slightly press it to the base.

We put the fourth petal circle on the base and apply glue only to the base.

We fasten the pin from the base with a wire and cut off the remaining wire.

Take a piece of olive foamiran with a diameter of 1.5 cm and put it on a stiletto heel.

And glue it to the base.


We make notches on the sepals and fold them like an accordion and gently rub them between our fingers and straighten them.

We put a sepal on the hairpin and glue it to the base of the rose.

This is the rose we made from foamiran on a stiletto heel. These hairpins can be used to decorate wedding, evening or even everyday hairstyles.
Hair decoration with a headband with foamiran flowers
At master classes Forget-me-nots And Flowers from scrap foamiran we made beautiful little wonder flowers that would be perfect for a headband. With these flowers we will make a headband for you.

This is the headband we will make with our own hands.
Step-by-step master class on decorating a headband with foamiran flowers

We take a satin ribbon and a metal bezel and treat the bezel with tape, wrap it on the bias, gluing it in places.

The headband is ready.

Take a strip of foamiran 0.5 cm wide and slightly rub it between your fingers to make it soft.

Here's a hair decoration - a headband with flowers.
Hair decoration: marine style comb MK

This is the kind of comb for decorating your hair that I offer you in this master class.
To create a comb hairpin you will need:
- marshmallow foamiran in blue and coral colors;
- oily lilac pastel and sponge;
- iron;
- second glue;
- scissors;
- beads 0.3 cm and 0.2 cm;
- bead wire;
- scallop
Pattern for creating a hair comb from foamiran
We will make the corals and flower for the scallop according to the pattern.

According to this pattern, we cut out a coral pattern from cardboard. And from blue marshmallow foamiran, squares for flower petals in the shape of an asterisk.
Foamirn coral and flower patterns

And from blue marshmallow foamiran we cut out squares for star-shaped flower petals and from coral marshmallow foam we cut out rectangles in the amount of 6 pieces for each coral. The rectangles are slightly larger than the cardboard pattern.

We thin out the marshmallow foamiran through sheets of office paper. To get corals, take three rectangles, fold them in a pile and put a cardboard pattern on top and iron them through the paper.

These are the coral prints we got.

Then we cut out the corals along the cleats.

From the prepared blue marshmallow foamiran we cut out the petals for the star flower.
How to assemble a hair comb with your own hands: step-by-step photos

Using lilac oil pastels we tint the edges of the petals on both sides.

We bend the petals in half, heat them on the edge of the iron and pull out the petal. Then we heat the edge of the petals and make waves.

We process four-petal circles in the same way as single ones, each petal separately.

We take a strip of blue foamiran and glue it over the edge of the comb for attaching decorations. And cut out a small circle for the base of the flower.

We process the corals with an iron, heating at maximum and bend them to your taste.

Glue the corals on both sides of the scallop symmetrically.

And in the middle of the comb on the base we begin to collect a flower in the form of an asterisk, five petals in a circle.

So we glue three rows of five petals. We glue the second row a little closer to the center than the first and glue it between the petals of the first row in a checkerboard pattern. The second one is even closer to the center and between the petals of the second row. Glue two four-petal circles into the middle.

Take a 0.5 cm bead and cover it with blue foamiran.

Glue a processed bead into the center of the flower.

We take 0.3 cm or 0.2 cm beads and decorate the corals, glue 3-4 pieces.

We take 10-8 cm beaded wire, put a bead on each wire and bend the wire in half and twist it. Then we wind the wire with the bead onto the stick in the form of a spiral. We connect 3 wires together and attach them to the corals

We made this hair decoration from foamiran with our own hands. If you have small shells, you can glue them on corals or near a star flower.
Wedding decoration made of foamiran: master class on assembling a boutonniere

This is the kind of boutonniere we will create for the groom at the master class.
To create you will need:
- white, pink, lilac in two shades, olive Iranian foamiran;
- iron;
- instant glue or hot glue gun;
- wire No. 26-28;
- scissors;
- tape tape white and green;
- stamens lilac;
- clasp.
For the boutonniere we will create three roses and a sprig of leftover.
We will create roses without separate patterns.

To create a white rose, cut out squares of 2*2 cm from white foamiran - 11 pieces, 3.5*3.5 cm - 12 pieces.

We cut out petals in the form of droplets from the squares.

Heat the petals on an iron at silk-wool temperature, fold them like an accordion and rub them between your fingers, straighten and stretch them, make a depression in the middle of the petal. We process the edge of the petals 3.5*3.5 cm on the edge of the iron and slightly twist it.

Take a piece of foil 4.5*4.5 cm and form a droplet at the base of the rose and glue the droplet onto wire No. 28-30 - 8-10 cm.

We take 3 small petals and cover a drop of foil, covering it so that the foil is not visible.

For the second row we glue 3 small petals slightly overlapping in a circle. We also glue 5 petals overlapping the third row.


Then we glue 7 larger petals, glue the last petal in a circle and place it under the first petal. The rose is ready.
Cut out a sepal from olive foam.

We heat the sepals on an iron at silk-wool temperature and rub them between our fingers and straighten them. Then glue it to the rose.
We also form a pink rose without separate patterns.

We cut out 3.5*3 cm rectangles from pale pink foamiran. We cut out 23-25 petals for one rose.

From rectangles we cut out petals in the form of droplets.

We heat the petals on an iron at silk-wool temperature, fold them like an accordion and grind them. We straighten and pull out 10-11 petals. We process the remaining petals on the edge of the iron and twist the edge of the petals, making one or two tucks at a time.

We also make the base of the rose out of foil.

We glue the base of the foil with even petals, covering the foil.

Then we glue 3 petals with two tucks.

Then glue 5 petals in a circle, overlapping.

Then we glue the petals overlapping 7 pieces, straight-twisted petals. The rose is ready, glue the sepals to it.

Using a hole punch, we cut out the petals of the “Levkoy” flower from lilac foamiran. We process it with an iron and process it with bulk. We heat some of the petals slightly without treating them with bulk.

We take 2 petals of light and dark lilac, 2 processed with bulk and 2 heated on an iron and 2 double stamens. We fold the stamens in half and put the petals on them and glue them.

We take wire No. 28-30, make a loop at the end and put on the petal, seal the loop with the petal. Then we begin to attach one flower at a time to the wire, securing it with white tape. So we attach all the flowers in a checkerboard pattern, forming a “Levkoy” branch.

Then we collect three roses and a sprig of “Levkoy” together.

We take several pieces of wire 15-20 cm and treat it with tape.

We form several decorative wires. I make three by winding them on a round stick and connecting three with rings.

We take the wire treated with tape and a clasp for the brooch.

We pass the wire through the holes of the fastener.

Then we connect both ends of the wire and twist them.

We take a piece of green foamiran and glue it on both sides to the fastener, designed to secure the fastener more firmly.

We attach the clasp to the decorative details of the boutonniere. And we treat the handle of the boutonniere (stem) of the flowers and the decorative details and fastening wire with tape.
A ready-made wedding decoration made from foamiran with your own hands - a boutonniere made of roses.
Almost all girls, girls and women love wreaths. This is a wonderful accessory for decorating the head; it elegantly emphasizes natural beauty and adds charm. In this article we will look at how to make a chic head wreath from foamiran with your own hands.
You will need: foamiran 0.5 cm thick (orange, yellow, cream, light green, dark green and red), scissors, toothpick, curly scissors, oil paint in autumn shades, sponge, sheet of paper, iron, floral wire, ruler, super glue, lighter, lilac clay (for blueberries) or beads, tape, foil, wire at least 2 mm thick and 60 cm long, ribbon or string, mold (leaf shape).
Master class
- Print or draw leaf templates, then cut them out.
- Trace the templates onto foamiran with a toothpick, then cut them out.
- Make a sufficient number of multi-colored leaves, for example 60, remember, the more there are, the more magnificent and beautiful the wreath will look.

- Add realism to some of the leaves by trimming the edges with scissors.
- Scratch a small part of the leaves with a toothpick.
- Tint the leaves in this way: apply a little oil paint to the sponge, blot a sheet of foamiran, then remove the excess with a piece of paper.

- Combining colors: color the yellow foamiran leaf with light green and brown paint. Also, color some yellow leaves with orange, red and light green paint. Tint red leaves with brown, green leaves with burgundy, brown and dark green.

- Preheat the iron on the second setting, apply the sheet for 2 seconds, remove it and press it onto the mold to make an imprint of the sheet. Repeat this process with all the leaves. Please note that this should be done quickly and very carefully, as foamiran is highly flammable. If you are new to this business, it is better to skip this point and proceed further.

- Cut the floral wire into 7 cm long pieces and make a loop at the end.
- Glue the floral wire to the front side of each leaf using super glue.

- Treat the edges of the leaf with fire using a lighter. The edges should be realistically curved. Repeat this process with all the leaves. Do this carefully, I remind you that foamiran is highly flammable.

- Roll a ball of purple clay the size of a blueberry. Make 15 berries, place each blueberry on a wire with a loop coated with super glue. Using the tips of a pair of scissors, score the tops of the blueberries and set aside to dry. Beads can be used as blueberries.

- Start assembling the wreath in this way: form small bouquets of leaves and berries, secure them with tape.
- Cut rose petals in the shape of a drop from red foamiran. One bud will require 10-15 petals. The number of buds depends on your desire; you can make from 3 to 7.

- Tint the edges of the petals with brown oil paint.
- Make the petals thinner in this way: heat the petal on the iron for 2 seconds, then fold it into an accordion and rub the petal with your fingers. Open the petal and create an indentation and curl the edge of the petal outward. Repeat this process with all the petals.

- Finish the edges of the petals using a lighter.
- Roll up a foil drop, make a loop on the wire, apply super glue and put on the foil drop.
- Glue 2 petals opposite each other and form a bud by gluing the petals in a checkerboard pattern, opening the flower slightly. Form the desired number of roses in the same way.
- Make the base for the wreath by cutting 60 cm of wire. Make loops at the ends.

- Cut the tape into 15 cm long pieces, fold each piece with the sticky side inward and cut lengthwise into 2 halves.
- Open the end of the tape, apply it to the base 10 cm from the edge and wrap the wire around it.
- Attach bouquets of leaves and berries, securing with tape.

Foamiran jewelry. About the properties of this material
- The material is very soft, pliable and flexible, especially if you hold a small piece of fom in your hands, it begins to “melt”. But real miracles happen when foamiran is heated more strongly. If you cut rose petals from a sheet and then apply an iron to the workpiece (heating temperature “linen”), then the foam rubber becomes so plastic that it can be compressed, stretched in different directions, pressed. When heated, the foam contracts and stretches best. Instead of an iron, it is more convenient to use hair curlers. It is enough to pull the blank through the curling iron - and in front of you is a new one, like a real flower petal. In addition to the iron and tongs, you can use a hair dryer, and if you need to work with small workpieces, you can apply them to the heated nozzle of a glue gun (you need to clean the hole from glue in advance).

- Besides stretching and shrinking, foam is very easy to cut with scissors or a knife. The simplest scissors will do. And in order to do the job efficiently, it is advisable to cut the sheet of foam on a special rubberized backing. If you need to make a wavy edge of the workpiece, then you need to use scissors with a curly end, and then slightly stretch the workpiece along the edge with your fingers.
- But this is not all that foamiran is capable of - the thinnest sheets of foam (1 mm thick) can be squeezed out with a shaped hole punch, which means that new opportunities open up for needlewomen.
- To prevent the foam sheet from getting stuck in the hole punch hole, you need to place a thin sheet of plain paper (you can even use newspaper) under the bottom along with the sheet of foam. The edges of the workpiece will be smooth and neat.
- Foamiran has many advantages, it stretches easily, you can give the product the desired shape, cut out a shape with scissors or a knife. But what foam does not tolerate is contact with sharp objects. If you carelessly run something sharp across a sheet of foam, marks will remain on the surface. On the one hand, this is a disadvantage, and on the other, an advantage. Because for their work, many craftsmen use templates that can be traced directly onto a sheet of foam material with a toothpick, sharpened pencil or awl.
- Foamiran is a non-toxic material and is easy to clean with water. Even the finished product can, if necessary, be washed under running water and nothing will happen to it! As for the safety of this material for needlework, you can safely give the kids leaves of foam so that they develop their imagination and make crafts on their own.
Handmade foamiran jewelry is very popular. You can make stunningly beautiful works from this material:


Neck decoration made of foamiran:

How to make hair decorations from foamiran with your own hands
We have figured out the properties of foamiran; you can try to make a simple head decoration from foamiran yourself: a hairpin or headband. Let's start simple and make a hair clip.
What we need:
- sheet of white foamiran;
- yellow and pink dry pastels;
- wet wipes;
- petal blanks;
- awl or toothpick;
- stamens are white;
- scissors;
- glue gun;
- automatic hairpin
How to make a hairpin:
- In order to make a medium-sized flower (diameter 8 cm), you need to buy a standard sheet of white foamiran (A4 format).
- Attach flower templates (3 pieces of different sizes) to a sheet of foam, outline the outline with something sharp. Even a non-writing pen will do.
- Cut out the petals along the contour.
- Now we take a yellow pastel, draw not an outline along the edge, but rather fill the space of each blank, heading towards the center.
- Now you need to take a damp napkin and rub it over the blank, or you can do it differently: rub the dry pastel stick with the napkin and paint the petal blanks. The result will be a delicate yellowish tint.
- You need to do the same with pink chalk, just color the outline and, as it were, stretch the color, making it deeper from the edge of the petal to the center.
- In total you will get 8 blanks, 3 of which (central) need to be made more contrasting, darker in color.
- To add texture to each petal, you need to use an iron. Turn it on to the “Wool” position and heat each petal individually. Press the sole of the iron against the workpiece and hold it for several minutes. The petals will become softer and rise a little.
- Now, quickly, before the petals have time to cool, you need to twist them into a tube (first fold them in half). You will get a bud.
- When the petals have cooled, they need to be straightened, slightly stretching along the edge. The petal should be thinner towards the edge.
- Now assembling the flower. Foamiran can be glued using either special glue or hot glue. In this case, it is advisable to use moment-crystal glue, but if you don’t have such glue at home, then you can also glue all the petals together sequentially with hot glue.
- The petals need to be glued together in rows, from larger to smaller pieces. When you finish the work, insert a toothpick into the middle so that the workpiece sticks together correctly and does not fall apart.
- Let the flower dry for now, and we will make the stamens. To do this, we will use a thin wire of a light shade; we need to tie up the stamens, fold them in half, and pull them by the wire into the center of our flower.
- On the wrong side you need to tie the ends of the wire several times and trim off the excess.
- All that remains is to attach a hairpin or elastic band. To do this we will use hot glue. If you glue an elastic band, then you need to glue a piece of foamiran on top of it so that the hairpin does not fall apart.

Using the same principle, you can make a decoration from foamiran - a hair comb.

Master class on DIY foamiran decorations
Handicraft masters most like to make various flowers from this soft and plastic material. And only then these blanks find further use. Interestingly, foamiran can be used to make not only hair decorations: elastic bands, hairpins and headbands, but also beautiful neck decorations, brooches, and bracelets.
We invite you to plunge into the wonderful world of needlework and make your own decoration from foamiran - a lily flower.
Materials and tools:
- 2 sheets of white and green foamiran;
- ready-made stamens;
- dry pastel or acrylic paints, brush;
- markers;
- cardboard;
- hot glue;
- thin wire;
- toothpicks;
- scissors and iron.
Making a lily from foamiran with your own hands:
- We make our own preparation of lily petals. Draw an outline on a sheet of cardboard and cut it out with scissors.
- The petal size is 6 cm in diameter. The template must be attached to a sheet of foam, outline the outline with any sharp object (you can use scissors) to cut along the outline. You should get 6 white petals.
- You will need pink and lilac pastels or acrylic paints to tint the blanks on one side and the other.
- To give texture to each petal, you need to try to make veins by hand. To do this you will need a toothpick and an iron. Heat one piece with an iron; as soon as you see that the material becomes soft and pliable, you need to draw stripes with a toothpick before the petal has time to cool.
- Now you need to warm up the edges of the petal and give them a waviness, slightly stretching the material with your fingers.
- At the bottom of each blank, use a brown felt-tip pen to draw dots, like a real flower.
- Now let's get down to preparing the stamens and pistils. You need to make a bouquet from stamens and pistils, use thin wire (0.3 mm). We twist it and insert it into the middle of the flower.
- Now we cut out leaves from green foam and also heat them over the iron to give each leaf a texture.
- Hot glue the leaves to the petals on the back side.

The beautiful flower is ready, now show your imagination and figure out where it can be used. And we give you a hint: you can decorate your home with delicate and beautiful flowers from foamiran.

How to make wedding decorations from foamiran with your own hands
The most beautiful and most delicate royal flower is the rose. These flowers are given to loved ones and only people. No wedding celebration is complete without a beautiful bouquet of roses. You can make a beautiful decoration from foamiran for the bride and her friends.
How to make a rose from foamiran and what you will need, we will find out further:
- 2 sheets of pink and soft green foamiran;
- foil;
- scissors and glue;
- rose petal preparations.
Let's make a beautiful rose together with you:
- If you don’t have a blank, you can make it yourself from thick cardboard. Draw the petals and cut them out. Experienced needlewomen simply fold a sheet of pink foamiran into several layers, draw a petal with a simple pencil and cut it out immediately with scissors. The important thing here is not to worry that nothing will work out. On the contrary, it is important to ensure that, as in nature, the petals are not the same.
- In total you will need 10 petals: 5 large and the same number of small ones.
- You need to warm the petals one by one with an iron, and then stretch the edges with your fingers to make them wavy.
- Let's start assembling the rose: roll a ball out of a piece of foil, wrap the smallest petal around the ball, and fix it with hot glue. You will get a cone.
- We glue each petal sequentially in a checkerboard pattern. First you will get a small bud.
- Now you need to attach the large petals, and then turn on the iron and heat the edges of the rose petals.
- We cut out leaves from a sheet of light green foam, also apply them to the iron, slightly twist them into a tube, but do not press them too hard. We unfold it and get ready-made leaves.
- They need to be glued to the rose bud on the back side with hot glue.

The beautiful rose is ready. You can make several of these roses and assemble them into a wreath:

DIY foamiran jewelry. How to decorate glasses with foamiran
And again we will make beautiful and very delicate roses. But the execution technique is slightly different from the previous master class.
Let's prepare the following:
- white foamiran sheet;
- glue "Moment";
- glasses;
- half beads for pearls;
- contour paint for working on glass;
- a piece of sponge for washing dishes;
- silver acrylic paints;
- sheet of cardboard, pencil, scissors.
Decorating glasses:
- On a sheet of cardboard we draw a heart-shaped blank.
- We cut it out, apply the blank to a white sheet of foamiran, outline the outline with a sharp object, and cut it out with ordinary scissors.
- For 1 glass you need to prepare 10-12 petals.
- Each petal needs to be heated with an iron, the warm material is stretched with your fingers in the middle so that the petal turns out to be convex.
- Each petal, while it is still warm, is twisted into a loose flagellum and straightened.
- Preparing glasses: wash thoroughly under running water with detergent, wipe, and treat with glass surface cleaner.
- It is best to work at this stage with gloves so as not to leave fingerprints on the glass.
- Using acrylic paint we put small dots on the stem of the glass, then we tint the stem of the glass and especially the place where the flower will be attached with white paint. This is exactly how you can hide unevenness and drops of glue.
- We are waiting for the paint to dry and we can begin the most important thing - assembling the rose.
- Place the glass on a flat surface with the stem up, and glue the petals in sequence. We make sure that the petals do not move apart and are not attached too closely to each other. You need to achieve naturalness so that the petals lie beautifully.
- Also pay attention to the fact that the glass is comfortable for the bride and groom to hold in their hand, therefore, before gluing the first petal, you need to take the glass in your hand to understand all its functionality.
- We glue the petals with “Moment” or “Titan” glue. You need to apply glue to the glass, attach the petal, press it - wait.
- The first row of petals has been glued, now the next row - the petals can be glued onto the foamiran, and this is a little easier. The main thing is to twist it a little while working, and if necessary, then glue the petals in the right places.
- We try to work as carefully as possible, because this is a wedding accessory - and there should be no drips, smeared glue, uneven strokes or fingerprints on it. The work must be done as carefully as possible.
- We wait for the petals to stick together, and then we move on to decorating the rose’s stem.
- It is necessary to glue half beads under pearls around the stem of the flower as carefully as possible. To make your work more accurate, buy glue-based beads.
- Before using glasses, they need to be wiped and preferably stored in a cardboard box. If you doubt that everything will work out the first time, we recommend practicing on ordinary glass glasses.
In the summer, various hair decorations become especially popular; they look very stylish and help complete the created image. It’s quite easy to make beautiful foamiran headbands with your own hands, the most important thing is to be patient and follow the instructions step by step.
To make a headband using flowers from foamiran, the master class of which is quite simple, you initially need to prepare special materials and tools.
Namely:
- Foamiran in two different shades of the same color and green material;
- Dry pastel;
- Glue gun;
- Foil;
- Scissors;
- Thick fabric;
- Lace;
- Headband.
To make a headband with roses from foamiran, you first need to make the flowers themselves. To make roses, you need to cut out the petals from foamiran, lay them out on a hot iron, and when they are hot, stretch the middle of each petal with your hands and bend the edges to give it credibility. When all the petals are prepared, you need to collect them into a flower, pasting over a base made of a piece of foil, which needs to be twisted into a roller shape.

The leaves also need to be warmed up and veins drawn on them, and also twisted a little so that they look like real ones. Flowers need to be collected by attaching green leaves to them. Then you need to cut out 2 ovals for the base. Make several cuts on one oval and thread it into the prepared rim, and attach the second base to the first.
You need to glue roses onto the prepared base, as well as additional decorations to completely cover the entire space of the base. On the opposite side of the headband you need to decorate the base with lace.
Crocus flowers look very beautiful and elegant in the headband, which can be collected into a beautiful bouquet.
To make such a headband you will need:
- Purple, yellow and olive foamiran;
- Template paper;
- Toothpicks;
- Wire;
- Iron;
- Hot glue;
- Metal rim;
- Scissors.
Initially, you need to prepare all the required templates for leaves and petals. For the petal, you need to draw on paper 1.5 cm wide and 2 cm high. The leaves can be made in any shape, the most important thing is that they fit the overall composition. Then you need to cut out a lot of petals from purple foamiran, and prepare the middle from yellow material. To make the middle, you need to cut a strip 2 cm wide and cut it into fringe, slightly short of the edge. The strips should be quite thin.
To make the petals, you need to place the blanks on a preheated iron, and then twist them a little. Cut the wire into equal lengths of approximately 3 centimeters and attach a small strip of fringe to one end.
After this, you need to fasten the petals one at a time around the fringe, distributing them evenly, so that you end up with a beautiful flower. Each flower should have 3 petals. When everything is ready, you need to prepare the leaves from olive foamiran in the same way.
Leaves and flowers must be attached sequentially. First you need to attach several leaves to the rim, and then glue flowers on them. The ends of the wire should be strictly located on the same line, and the reverse side of the rim should be very beautiful and neat. When all the flowers are secured, you need to cover the wire with several leaves. The headband can be complemented with a beautiful ribbon if only part of it is filled with flowers.
Beautiful headband with flowers made of foamiran
Headbands made using foamiran flowers look quite stylish and interesting. In addition, these are light and interesting products that can complement and diversify the created image.

To make a flower headband from foamiran you will need the following materials and tools:
- White, pink, milky foamiran, 0.5 cm thick;
- Scissors;
- Iron;
- Cardboard for patterns;
- Paints;
- Ready stamens;
- Metal or plastic rim;
- Satin ribbon;
- Hot glue;
- Chiffon flowers.
Making flowers from foamiran does not take too much time, and simple master classes will be understandable even for beginners. Initially, you need to prepare white flowers, for which you cut out 5 white petals in the shape of a drop. Each petal needs to be heated a little with an iron and the middle stretched a little, thereby giving them a convex shape. Lightly tint the edges of the petals with yellow pastel.
From a strip of white foamiran, cut out a clove-shaped blank for the center of the future flower. The teeth need to be leaned against a hot iron for a few seconds, and then using hot glue, glue them together with the curls facing outward. To make a milky flower, you need to cut out small petals, twist them, and then straighten them to add texture. Then wrap one petal around several stamens and glue two more petals. Cut petals in the shape of a drop from pink foamiran, and then heat them up and give them a wavy shape. You need to collect a flower from several petals around yellow stamens. Drape the headband with a satin ribbon, and then glue chiffon flowers to it at equal distances. Then evenly distribute the foamiran flowers along the rim to form a finished composition.
Foamiran bandage: how to make
A headband with decoration made from foamiran can be quite interesting and original.

This decoration is perfect for:
- For a little girl;
- For a photo shoot;
- As a daily decoration;
- For a wedding.
Making headbands for little girls and adults is quite simple; the most important thing is to decide on the theme of the product, as well as prepare all the required materials and tools.
Important! When creating a headband for a baby, you need to take into account the child’s age and select small, but at the same time quite bright and original flowers.
Recommendations: how to make a winter-themed headband from foamiran
For children and adults, you can create original and very interesting winter headbands with decorations made of foamiran and soft fur ears. This craft does not take much time, however, you need to first prepare diagrams of the product so that you can make a pattern from them.

You can decorate the headband:
- Snowflakes;
- Asterisks;
- Pine cones and Christmas trees made of foamiran.
Children's hoops, which can be decorated with a snowflake or a star made of shiny foamiran, will look quite interesting. Such a product will look quite original, as the decoration shimmers in different colors and shines beautifully. This craft will be an excellent decoration for girls and will complement a carnival costume or elegant dress. Berry headbands can look beautiful and interesting and will go perfectly with absolutely any outfit.
Headband with flowers made of foamiran: master class on making
Headbands with flowers made from foamiran can be very different, it all depends on your own imagination. The headband decorated with poppy looks very beautiful.
To make this decoration you need to take:
- Red and green foamiran;
- Foil;
- Toothpicks;
- Glue gun;
- Headband;
- Satin ribbon.

Initially, you need to cut out flower petals and leaves from foamiran. Then, using a hot iron, slightly heat the workpieces and give them shape, stretching and twisting the corners. When all the pieces are fully prepared, you need to make a small ball of foil and cover it with preheated foamiran.
Place the ball on a toothpick and cover it with prepared poppy petals using hot glue. Then you need to attach the prepared leaves to the flower.
After the flower is ready, it needs to be attached to the headband, previously wrapped with a satin ribbon. You can complement the headband with any decorations, in particular beads, flower buds and much more.
MK headband made of foamiran: flowers with berries
A modern stylish headband made with flowers and berries looks very beautiful and unique.

To make such a headband you will need:
- Any flowers made of foamiran;
- Ready-made candied berries;
- Hot glue;
- Headband;
- Satin ribbon.
To make a headband, you need to first prepare flowers from foamiran, as well as candied berries, using polymer clay, glue, sugar and wire. You need to make berries of various shapes from polymer clay and put them on a thin wire. For greater strength, the products need to be baked in the oven, and then covered with glue and dipped in sugar.
When all the details are prepared, you need to wrap the headband with ribbon and attach flowers, berries and other used decorations to it using a hot gun.
Foamiran headbands (video)
Headbands made with foamiran flowers look quite stylish and original; the most important thing is to put in very little effort to make such a craft.