In order to conduct chemical and physical experiments and try to study the laws of nature, you don’t have to wait until it’s time to go to school. You can conduct entertaining experiments in the form of a game at home with your children. preschool age. Of course they will simple experiments, which do not require special knowledge or training. They must still be carried out exclusively in the presence of adults in order to avoid unforeseen situations that are dangerous to the lives of children. You can watch some of the experiments listed below and other experiments on video on our website.
Examples
So, let's see what interesting scientific experiments in the form of a game can be done at home?
First of all, let’s decide which substances are fun and safe to conduct experiments at home for preschool children.
- Firstly, with water. You can dissolve various substances in it and observe the manifestation of their properties.
- Secondly, with air.
- And finally, with all available means: soap, soda, salt, rubber, etc.
Water (1 option)
First, let's do a simple experiment with water. To do this experiment you will need:
- a quarter glass of colored water,
- a quarter cup of sunflower oil
- and a quarter glass of syrup.
As a result, while playing, children develop the concept of different densities of liquids.
As a result of the experiments, the following picture should be obtained: the syrup, as the densest liquid, will settle to the bottom, water will be in the middle, and the oil will float to the top.
Home experiments with water are the easiest. They usually consist of mixing various substances with water. With children of preschool and primary school age, you can do another shocking experiment, which, however, is no different from an ordinary boy’s game.
Option 2
Fill the container with water, add a quarter of an Alka-Seltzer tablet, cover with a lid and step aside. It is very interesting to watch how the lid flies off to the side under the pressure of carbon dioxide. You can view similar experiments in the photo.
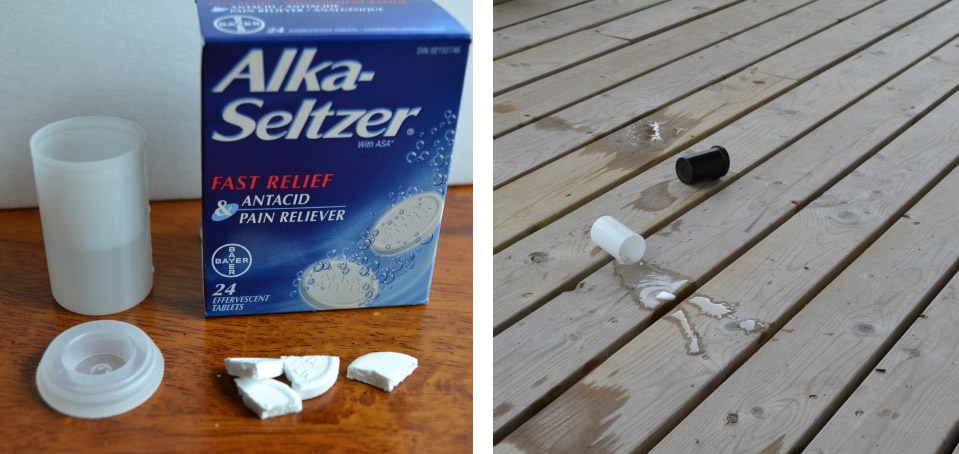
Interesting science experiments can be done at home using a variety of chemicals. Of course, for preschool children, we will not use life-threatening acids or alkalis for play. Interesting experiments are obtained even if you use things familiar from birth: soap, vinegar, salt, etc.
Inflating the balloons
For the following experiments you will need:
- plastic bottle,
- vinegar,
- baking soda,
- balloon,
- funnel.
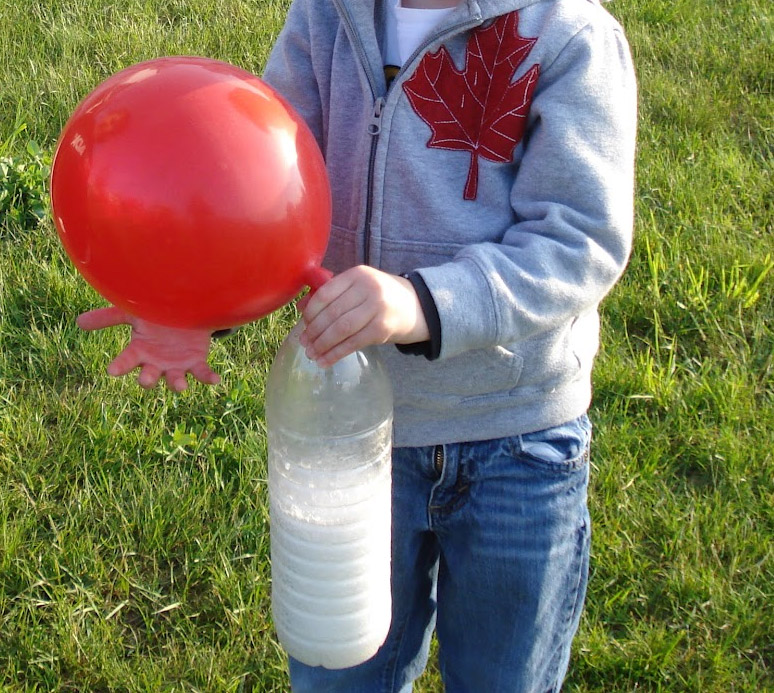
We begin the experiment by pouring into plastic bottle one and a quarter cups of vinegar. Fill a balloon with three-quarters of a cup of soda and attach the balloon to the top of the bottle. Carefully let the soda fall into the bottle and watch how the ball inflates, but it will not fly. Take a video of a similar experiment and show it to your friends: they will probably want to repeat it.
Video
Oil
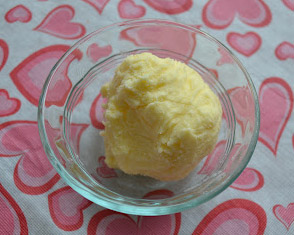
Interesting experiments can be done with butter. As a result of such experiments, any child will feel like a real wizard. Take a packet of milk cream and pour it into a container with a tight-fitting lid. Close the lid and start whisking. The experiment lasts quite a long time - about 20 minutes. First the cream turns into a thick cream, and then into homemade oil. The child is truly surprised by such a transformation. When the cream thickens, drain off the remaining water by straining through cheesecloth.
Video on the topic
Entertaining home experiments can provide a lot for the development of preschool children. Scientific experiments carried out in the form of games teach children to be inquisitive, attentive to natural phenomena, and develop erudition. As a result, the child clear example learns the laws of physics and chemistry, which will subsequently be studied at school. Fun experiments for preschool children help reveal their talents and abilities and prepare future scientists.
Plants
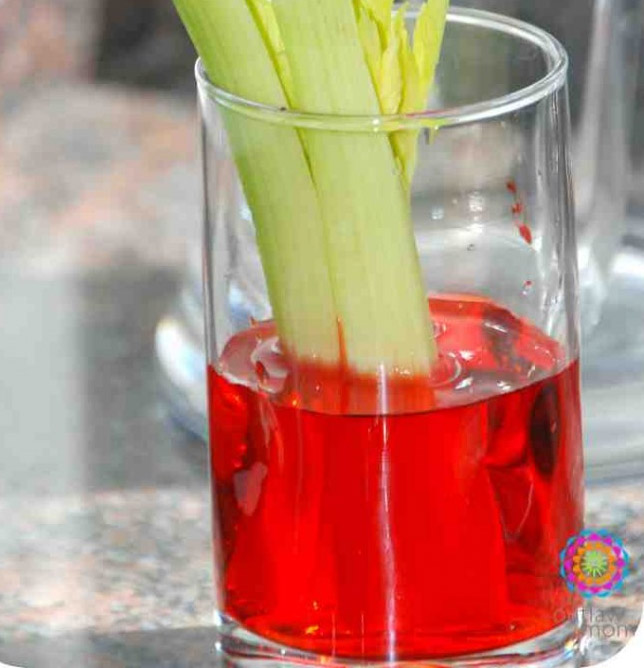
Through experiments with plants, children can become familiar with the physical phenomenon of absorption. This is the ability of a material or living being to absorb the constituents of another substance. To conduct the experiment, you will need several stalks of celery and colored water, for example red. Pour water into a glass and drop the celery stalks into it. Of course, this experience takes time. After a few days, the stems will begin to absorb water and turn red in color. If the stems then sprout leaves, they will also be red. Thus, the rather complex theoretical concept of absorption becomes simple and clear thanks to fascinating experiments.
Making jelly
Fun experiments for children can bring not only educational benefits, but also quite material satisfaction. For example, the result of experiments can be the creation of a delicious dish, which will also serve as a teaching aid. Such an experiment is convenient to conduct not only for preschool children, but also for school-age children. We invite you to study with your children the structure of plant and animal cells using... jelly, which can then be eaten by the whole family. For these experiments you will need kitchen sets for making jelly and sets of various small sweets:
- jelly,
- marshmallows,
- caramel.
We open the jelly preparation kits and do everything according to the instructions on the packages. Pour the jelly into molds, preferably square. This will be the basis for our cells. Plant cells can be made green, and animal cells orange. Accordingly, in stores we choose sets of jelly of these colors. When the jelly has hardened, open the sets of candies and lay out the component cells from them. Material about this is easy to find on the Internet or in a school textbook. From such sweet crafts you can make a whole training manual, filming them on video.
- a little milk
- food colors of different colors,
- a piece of soap
- ear sticks
- and a dinner plate.
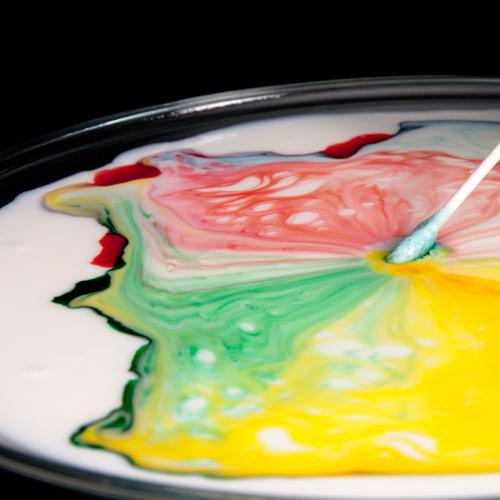
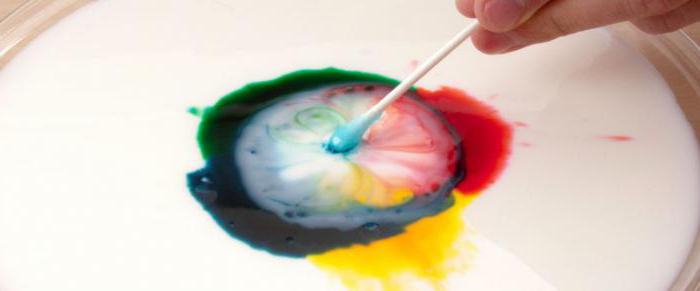
Pour some milk into a plate. Add food coloring drop by drop various colors to the center of the plate. Dyes can be purchased in liquid form or purchased in powder form, which must then be diluted with water. Next, dip the ear stick into the middle of the milk. Don't mix colors! Place a drop on the other end of the ear stick liquid soap. Place the soapy end of the stick in the center of the plate and hold for 10-15 seconds. Look at the explosion of colors and colors!
The experience works very simply. Milk has a consistency similar to water, but contains fats, minerals, vitamins and other substances. The secret of a symphony of colors lies in a drop of soap. The fact is that the main property of soap is to eliminate fats. When soap is placed in milk, the soap molecules try to attack the fat molecules, and in turn, the fat molecules try to avoid the “attack.” It is this process that reflects the rapid movement of flowers.
This is what you should get:
So, experiments for children in the form of games at home are one of the the most important conditions development of erudition and further interest in learning. Even if you are not strong in physics or chemistry, on our website you can find many videos and descriptions of instructions for implementation. At the same time, you do not need expensive sets of chemicals: you will find everything you need at home. Try, observe, experiment!
The experiments at home that we will talk about now are very simple, but extremely entertaining. If your child is just getting acquainted with the nature of various phenomena and processes, such experiences will look like real magic for him. But it’s no secret that it is best to present complex information to children in game form- this will help consolidate the material and leave vivid memories that will be useful in further learning.
Explosion in calm water
Discussing possible experiments at home, first of all we will talk about how to make such a mini-explosion. You will need a large vessel filled with regular tap water (for example, it could be a three-liter bottle). It is advisable for the liquid to settle in a quiet place for 1-3 days. After this, you should carefully, without touching the vessel itself, drop a few drops of ink into the very middle of the water from a height. They will spread beautifully in the water, as if in slow motion.
A balloon that inflates itself
This is another interesting experiment that can be done at home. You need to pour a teaspoon of ordinary baking soda into the ball itself. Next, you need to take an empty plastic bottle and pour 4 tablespoons of vinegar into it. The ball must be pulled over its neck. As a result, the soda will pour into the vinegar, a reaction will occur with the release of carbon dioxide, and the balloon will inflate.
 Volcano
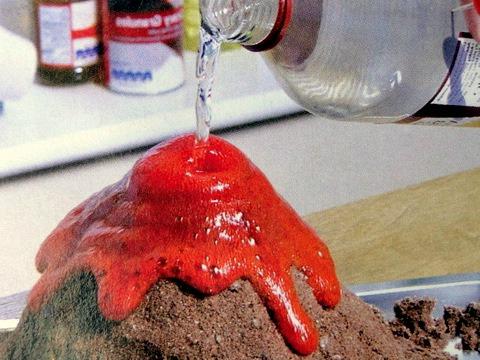
Using the same baking soda and vinegar, you can create a real volcano in your home! You can even use a plastic cup as a base. Pour 2 tablespoons of soda into the “mouth”, fill it with a quarter glass of heated water and add a little food coloring. dark color. Then all that remains is to add a quarter glass of vinegar and watch the “eruption”.
"Color" magic
Experiments at home that you can demonstrate to your child also include unusual changes in their color with different substances. A striking example of this is the reaction that occurs when iodine and starch combine. By mixing brown iodine and snow-white starch, you will get a liquid... of a bright blue hue!
Fireworks
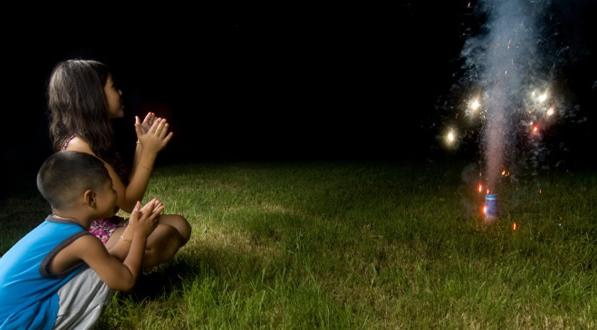
What other experiments can you do at home? Chemistry provides a huge field for activity in this regard. For example, you can make bright fireworks right in your room (but preferably in the yard). A little potassium permanganate needs to be crushed into a fine powder, and then take a similar amount of charcoal and grind it too. After thoroughly mixing the coal with manganese, add iron powder. This mixture is poured into a metal cap (an ordinary thimble will do) and kept in the flame of the burner. As soon as the composition heats up, a whole rain of beautiful sparks will begin to scatter around.
Soda rocket
And finally, let’s talk again about chemical experiments at home, which involve the simplest and most accessible reagents - vinegar and sodium bicarbonate. IN in this case you will need to take a plastic film cassette, fill it with baking soda, and then quickly pour in 2 teaspoons of vinegar. The next step is to put a lid on your homemade rocket, place it upside down on the ground, stand back and watch it take off.
Anastasia Sergeeva
Interesting chemical experiments that can be easily repeated at home
Chemist is a very interesting and multifaceted profession, uniting under its wing many different specialists: chemical scientists, chemical technologists, analytical chemists, petrochemists, chemistry teachers, pharmacists and many others. We decided to celebrate the upcoming Chemist’s Day 2017 with them, so we chose several interesting and impressive experiments in the field under consideration, which even those who are as far from the profession of a chemist as possible can repeat. The best chemical experiments at home - read, watch and remember!
When is Chemist's Day celebrated?
Before we begin to consider our chemical experiments, let us clarify that traditionally Chemist’s Day is celebrated in the countries of the post-Soviet space at the very end of spring, namely on the last Sunday of May. This means that the date is not fixed: for example, in 2017 Chemist’s Day is celebrated on May 28. And if you work in the chemical industry, or are studying a specialty in this area, or are otherwise directly related to chemistry on duty, then you have every right to join the celebration on this day.
Chemical experiments at home
Now let's get down to the main thing and begin to perform interesting chemical experiments: it is best to do this together with young children, who will definitely perceive what is happening as a magic trick. Moreover, we tried to select chemical experiments for which reagents can be easily obtained at a pharmacy or store.
Experiment No. 1 - Chemical traffic light
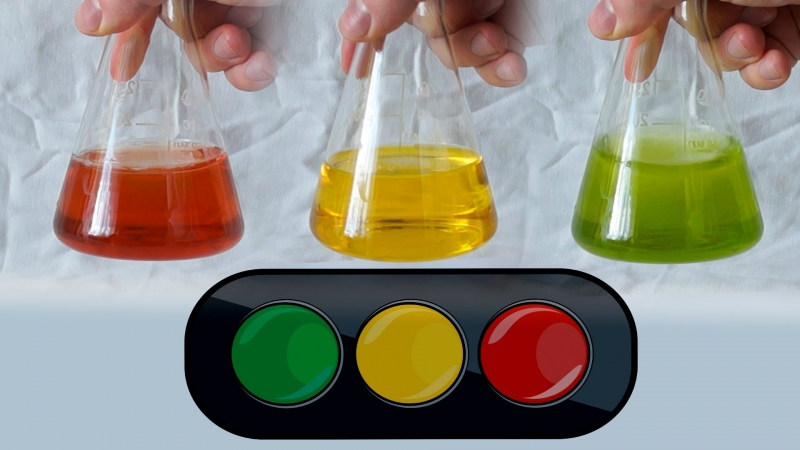
Let's start with a very simple and beautiful experiment, which received this name for good reason, because the liquid participating in the experiment will change its color exactly to the colors of the traffic light - red, yellow and green.
You will need:
- indigo carmine;
- glucose;
- caustic soda;
- water;
- 2 transparent glass containers.
Don't let the names of some ingredients scare you - you can easily buy glucose tablets at a pharmacy, indigo carmine is sold in stores as a food coloring, and you can find caustic soda in a hardware store. It is better to take tall containers, with a wide base and a narrower neck, for example, flasks, to make them easier to shake.

But what is interesting about chemical experiments is that there is an explanation for everything:
- By mixing glucose with caustic soda, i.e. sodium hydroxide, we obtained an alkaline solution of glucose. Then, by mixing it with a solution of indigo carmine, we oxidize the liquid with oxygen, which it was saturated with during pouring from the flask - this is the reason for the appearance of the green color. Next, glucose begins to work as a reducing agent, gradually changing color to yellow. But by shaking the flask, we again saturate the liquid with oxygen, allowing chemical reaction go through this circle again.
You will get an idea of how interesting it looks in real life from this short video:
Experiment No. 2 - Universal acidity indicator from cabbage
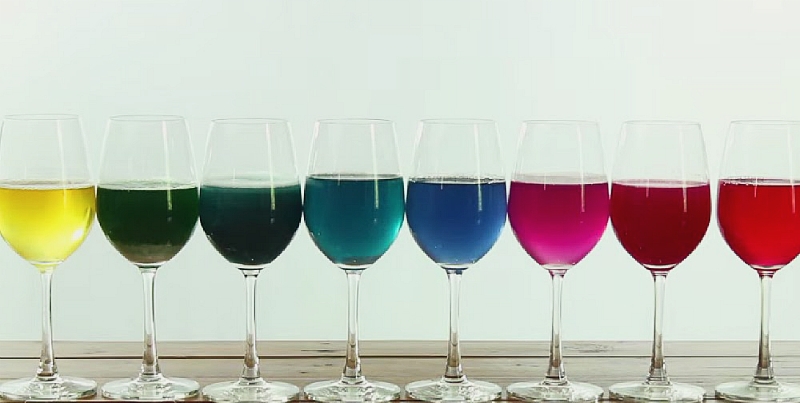
Children love interesting chemical experiments with colorful liquids, it’s no secret. But we, as adults, responsibly declare that such chemical experiments look very spectacular and interesting. Therefore, we advise you to conduct another “color” experiment at home - a demonstration of the amazing properties of red cabbage. It, like many other vegetables and fruits, contains anthocyanins - natural indicator dyes that change color depending on the pH level - i.e. degree of acidity of the environment. This property of cabbage will be useful to us in order to obtain further multi-colored solutions.
What we need:
- 1/4 red cabbage;
- lemon juice;
- baking soda solution;
- vinegar;
- sugar solution;
- Sprite type drink;
- disinfectant;
- bleach;
- water;
- 8 flasks or glasses.
Many of the substances on this list are quite dangerous, so be careful when performing simple chemical experiments at home, wear gloves and, if possible, safety glasses. And don’t let children get too close - they may knock over the reagents or the final contents of the colored cones and even want to try them, which should not be allowed.
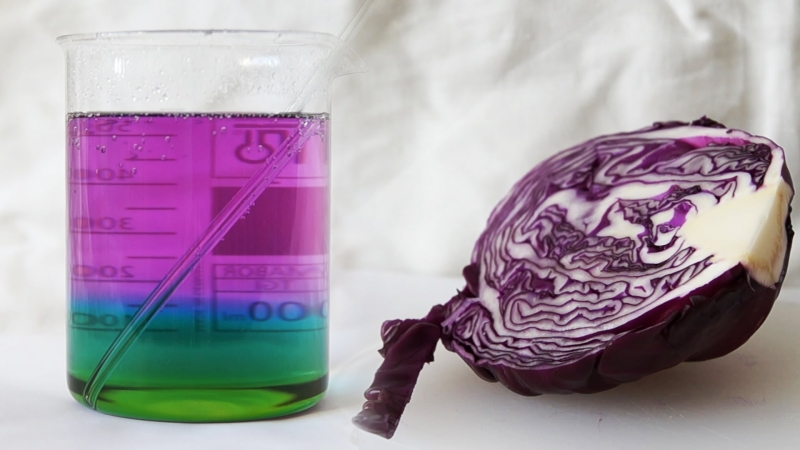
Let's get started:
How do these chemical experiments explain the color changes?
- The fact is that light falls on all objects that we see - and it contains all the colors of the rainbow. Moreover, each color in the spectrum has its own wavelength, and the molecules different shapes, in turn, reflect and absorb these waves. The wave that is reflected from the molecule is the one that we see, and this determines what color we perceive - because other waves are simply absorbed. And depending on what substance we add to the indicator, it begins to reflect only rays of a certain color. Nothing complicated!
For a slightly different version of this chemical experiment, with fewer reagents, see the video:
Experiment No. 3 - Dancing jelly worms
We continue to do chemical experiments at home - and we will conduct the third experiment on everyone’s favorite jelly candies in the form of worms. Even adults will find it funny, and children will be absolutely delighted.
Take the following ingredients:
- a handful of gummy worms;
- vinegar essence;
- ordinary water;
- baking soda;
- glasses - 2 pcs.
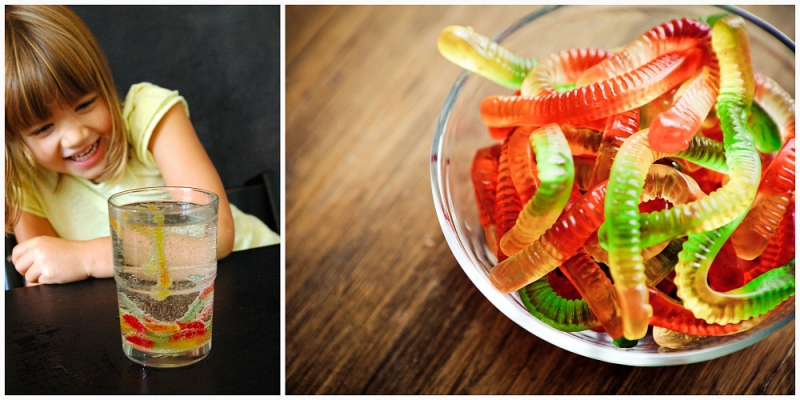
When choosing suitable candies, choose smooth, chewy worms without sugar coating. To make them less heavy and easier to move, cut each candy lengthwise into two halves. So, let's begin some interesting chemical experiments:
- Make a solution of warm water and 3 tablespoons of soda in one glass.
- Place the worms there and keep them there for about fifteen minutes.
- Fill another deep glass with essence. Now you can slowly drop the jellies into the vinegar, watching how they begin to move up and down, which is in some way similar to a dance:
Why is this happening?
- It's simple: baking soda, in which the worms are soaked for a quarter of an hour, is sodium bicarbonate, and the essence is an 80% solution acetic acid. When they react, water, carbon dioxide in the form of small bubbles and sodium salt of acetic acid are formed. It is carbon dioxide in the form of bubbles that the worm becomes overgrown with, rises up, and then descends when they burst. But the process still continues, causing the candy to rise on the resulting bubbles and fall until it is completely completed.
And if you are seriously interested in chemistry, and want Chemist’s Day to become yours in the future professional holiday, then you will probably be curious to watch the following video, which details the typical everyday life of chemistry students and their fascinating educational and scientific activities:
Take it for yourself and tell your friends!
Read also on our website.
April 23rd, 2014What does everyone have at home and never get tired of playing with? Water! Personally, I have not met a single child who was indifferent to her. You can come up with an endless number of games with water, we have collected the most interesting ones here. Games with water for kids are known to everyone, but we tried to come up with something for each well-known game that would also interest older children. We also included simple and spectacular experiments in the review!
Well, shall we begin?
Games for kids and more
1. Drowning - not drowning
In addition to floating and sinking objects, it is interesting to watch how something sinking slowly and smoothly sinks to the bottom. Here is a video with beautifully sinking flowers:
Or the egg experiment:
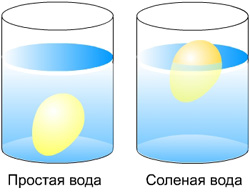
Take 3 jars: two half-liter and one liter. Fill one jar with clean water and place a raw egg in it. It will drown.
Pour a strong solution of table salt into the second jar (2 tablespoons per 0.5 liters of water). Place the second egg there and it will float. This is explained by the fact that salt water is denser, which is why it is easier to swim in the sea than in a river.
Now place an egg at the bottom of a liter jar. By gradually adding water from both small jars in turn, you can get a solution in which the egg will neither float nor sink. It will remain suspended in the middle of the solution.
When the experiment is completed, you can show the trick. By adding salt water, you will ensure that the egg floats. Adding fresh water will cause the egg to sink. Externally, salt and fresh water are no different from each other, and it will look amazing.
2. Water in the form of... what?
You can take a plastic cup, a transparent bag, a surgical glove. And everywhere the water is the same, but so different.
And if you pour water into plastic sand molds and freeze them, then you will get shaped pieces of ice.
For older children, you can experiment with volume. Here is one of Piaget's experiments: we take two containers - one is a narrow, tall glass, and the second is low and wide. We pour the same amount of water and ask the children which glass has more? Up to a certain age, children answer that there is more water in a tall glass - because it is SEEN!
3. Leaky bag
Does a bag with holes leak? Let's try it together.
4. Color the water

pic
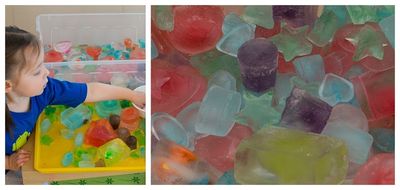
When my son was little, he could endlessly dilute paint in water. Mixed all imaginable and inconceivable colors. And when he got tired of playing with the liquid, he poured it all into molds and we made colored ice.

pic
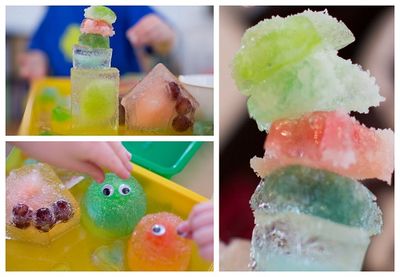
By the way, for older kids, suggest sprinkling salt on the ice and observing what happens
pic
5. Freezing
In addition to colored ice, my son really liked to freeze little figures and then save them. We timed how long it would take for natural defrosting, defrosted it with our finger, and dripped warm water from a pipette. The process of freezing and thawing fascinated my son and it was one of his favorite activities at home in bad weather.
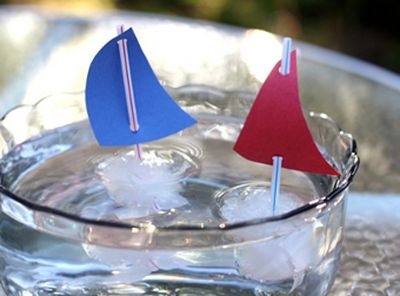
We also loved making ice boats and launching them.
And if you put a thick thread on a piece of ice and sprinkle salt on top, then after a few seconds it will freeze and the ice can be lifted by holding it solely by the thread. This trick can be performed by throwing a piece of ice into a glass of cold water.
Here's another very interesting experiment with ice.
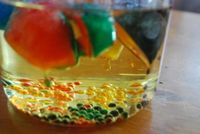
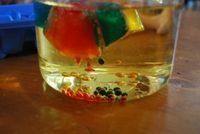
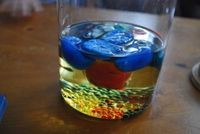
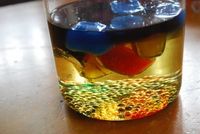
You need to put several cubes of colored ice into a jar with vegetable or baby oil. As the ice melts, its colored droplets will sink to the bottom of the jar. The experience is very spectacular.
6. Spell water
2. Sieve - sippy cup
Let's do a simple experiment. Take a sieve and grease it with oil. Then we’ll shake it and demonstrate another trick - pour water into the sieve so that it flows along inside sieves And, lo and behold, the sieve is filled! Why doesn't the water flow out? It is held in place by a surface film; it was formed due to the fact that the cells that were supposed to let water through did not get wet. If you run your finger along the bottom and break the film, the water will flow out.
3. Lava lamp

We talked more about this experience
4. Experiment with glycerin
Not quite an experience, but very beautiful result it turns out.

All we need is a jar, glitter, some kind of figurine and glycerin (sold at the pharmacy)
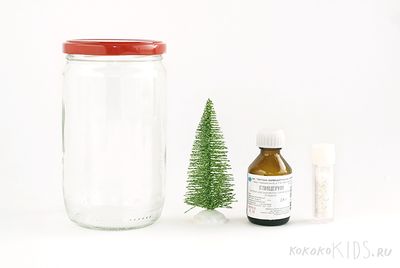

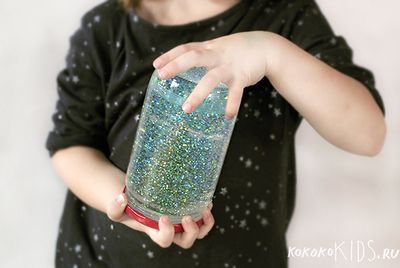
Pour boiled water into a jar, add glitter and glycerin. Mix.
Glycerin is needed to make the glitter swirl smoothly in the water.

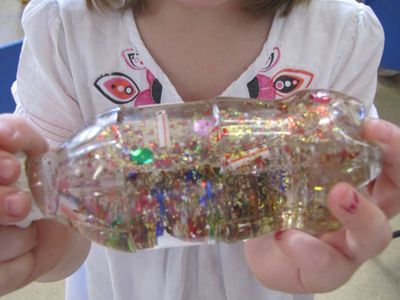
And if you don’t have a jar at hand, you can simply arrange swirling sparkles in a bottle
pic

pic
5. Growing crystals

To do this, you need to dissolve a lot of salt in hot water, so much that it stops dissolving. You need to lower a thread (preferably woolen, with fluff) into a jar with the solution, although you can also use a wire or a twig so that part of it is above the water. Now all you have to do is arm yourself with patience - in a few days beautiful crystals will grow on the thread.
Or you can use sugar. Here's more details
6. Making a cloud
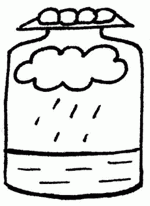
Pour hot water into a three-liter jar (about 2.5 cm). Place a few ice cubes on a baking sheet and place it on top of the jar. The air inside the jar will begin to cool as it rises. The water vapor it contains will condense to form a cloud.
This experiment simulates the process of cloud formation as warm air cools. Where does rain come from? It turns out that the drops, having heated up on the ground, rise upward. There they get cold, and they huddle together, forming clouds. When they meet together, they increase in size, become heavy and fall to the ground as rain.
7. In search of fresh water
How to get drinking water from salt water? Pour water into a deep basin with your child, add two tablespoons of salt there, stir until the salt dissolves. To the bottom of the empty plastic glass place washed pebbles so that it does not float, but its edges should be above the water level in the basin. Pull the film over the top, tying it around the pelvis. Squeeze the film in the center above the cup and place another pebble in the recess. Place the basin in the sun. After a few hours, clean, unsalted drinking water will accumulate in the glass. This is explained simply: water begins to evaporate in the sun, condensation settles on the film and flows into an empty glass. The salt does not evaporate and remains in the basin.
8. Tornado in a jar
The tornado that rages in the bank is actually very spectacular; it can captivate children for a long time. You need a jar with a tight-fitting lid, water, and liquid dishwashing detergent. You need to pour enough water into the jar so that the distance from the water level to the neck of the jar is approximately 4-5 cm. Now add a little liquid product to the water, close the lid tightly and shake the jar. It should turn out to be a tornado.
9. Rainbow
You can show the children a rainbow in the room. Place the mirror in the water at a slight angle. Catch a ray of sunlight with a mirror and point it at the wall. Rotate the mirror until you see a spectrum on the wall. Water acts as a prism, splitting light into its components.
10. Lord of matches
If you put a piece of sugar in a saucer with water and matches floating in it, then all the matches will float towards it, and if a piece of soap, then away from it.
11. Changing the color of the water
Make a soap solution in a jar - dilute the soap. Then we take liquid (transparent) phenolphthalein (purgen laxative) purchased at the pharmacy and show the child how by pouring clear water into another clear water we get bright crimson! Transformation right before your eyes. Then we take clear vinegar again and add it there. Our “chemical” turns from crimson to transparent again!
12. Ink transformations
Add ink or ink to a bottle of water until the solution is pale blue. Place a tablet of crushed activated carbon there. Close the neck with your finger and shake the mixture.
It will brighten before our eyes. The fact is that coal absorbs dye molecules on its surface and it is no longer visible.
And here are the bizarre, fascinating patterns that ink forms in water
Or so

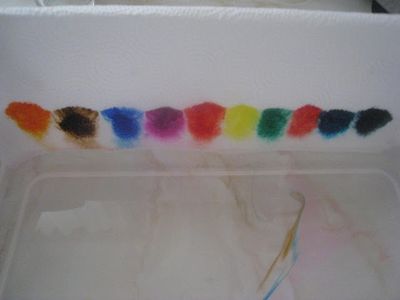
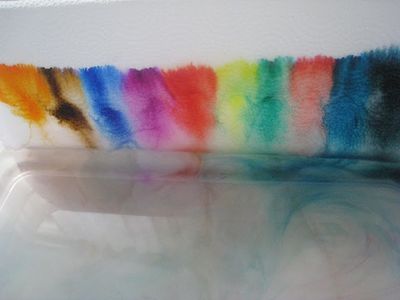
pic
14. Optical illusion in a glass of water
Such a complex but interesting science as chemistry always causes an ambiguous reaction among schoolchildren. The children are interested in experiments that result in the production of substances of bright colors, the release of gases, or precipitation. But only a few of them like to write complex equations of chemical processes.
The importance of entertaining experiences
According to modern federal standards, project-based research activities have been introduced in secondary schools. Such a program subject as chemistry also did not go unnoticed.
As part of the study of complex transformations of substances and solving practical problems, the young chemist hones his skills in practice. It is through unusual experiences that a teacher develops an interest in the subject in his students. But in regular lessons, it is difficult for a teacher to find enough free time for non-standard experiments, and there is simply no time to conduct them for children.
To correct this, additional elective and optional courses were invented. By the way, many children who are interested in chemistry in the 8th and 9th grades become doctors, pharmacists, and scientists in the future, because in such classes the young chemist gets the opportunity to independently conduct experiments and draw conclusions from them.
What courses involve fun chemical experiments?
In the old days, chemistry for children was available only from the 8th grade. The children were not offered any special courses or extracurricular chemical activities. In fact, there was simply no work with gifted children in chemistry, which had a negative impact on the attitude of schoolchildren to this discipline. The children were afraid and did not understand complex chemical reactions, and made mistakes in writing ionic equations.
Due to the reform of the modern education system, the situation has changed. Now in educational institutions are also offered in lower grades. The children are happy to do the tasks that the teacher offers them and learn to draw conclusions.
Chemistry-related electives help high school students gain skills in working with laboratory equipment, and those designed for junior schoolchildren contain vivid, demonstrative chemical experiments. For example, children study the properties of milk and become familiar with the substances that are obtained when it sours.
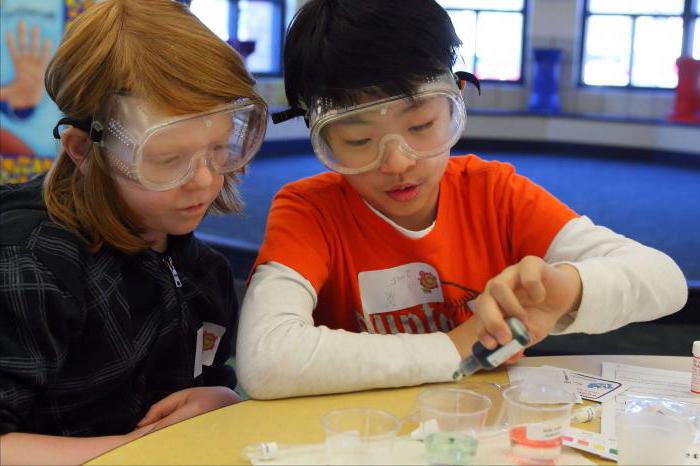
Experiences related to water
Entertaining chemistry is interesting for children when, during the experiment, they see an unusual result: the release of gas, a bright color, an unusual precipitate. A substance such as water is considered ideal for conducting a variety of entertaining activities for schoolchildren.
For example, chemistry for 7-year-old children can begin with an introduction to its properties. The teacher tells the children that most of our planet is covered with water. The teacher also informs the students that in a watermelon there is more than 90 percent of it, and in a person it is about 65-70%. After telling schoolchildren how important water is for humans, you can offer them some interesting experiments. At the same time, it is worth emphasizing the “magic” of water in order to intrigue schoolchildren.
By the way, in this case, the standard chemistry set for children does not involve any expensive equipment - it is quite possible to limit yourself to affordable devices and materials.
Experience "Ice Needle"
Let's give an example of such a simple and at the same time interesting experiment with water. This is the construction of an ice sculpture - a “needle”. For the experiment you will need:
- water;
- table salt;
- ice cubes.
The duration of the experiment is 2 hours, so such an experiment cannot be carried out in a regular lesson. First you need to pour water into an ice tray and place it in the freezer. After 1-2 hours, after the water turns into ice, the entertaining chemistry can continue. For the experiment you will need 40-50 ready-made ice cubes.
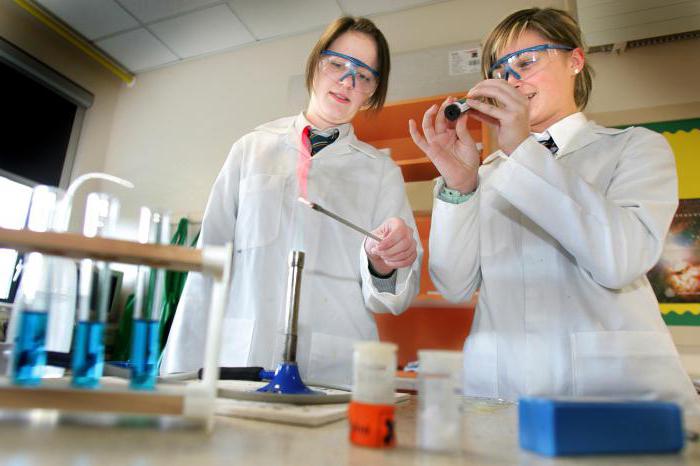
First, children must arrange 18 cubes on the table in the form of a square, leaving a free space in the center. Next, after sprinkling them with table salt, they are carefully applied to each other, thus gluing them together.
Gradually all the cubes are connected, and the result is a thick and long “needle” of ice. To make it, just 2 teaspoons of table salt and 50 small pieces of ice are enough.
You can tint the water to make the ice sculptures multi-colored. And as a result of such a simple experience, chemistry for 9-year-old children becomes an understandable and fascinating science. You can experiment by gluing ice cubes in the shape of a pyramid or diamond.
Experiment "Tornado"
This experiment does not require special materials, reagents or tools. The guys can do it in 10-15 minutes. For the experiment, let's stock up:
- plastic transparent bottle with a cap;
- water;
- dishwashing detergent;
- sparkles.
The bottle should be filled 2/3 with plain water. Then add 1-2 drops of dishwashing detergent to it. After 5-10 seconds, pour a couple of pinches of glitter into the bottle. Screw the cap tightly, turn the bottle upside down, holding it by the neck, and twist it clockwise. Then we stop and look at the resulting vortex. Before the “tornado” starts working, you will have to spin the bottle 3-4 times.
Why does a “tornado” appear in an ordinary bottle?
When a child makes circular movements, a whirlwind appears, similar to a tornado. The rotation of water around the center occurs due to the action of centrifugal force. The teacher tells the children about how scary tornadoes are in nature.
Such an experience is absolutely safe, but after it, chemistry for children becomes a truly fabulous science. To make the experiment more vivid, you can use a coloring agent, for example, potassium permanganate (potassium permanganate).
Experiment "Soap Bubbles"
Do you want to tell your children what fun chemistry is? Programs for children do not allow the teacher to pay due attention to experiments in lessons; there is simply no time for this. So, let's do this optionally.
For students junior classes This experiment will bring a lot of positive emotions, and you can do it in a few minutes. We will need:
- liquid soap;
- jar;
- water;
- thin wire.
In a jar, mix one part liquid soap with six parts water. We bend the end of a small piece of wire into a ring, dip it into the soap mixture, carefully pull it out and blow out of the mold a beautiful soap bubble of our own making.
For this experiment, only wire that does not have a nylon layer is suitable. Otherwise blow it out soap bubbles children won't be able to.
To make it more interesting for the children, you can add food coloring to the soap solution. You can arrange soap competitions between schoolchildren, then chemistry will become a real holiday for children. The teacher thus introduces the children to the concept of solutions, solubility and explains the reasons for the appearance of bubbles.
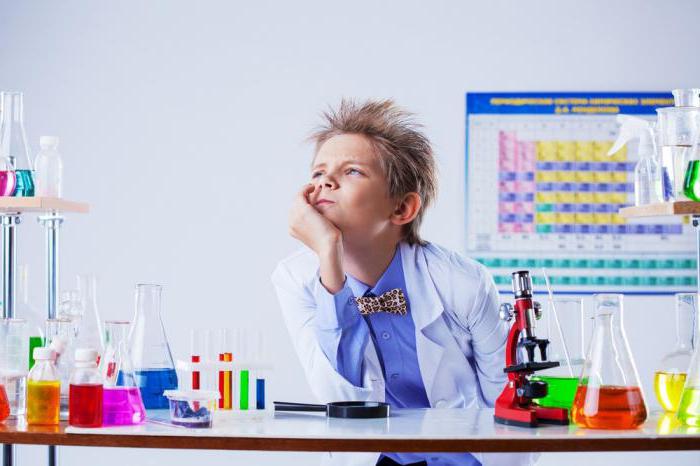
Entertaining experience “Water from plants”
To begin with, the teacher explains how important water is for cells in living organisms. It is with its help that nutrients are transported. The teacher notes that if there is not enough water in the body, all living things die.
For the experiment you will need:
- alcohol lamp;
- test tubes;
- green leaves;
- test tube holder;
- copper sulfate (2);
- beaker.
This experiment will require 1.5-2 hours, but as a result, chemistry for children will be a manifestation of a miracle, a symbol of magic.
Green leaves are placed in a test tube and secured in a holder. In the flame of an alcohol lamp, you need to heat the entire test tube 2-3 times, and then do this only with the part where the green leaves are located.
The glass should be placed so that the gaseous substances released in the test tube fall into it. As soon as heating is completed, add grains of white anhydrous copper sulfate to the drop of liquid obtained inside the glass. Gradually white disappears, and copper sulfate becomes blue or dark blue.
This experience brings children into complete delight, because before their eyes the color of substances changes. At the end of the experiment, the teacher tells the children about such a property as hygroscopicity. It is due to its ability to absorb water vapor (moisture) that white copper sulfate changes its color to blue.
Experiment "Magic Wand"
This experiment is suitable for an introductory lesson in an elective course in chemistry. First you need to make a star-shaped blank and soak it in a solution of phenolphthalein (indicator).
During the experiment itself, the star attached to the “magic wand” is first immersed in an alkali solution (for example, in a solution of sodium hydroxide). Children see how in a matter of seconds its color changes and a bright crimson color appears. Next, the colored form is placed in an acid solution (for the experiment, using a hydrochloric acid solution would be optimal), and the crimson color disappears - the star becomes colorless again.
If the experiment is carried out for children, during the experiment the teacher tells a “chemical tale”. For example, the hero of a fairy tale could be an inquisitive mouse who wanted to find out why there are so many bright flowers in a magical land. For students in grades 8-9, the teacher introduces the concept of “indicator” and notes which indicators can determine the acidic environment, and which substances are needed to determine the alkaline environment of solutions.
"Genie in a Bottle" Experience
This experiment is demonstrated by the teacher himself, using a special fume hood. The experience is based on the specific properties of concentrated nitric acid. Unlike many acids, concentrated nitric acid is capable of chemical interaction with metals located after hydrogen (with the exception of platinum and gold).
You need to pour it into a test tube and add a piece of copper wire there. Under the hood, the test tube is heated, and the children observe the appearance of “red gin” vapors.
For students in grades 8-9, the teacher writes an equation for a chemical reaction and identifies signs of its occurrence (change in color, appearance of gas). This experiment is not suitable for demonstration outside the walls of a school chemistry laboratory. According to safety regulations, it involves the use of vapors of nitrogen oxide (“brown gas”) that pose a danger to children.
Home experiments
In order to whet the interest of schoolchildren in chemistry, you can offer a home experiment. For example, conduct an experiment on growing table salt crystals.
The child must prepare a saturated solution of table salt. Then place a thin twig in it, and as the water evaporates from the solution, crystals of table salt will “grow” on the twig.
The jar of solution should not be shaken or rotated. And when the crystals grow after 2 weeks, the stick must be very carefully removed from the solution and dried. And then, if desired, you can coat the product with colorless varnish.
Conclusion
There is no more interesting subject in the school curriculum than chemistry. But in order for children not to be afraid of this complex science, the teacher must devote sufficient time in his work to entertaining experiences and unusual experiments.
It is the practical skills that are formed during such work that will help stimulate interest in the subject. And in the lower grades, entertaining experiments are considered according to the Federal State Educational Standards as independent project and research activities.

