I needed:
Crepe-satin (pink) – 2 m (270 RUR)
Mesh (hard) – 3 m (315 RUR)
Zipper (hidden) – 1 piece (15 rubles)
Sequins – 2 packs (regular transparent and butterflies) (30 RUR)
Sequin braid – 1.5 m (15 rubles)
Beads – 1 pack (15 rubles)
Butterfly applique – 3 pcs (75 RUR)
Braid (1.2 cm) – 1.5 m (45 rubles)
Adhesive fabric, adhesive tape (I don’t know exactly what it’s called, popularly called Velcro), threads in the color of the fabric, fabric for a pattern - the quantity and price of these materials are not taken into account
Total: 780 rub.
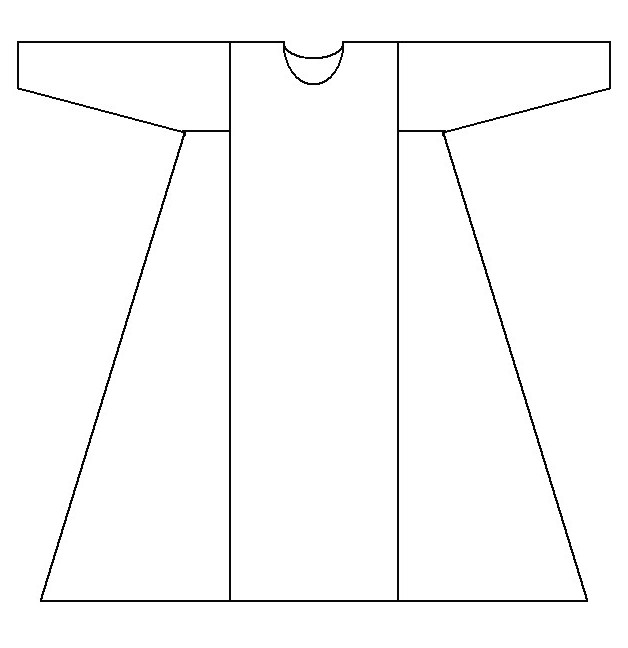
Dress model

We start with a pattern, I didn’t do any constructions or calculations, everything is simpler for me:
I took a scrap piece of flannel and traced it around an old T-shirt.

To begin with, I simply cut out the shape of a T-shirt

I swept away the seams, tried it on my daughter, and drew the bodice style right on the model. I cut off the excess and sewed the seams on a machine.

I tried it on again, making sure that it fit, did not press or hang.
Now you need to trim the allowances right next to the seam,

Thus, we will get a pattern, 
When cutting our fabric you will only need to trace the pattern and make seam allowances
Like that

We outline the shelf as it exists, but we still need to work on the back. As we remember, we are planning lacing at the back, which involves tightening the dress. Schematically it will look something like this

This means we need to divide the back pattern into 3 parts. Cutting the pattern.
Now instead of the middle part we will do new pattern, several centimeters longer

Next, it is more advisable to label the back patterns, because they are more like simple rectangles and you can get confused and sew the wrong thing and the wrong place. In the photo: Middle, side, top - it’s clear, we write the letter P in the middle, since this is the right side. Accordingly, on the left I wrote L

When cutting, we cut out 2 shelves, glue one with adhesive fabric using an iron, and leave the second as is

These parts need to be glued with adhesive

Everything except the middle of the back and the second shelf.
Sorry, not all the photos, but I think so in some detail, I forgot about the neck of the back. Or what should we call her? In general, we fold the pattern in half, trace it on the fabric, making allowances for the seams, and probably add a centimeter and a half at the ends for fastening, or rather for sewing on Velcro, there should be 4 such parts, 2 - glued, 2 - not

We grind

Iron the seams in different directions

Ironing the seams of a product during sewing is very important, firstly, it affects the quality and appearance of the product, and secondly, it simplifies further work. Further I will not mention the wet-heat treatment of the seam, you just need to make yourself a rule - “Laid a line - Iron it!”
Assembling the back
I didn’t provide any thin braid, so we’ll make do with what we have. Cut the required amount of braid for the loops

Mark the places for sewing on the loops, fold the braid in half and sew hand stitches along the entire length, and not just at the base, so that when sewing on a machine they do not lie crookedly


We process the upper edges of the parts using an overlocker or zigzag
We sew on a typewriter

I laid the second line at some distance from the first


Removing hand stitches


Processing the edges of the seams

Mom’s overlocker is old and sometimes skips, but still better than zigzag

Now we take our back and the shelf, which is glued, sew down one side seam and process the edges

Now we connect two shelves with hand stitches, right sides inward

Machine stitching

Just like this, you don’t need to sew anything extra, there will be a zipper on the side, and the bottom will be sewn to the skirt

Now you need to cut the seam allowances in all curved lines so that the seam fits well when turned out and there are no problems with basting the piping. We make cuts like this, not reaching the seam 2 mm, the steeper the curvature, the more notches you need to make in that place

We trim the corners, all for the same thing - so that it’s easy to turn out and the allowances don’t get in the way

Removing hand stitches

Turn it inside out, I got it like this (it looks a little weird, my first thought was)

Now you need to sweep out the piping, this is how it should look from the inside out


Simultaneously with basting the edging, you need to bend the upper cut of the back

Here's a closer look at the side seam

In progress

Here is our back, it will look like this


Now we sew the upper edge of the back, armholes and neckline of the front on a machine 2-3 millimeters from the edge

Removing hand stitches

Now fold it like this and add hand stitches.

Naturally, we sew out the edging, as we did earlier, this is what it will look like from the inside out

We sew a stitch on a machine, 2-3 mm from the edge


Cutting out a petticoat
We lay out our bodice, remove the screed, and straighten it. We measure the length, add another 10 cm to this length, this will be the width of our petticoat, make the length approximately knee-length, or just above the knee, there is no point in being longer, and it will be uncomfortable.
(in the photo you can see a mistake, I first cut it exactly along the bodice, later I realized that for ease of movement and fluffiness it is necessary to add about 10 cm, I didn’t realize this too late, so I just made an insert. Later we’ll make darts and the length will be equal to the bodice )

Now let's try on the zipper

Let's put a mark up to which we will lay the line

Let's sweep

It turns out like this

The bottom of our petticoat also needs to be processed.
Now we cut a strip of mesh, I have it 20 cm wide and about 3 m long (depending on what kind of assemblies there will be, but the more often the better)
We sew our mesh, making assembly, to the very bottom of the petticoat

We do not ignore the beginning and end of the mesh cut, it certainly will not crumble, and there is no need to process it. You just need to fasten the edges, placing one edge on top of the other and stitching. This way the tier will keep its shape better

It’s hard to see in the photo, I have lines marked on the fabric along which the next tiers of the mesh need to be sewn

As a result, I sewed 4 tiers, each 20 cm wide. We will make the top tier long so that it gives the dress a smooth shape and the steps of the tiers are not visible in the outline of the dress. We measure the length of the dress itself from the waist to the desired length, subtract 4 cm, this will be the width of our final tier.
As we remember, our petticoat is larger than the bodice and we need to make darts. I made 4 darts, 2 in the front and 2 in the back. Of course, you can simply make a tuck, but you definitely need darts in the front, because our bodice shape is not straight and we will sew the last tier to the petticoat according to the shape of the bodice.
The darts are done, now we apply the bodice and outline the shape of the bodice. The line I outlined is not visible in the photo, I drew it on the computer

Now, we sew the mesh tier just below the intended line and the edge of the material at the back. This is necessary in order to then sew the petticoat to the dress. If we don't leave room, there will be nothing to attach it to.
So we sewed on the last, final tier of the mesh, but due to the shape of the bodice, the length of our petticoat became even. We put it on the model and cut it right on the figure, it’s a petticoat, it doesn’t require much precision, the main thing is that it doesn’t stick out from under the dress.
I don’t know why I didn’t take a photo of the petticoat in the forest, I’ll try to depict it schematically

The picture shows that the tier is sewn below the intended line.
Now you can cut off the excess.
We lay out the decorations on the bodice and come up with a pattern, then you can start gluing with an iron (I have a Butterfly appliqué) and sewing on beads with sequins, the main thing is not to confuse the sequence, otherwise you can burn the sequins


Now we need to cut out the skirt of our dress. I decided that our dress didn’t need extra seams, so I cut it out to length. It is necessary to cut according to the width, but ours is only 1.5 m, and I needed at least 2 m. I cut out the width we needed to the length to the floor, and a length of 2 meters (later I thought that it was still not enough, if only even more magnificent, but then I would be tortured to sew it to the bodice, here you already need to gather 2 m and then sew it on 60 cm).
There are fewer and fewer photos, I will explain with my fingers
For many mothers, the first child becomes a kind of last doll. This phrase especially applies to girls. So they try to dress their little ones like princesses, spending huge amounts of money on different outfits. Every mother wants her daughter to look her best at any occasion. But it’s not at all necessary to go shopping and buy expensive things; you can independently replenish your children’s wardrobe with beautiful, elegant, festive clothes. This article will be devoted to this; in it we will give several examples of how to sew a princess dress for a girl with your own hands.
Sewing a fairy dress for a little fairy
To sew a dress for a princess with your own hands, you will need only half a meter of yellow material, about a meter wide, with print and embroidery of white and golden flowers.
Important! It's better to give preference natural fabric, for example, buy linen, chintz or silk so that the baby feels comfortable in a new outfit.
Also for sewing you will need:
- Stitching of the corresponding color is approximately 1 m.
- Satin ribbon 1.5 m long and 2.5 mm wide.
- Tailor's meter, pins.
- Ruler, scissors, thread, pattern, chalk or a piece of soap.
- Sewing machine.
Carry out sewing according to this pattern:
- Before starting work, wash and iron the fabric, because if it is natural, it is guaranteed to shrink after washing.
- Make the drawing directly on the material; no paper patterns are needed.
- First draw two squares, the sides of which are 50 cm. Then cut them out to get the base for the dress.
- Measure two more pieces of stitching measuring 50 cm each.
- Decide from the drawing where the top and bottom of the outfit will be, then pin the seam to the base at a distance of 1 cm from the edge, and they should be located across the edge, so that later it will be more convenient to lay the stitching without basting the details.
- Sew the seam to the base, fasten the seams, including reverse on the machine and also back. Take out the pins. Trim any irregularities on the fabric and seams.
- Using an overlocker, process the edge, the step length should be 1 mm, and the seam height should be 5 mm. Then smooth it out, turn it towards the base, and add another line. Do the same steps with another square of material.
- Place the squares of fabric face to face, fold them lengthwise, and pin them in several places so that they do not move during the cutting process.
- Set aside 10 cm from the fold at the top of the future dress, place a conditional point C. Then set aside another 5 cm from it towards the edge, mark this point with the letter A.
- From point A, draw a perpendicular 10 cm long down, place point B. From the edge of the line connecting the base and the seam, draw a straight line to point B, connect them. Using a pattern, connect points B and C. That's it, the pattern is ready.
- Cut out the product blank, leaving 1 cm along the seams along the line. Remove the pins and unfold the future dress. Pin it on the sides with pins, stepping back 1-1.5 cm from the edge.
- Sew the side seams and secure them. Iron these seams using steam, separating the edges clearly along the seam. Finish the edges with an overlocker or zigzag.
- Now start processing the armholes. Fold the armhole line inside out at a distance of 0.5 mm, then iron it with an iron.
- Place a seam, 2-3 mm away from the edge. Fold the seam over again and stitch over the existing line.
- All that remains is to process the neck. Fold and iron its edge by 1 cm. Shape, then iron the drawstring so that it is wider in width satin ribbon by 5 mm, fold the edges again and smooth them.
- Place a stitch at a distance of 1 mm from the very first fold, making sure to secure it along the edges.
- Using a pin, thread a satin ribbon through the drawstring and tie it to a bow on one shoulder.
The dress is ready! Iron it before trying it on. You can wear this outfit on New Year's parties and other events.
Making Princess Sofia's dress
Surely every girl has watched a cartoon about the brave and charming Princess Sofia. Naturally, all girls want to be at least a little like their favorite fairy-tale heroine. If you really want to make a surprise, then sew a dress for a little princess with your own hands using this master class.
Prepare the following materials for work:
- 1.5 m of lilac crepe satin as the main material.
- 1 m crepe satin white.
- 30-35 cm of lilac calico for the wrong side.
- 5-6 m of braid with sequins.
- 20 rhinestones
- Zipper length 35 cm.

Sew a fairy-tale princess outfit according to the instructions:
- Remove the top pattern from the T-shirt, making allowances for the fastening and seams, because the pattern should be a little larger to be comfortable, then adjust the outfit to your figure.
- Cut two sets of these blanks from fabric for the front side and material for the back side. Sew them separately at the sides and shoulders.
- Connect the pieces together by sewing the neckline from the wrong side. Make small cuts of 2-3 mm on the fold. Turn them right side out.
- To make sleeves, cut out 2 leaf-shaped elements from the base material, fold the edge on one side, and sew.
- Fold the edges of the armhole inward, inserting the sleeves into the appropriate places. You will get small sleeves. Sew them to the dress.
- Try the top on the girl, mark where the zipper will be.
- Now you need to sew the petticoat. Cut a wide strip measuring 70 by 230 cm; 2 pieces of white fabric measuring 70 by 115 cm.
- Sew a 6 cm wide satin ribbon to the bottom and sew the sides of the skirt. Fold the hem in half and sew.
- Sew the main skirt from lilac material. To do this, cut out 4 petal-shaped elements.
- Cut out 4 flowers from white fabric and sew flowers onto each petal of the outer skirt.
- Sew all the details of the upper skirt, burn the bottom edge, and sew braid with sequins to it.
- Cut out two more parts from the main material, burn the edges, and sew braid to them.
- Sew all three layers of the skirt, gather in the waistband.
- Sew the top and bottom of the outfit, insert a zipper, sew braid along the entire neckline, and attach rhinestones.
As a result of the work done, you will get a simply gorgeous dress, exactly similar to the outfit of Princess Sofia from the cartoon of the same name.
Important! So that you really succeed fluffy dress like a princess, attach a petticoat with rings to it with your own hands.
We sew a festive dress for the New Year's party
Today it’s easy to find patterns for New Year’s outfits on the Internet. If you follow all the recommendations and the diagram, you can easily sew a princess dress with your own hands for a girl. That is, in the above master class we will use a ready-made pattern.
Perform all of the following steps in sequence:
- Take all the necessary measurements from your baby, add reliefs and darts.
- Cover the material chosen for sewing with sickle tape, then cut out a part for the corset from it with small allowances for seams, lining, and a fastener bar. Sew the girder to the bodice.
- Place the lining and corset together and secure them. Turn the part inside out, sew on the ties, then the fasteners.
- Cut out a skirt from organza and satin.
- Finish the skirt with stitching. Cut out the frill and petticoat and sew them on.
- Assemble the skirt, sew an elastic band and a petticoat into it.
- Cut off all excess from the bottom and trim the edges.
- Make flowers and a belt for decoration.
- Sew all the details together, straighten the dress.
All girls dream of being princesses, dressing in beautiful lace dresses with long fluffy skirts and always having a crown on their head. The festive New Year's carnival is just the right place to dress up in a princess costume and show off in it in the company of Grandfather Frost and the Snow Maiden. However, New Year's parties are not the only place where you can wear a crown.
Image details
What do you need to make your own princess costume? To avoid missing anything, you should disassemble the outfit piece by piece. It can be made detailed - include in the princess costume such additional elements as pantaloons, gloves, a fan, a handbag, a scarf with initials, jewelry in the form of pendants with precious stones, or limit yourself to just a dress and a crown.
Materials and tools
So, firstly, you should choose the fabric for the dress with its many petticoats. A win-win For full skirt- It is distinguished by its hardness. A more standing one will hold the shape of a skirt well, while a softer one is perfect for creating ruffles. For the main part of the dress, satin, brocade or velor are well suited. You can also use chiffon and silk, or make the top of the dress entirely from beautiful knitted fabric like velor or sequin fabric.
A princess costume can be made in absolutely any color, but, as you know, almost all little girls really like pink shades, and therefore this color scheme The little fashionista will appreciate it. But, of course, it is better to ask about her preferences in order to definitely please the child.

In order to sew a princess costume for a girl, you will also need some accessories to create decorative elements: various beads, sew-on stones, felt or cardboard for making a crown, a piece of fabric or gold-colored satin ribbons.
How to sew a dress?
Making a carnival one is not at all difficult. Its basis is the dress, and this is the most difficult stage of the work. However, the process of sewing it is not as difficult as it might seem.

For convenience, the work can be divided into parts: first, work on the bodice of the product, and then on the skirt. The first step is to develop a product template. Therefore, armed, you need to take the following measurements from the child: chest and waist volume, tummy volume, back width, front width, shoulder width, neck circumference, chest height, back and front length to the waist and sleeve length.
Constructing a dress bodice pattern
All taken measurements transferred to paper as follows:
- You should draw a rectangle with sides equal to the measurements “chest girth” and “back length” to the waist.
- According to the “chest height” measurement, determine the chest line in the drawing.
- Mark the neck in the upper corners of the drawing. Here everything depends on the intended model; the neck can be closed high or open with a beautifully designed neckline, where a precious necklace made of beads and stones will flaunt.
- To mark the edge of the shoulder seam line, you should put a “back width” measurement on the drawing, along the top side of the rectangle. For a beautiful fit, the shoulder line is drawn with the edge lowered by 1.5 cm.
- Next they go down to the chest line and divide it into the back, armhole and front areas. The first of them is equal to the width of the back, the second is calculated by dividing the chest volume by 4, and the remainder falls on the front shelf area.
- The next step is to determine the middle in the armhole area. A side seam will come out of it, on which, if necessary, you can make darts for the waist.
- Next, you should finalize the armhole by connecting the extreme points of the shoulder seams with the middle point. In this case, you should draw a smooth line, rounding off all sharp corners.
At this stage, the blank for the bodice is ready. Next, you need to transfer it to the fabric and cut it taking into account allowances for processing the seams.
Construction of a sleeve pattern

A children's princess costume can be made with small sleeves or, conversely, they can be made long with beautiful corners falling to the floor at the wrist. To make a template you will need already finished pattern bodice of the dress. It is folded along the shoulder seams and the armhole is outlined along the contour. If you draw a circle, part of which is formed on the shoulder cap, and at its bottom in the center place a segment equal to the girth of the top of the arm, extend this line in both directions and complete the sleeve cap, going around the circle, the length of which would be equal to the cut of the armhole, then you will get a template for sewing.
However, if you sew, for example, a Princess Leia costume, then it will be enough to fold the fabric in half and simply mark the side and sleeve seams with a smooth transition under the armpit.
Sewing a skirt
Sew a skirt and connect it with a bodice, getting a great princess costume with your own hands - it's easy! To make it, you only need two measurements: the length of the product and the volume of the child’s abdomen. Next, having calculated the required amount of fabric, you can draw the template directly on the canvas, since it is an ordinary rectangle, which is closed with a seam and gathered at the top with an elastic band. Here you can simplify the task by leaving the bodice and skirt as separate parts, so as not to attach a zipper or sew on buttons. If the product is multi-layered, then each of the layers must be closed separately, but they can all be assembled at the top with one elastic band.
It is better to make the lower layers from hard tulle, then use soft tulle, and then the main fabric.
Creating a costume with your child
A DIY princess costume is a great opportunity to collaborate with your child! Every mother can devote an extra hour of precious time to her child and allow the baby to participate in creating a chic outfit. You can instruct her to string beads onto a fishing line or, under mom’s supervision, cut tulle with scissors. These tasks are simple, but the child is guaranteed a pleasant experience, because the thought that she helped sew a princess costume will become a reason for pride for the girl and will spur her on for further exploits in the future.
How to create the image of Leia?
Such a cult saga as Star Wars left no one indifferent. Adults and children, glued to the screens, watched in fascination, part after part. The boys imagined themselves in swarms of Jedi, and the girls dreamed of dressing up as Princess Leia. It’s not difficult to dress up in such a mysterious image at a carnival celebration. A white straight dress with one-piece sleeves, a belt at the waist and a hairstyle with two braids gathered on the head into buns - and you can shine at the holiday.
To sew such an outfit, you will need a white cloth two measurements long from the neck to the child’s floor. It can be satin or velvet fabric, you can also use just linen or cambric. For cutting, you will also need to measure the length from wrist to wrist (through the child’s neck) and set aside given value along the fold. On the neck, in the middle of this segment, you will need to make a cutout. And so that the head fits well, there is a cut on the back or front shelf. It can be closed with ties or buttons. Next, you need to measure the circumference of the chest and abdomen and, according to the larger value, place this segment directly on the canvas in the center from mark to mark indicating the wrists. Next you will need to draw sleeve and side seams like “ bat"and flare down the panel of the dress by about 7-10 cm on both sides. Then all that remains is to find a suitable belt (or sew it from a strip of fabric) and complement the look with the appropriate hairstyle.

How to create the image of Jasmine?
The legendary adventures of Aladdin would be practically uninteresting to girls if a princess did not appear in them. Her outfit has long been every girl's dream. It is best to sew a Princess Jasmine costume from chiffon, satin or silk with inserts of beautiful gold fringe with beads and other decorative elements in the form of beads, stones and satin ribbons. To sew the top, you can use the bodice pattern described above, and for the pants you need to take the child’s sweatpants, fold them inside out, pant leg to pant leg, and trace along the contour of the seams. When cutting, you will need to add 10 cm along the side seams and 5 cm at the top and bottom (to create a drawstring for the elastic).

A little imagination - and a chic princess outfit for your beloved child is ready!
3. Detailed master class on sewing dresses for girls from Elena (Elena laitdream)
A dress for a girl turns out to be super budget-friendly. It could be dad's shirt and a little lace, mom's skirt and some kind of applique, or a funny-sized piece of fabric - a remnant from her sewn dress.
Children's dress r 86-92 .

Dress Materials:
· Fabric that holds its shape (cotton, linen, gabardine, crepe, shirt fabric, etc.): with a width of 1 m – 0.8 m, with a width of 1.5 m – 0.5 m
· Zipper or button closure
· Cotton, lawn for lining – 0.6 m at any width
· Trim: lace – 2.5 m, 3 buttons
Girls, sorry for the corrections in the pattern: at first I wanted to give a more universal one (front-back clasp), and then I realized that I would only confuse those who are not yet very smart at “swimming” in this matter... But, alas, I no longer have the strength to redraw it! ))))) only the crossed out words were corrected - they are not needed, the rest is completely correct.
1. Open it up. Using the patterns, we cut out the parts: front – 1 part with a fold, back – 2 parts, skirt – one part with a fold.


2. Assembling and processing the top of the dress:
a. We assemble the dress along the shoulder sections, trim the allowances to a comfortable size - 1-1.5 cm, and iron them. Leave the side seams open.
b. Place the resulting piece face to face on a piece of cotton fabric that will be used as a lining.

c. We carefully smooth out the details, making sure that the front of the dress and the lining match perfectly. We chop off the parts and cut out the lining 
d. Baste in in this case not necessarily, you can chop the tailor’s pins like this and safely stitch along them: the machine easily passes over the pins if they are inserted clearly perpendicular to the stitch line, and the chance that the machine’s needle will hit the pin is minimal.

e. We line up the neckline and both armholes, iron them, cut off the allowances to 0.5-0.7, and if necessary, cut the allowances at the rounded areas. Please note that we sew the beginning and end of each armhole along the side seam allowance slightly obliquely - this is important. 
f. Having placed the resulting part with the lining up and the front towards you, we place our hand between the dress and the lining, with the other hand we help ourselves and pull the back lining towards us through the shoulder tunnels
.


Repeat with the other half of the back. Straighten the inverted part. 
g. Carefully sweep out the edge of the armholes and neckline, making sure that the 1 mm roll goes to the wrong side of the dress - then the lining will not be visible. We iron it to make sure it’s done well and stitch it along the front side of the dress. 
h. We sew the side seams, not forgetting to make a reliable fastening at the armhole itself. To do this, I do this: I start stitching from the armhole to the waist line, but not from the very edge of the armhole, but stepping back 3-5 mm from the processed edge of the armhole. I sew two or three stitches, turn on the reverse and return the stitch to the very edge of the armhole, then, releasing the reverse, I sew a regular stitch. Why is this so? – the beginning of the stitching will be inside the seam, the beginning of the side seam will be secure and without any knots. We process the cuts (zigzag, overlock) and manually secure the side seam allowances at the armhole. The corners of the allowances should be below the edge of the armhole so that they do not peek out. It was for this purpose that we made slightly beveled lines along the allowances at the beginning and end of the armhole (see point 4).
3. Connecting the top of the dress and the skirt. We fold the skirt and top of the dress face to face, carefully aligning the marked pattern lines so that after sewing the middle back seam, all the lines clearly coincide. We sew down the waist seam, overcast the edges and iron the seam allowances upward. Place the lace on the waist seam line, sew along both edges if the lace is wide, and along the bottom edge at the waist if it is narrow.
4. Clasp. Sew the back seam of the dress, turning close attention for a perfect match of all the lines in the “middle seam-waist line” section. We iron the middle seam as follows: the left back part – we fold the seam allowance to the wrong side, the right back part – we don’t fold the seam allowance, we leave it even. We process the slices separately. We manually sew the allowance on the left back part to the neckline and baste it air loop for a button. On the right part we sew a button under the fastener.
Advice: You can decorate the dress with a zipper, but then you definitely need a non-hidden zipper, because... a hidden zipper will be a bit harsh for delicate baby skin.
5. Dress hem. We draw the hemline. To do this, we process the cut with an overlock or zigzag, apply lace to the face of the skirt and stitch it either with a small zigzag or with a double needle, depending on the thickness of the fabric and lace.
6. Iron the dress. Ready.
Important! If there is no single piece of fabric for lining or the size of the future dress is such that it does not fit into the existing width of the fabric, then the same thing can be made from a stitched lining. To do this, we cut out the front and back pieces from the lining fabric, connect them along the shoulder seams, iron them - and then work as if they were a single piece. A small condition - you need to ensure that the shoulder seams match and carefully trim the allowances so that there is no noticeable thickening at the junction of the dress seam and the lining.

For the princess costume you will need:
blue stretch velvet - 1 m;
blue stretch velvet - 50 cm;
silver fabric - 30 cm;
decorative braid - 4 m;
Velcro - 10 cm;
white satin - 1 m 50 cm;
blue satin - 2 m;
interlining - 20 cm;
wide elastic band- 10 cm;
narrow elastic band - 15 cm;
satin ribbon - 30 cm.
DIY princess costume: instructions
Bodice
1. In order not to be mistaken with the size, take your daughter’s blouse and, placing it on paper, make a pattern for the top of the dress.


2. Place the pattern on the blue velvet folded in half and cut out the bodice. Don't forget to leave 2 cm allowances on all sides.


3. The back of the bodice of the princess costume consists of 2 parts. They should be identical to the front, only leave a 2 cm allowance in the middle to create a fastener. And the back neckline should be a little less deep.


4. Draw a trapezoid on the wrong side of the silver fabric. Dimensions are approximate. Its upper part should be equal to the width of the cutout. Height - the length of the front. The base is slightly wider than the top (up to your preference). Allowances are 1 cm on each side. Cut out the piece and use pins to attach it to the front piece, tucking in the seam allowances.

5. Sew on the silver insert using a sewing machine.

6. Give the neckline a rounded shape.

7. Decorate the middle of the bodice of the Cinderella costume with decorative braid. First, zigzag in one direction.

8. Then in the other direction.

9. Now trim the sides of the silver insert with braid.

10. Let's move on to working with the back parts. Fold the inner edges over 2 times and stitch.

11. Place 2 back pieces onto the front piece. Match the sides and shoulders (don't forget the overlap for the fastener).

12. Cut the Velcro into 4 equal pieces. Sew 3 pieces of Velcro at equal intervals to the front side of the left shelf. Sew the other side of the Velcro onto the wrong side of the right shelf.

13. Align the parts, placing the right sides together. Sew shoulder seams.

14. Sew the sides.

Sleeves
1. Copy the sleeve pattern onto paper. The base of the part must be at least 12 cm. By increasing the steepness of the edge, you can make the sleeve more magnificent.

2. From white satin, cut out 2 sleeve pieces for Cinderella’s costume, as well as 2 identical rectangles measuring 7.5 x 24 cm.

3. Fold the rectangles in half, right side out, and iron.

4. Place the sleeve on the raw side of the rectangle. Gathering the sleeve evenly in the middle, pin the pieces together.


5. Stitch. Finish the edge with a zigzag. Do the same with the 2nd sleeve.

6. Iron the pieces by folding the cuffs down. The result should match the photo.

7. Fold the sleeves in half and sew an inner seam.

8. Turn the bodice and sleeve parts inside out and pin them together.

9. Use a sewing machine to sew the seams.

10. Finish the edges with a zigzag stitch. Trim off any excess threads.


Neck
1. Turn the bodice right side out.
2. Cut a strip of blue velvet 3 cm wide, approximately equal to the circumference of the neckline. Fold it in half.


3. Sew the ribbon to the front of the cutout.

4. Fold the ribbon inward and stitch so that there is a neat stitch on the front side along the contour of the neckline.

5. Shorten, fold and hem the parts of the ribbon that extend beyond the edges of the neckline.


Petals
1. How can you sew a princess costume with your own hands and leave it without beautiful petals on the sides? Cut a square with a side of 60 cm from white satin.

2. Shape it into a circle.


3. Fold the circle in half. Sew along the rounded side, leaving a small hole. Through it, turn the part right side out. Carefully sew up the hole.

4. Place a basting stitch along the straight side at a distance of 0.5 cm from the edge.
5. Pull the thread and gather the petal.

6. Place it on the side of the bodice so that half of the petal is in front and half in back. Pin the second petal.


7. Sew the petals and finish the edge.
Skirt
1. From blue satin, cut out 2 identical rectangles measuring 110 x 65 cm.

2. Sew the pieces together by connecting the smaller sides. Finish the edge with a zigzag.


3. Place a basting thread along the top edge. Pull the end and gather the skirt, evenly distributing the pleats.
4. Place the skirt of the Cinderella costume against the bodice (right side to right side). Fasten the parts with pins.

5. Sew the seam and finish with a zigzag stitch.

6. Turn the dress right side out. It's ready.


Accessories
Headband

1. Make 2 identical parts from blue satin. Measure the circumference of your child's head. The length of each part should be 2/3 of the length of the head. It should widen slightly in the middle. Cut out 2 more pieces of the same shape from non-woven fabric. But they should be a little smaller.
2. Using an iron, connect the satin and non-woven parts.
3. Trim the corners of the blue fabric.
4. Place the pieces together, matching the satin sides. Sew, leaving only one narrow side unstitched.
5. Turn the bezel to the right side using a pencil.
6. Straighten the part and iron it. Sew up the open edge.
7. Sew an elastic band to the ends of the headband. The headband is ready.

Fingerless gloves

1. Having measured the girl’s hand, cut out 2 parts that widen at the top. Don't forget about allowances. Gloves may be slightly larger than the diameter of the handles. Cut the lower part at an acute angle.
2. Carefully finish the edges without stretching the fabric.
3. Sew an elastic loop to the sharp corner.
4. Use a pin to thread the elastic into the hem of the top. Pull it slightly so as not to pinch the handle and secure it at the edges.
5. Fold the pieces in half lengthwise and sew a seam. Do the 2nd part in the same way. Turn right side out. The gloves are ready.

Necklace

1. Measure your baby's neck circumference. Cut a piece of satin ribbon the same length plus 3 cm.
2. Sew a piece of Velcro to both ends of the tape. It will serve as a clasp.
3. Attach a decorative braid decoration in the center of the necklace on the right side.

The princess costume is ready. You can go to the ball.

| More |


