Autumn is a magical time filled with bright colors and rich flowers. A fabulously beautiful autumn carpet cannot leave a single person indifferent. That's why With Today we invite you and your children to recall the extraordinary beauty of autumn landscapes and make some applications on the theme of autumn!


Well, how you prepare the materials plays an unimportant role in applications with leaves and flowers. It is not necessary to dry them; you can quickly make preparations.
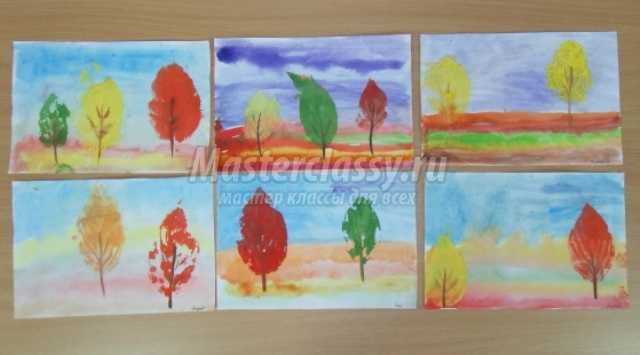
Bright colors of autumn trees
Autumn nature before long hibernation gives us a chance to admire the bright and rich colors, enjoy the variety of colors and capture in our memory the natural beauty of autumn landscapes. Each leaf is a unique masterpiece created by nature itself.
Magic maple leaves
The autumn fairy tale does not last long, which is probably why many people strive to preserve its beauty in their crafts and applications. To extend the magical charm of autumn, we suggest you create several applications from leaves, as well as some other natural materials, with your own hands!
Children studying in younger group kindergarten, together with teachers or parents they can make beautiful crafts with autumn trees:


Step-by-step instruction:
- First, draw the outline of the tree on paper. If you are making a birch tree, you can draw its trunk with a black helium pen. If you want to make an applique with a maple tree, you can draw a trunk with branches with brown gouache or cut out these details from colored paper.
- After this, you will need to attach the leaves to the tree. They can be glued using PVA or secured with thin tape.
Video: Autumn tree made from pieces of foliage
Autumn tree You can make it not only from whole leaves, but also from small pieces. To learn how to make a tear-off applique from leaves, you can watch a small MK.
This video explains in detail how to make tear-away appliqué from dry leaves, as well as how to use the leaves as a template. By applying such a natural stencil smeared with paint to a paper sheet, you can get an amazing autumn pattern!
Foliage paintings
Leaves can be cut into desired shapes.
The main plot needs to be made from leaves, but if it is difficult for a child to work with natural material, he can complete the plot itself.


You can come up with a whole fairy tale plot for children and use it in an application. For example, come up with a Cat and Mouse fairy tale.


Boys can set sail to unknown shores.
For older children, you can offer to take a portrait of a friend or a self-portrait. They will have fun making a neighbor.

Autumn landscapes
Foliage panel
Beginners practicing in middle group, they can try to make not only various trees from leaves, but also an entire autumn forest:


For step-by-step creation such an unusual landscape they will need:
- leaves from different trees;
- glue;
- pencil;
- scissors;
- markers.
Description of work:

Volumetric landscapes
If kids are mainly engaged in mastering flat crafts, then children studying in senior group begin to get acquainted with the concept of volumetric applique:


To make a three-dimensional landscape yourself with autumn forest you need to prepare in advance:
- plasticine;
- small cardboard box;
- green sheets;
- dry leaves;
- pine twig;
- glue;
- bump;
- acorns;
- scissors.


Techniques for making three-dimensional crafts:
- Take cardboard box and cut off one of its walls.
- Cover the inside of the blank with green sheets.
- Glue dry leaves to the walls and bottom of the box.
- Roll a couple of small balls of brown plasticine, stick leaves, spruce or pine branches into them, and then attach them to the cardboard.
- Place finely chopped leaves on top of the plasticine blanks.
- Make a hedgehog out of plasticine, a few mushrooms and a couple of still green bushes of grass.
- Decorate a voluminous craft with these blanks.
To make a voluminous craft look more beautiful, you can additionally decorate it with dried blades of grass, spikelets, flowers or acorn caps. During production autumn forest You can use any natural materials, the main thing is that they look harmonious and complement each other! So, for example, caps for mushrooms can be made from acorns, but an ordinary pine cone is quite suitable.


Video: Hedgehog made from natural materials
Painting “Gifts of Autumn”
In kindergarten, children know that the main decoration of any autumn landscape- This is a carpet of leaves. Every autumn, a magical leafy carpet wraps the earth, painting it in bright rich colors. To make a magic leafy carpet you will need:
- dry leaves;
- glue;
- acorns;
- a sheet of thick cardboard;
Scheme of work:
- Glue the leaves to the base so that they slightly overlap each other and completely cover the cardboard.
- When the carpet dries, attach several acorns and their caps to it.
- To make a child's applique last longer with its beauty, adults can cover it with hairspray or sprinkle it with sunflower oil, and then insert it into a frame.
After the painting is ready and completely dry, you can open it with varnish so that it can be preserved for a long time.
Drawings on a sheet and with a sheet
As we have already said, autumn is a magical time. And so that you can see this for yourself, we suggest you make unusual magic leaves that will become the main decoration for your applications!
For children, creating such magical leaves is a great opportunity to show their imagination and bring to life even the most unusual ideas. Drawing strokes, dots and stripes with gouache on sheets will help preschoolers prepare for writing and teach them perseverance and accuracy.


You can make any design on the leaves. Kids can draw simple patterns, and the guys involved in preparatory group, can depict the same funny animal faces as shown in the photo:


There are no special instructions. Every child can show their imagination and draw what they like!
You can make a fairy forest out of foliage using a print. We apply paint to a sheet and use it as a stamp.
Video: Application of autumn leaves
Stencils and templates for works on the theme “Autumn”


Useful tips
In autumn, nature gives us many different materials to work with.
First of all, these are, of course, colorful leaves.
From a huge selection of leaves of different shapes, sizes and shades you can make beautiful applications.
You don't have to make complex applications to make them beautiful - just use your imagination and learn a few simple secrets.
On our website you will also find:
Here is just a small part of the autumn beautiful applications which are very easy to do:
Applique on an autumn theme: leaves in a frame
This project is incredibly easy to make. By inserting a leaf into a glass frame, you decorate the interior (even if only for a short time) with autumn colors.

Children's autumn applique: leaves - mosaic
In this craft you can show all the colors of autumn in one leaf. Not only does it look very beautiful, but it is also very simple to do - collect the leaves, paint them and put them in a certain sequence to form a kind of mosaic picture.

Leaf applique: hanging leaves

You will need:
Gold paint (spray)
White marker
Twig
Adhesive tape

1. Collect several fallen leaves that have not yet curled up and place them under a thick book.
2. Take gold paint and carefully apply it to the tips of the leaves. Let the paint dry.

3. Use a white marker to write something pretty on the leaves.
4. Tie a few threads different lengths to a small branch.
5. Cut two identical pieces from the ribbon, fold each in half. To make the loops, attach them with a pin or nail to the wall or board (if in a kindergarten or school) at a distance of about the length of the branch.
6. Hang the branch on the loops and glue the leaves to the threads.
DIY applications: chandelier
A similar simple hanging structure can be made from colorful leaves and used to decorate any interior.

How to make an applique: leaf wreath
The leaves can be combined into one whole design to create a beautiful wreath. You can use ordinary leaves, or you can use those used for the above mosaic, i.e. placed under a press and painted.

Crafts, applications: autumn vase
Making this home decoration is very simple - collect several branches with not yet fallen leaves and place them in a vase with water. You can also find dry branches and use clear tape or bright string to attach fallen leaves to them.

Application on the theme "Autumn": personalized cards made from leaves
You can make such cards to indicate each guest his place at the table or to write some kind of holiday wish and attach it to a gift.

You will need:
Leaves with tails (peeled, dry, smooth)
Gold paint (spray or gouache)
Rope
Colored paper
Scissors
Hole puncher

1. After you have collected the leaves, wash them, dry them and put them under a press (a thick book, for example) to flatten them.
2. After this, apply spray paint to the leaves - just do this carefully outdoors, with a mask and preferably with special glasses, because the contents of the can are poisonous. You can paint them with gouache.
3. Cut out labels from colored cardboard on which you can write the guest’s name or a wish (if you decide to give someone a gift) with a pen or marker.

4. Using thread, attach the tags to the painted leaves.


Application (master class): autumn lanterns

You will need:
Autumn leaves
Jar
Decoupage glue (mod podge)
Glue brush

1. Collect the leaves, straighten them under a press and dry them.


2. Apply decoupage glue to the surface of the jar.

3. Glue a layer of leaves to the jar and apply another layer of glue on top.


4. Leave the workpiece to dry overnight.
*If some of the leaves don't stay on the jar completely, use rubber rings (rubber bands) to hold them in place.
The article presents a variety of paper accordion leaves, templates and step by step instructions creating a particular sheet. Such leaves may be in the very different colors, for example, if they are dedicated to autumn events, it is better to use colored paper in yellow, orange and red colors, for spring events - good option There will be leaves of light green and green shades. Even for winter celebrations, you can make leaves from silver or white paper.
For work you will need the following materials:
- Colored paper of various colors suitable for leaves;
- Scissors, glue stick, simple pencil.

Paper accordion leaves step by step: 8 options with templates
Option 1. Accordion paper maple leaf

You will need yellow or green colored paper. Cut an arbitrary rectangle from it.

Fold it in half.

Draw or print the template for yourself. Cut it out and attach it to the colored paper folded in half, taking into account that the straight long side on the template falls on the fold.

Trace with a pencil. In the photo the fold is on the left. And in the future, all stages presented with paper folded in half will be folded on the left.

Cut out the workpiece, carefully cutting off all wavy lines.

Now open it. You should end up with a similar piece, with symmetrical edges.

At this stage it's time to do paper accordion. It is better to start from the bottom, widest side. Fold a small fold, no more than 7 mm wide, but extending over the entire area of the sheet. Press carefully and then fold the same fold in the other direction. Repeat this process until all the paper has turned into an accordion.

For convenience, turn the accordion over with the long side up.

Find the middle and fold it in half. Press well, especially in the area of the bottom fold and glue internal sides. In the photo this area is shown with arrows.

Depending on the structure of the paper, sometimes it becomes necessary to glue the bottom two or three folds of the sheet. Most often they diverge very much thin paper. Dense holds all the folds together well without glue.
The accordion paper maple leaf is ready, straighten its folds and glue a thin stem.


Option 2. Autumn leaf made of accordion paper

Of course, it can be not only autumn. If you make it from green paper, the leaf will look like spring or summer.
To create it you also need a piece of rectangular paper.

As in the first option, the paper needs to be folded in half.

Then you should use a template or draw a simple zigzag line, reminiscent of one part of a Christmas tree. 
This line should start from the fold of the paper and end at the bottom.

Cut out the drawing obtained using a template or your own efforts.

Open the sides.

Make small folds, length from one side to the other, and width of 5-7 mm. If the sheet big size or children are small, the folds may be larger.

The accordion is made; for convenience, turn it wide side up.

Mark the middle and carefully fold it in half. Press down, especially at the very bottom.
Apply glue to one of the inner sides and glue them together. In the photo this area is shown with arrows. If necessary, glue a few folds at the very bottom of the leaf.

At the end, straighten the accordion sheet a little and glue the petiole, which is a thin strip of colored paper from which the sheet itself is made. But such a stem is not strong, it can only complement the leaf, and, for example, gluing leaves to a homemade tree will not work. It is better for these purposes to use colored cardboard, or colored paper, twisted into a flagellum and threaded through a hole in the bottom of the sheet.

Option 3. Oak sheet of accordion paper

The outline of this leaf is similar to that of an oak leaf, only the longitudinal folds slightly worsen this definition. But as a change, this version of the leaf will also come in handy, especially in those works or events where you need a lot of leaves. different shapes.
Cut out a square from paper.

Fold it in half, the fold is on my left.

Use a template or draw large waves yourself, starting from the fold side and reaching the bottom side. 

Cut the part through two sides at once, but without touching the left one. She must be whole.

Open the paper.

And, as always, make thin folds, starting with the widest part of the paper. Carefully fold all the paper into an accordion, one fold in one direction, the next in the other. For convenience, the paper can be turned over during operation. As a last resort, draw light longitudinal lines with a simple pencil and then fold a leaf along them.

Place the resulting accordion with the longest side facing up.

Find the middle and fold the accordion in half. Glue the inside sides together.

Straighten the folds, glue the petiole and the accordion-shaped oak leaf is ready.


4 version of accordion paper sheet

This species looks like a hornbeam or beech leaf. And on the leaves of many other trees. The main thing is that it does not require any templates; it is extremely simple to make.
To make this oblong leaf, you need triangular shaped paper. You can first cut a square out of paper.

Fold in half, connecting opposite corners.

Cut in half and you get two triangles.

You will need one triangle per sheet. Turn it wide side down and start making folds there, like an accordion.

Turn the entire triangle into an accordion.
For convenience, turn it over with the longest side facing up.

Find the middle and fold exactly in half, bringing the ends together. In the middle, apply glue to one side and glue the side parts together.

Straighten it a little and glue the stem. The sheet is ready.

5 version of accordion paper sheet

The most common type, the shape resembles the leaves of poplar, linden, and birch. For variety, let it be green, although the leaf in the autumn, yellow-orange version is no less interesting.
It requires a not very wide paper rectangle.

Fold the rectangle in half, the fold in the photo on the left.

Use a template or draw a convex line yourself, the beginning of which is from the side of the fold, and the sloping slope reaches the underside of the sheet folded in half. 
There are no exact proportions or markings here. If you want a more prominent narrow tip, the indentation on the line can be made more pronounced.

Cut out the design without touching the left side.

Open the paper.

Make an accordion, starting with the straight, longest side. As usual, the width of the folds is ideal in the region of 5-7 mm.

Turn the accordion over with the straight side facing up.

Fold in half and glue the inside sides together. If necessary, glue the bottom folds.

Spread the leaf and glue the stem.


Option 6. Another maple leaf made from accordion paper

There are quite a few varieties of maple leaves made from folded paper. It all depends on the template. There are very simple ones that can be drawn almost arbitrarily, and more complex patterns that it is still advisable to follow as accurately as possible. In the second case, the maple leaves are more perfect, closer to the original.
Despite the fact that I was the first to show one type of maple leaf, I still can’t resist and show you another one that I really liked.
For this you will need square colored paper.

This square then needs to be folded in half.

Print the template and carefully reproduce its lines on colored paper, taking into account that the fold is on the left. 


Then everything is as usual. Unfold the paper piece.

Make narrow folds, starting from the straight, wide side and up to the very top.


Find the middle and fold the accordion-folded paper in half. Here you can see that this yellow paper is thinner than the previous ones; at the very bottom the folds are not held together. Therefore, they need to be forced to do this with glue. You can safely apply glue at the fold on the three lower folds. And, of course, glue the inner two sides together, where shown by the arrows.

Straighten the folds a little, glue the stem and it’s beautiful, in this version autumn Maple Leaf the accordion is ready.

7 version of accordion leaves

Simple round shape sheet. There can be a variety of colors inherent in the leaves.
You will need a rectangular piece.

Fold it in half.

Using a compass or something suitable round, draw a rounded line connecting the sides of the paper. The fold is in the photo on the left.

Cut along the outline.

Open it up and you will have an even semicircle.

Make small folds, starting from the straight side of the semicircle and to the very top.

Turn the accordion piece over so the long, straight side is facing up.

Fold in half and glue the inside sides together.

Carefully straighten and glue the stem. The round sheet is ready.

Option 8. Thin oblong accordion leaves

The shape is inherent in the leaves of willow, olive and some others.
To make such a sheet, you need a rectangular, rather narrow strip of paper. The narrower it is, the thinner the leaf, although it is more difficult to make very thin ones.

Fold the strip in half.

Draw a slanting line. Please note that in the photo the fold of the paper is on the left.

Cut along the line to create a double triangle.

Reveal its parts.

Fold into a shallow fold. As you can see, it is problematic to make even folds on very narrow paper, but this will not appear on the sheet.

Turn the long side up and bend the accordion in half. Glue the middle.

You will get this narrow sheet of accordion paper.


Application "Autumn"- a favorite activity of schoolchildren and preschoolers, during which children learn to work with various materials, from paper to various grains and seeds collected in nature, and also master various techniques and techniques for working with them. As a result of such a creative process, children develop a correct understanding of natural changes, lexicon. In the process of making crafts, children learn to work not only independently, but also in groups of several people, for example, three people can immediately take part in the creation, each of whom will have their own task.
Lesson: applique “Autumn”
The very first creative lesson “Applique autumn” waiting for children in the younger group kindergarten, where they only get acquainted with the simplest techniques of working with paper.First, children need to be prepared for the creative process: while walking with children on the playground, it is necessary to draw their attention not to what changes in nature occur with the arrival of the first autumn months. Kids can be asked a question about what the color of the leaves was in the summer and what it is now. Draw their attention to the fact that every day the leaves fall to the ground and soon the trees will remain completely bare, until, with the arrival of spring, small green leaves begin to appear on them again. The teacher must explain that such changes occur in nature every year, and each season has its own “unusualities”, which are reflected in fairy tales and stories of writers, in children's songs, riddles and paintings.

When you and the children return to the group, before the actual creative activity begins, you need to show them famous paintings that would display autumn theme, turn on children's songs and be sure to solve a few together with the kids simple riddles.
In the younger group, creative activities should take place in game form, because kids don’t like to sit in one place for a long time, they want to be constantly on the move. And only after the educational game can the teacher invite the children to take their place at the table and start doing applications on the theme of autumn for kindergarten.

During the lesson, kids will acquire the first skills of composing a composition, because they will have to independently (and if necessary, with the teacher’s prompts) lay out leaves of different shapes on a paper base, and then carefully glue them. Perhaps this will be the child’s first experience working with glue, so first the teacher should show which side the paper form should be coated with glue, how to apply it to the base and how long to wait for it to stick.
During the lesson, the child will have an idea of what colors represent October - work will be done with yellow, red, orange.
Since the children of the younger group do the most, the teacher must independently prepare all the necessary material for them, make paper blanks, so that during the lesson the child only has to arrange and glue them correctly.

Application: abstract “Autumn”
Thanks to a well-designed lesson plan “Applique”, summary “Autumn” must be prepared in advance so that everyone is prepared for the lesson necessary materials and additional things for visual representation, the child will get a complete understanding of this natural phenomenon, like “leaf fall,” his vocabulary will be replenished with new words. As we have already said, in the younger group the child will develop a sense of composition, color and shape. During the creative process, the baby will become more diligent, will take initiative, and learn to work with materials and tools independently.
To make the first one beautiful paper applique “Autumn”, templates The teacher must prepare in advance. For each child, you need to prepare a sheet of paper with a “tree trunk” cut out of brown paper pasted on top. You should also prepare paper leaves, five pieces will be enough for the first lesson, they should also be cut out of paper, but using different autumn colors - gold, red, yellow, and it is also advisable to make all five blanks in different shapes. This set should be distributed to the children along with glue and a brush.

Now you can proceed directly to composing the composition: the children’s task is to place the leaves on the base so as to create the feeling that they are falling from a tree. First, the kids must place the leaves on the base, and the teacher must evaluate their work and gently point out mistakes. After which comes the next crucial moment - gluing, during which the teacher must ensure that the children hold the brush correctly in their hand and coat the workpieces with glue.
Finished works must be hung in a prominent place in the group, so that parents can appreciate the efforts of their children in kindergarten, so that children's applique "Autumn" has become one of the main ways to spend time at home on weekends.

Children's applique "Autumn"
Application made of colored paper on the theme of autumn- a creative task for children in the middle group to systematize their knowledge about various autumn signs and consolidate knowledge about seasonal natural changes.During the lesson, the children will have to determine which leaves have fallen from which trees, thus their vocabulary will be replenished, but first they must conduct an educational lesson about which trees are popular in your area, which grow in the park or in the yard kindergarten, so that each example is clear.

During a walk, it is important to draw the attention of preschoolers to the fact that some trees remain green both in autumn and winter. And in a group you can spend time solving thematic children's riddles about leaf fall, autumn, evergreen trees.
The main goal of the lesson is not only to improve the child’s creative skills (in particular, gluing small elements), but also to develop his logical thinking, fine motor skills fingers, form tactile sensations. If at first it may be difficult for children to work with small elements, then over time their movements will improve, and at the same time an interest and love for various types creative activity.
Application from leaves “Autumn” It can also become the basis for a card for a grandparent’s birthday. And also usually the results of children's creativity are exhibited at a competition in kindergarten.


Collecting beautiful leaves on a fine autumn day is a most exciting activity. And when you return home, you want to somehow preserve this splendor or use it to create something beautiful - the material simply begs for it! The most interesting thing is to make various compositions and applications from colorful autumn leaves. This type of creativity develops the child’s fantasy and imagination. In it, images can be created from ready-made shapes by simply placing them on top of each other, rather than cutting them out of paper. And the color palette of leaf fall will put any largest set of colored paper to shame!
YOU WILL NEED:
Colorful autumn leaves
Multi-colored cardboard or velvet paper
PVA glue (you can use starch glue or rubber glue)
Brush
Scissors
Tweezers
Oilcloth
DRYING AUTUMN LEAVES
Applications can be made from either freshly picked or dried leaves. If you want to preserve the leaves, two drying methods can be recommended.
The first, well-known, method is to insert leaves between the pages of an old unnecessary book. It is better to lay each leaf on both sides with a paper napkin.
The second method is express drying of the leaves using an iron. Just remember that the leaves are not sterile, so it is better to iron them on a surface that you don’t mind throwing away later, for example, on large sheets of paper. You also need to put a sheet of newsprint or a paper napkin on top of the sheet before ironing.

AUTUMN LEAVE APPLICATION TECHNIQUE
Before you start work, cover the table with oilcloth so as not to stain it with glue. Prepare the base - a sheet of cardboard, collected leaves, scissors, glue, tweezers.
First you need to come up with a future picture. Then link it to separate sheet. And only then start gluing the individual leaf parts to the base. It is best to apply the glue in droplets along the edges. If you apply glue to the entire surface of the sheet, it will warp when the application dries.
The finished picture should be placed under a press for one or two days.
Don't forget to frame it!
4.
TYPES OF APPLICATIONS
Overlay applique. Try to start by coming up with pictures that do not require cutting out any details from the leaves, but are created by overlaying the leaves. You can come up with a lot of such pictures: butterflies, mushrooms, chickens and other birds... The missing elements can be drawn in with a felt-tip pen or made from other natural materials.
Having mastered simple pictures, children can begin to come up with multi-tiered images. In this technique, leaves are glued on top of each other in layers. The application will turn out bright and cheerful if the leaves are different in color.
5.
6.
Silhouette applique.
In this type of appliqué, excess parts of the leaf are cut off so that the result is exactly what the little artist intended.
7.
8.
9.
10.
11.
12.
Modular application (mosaic).
Using this technique, a picture is created by gluing many leaves of the same or similar shape and size (or, for example, maple seeds). This way you can make the scales of a fish, the tail of a cockerel or a firebird.
13.
Symmetrical applique.
It is used to create individual images or entire paintings with a symmetrical structure, as well as to obtain two completely identical images (for example, reflection in water). To do this, you need to select similar leaves to get an image with its “reflection” or symmetrical in itself (“Butterfly”, “Dragonfly”, “Landscape with a lake”, “Boat on the river”).
14.
15.
Ribbon applique- a type of symmetrical appliqué.
Its difference is that it allows you to get not one or two, but many identical images - ornaments. You get a whole “round dance” of trees, flowers, mushrooms, butterflies, etc.
In conclusion - a small selection of pictures collected from different corners Internet - to awaken the first associations for you and your baby. One has only to show the child how this is done, and his imagination will allow him to create more and more new pictures from this amazingly beautiful natural material- autumn leaves!
16.
17.
18.
19.
20.
21.
22.
23.
24.
25.
26.
27.
28.
29.
30.
31.
32.
33.
34.
35.
36.
37.

Source: http://allforchildren.ru/article/autumn01.php

And these work samples are taken from
1.
2.
3.
4.
5.
6.
7.
8.
9.
10.
11.
12.
13.
14.
15.
16.
17.
18.
19.
20.
21.
22.
23.
24.
25.
26.
27.
28.


