One of the common options for updating old favorite things used at home is to apply DIY decorative elements to them from scrap materials.
Ideas for decorating old things
There are an incredible variety of decorating ideas.
1) You can use the decoupage method, with its help you can transform any piece of furniture or the walls and ceiling of a room. It is only necessary to cover the selected surface with several layers of paint and varnish. To decorate the wall, patterns are cut out of paper, which are painted and glued to the surface of the walls using the same technology.
2) It is not necessary to get rid of old furniture, you can give it new life with handmade upholstery. Everything can be restored, from simple chairs to ottomans and sofas.
3) Creating a three-dimensional painting from an old photo frame is also not very difficult. A little fantasy and imagination - and an interesting gallery for the wall is ready.

4) As an option for a painting, you can make a collage from a window frame.
We will conduct a master class on creating such jewelry with photos and step-by-step instructions.
Making a collage from a window frame
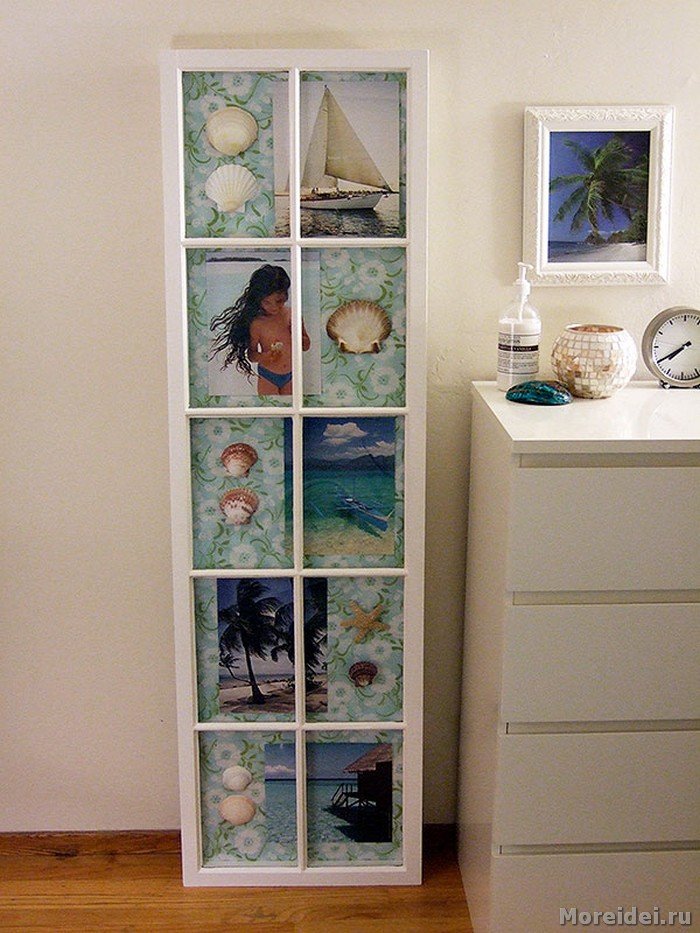
Finding a suitable window frame, in principle, is not difficult; the main thing is to choose the size of the future collage so that it fits in the place chosen for it. First of all, you need to remove all the glass from the frame and clean it of paint. Or at least sand out the rough edges.
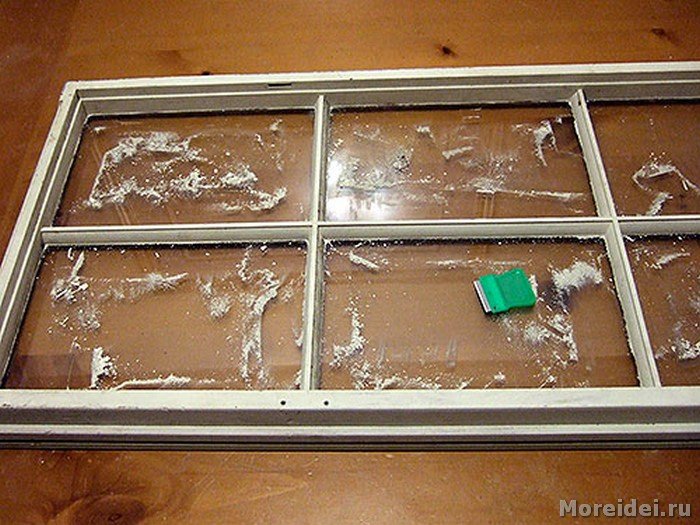
Now we cover the frame with fresh paint, the color of which can be matched to the color of the surrounding environment or use something neutral: white, beige and others.

Cut a piece of cardboard to fit the frame. It can be cut from a refrigerator box or washing machine. We choose the appropriate material and make a tight-fitting fabric. We attach the material to back side using tape.
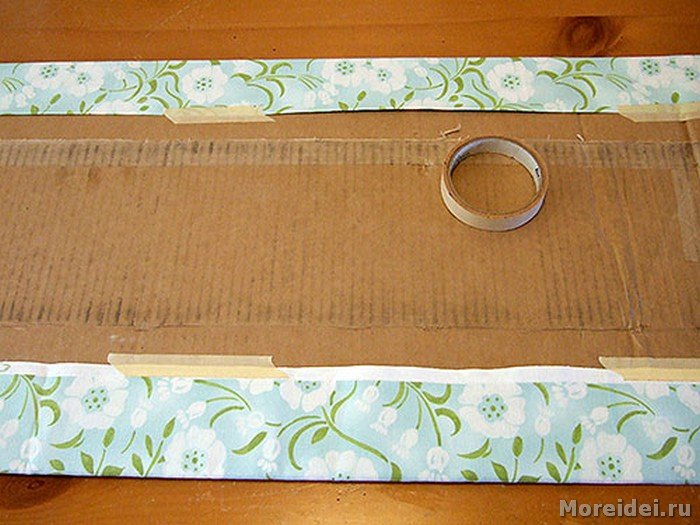
Selected fragments of the collage are pasted with glue or attached to the fabric using double-sided tape.
![]()
We insert the collage inside the frame.

Be sure to cover the back of the collage, carefully tucking the edges inward.
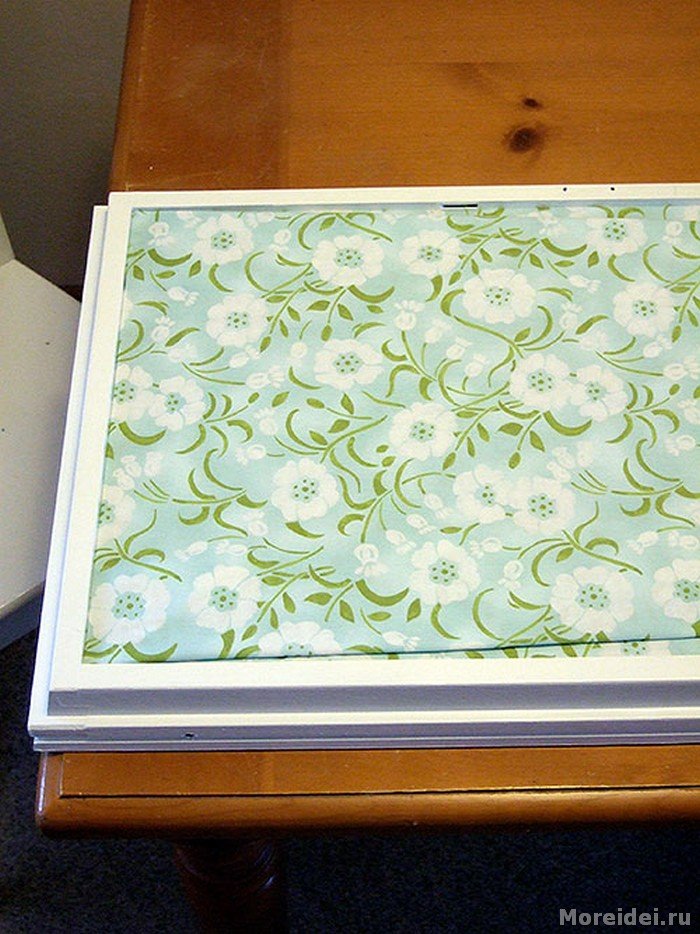
That's all, all that remains is to install the collage.
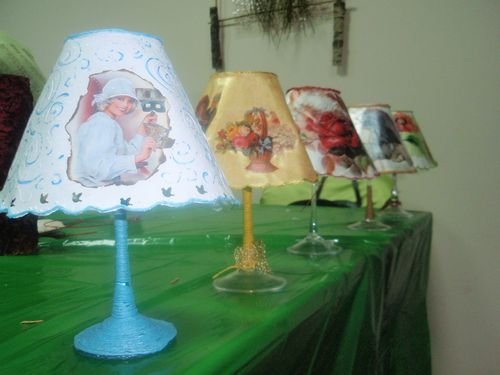
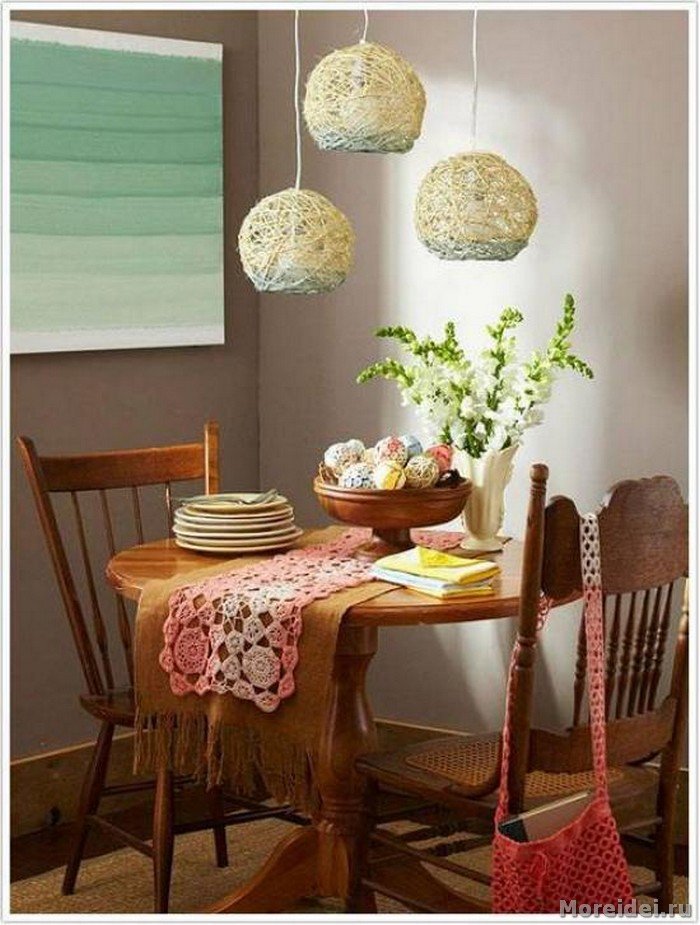
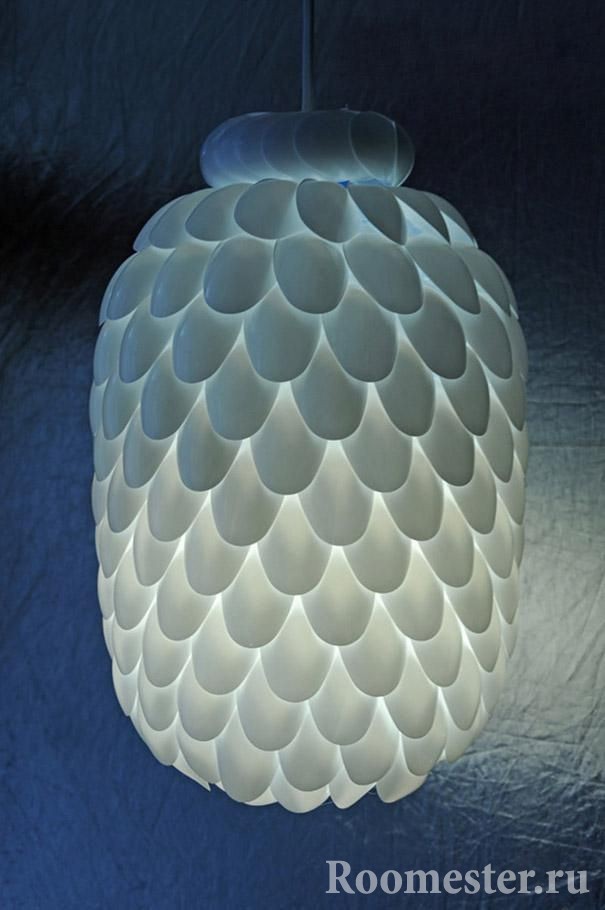
5) The creation of new lampshades for old lamps was used by our grandmothers when there was no such abundance of home decorations. You can remember old techniques, or you can use new ones.
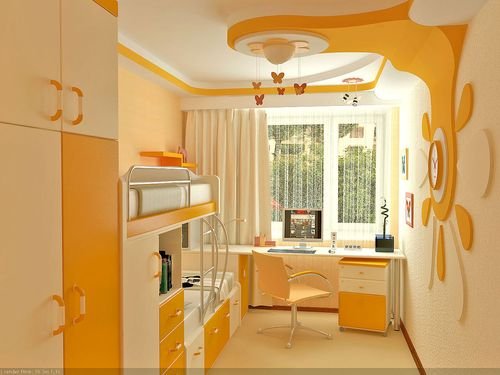
6) Great option use for home decoration volumetric panels, for example, from butterflies.
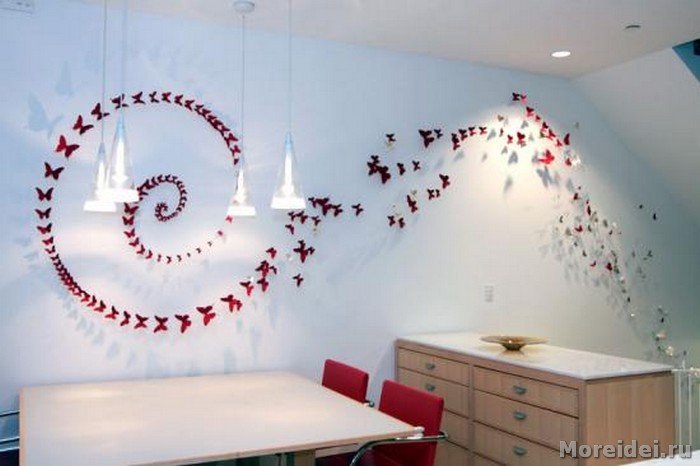
Of course, such butterflies are sold; there are special vinyl stickers that you just need to attach to the wall. But who is stopping us from saving money and doing it ourselves using a stencil? We attach it to vinyl film and cut out an unlimited number of butterflies. When removing the protective film, take into account that it must remain on the wings, otherwise they will stick to the wall. We make the necessary markings, the shape of which you can come up with yourself, and attach the butterflies to the wall with the central part. Variety for the sake of insects can be done different colors and size. As a result, you will get an excellent panel that gives the impression that these are real butterflies sitting on the wall.
7) Vintage technique has always been popular. It is especially often used when decorating furniture, for example, bedside tables.
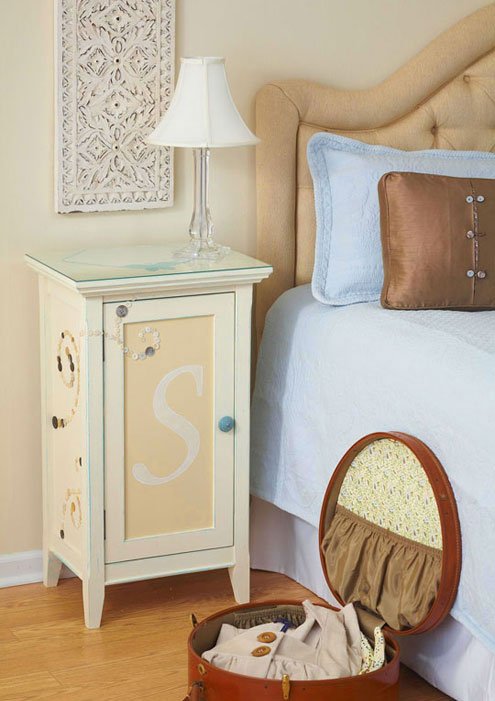
Do you think specially purchased rhinestones were used to decorate this bedside table? Nothing of the sort, these are old mother-of-pearl buttons, and under the glass lies my grandmother’s handkerchief with embroidery. Agree - not bad?
There are many more variety of options, in this video you can see some interesting ideas.
Children can be occupied not only with exercises and games. There are plenty of activities where children can exercise their fine motor skills hands and do interesting gifts for your mothers, exhibits for an exhibition and decorations for your room or playroom kindergarten. These can be made from vegetables and fruits, beads, boxes, paper, wood and other available materials.
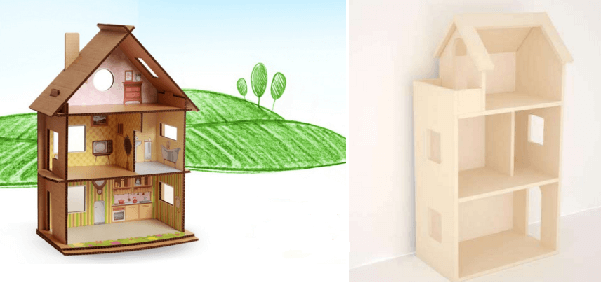
A huge number of crafts can be made from such improvised materials as paper and cardboard. Let's start with crafts that can be made from cardboard. A large box can be used to make an excellent cardboard house for dolls.
You will need a cardboard box of the appropriate size. Cut off one of the walls of the box, but do not throw away the cut out pieces of cardboard, they will still be useful to us. Place the box so that the cut part is on top. Cover all sides of the cardboard box with tape.
DIY dollhouse
Now take those pieces of cardboard that you set aside at the very beginning, cutting them off from the box. Connect these parts with tape and also use tape to attach the cardboard roof to the dollhouse. Now you can move dolls into the house, you can cut a window in the house and generally arrange it to your liking. We only showed you how to make a cardboard base for a dollhouse, and then you can get creative and use boxes to create houses for large and small dolls.
You can also make wonderful crafts from paper, but we will focus on this option as applique. Let's take a sunflower as an example and try to cut it out of paper and stick it on cardboard, this will be our applique. You will need:
- Colored paper.
- Scissors.
- Glue.
- Cardboard.
- A cloth to blot the glue.
- Ruler.
- Pencil.
Take yellow or orange paper and fold it like an accordion. On the first fold, draw a petal; its width should not be more than 3 cm. These will be the petals for your sunflower.
The middle can be made in two ways. The first is to simply cut out a circle from black paper and use it as the center. The second option is more complex, for example, you can cut out a black circle, but when you paste it on paper, you can generously coat it with glue and decorate it with beads that will imitate seeds.
Glue the center onto the cardboard and start gluing your petals in it, this is how your applique will begin. Once all the petals are glued on, you can leave everything to dry and consider your applique complete. Or you can cut out a sunflower stem and a beautiful leaf from green paper, stick them on, and only then can the applique be sent out to dry.
Any application will develop the child’s eye and fine motor skills, so try to do this type of craft as often as possible. The applique can be made not only from paper, but also from any other available means. An applique made by a child with his own hands can become a wonderful decoration for an exhibition, a room, and a memory for many years.
From disks
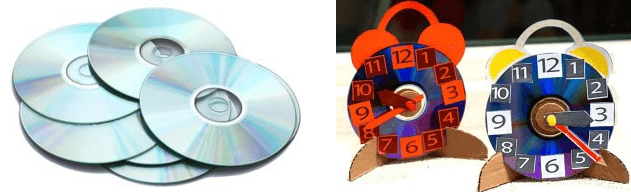
If you have old disks, don't rush to throw them away. You can make beautiful refrigerator magnets with your own hands at home. You will get a wonderful gift for your mother or grandmother using scrap materials.
You will need:
- A piece of white fabric.
- Glue.
- Cotton wool.
- The napkin is thick with a beautiful pattern.
- Disk.
- Double sided tape.
- Cardboard, even a wall of thick boxes will do.
- Magnet.
Cover the disc with fabric. Place pieces of cotton wool on the fabric so that they form a smooth surface. Place another layer of fabric on top of the cotton wool and tighten the disc so that the fabric does not sag anywhere. We secure everything with double-sided tape. We place a napkin on top of the fabric so that the design is in the center. Secure the napkin with double-sided tape and carefully place it on the edges of the disk.
Glue a circle of cardboard at the back that will cover the folds. Glue a magnet onto the cardboard. Your homemade DIY gift is ready. If you wish, you can decorate the magnet with beads and use a wooden circle instead of cardboard.
Crafts from disks
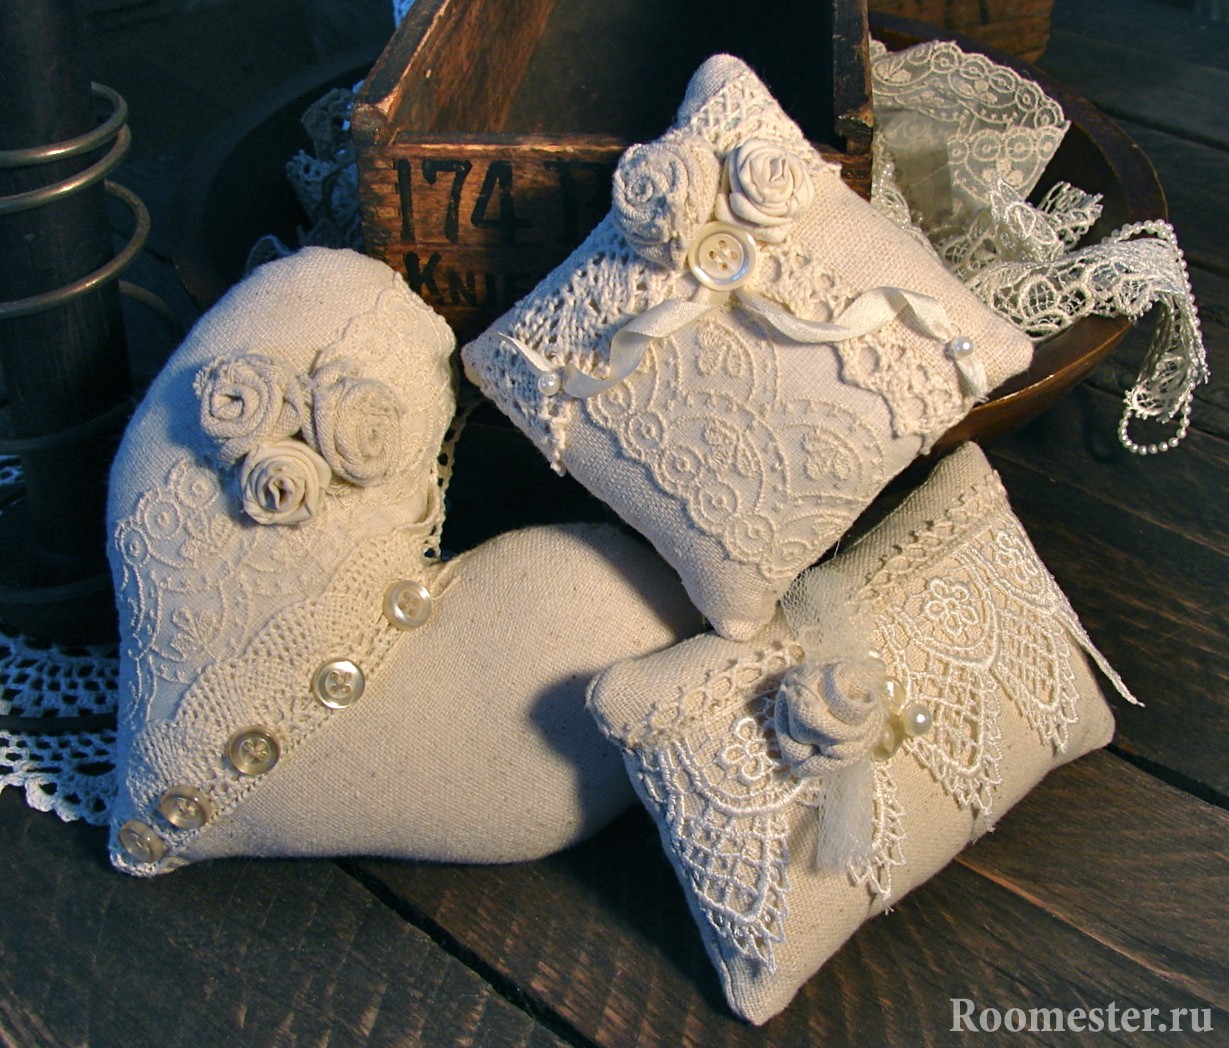
From napkins
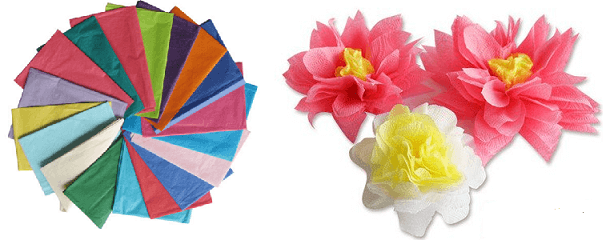
From such improvised materials as napkins you can make very cute ones. For example, you can create a beautiful heart as a gift for your mother. Cut out a heart from thick paper, this will be our base. From white and pink napkins Roll into balls about a centimeter or two in diameter. Glue pink and white balls in a chaotic order onto our heart. If desired, such a craft from improvised means can be decorated with a beaded flower.
Such a heart made from napkins can be an excellent exhibit for a kindergarten exhibition; it will look great among other crafts made from boxes, wood, beads and paper.
DIY flowers from napkins
From leaves
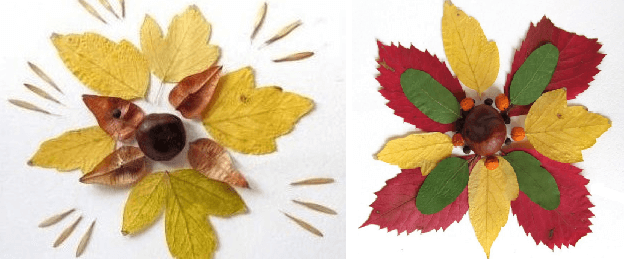
From materials such as dried autumn leaves you can make a magnificent panel. It is advisable not to pick leaves from the tree and not to use raw leaves. Those leaves that have already fallen from the tree need to be collected, dried thoroughly under a press from boxes of paper, and then they can be used.
You can make a whole panel picture from the leaves. Draw the outline of the fish on the sheet and then begin to glue the leaves so that they imitate the scales and gills of the fish. The fins can be made from bright leaves, and the eye can be made from colored leaves.
This way, leaves from a tree will become one of those materials that can captivate children and which you don’t need to spend money on at all. And collecting leaves will also be fun. This beautiful panel can be kept at home, or you can give it to a kindergarten group by decorating it with beads or inserting a hand-made wooden frame.
You can make these crafts from dry leaves with your children.
From plastic bottles
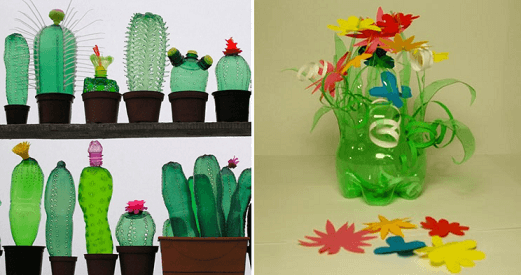
A plastic bottle is one of those things that can be adapted for play. For example, from the usual plastic bottle and a thin plastic bag, you can make a jellyfish and an aquarium for it with your own hands.
You will need to cut a circle out of the bag. Under the tap, collect the circle into a bag and fill it with some water. Tie the bag tightly so that the water occupies a quarter of the bag, and most of the skirt remains free. The tied part with water should fit into the neck of the bottle. Cut the skirt with scissors to create jellyfish tentacles.
Fill a bottle with water, launch a jellyfish and, if desired, add a little blue dye. Now you can play and enjoy the swimming of the jellyfish that you made with your own hands. Such a toy can be placed on a stand made of wood or boxes and you will have such a “pet” at home or in a kindergarten group.
Crafts from plastic bottles
Crafts from plasticine
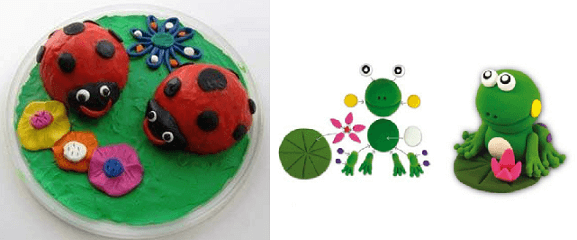
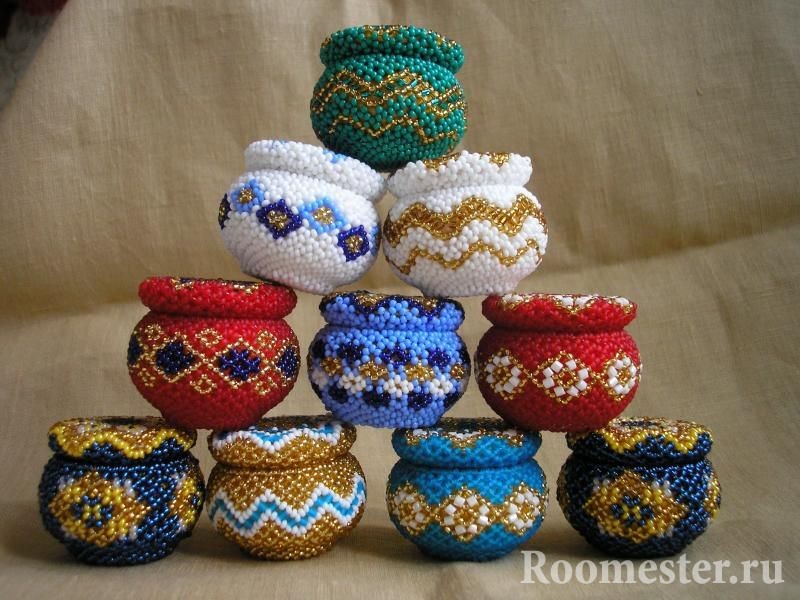
Crafts can be made from different materials, but from plasticine they turn out especially beautiful. You can sculpt different animals, boats, houses, fairy-tale heroes, vegetables, fruits and treats for playing with dolls. Let's tell you a little secret - if you sculpt animals or people, you can make their eyes out of beads, so they will look beautiful.
If you want to keep yours for a long time, you can purchase self-hardening plasticine. You can sculpt what you like and leave it to dry in a cool place on a leaf. Prepare several boxes and, after drying, put your crafts there. This way they can be stored or taken to a kindergarten group.
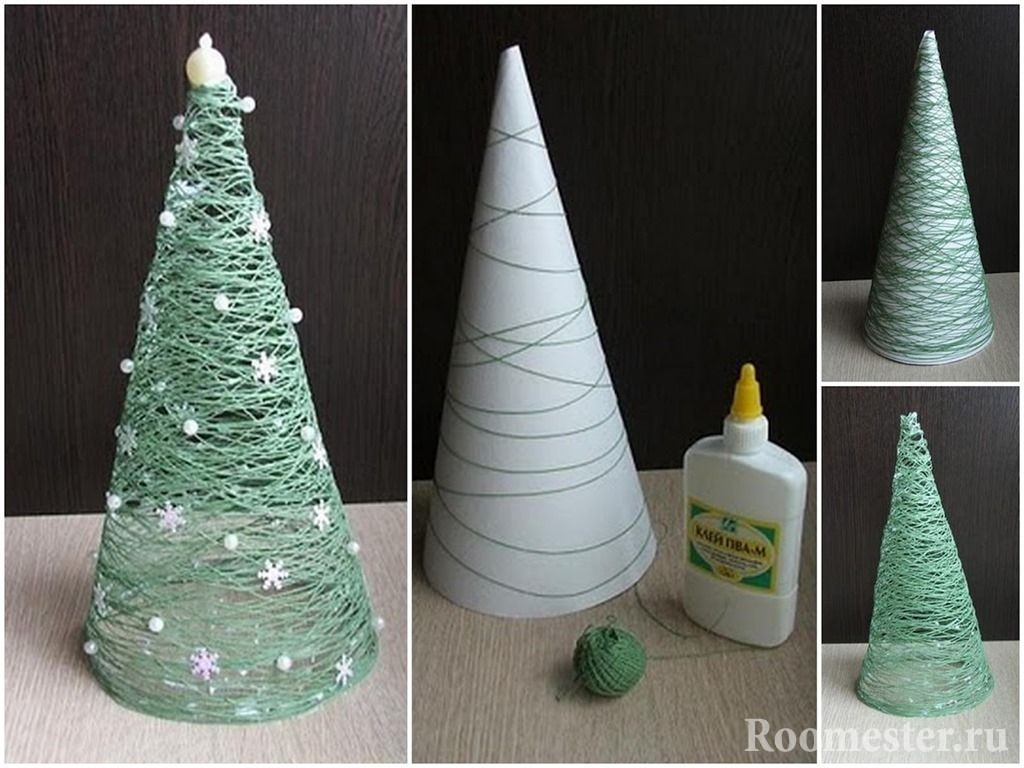
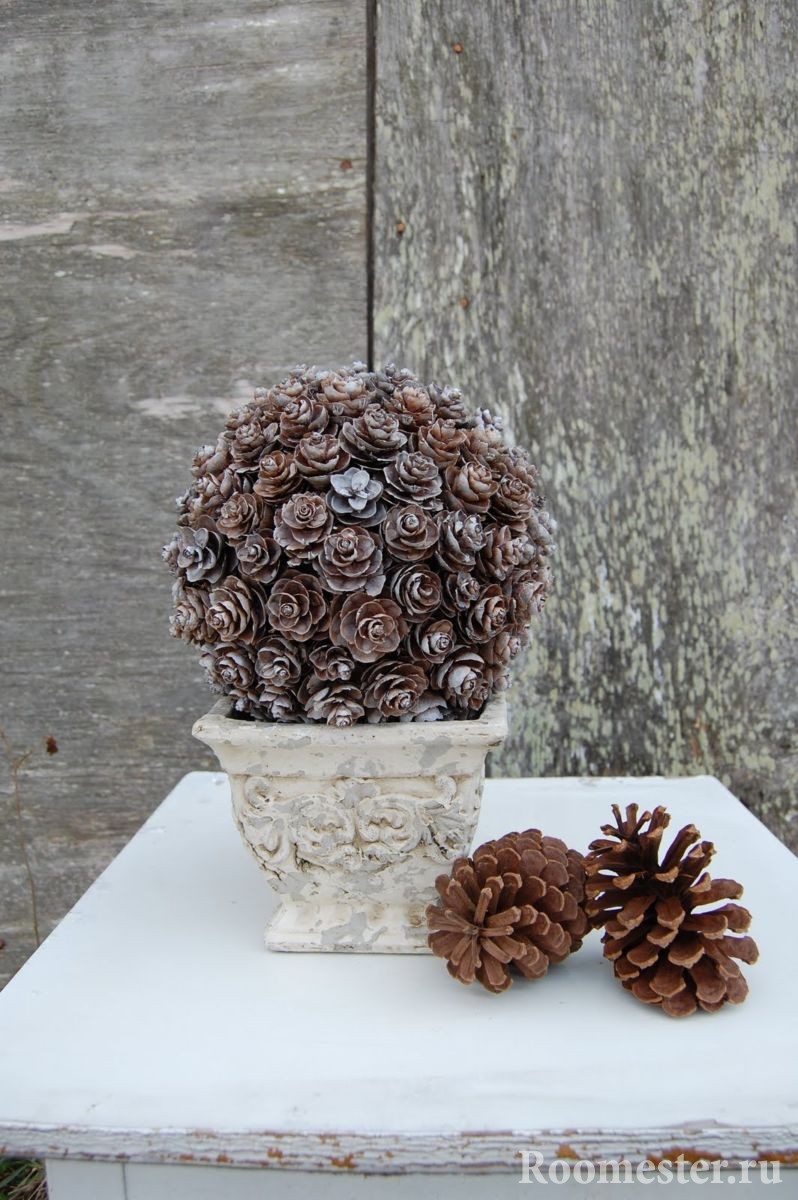
From the cones
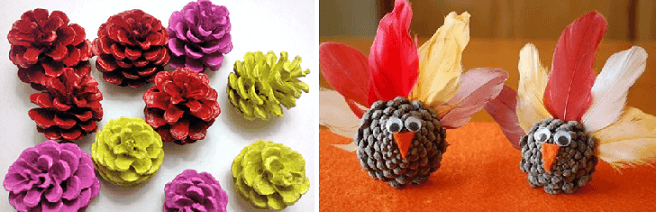
From natural materials absolutely do various crafts. The use of such materials gives children the opportunity to get to know nature better and learn to use its gifts. Cones are one such gift that can be used to make beautiful flowers with your own hands.
Everything is very simple, you need to take opened dried pine cones, gouache paints, skewers and hot glue. If desired, you can also cut out leaves from a green leaf. Turn the pine cone over and paint it with paints. Mark the middle with contrasting paint. Paint the wooden skewers with green paint and let them dry along with the pine cones.
Apply a drop of hot glue to the top of the pine cone and press the tip of a long wooden skewer onto it. Glue a piece of paper to the skewer, and your bouquet of flowers is ready. If desired, the flowers can have centers made of beads. This will be a beautiful ekibana for kindergarten.
When typing “DIY interior crafts” into search engines, are you faced with such a huge selection of design ideas that your eyes widen? What can you create without having any special skills that will not be very expensive, beautiful, or functional?
And now it’s spring outside the window! The days are coming when hands themselves reach out to renew the surrounding space, change the usual, following the rhythms of nature. It often happens that our means and capabilities are limited, but we are eager to bring daily life something bright, unusual, to please friends, loved ones, relatives with unique, beautiful and useful new things, moreover, putting a piece of your warmth into the object. What then can be done?
Crafts for the interior are an excellent solution. They are functional, emphasize the individuality of the author and owner of the item, meet the tastes of the owner of the item, and evoke the admiration of others. Below you will find inspiring ideas for creating crafts for the interior.
You need to decide on the purpose of the decor that you are going to make: who, where, and why will use it.
Interior crafts can be divided into types, for convenience:
- Purpose: for yourself, as a gift (to whom?), for children, for pets.
- By place of application: apartment or cottage, kitchen, bedroom, bathroom or hallway, or maybe it’s a gift to a colleague in the office. Having a clear idea of this point before starting work will help you decide on the style and materials.
- By function: storage (containers, stands, hooks), simple decorative elements (panels, paintings, frames, sculptures), textiles (create softness, comfort, warmth, sound insulation: rugs, pillows, furniture covers, tablecloths, curtains), lighting (lamps, candlesticks, lampshades), etc.
- According to the materials used: fabrics, threads, jute, stones, shells, paper, wood, etc.
- According to the method of decoration or production: painting using various paints and techniques, weaving, assembling, mosaic, decoupage, papier-mâché, embroidery, knitting, sewing, applique, mixed media.
Having answered for yourself with the help of these 5 points what exactly you would like to do, first you can choose your favorite home crafts for the interior from those presented below. Make sure you have everything necessary materials and start creating!
Crafts
Existing things at home are usually updated and decorated using paints, brushes, glue, rhinestones, eggshells, buttons and other available items.
For example, from an old vase, bottle, jar, or box, you can create original home decorations by painting them with paints, pouring colorful sand into transparent containers, and decorating them with jute rope or decorative cord.
Before this, the item should be primed. If the jar or bottle is transparent, consider using stained glass paints; you can get a very original vase or lampshade leg in the Tiffany style.
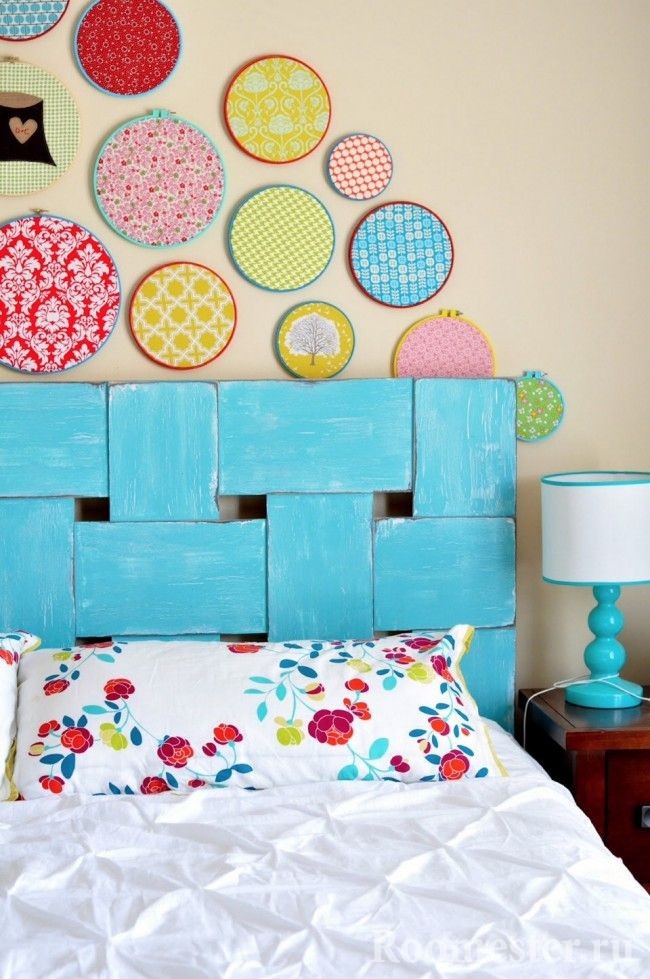
Crafts for the interior made of fabric, threads
Don't know how to embroider, knit or machine sew according to patterns? It doesn’t matter, these are not the only ways you can make a decorative item that radiates comfort, softness and warmth.
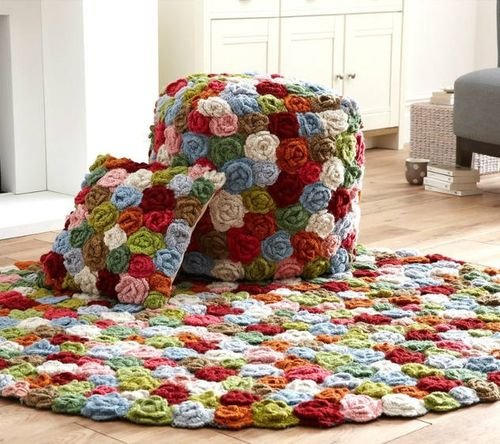
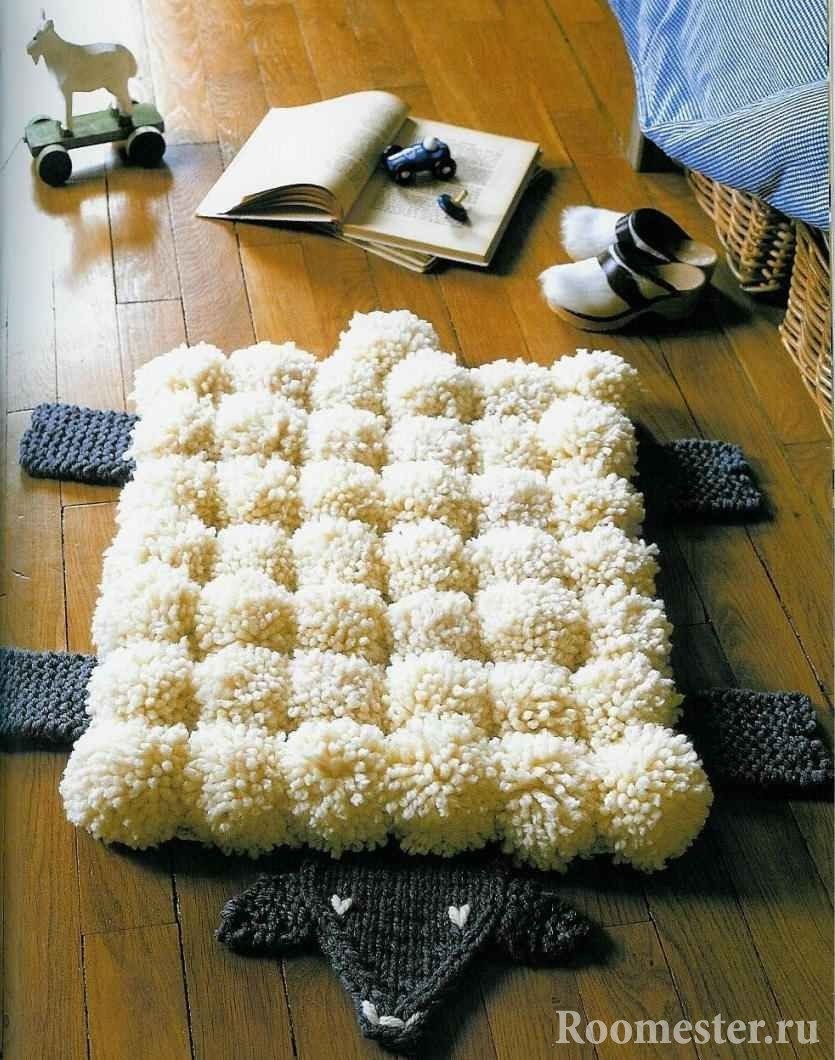
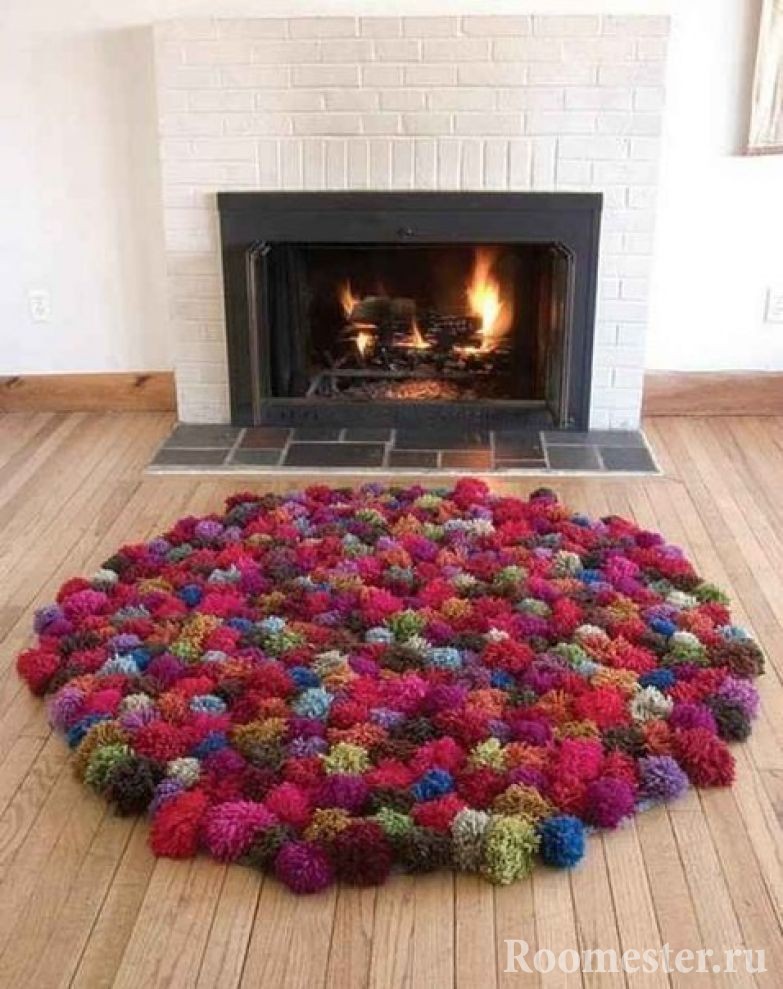
For example, everyone, even the smallest home designers (with the help of adults), can make creative blankets, rugs, pillows, seat covers, decorative flowers or a pom-pom toy.
Materials:
- threads or yarn for knitting, preferably soft, synthetic: acrylic, polyamide, lycra. Choose medium, thick, fluffy or voluminous threads (from 100 to 370 m/g). Pay attention to yarn with an interesting structure and color: terry, ribbon, gradient, melange. Think about the color combination of your decor, pattern, shape;
- needle with a thick eye;
- base, it is very convenient to use a plastic mesh, but any mesh fabric will do, you can also knit the mesh yourself, crocheted with single crochets. Fabric for the bottom of the base;
- scissors;
- cardboard.
Cut a circle (or 2) from cardboard with a hole in the center. Wrap the thread tightly around the cardboard circle, pulling the thread from the center to the edge, and bringing it under the cardboard circle again to the center in 2-4 layers. Then use scissors to cut the wound yarn along the outer circumference of the cardboard circle (it’s easier to cut when there are two circles - cutting between them). Remove the cardboard and tie the resulting bunch of threads in the middle, straighten the pompom. Continue making pompoms in the same way as needed.
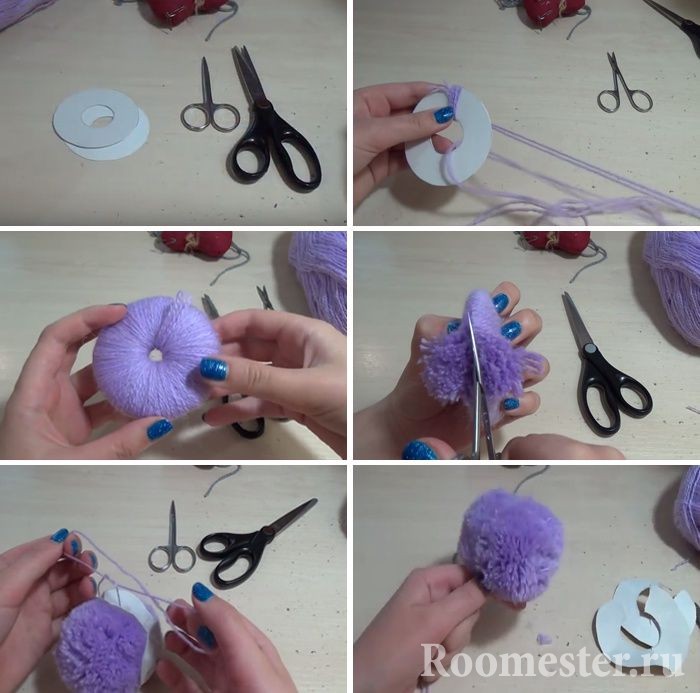
Instead of cardboard circles, you can wind the thread on a fork around the outer teeth, then fasten the thread around the winding between the middle teeth and cut from the sides of the fork.
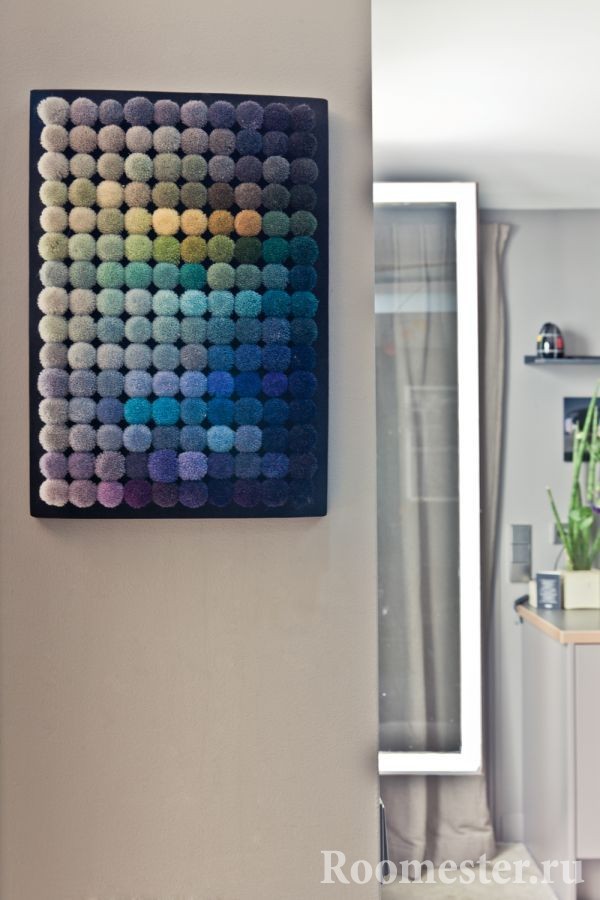
After all these manipulations, you need to sew the balls to the base, quite tightly and evenly. Here you need to show your imagination - create a geometric pattern, a smooth transition of colors, or leave the product monochromatic.
Connect the fabric for the lower part to the base, carefully sew along the edges with a connecting seam.
Pompoms are used to create beautiful panels, paintings and frames.
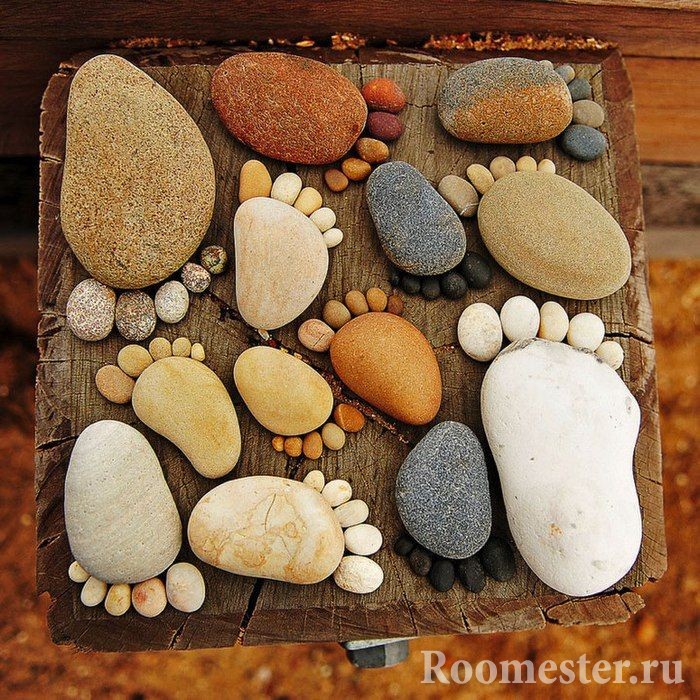
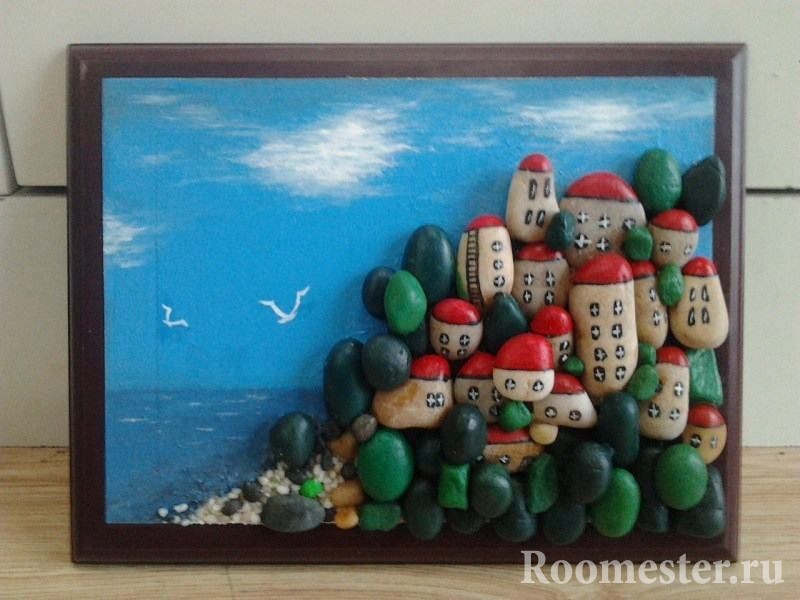
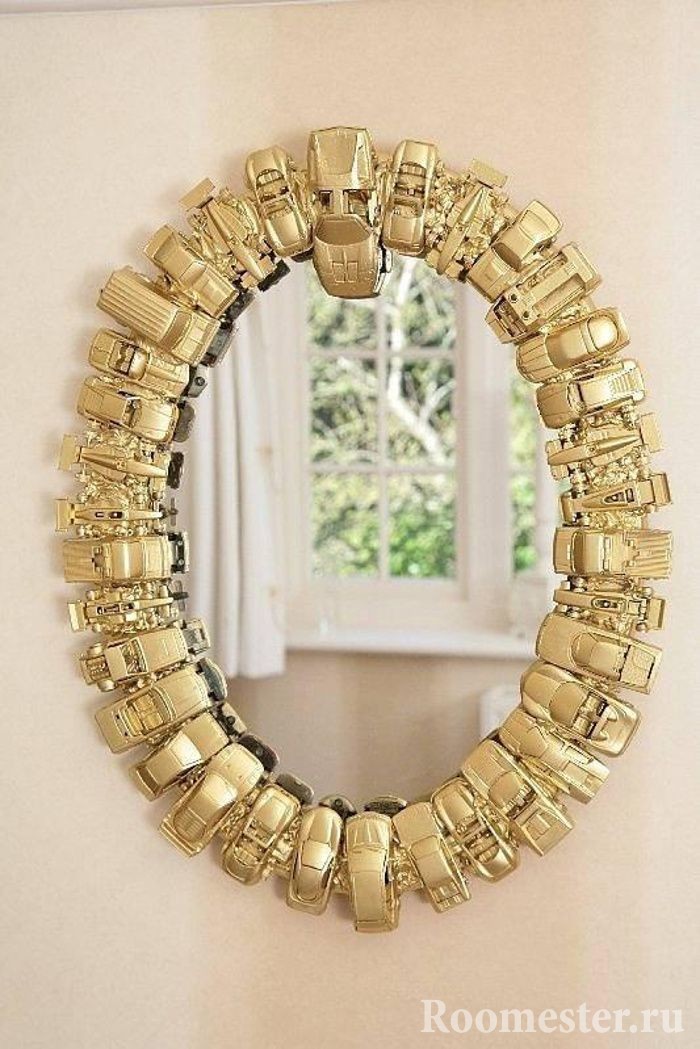
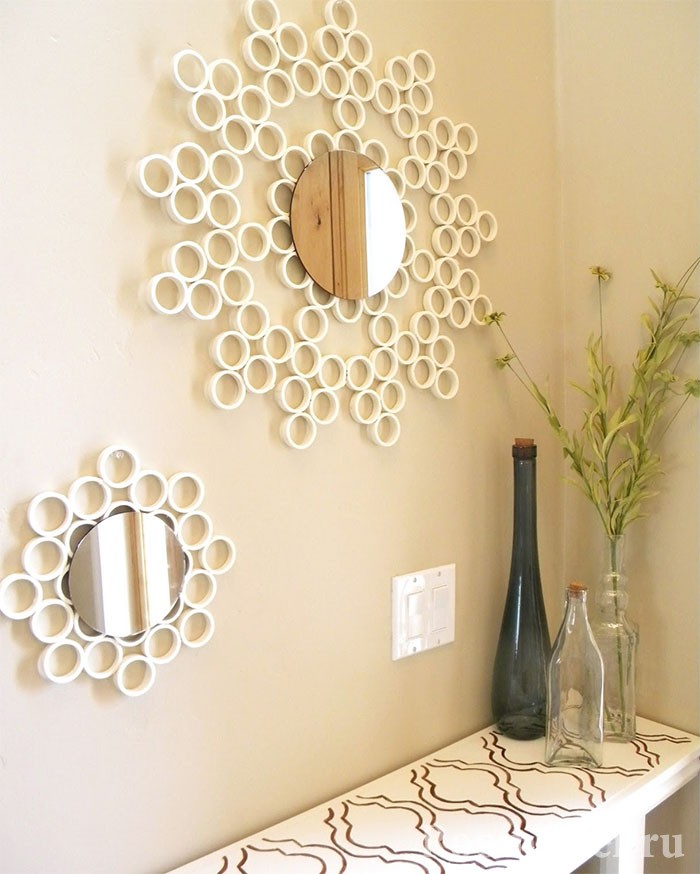
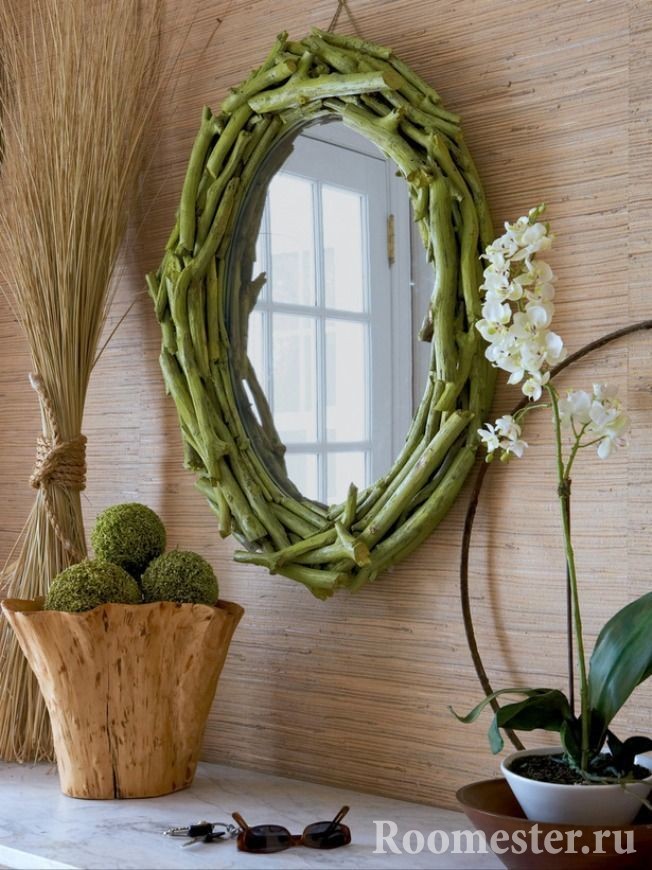
Crafts for the interior from stones, glass, mirrors, shells
Excellent stylish DIY interior crafts for the hallway, bathroom, and kitchen can be made using solid materials.
Broken mirrors, glass, beautiful dishes like mosaics are used to decorate vases, various boxes, wall mirrors, frames, panels, as well as tabletops. Special small mosaics, sold on Chinese websites and in hardware stores, are also perfect for this. Let's consider a method for making a mosaic frame for a mirror.
Materials:
- plywood or chipboard;
- PVA glue, or liquid nails, special tile adhesive;
- tongs or pliers/pliers - if you need to move parts of the mosaic placed on the glue;
- gypsum tile grout or plaster/tile adhesive;
- spatula (applying grout, but you can also use your finger);
- cloth/sponge to remove excess glue and grout
- mosaic or broken glass, ceramics, chipped mirror (or small round mirrors), shells;
- if the decorative elements are heavy (like large shells, starfish, etc.) you will need a reinforcing layer of special tape or mesh;
- sealant or putty to fill voids (protect from dust).

First, it is better for you to draw a sketch of how the mosaic parts will be located, so that you clearly know what pattern you will need to lay out with what colors. It will be a geometric pattern, floral, animal, abstract, or you might want to mosaic flowers. From the base, cut out a circle or rectangle with the required parameters using a jigsaw (or leave the piece as is, if it suits you in size and shape).

Glue the mirror using liquid nails or special glue to the base. Place parts of the selected decorative elements around the appropriate glue: broken mirror, mosaic pieces, shells in the intended order. After drying, wipe the gaps between the elements and remove excess with a cloth. After the voids have dried, carefully fill them with sealant or putty.
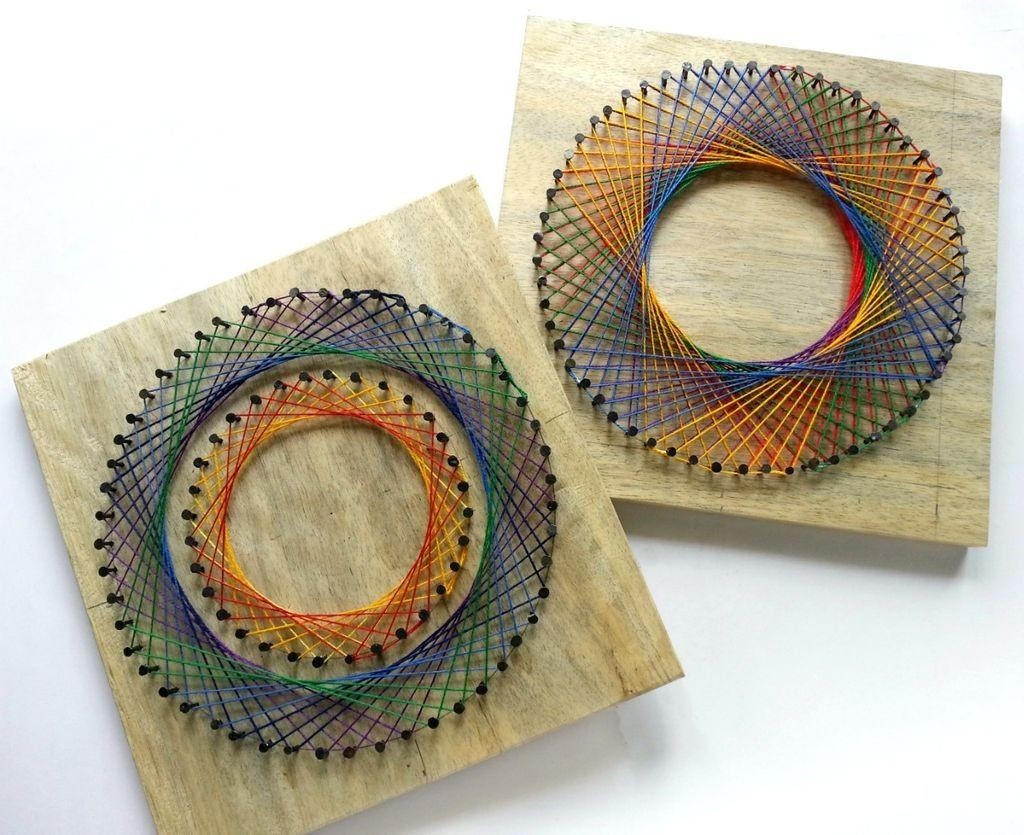
Wicker crafts
This includes macramé, beadwork, rattan, leaf weaving, cattail, paper - rolled newspapers. The last method is one of the most accessible, and it produces truly beautiful and stylish things for the home, and also useful ones.
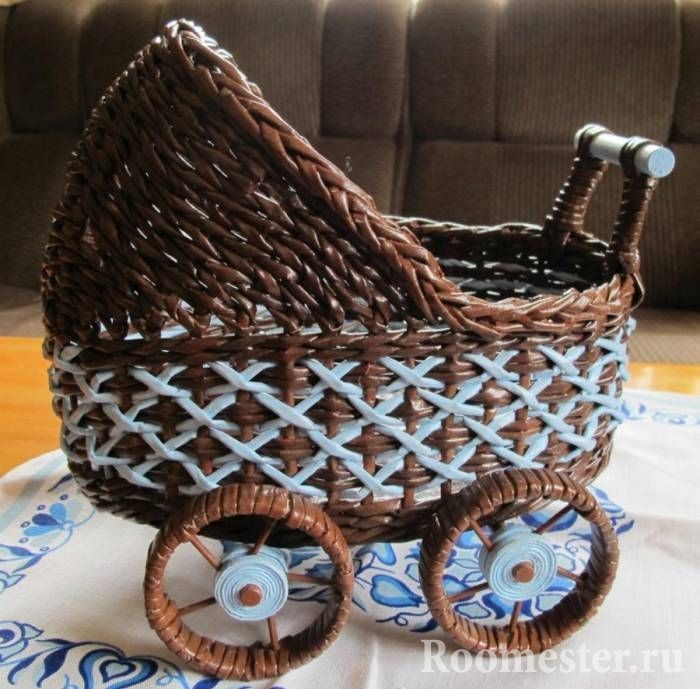
Yes, from newspaper tubes you can weave boxes, baskets, a flower vase, a flowerpot, a bottle stand, houses for cats, laundry baskets, panels, an armchair, furniture legs and much more. It’s better to start with something simple, for example a box:
Materials
Newspapers, cardboard;
- PVA glue;
- scissors, knife, ruler;
- pencil or knitting needle;
- a container in the shape of which the box (box, jar, vase, bottle) will be woven;
- paints: stain or food coloring (for eggs);
- clothespins for fixing tubes;
- varnish
A sheet of newspaper (or thin rough paper) is folded in half and cut into 4 equal parts. Then a pencil or knitting needle is applied to the corner of the sheet, and a newspaper is twisted around it (at an angle), the rod can be removed from the middle of the tube, the edges should be secured with glue. It should be used to a minimum, as it will not stain. The length of the tubes is also increased using glue. You will need a lot of such blanks, then dry them for at least 4 hours, after which they are painted in the desired colors and dried for another 8 hours. You should get beautiful, even tubes of equal thickness.
Cut out 2 bases of the desired shape and size from cardboard or thick paper. Mark one base using a ruler at equal intervals (you will need to calculate the exact value) and glue tubes to this base along the edge (if the bottom is square, be sure to have 1 tube in the corners at 45 degrees). The second part of the base is glued on top. This is the bottom. Then a tube (or several) is glued to one “ray” near the bottom and weaving begins using one of the methods (there are many videos on the Internet with various weaving techniques). The form is inserted inside and braided to the desired height. At the end, the product is varnished and dried.
Composition and accents
Have you decided on the future use of interior crafts? Great! If you are a beginner, then you will need some knowledge about style trends in order for your design masterpiece to fit perfectly. It's not difficult at all.
You should take into account the general features of the artistic design of the room where the product is intended to be used. Perhaps the room already has an accent (and according to the rules of composition there should be one) - a certain detail that stands out from the rest of the decoration and decor in color, size, shape. For example, in a classic interior it can be luxurious crystal chandelier, carved fireplace or patterned carpet. In modern interiors, this could be 3D photo wallpaper, an unusual plasterboard design, interestingly located lighting, beautiful curtains, and the like.
Always pay attention to objects of art and other home decor: paintings, carpets, pillows, curtains, figurines: won’t your craft compete with them, stand out from the overall picture. If your fashionable interior decoration is intended as an accent itself, when making it you should take into account the style of the room and the combination of colors.
A quick guide to style and color
Today, the Internet is replete with pictures of various beautiful combinations of colors and their shades, inspired by nature itself. From them you can choose a suitable ready-made combination table similar to your interior story.
The basis of such tables is the color wheel. In it, colors and their shades are arranged in a circle, in a rainbow order, in expanded versions - taking into account darkness and lightness of tone (multi-row color circles). The main thing you need to know is that those colors that are located next to each other on the color wheel go well together. These are neighboring companion colors; they work well with nuance, halftone or transition, for example, blue and green. Also, those located clearly opposite each other combine well (then we get a bright contrast, the colors complement each other and give richness, such as yellow and purple, blue and orange).
If the decor element does not imply a Christmas theme, you should avoid the proximity of red and green - this combination creates ripples in the eyes.
If you are not sure about the combination of beautiful complex shades (such as mustard, sea green, terracotta, marsh, etc.), look at similar color tables.
In order for your decorative element to fit most successfully into the interior of the house, try to determine the general style of the room and follow it so that the ideas you implement with your own hands will live happily life together in space.
Here are 8 common room styles in a modern home and their general characteristics that will help you decide on an idea:
Styles, of course, can be combined, flow into one another and skillfully use elements of each other, introducing national features.
By following the recommendations listed above, you will fill your space with creative, personalized crafts created with love, thus attracting love, luck and prosperity, as well as admiring glances into your home!
You really want your house to look stylish and expensive, but doing this with your own hands is actually easier than you might think. From the most ordinary, and sometimes unnecessary things, DIY crafts for the home look great.
Expensive furniture, works of art, modern gadgets will undoubtedly make your home look luxurious, but sometimes very little money, a little creativity and neatness are enough to get an interior that looks expensive and stylish, and all this attractive splendor is very inexpensive.
If you want to put your hands and soul into decorating your home, here are some ideas on how to do it.
DIY crafts from jars
Use jars to organize small items like cotton balls, ear sticks, bath salts. This useful decor is ideal for a bathroom or bedroom. The jars may be the same or not, this is not very important here. The important element here is the handles. These are furniture handles. When I visit hardware stores or furniture workshops, it is difficult for me to tear myself away from display cases with handles; I am especially attracted to transparent ones in the form of crystals. It truly looks luxurious. I always regretted that I didn’t have furniture where I could attach such luxury.
And here it is, a find for beautiful hands. Naturally, the lids on the jars originally came in all sorts of colors, but they were painted with simple white spray paint. And the luxurious handles were glued with metal glue.
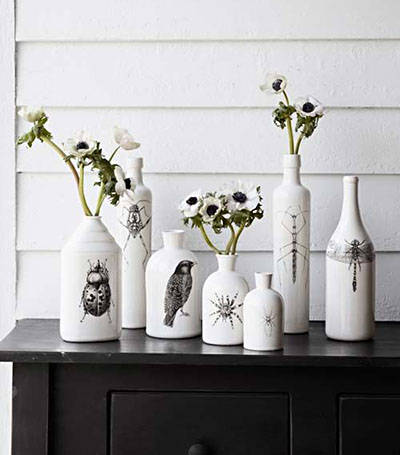
From bottles
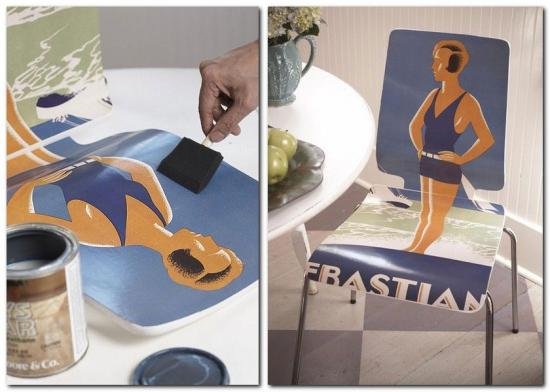
Such an exquisite decoration of the simplest bottles can be made using decal paper with transparent film. Of course, first you need to paint the bottle in the desired color, and then start decorating the surface.
Need to find interesting drawing, which suits your interior in shape and color and transfer it to the surface of the bottle. The design is printed on decal paper for a laser or inkjet printer.
By the way, such paper is called differently. Decal paper, gummed paper, decal and even transfer paper are all the same thing.
Then, the drawing is cut with scissors and lowered into the water. After 10-12 seconds, the picture will separate from the substrate. You can watch the video, a very interesting way to accurately transfer a design to the surface of a cup.
Read the guidelines for printing on decal paper carefully. Find out the paper type for your inkjet or laser printer; in the printer settings, check whether the paper type is specified correctly. Before applying to the surface, it must be degreased with alcohol. The treatment liquid must not contain acetone. Dry the applied design with a hairdryer or in the oven. Attention! The oven temperature should not exceed 150 degrees.
After application, coat with acrylic matte or glossy varnish, depending on the purpose of decoration.
With this paper you can make designs that will last for many years, such bottles and vases can be washed, nothing will happen to them.
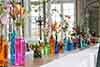
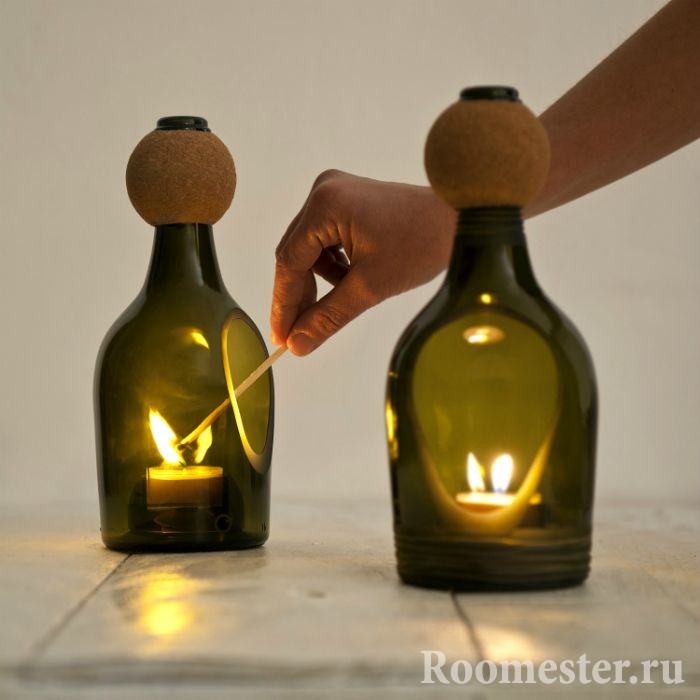
Anyone who has a creative streak is sorry to throw away empty “glass containers”.
And this is a right regret, because even the simplest glass bottles look magical in the interior.
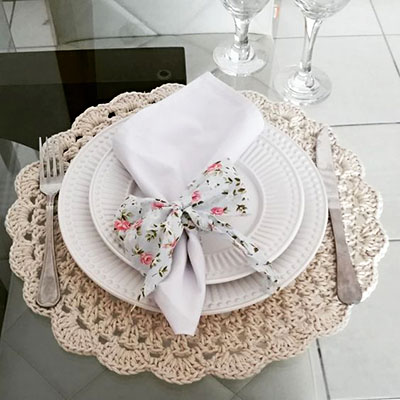
Serving napkins
Great idea! I talked about such exquisite home decoration in a previous article about. And I liked Lyudmila Sanzharovskaya’s comment that such table setting gives status to the owners of the house.
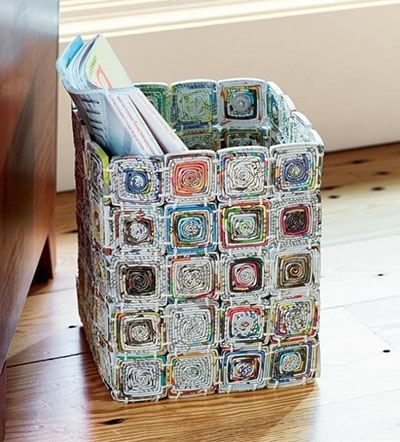
From newspaper and magazine tubes
I never thought that such practically free material would be so flexible. I was a guest at a children's creative center with a surprisingly cute name “ White rabbit" The hostess showed me the children's handicrafts, I was amazed, here is a dish woven from newspapers. After all, you can’t tell it from a vine. This dish will be varnished, it will not be afraid of water, and it can be used perfectly in the kitchen or in the garden for fruit.
This craft requires more skill and experience. But, as they say, the worst is the beginning.
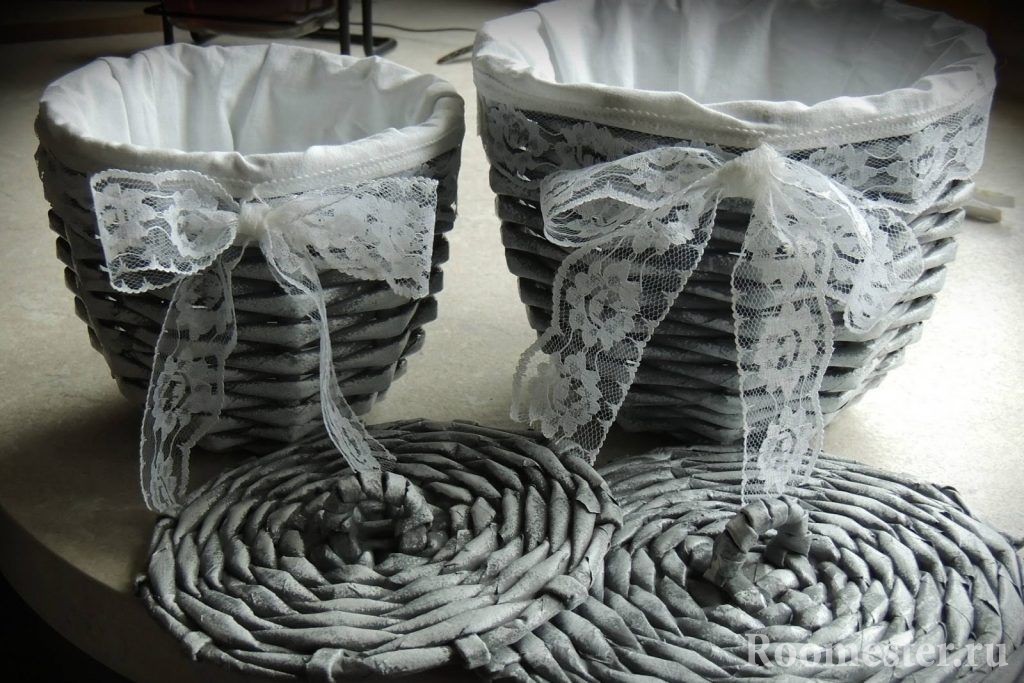
From the cord
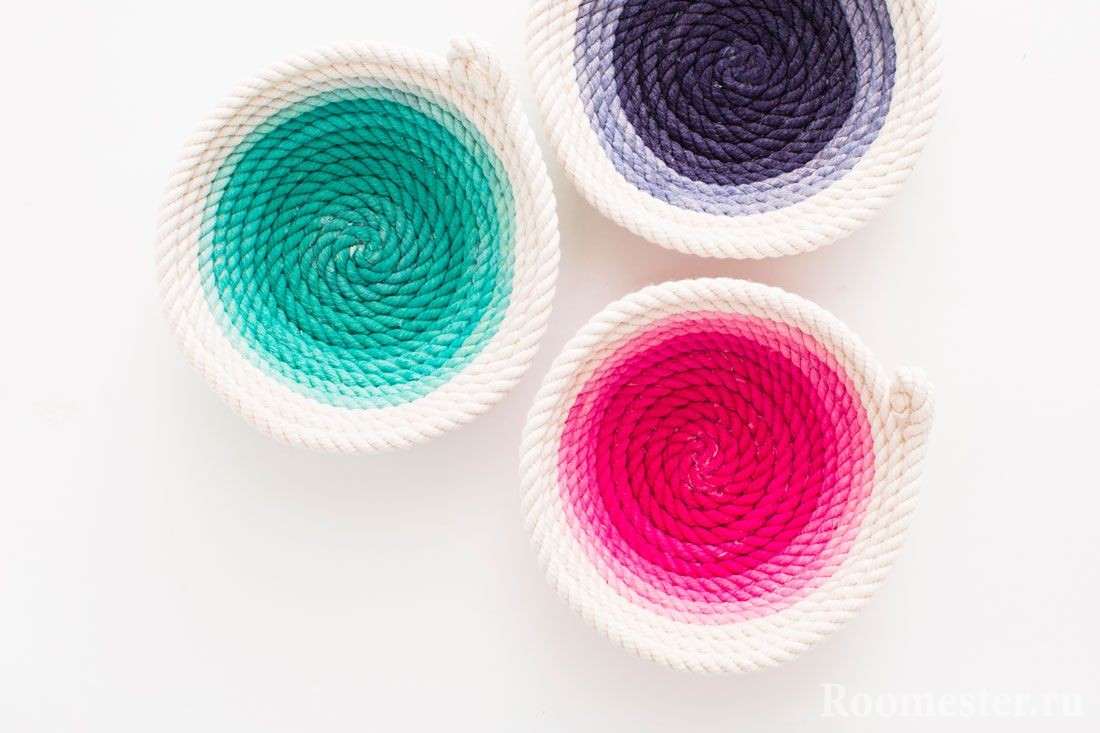
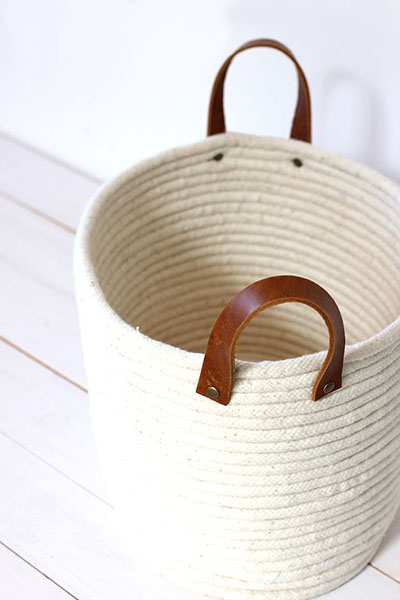
Nice natural color Cotton cord is a favorite material for DIY crafts. Flower pots and organizers look elegant and noble, especially in combination with brightly colored tassels made from floss threads or natrul materials such as leather.
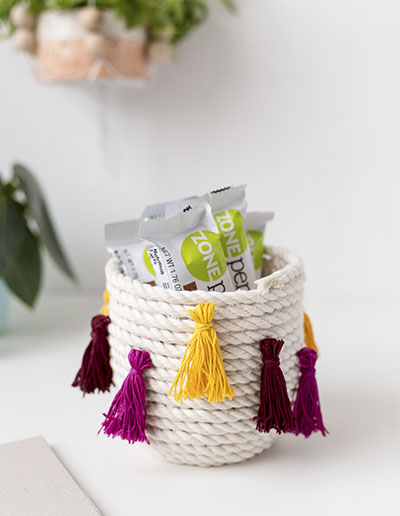
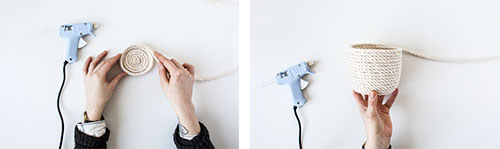
You can make rugs and baskets from scraps. But if the rugs can be made only from shreds, cut into ribbons and tied together into one thread for knitting. It is better to make a basket on a cord around which the shreds are wrapped. The basket should keep its shape. You can put tangles, scraps and everything a needlewoman needs in her handicraft corner.
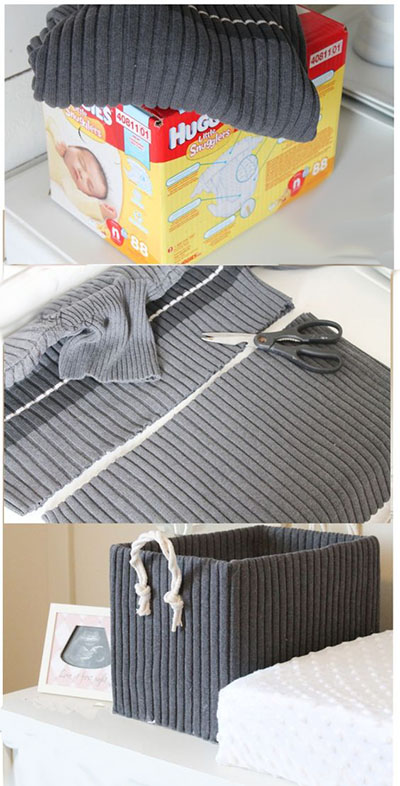
From an old sweater
A craft box can be made stylish using just... old sweater, which no one wears anymore.
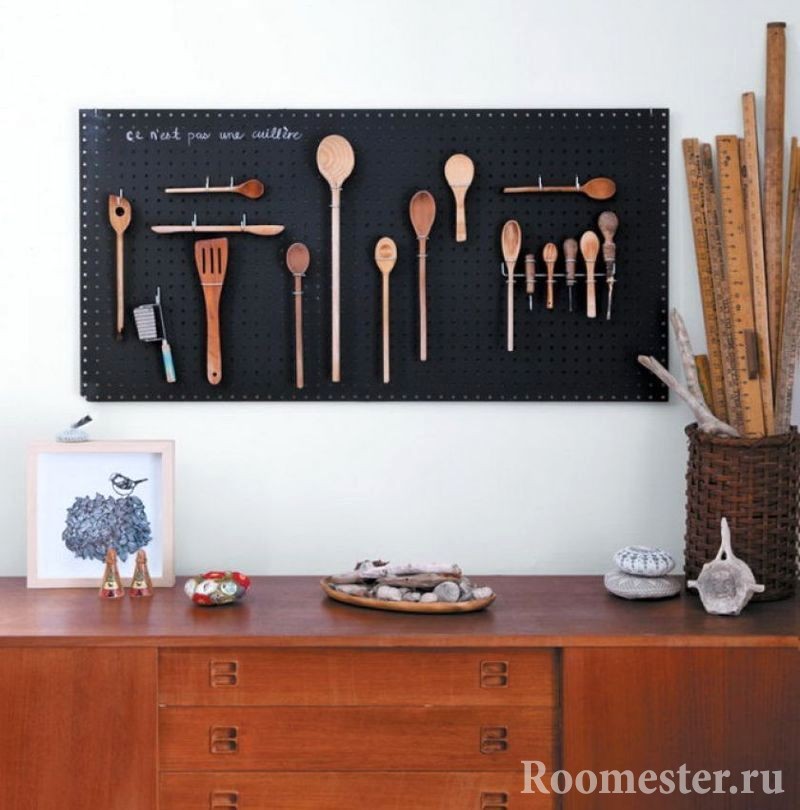
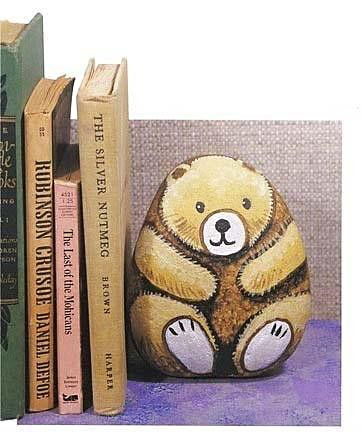
Book holders
I found such a cute guy on the Internet, I already have an article about holders, but it’s hard to pass by such a charmer. An ordinary stone, so skillfully painted and doing its functional task so well. Although in the article about holders the idea of a silver or gold polyhedron looks very expensive, the painted stone looks very nice and homey.
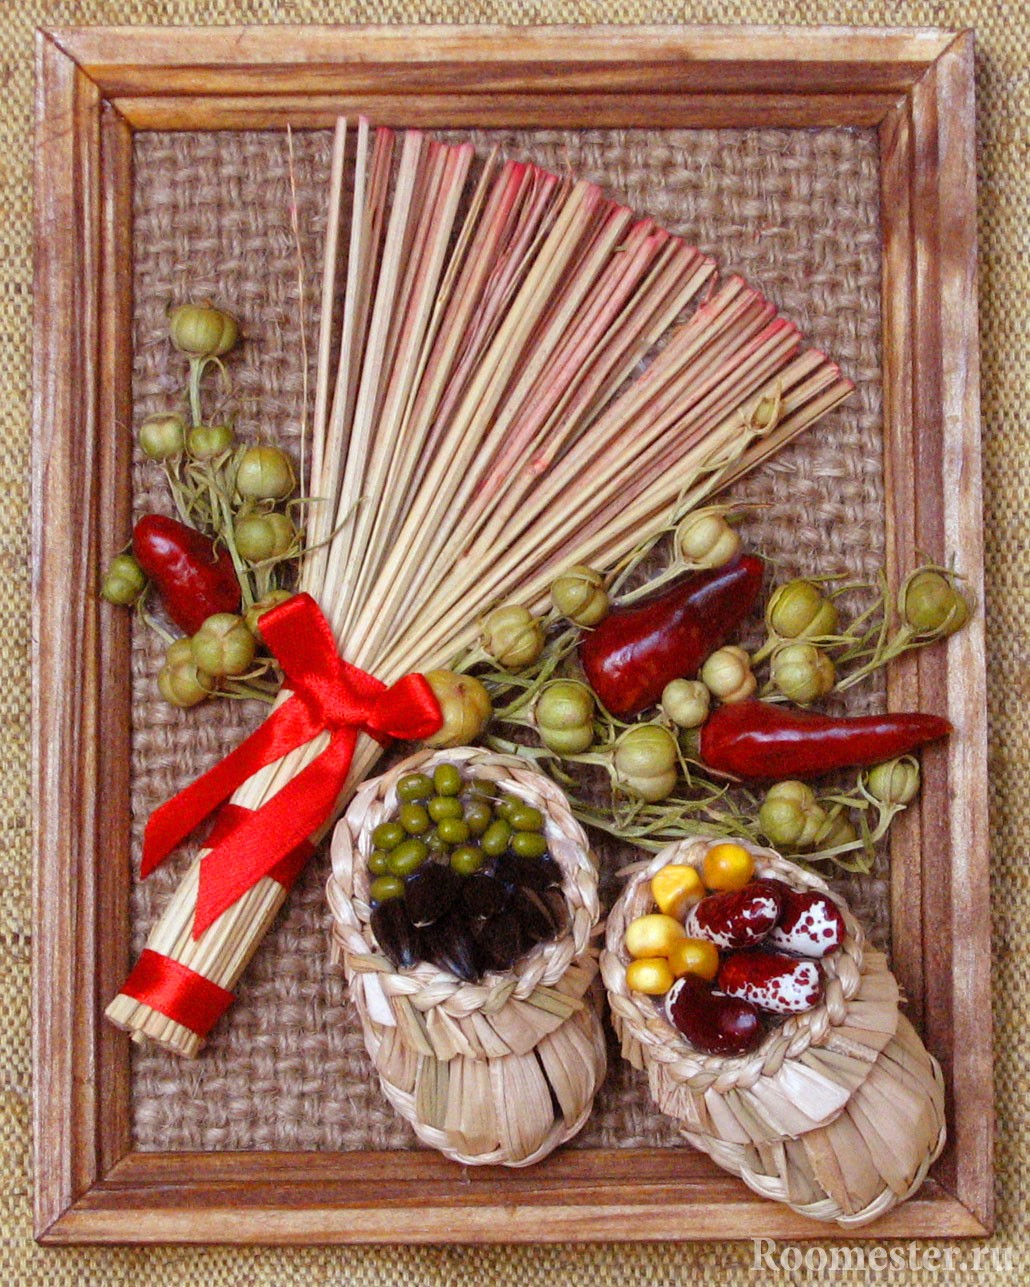
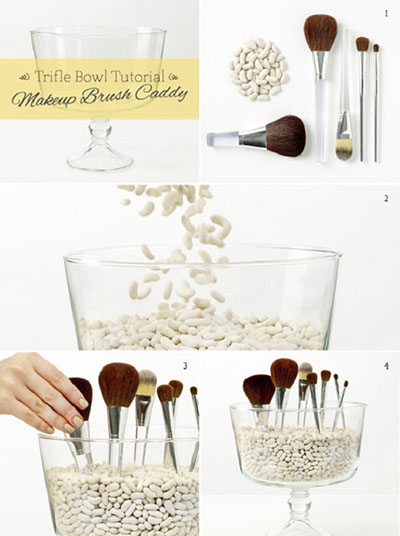
Beans and brushes
This proposal looks more like a life hack, but it looks so stylish that I decided to place this photo in crafts for the home. The truth about “making” here is only the process of pouring beans into a transparent vessel of suitable size.
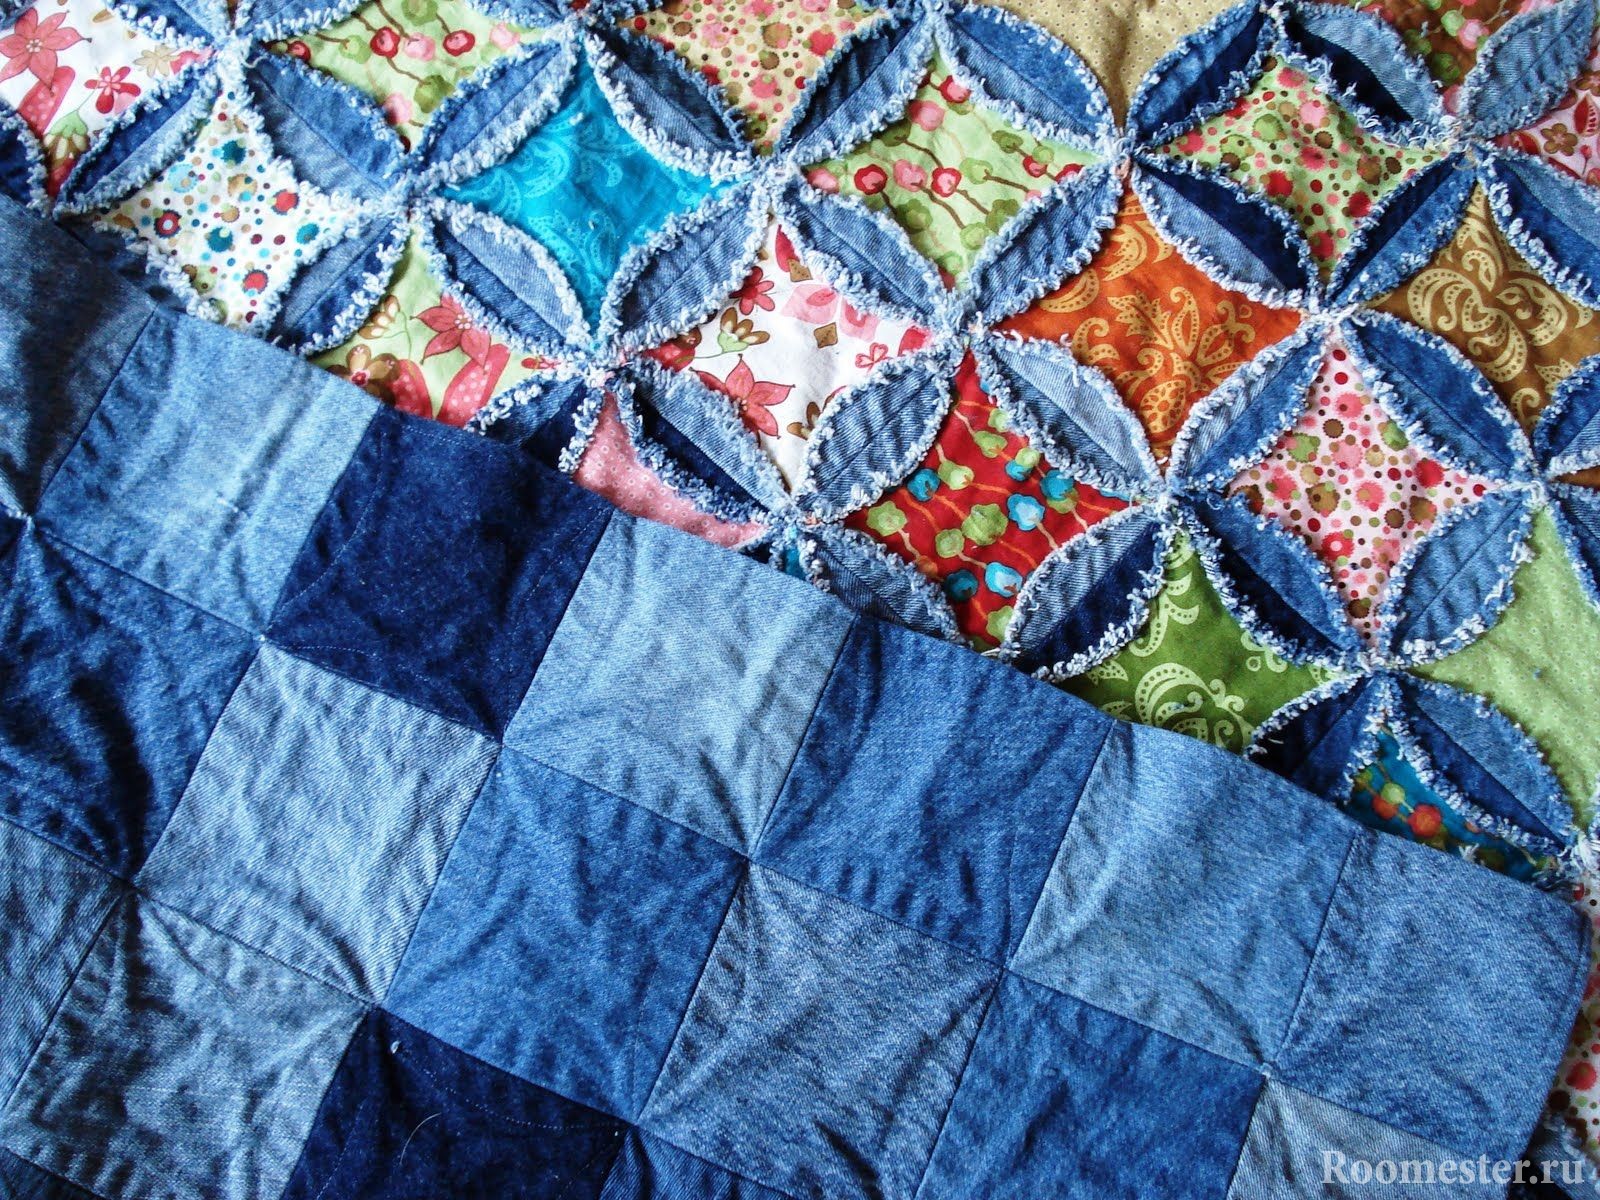
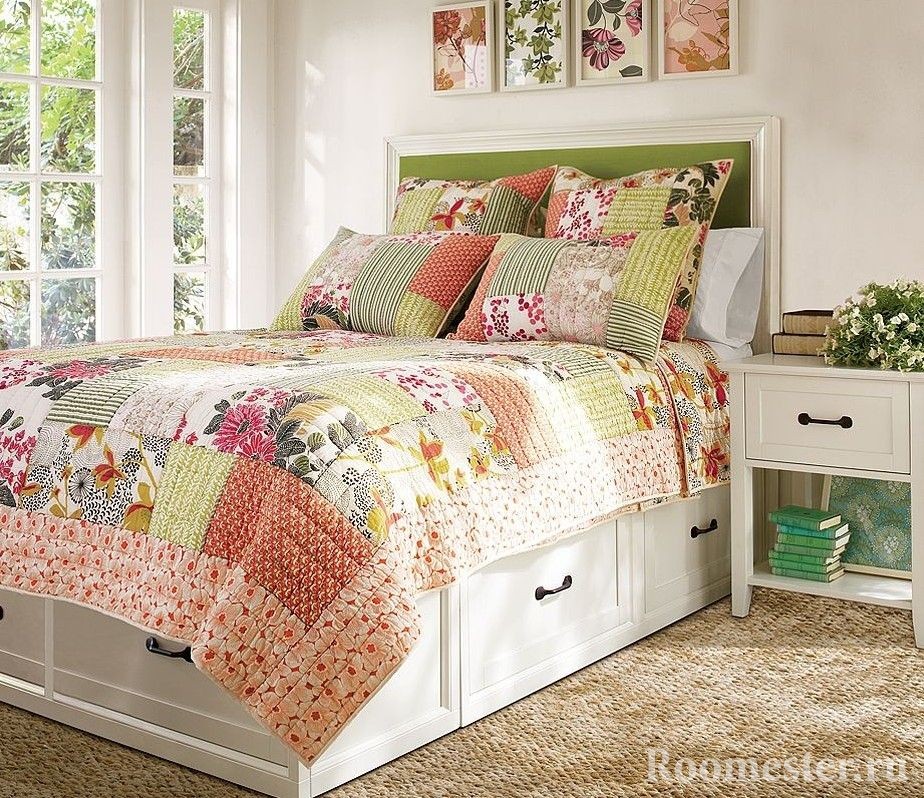
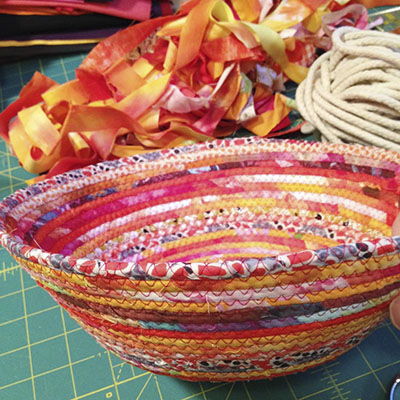
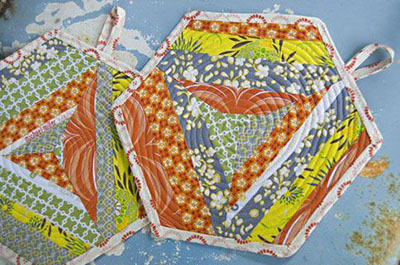
Crazy Shred
A wonderful technique for crafts for the home - crazy patchwork or crazy patchwork. The good thing about this technique is that all kinds of fabric scraps are used. Every girl who sews more or less has somewhere a treasured bag with scraps and leftovers. Using the technique of real, academic patchwork special attention paid to the selection of fabrics. They even sell sets. But there are no restrictions in this technique and it is easy to do.
Here, a guest of my site, Luda Strakovskaya, shows how to sew a potholder using this technique, everything is simple and clear.
In fact, potholders are a very necessary and beautiful detail of the kitchen interior.
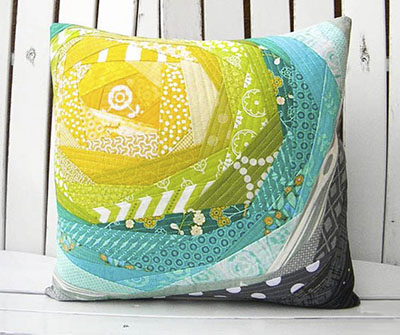
But there are also options for this technique in the living room. Decorative pillows for beauty, comfort and as a cohesive color element of the interior.
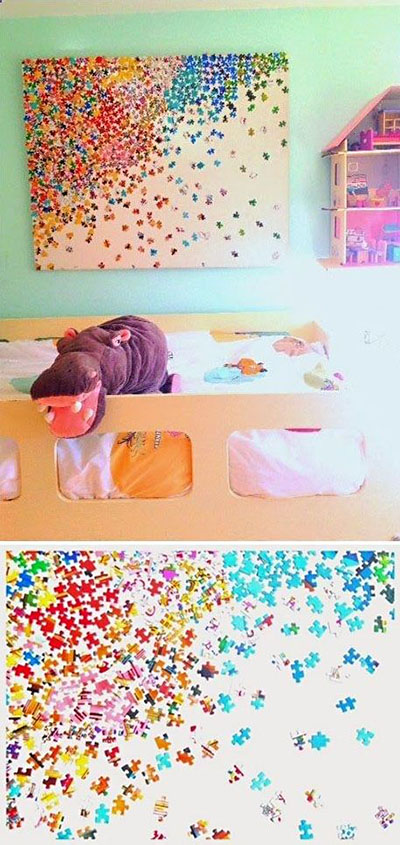
A scattering of puzzles
I don’t know about you, but I have a huge number of puzzles that have migrated from one box to another, got mixed up, rearranged, and now it’s no longer possible to assemble anything worthwhile from them. And here it’s so nice and nice idea for children's.
Crafts from buttons
This is a classic of the genre. Anything can be made from buttons, and there is practically no person who does not like to look at buttons. And in hardware stores there are always crowds of people near the scattering of buttons sold at discounts.
Recently I went into a store, there was a table with high sides and inside there were piles of various buttons that were left in the store one or several at a time, leftovers and illiquid items. A special scoop is stuck into the slide; you can pick up buttons directly with the scoop.
Mom and daughter, daughter, about 5-6 years old, are collecting buttons in bags, their faces are happy, overjoyed. I ask what you will do with them. Mom, hurriedly, - Oh, we don’t know yet.
I really want to see what they came up with with their buttons.
Maybe such beauty, for example.

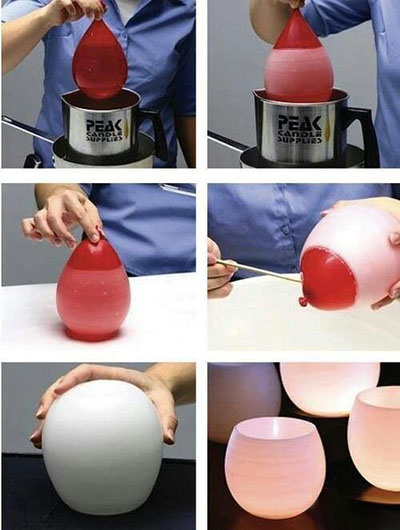
Cinder candles
Candles are always needed in the house. To create a romantic mood, for relaxation and release from the negative energy of the past hard working day, and, of course, for cases when there is an emergency power outage in the house.
Oh, this incident is perhaps the most favorite in our family. Especially when the children were little. Everyone comes to the kitchen, the kettle is turned on, the candles are lit and moments of happy family unity begin. It would be nice if everyone’s phones were dead by this time.
After such gatherings, a decent amount of cinders remains, or rather, this amount depends on the time needed by the emergency service to fix network problems.
The cinders need to be melted and poured into cups left over from sets or for some reason not used for their intended purpose.

Or you can make the “cup” itself from the same molten mass.
More ideas for a wooden nursery
A kind of stadiometer, or rather, an age meter made of wooden square planks, will decorate and allow you to observe changes in the size of the hand of the owner of the room.
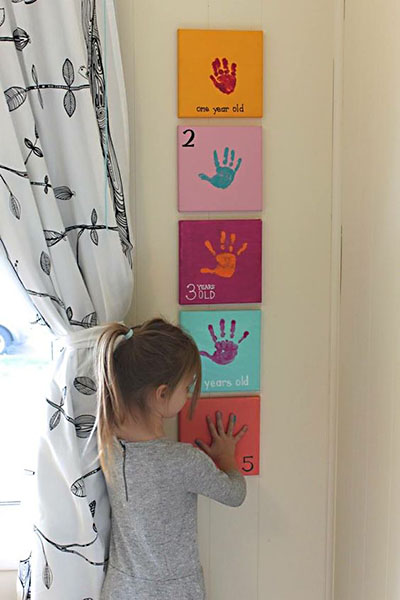
Well, or just decorate a children’s room on a budget, involving both kids and adults in the creative process.
Friends, decorating your home with your own hands is a pleasant thing when ideas have been formed and all that remains is to select materials and tools for crafts. When your soul is rushing and you want both this and that, there is no need to rush. I hope this article helped you decide, or at least was simply useful.


