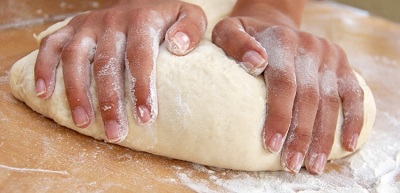
Both children and adults love to sculpt from salt dough. This is an extremely fascinating process, which is called testoplasty or bioceramics. And it also has another very funny name - flour. As you already understood, it consists of two parts - flour and salt. Therefore, all you need is to know how to make salt dough at home, which is not at all difficult and does not require a lot of time or money.
Making salt dough at home - tips
In general, there are no special tips here. All salt dough recipes are very similar and easy to make. All you need is salt, flour and some water. The main differences lie only in the presence or absence of other components - food coloring, cream of tartar or citric acid.
You need to take the most ordinary flour, without any additives or raising agents. It is better to use cheap low-grade flour, as it contains more gluten. Crafts made from fine flour, of course, turn out more elegant, but when dried they crack more and may even become deformed.
As for salt, it must be fine and free of possible impurities. Therefore, it is best to use “Extra”.
Do not add too much salt as this will make the finished product brittle. They break easily.
Try making the dough according to different recipes and choose the one that best suits you, the one that is easiest for you to work with. When studying the recipe, pay attention to the measure of these products:
- flour - 1 cup weighs approximately 100 g;
- salt – 1 cup weighs about 200 g.
If you have kneaded the dough, but it crumbles while working, just add a little more water to it; if the dough is too sticky, add flour.
Place unused play dough in a plastic bag or tightly sealed food container and store in the refrigerator.
How to make dough from flour and salt at home
Here is the simplest recipe for salted play dough. You can prepare it from what you always have on hand:
- flour – 1.5 cups;
- “Extra” salt - 1 glass;
- water – 0.5 cups.
Simply mix all the ingredients and knead the dough just like you would when making dumplings. Of course, you know that the longer you knead the dough, the more elastic it becomes, it stops crumbling and does not stick to your hands.
Colored salted play dough
In order for your products to acquire color, you can prepare salt dough according to this recipe. You will need:
- wheat flour – 1 cup;
- fine salt – 1 glass;
- Sunflower oil – 5 tablespoons:
- berry juice, vegetable juice or colored gouache;
- water - as needed.
Pour the flour into a bowl, add salt, a little gouache or berry juice and vegetable oil. Start kneading the dough, gradually adding water until you get the consistency you want.
How to make choux salted modeling dough at home
Yes, play dough can also be choux. To prepare it you will need:
- flour - 1 cup;
- fine salt – ¼ cup;
- water – 100 ml;
- any suitable dye - optional.
Pour water into a saucepan, put it on the fire and bring to a boil, reduce the heat so that the water continues to simmer slightly, add salt, pour in vegetable oil, add food coloring. Add flour in a thin stream, stirring constantly, and cook until the mixture thickens. Remove from heat, place on a floured, flat surface and knead until the dough acquires the necessary elasticity and no longer sticks to your hands.
How to make dough from flour and salt with glycerin and wallpaper glue
This recipe will help you prepare dough for making small items or small parts of your work. It turns out soft, elastic and practically does not crack, which is very important. You will need:
- flour – 1.5 cups;
- salt – 1 glass;
- wallpaper glue – 2 tablespoons;
- glycerin – 2 tablespoons;
- water – 0.5 cups.
Mix all the ingredients - first dry, then add glycerin and, gently kneading the dough, gradually pour in water. Knead the dough on a flat, floured surface until it reaches the desired consistency, elasticity and no longer sticks to your hands.
How to make play dough from flour and salt in the microwave
Play dough can also be prepared in the microwave. You will need:
- flour – 2 cups;
- fine or extra salt – 1 cup;
- water – 2 glasses;
- vegetable oil – 1 tablespoon;
- cream of tartar - 1 tablespoon;
- food coloring - optional.
Pour the flour into a glass or plastic container. Add salt and mix everything well until smooth. Gradually add other ingredients while stirring, then cover and microwave. The mode should be medium, time – 4 minutes.
Remove the container from the microwave, place the dough on a flat, floured surface, let cool and knead until elastic.
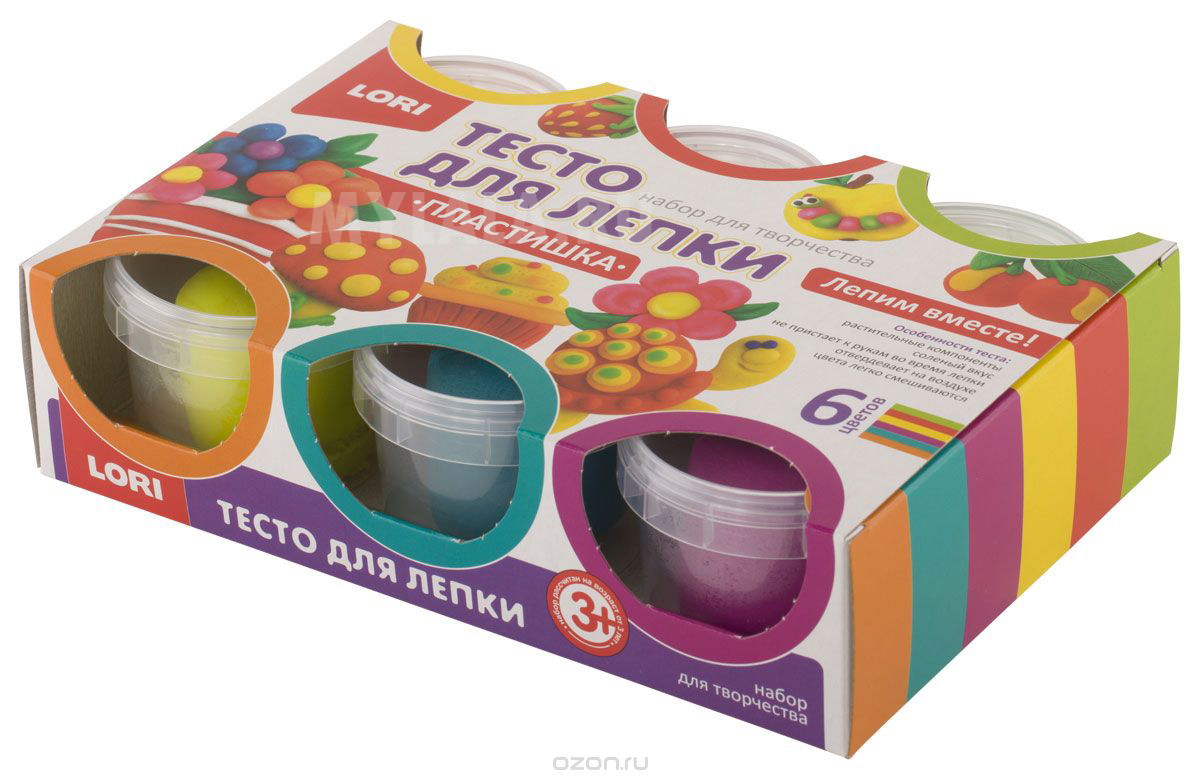
Salt dough is a very simple and accessible material for original crafts self made with your own hands. You can buy ready-made dough, such as Play Doh, at the store. Or you can do it yourself and even in several ways. They are similar to each other, but each master develops his own secrets over time. Let's learn the basics before experimenting.
Methods for preparing salt dough
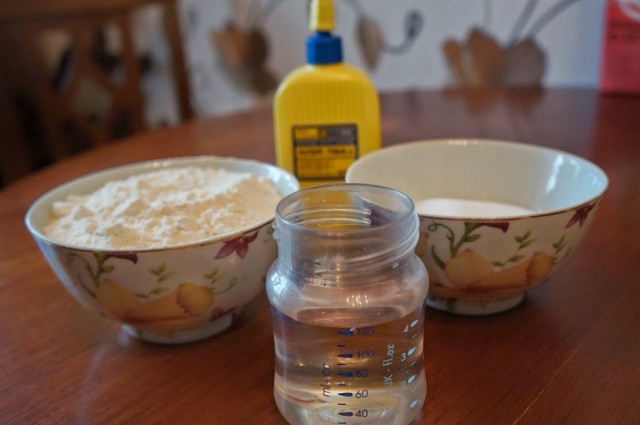
The simplest recipe for preparing salted modeling dough at home is to combine salt, flour, and water in different proportions. We will need:
- one glass of “Extra” salt;
- two glasses of flour;
- 3/4 cup of water must be cold.
Stir the dough until it turns into a homogeneous mass. This activity is not entirely for children. Adults can handle it better.
Tip: When you prepare the dough, add a little hand cream or vegetable oil. Then the mixture will be more plastic.
To check if it can be worked with, tear off a small piece and use it to sculpt a small piece. The dough should not crumble, otherwise the crafts will not work.
Some experts advise first combining salt and the required portion of flour, and then gradually adding water. Others first dissolve a portion of salt in water and only then add flour.
The secret of another recipe is in different proportions and a secret ingredient. To make play dough you need to mix:
- one glass of wheat flour;
- one spoon of wallpaper glue;
- two glasses of fine salt;
- one glass or so of cold water.
Tip: Try not to store the finished dough for too long. Otherwise, it will acquire a grayish tint, which will affect the quality of the crafts.
Some masters experiment with different types of flour. For this use:
- three glasses of wheat flour;
- one glass of rye;
- one and a half glasses of cold water;
- two glasses of salt.
Combine the components into a homogeneous composition in an already known order.
Tip: Dough made from a mixture of rye and wheat flour is easier to process.
The mixture for modeling crafts has the desired consistency if it:
- does not crumble;
- does not tear;
- comes off easily;
- quite dense.
You can knead the dough using a mixer. It's okay if the mass is too soft. Mix a little more salt and flour, add to the existing dough.
How to get colored dough
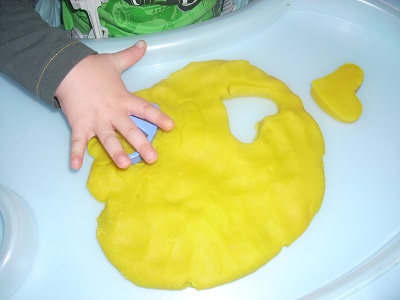
It is much more interesting to sculpt from colored materials, especially when you need to involve kids in a creative activity. It is difficult for them to paint products after baking. Young children should prepare the colored mass right away. It will turn out no worse than Play Do.
The easiest way to make colored dough at home is to add the color of paint you need to the water required by the recipe. Acrylic paints and gouache will also work. True, the products will turn out to be a delicate pastel color. In order to achieve richer and richer shades, as in the Play Doh sets, try out another method in practice.

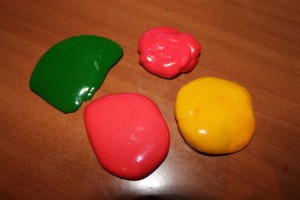
- Divide the dough into lumps, each of which is a separate piece.
We define the color of each of them. - Take a piece of dough and the desired paint in your hand.
- You need to make a dent in the lump and add paint with a brush, which must have a paste-like appearance. If the paint has dried, dilute it with a small amount of water.
- Knead our craft dough until it becomes colored.
Do not paint over the entire mass. The light shade will be useful for you to make the face, arms or legs of the future salt dough product.
When using the second method of coloring, you should be careful not to stain your clothes or furniture with paint. Your hands will instantly become multi-colored. But the paint washes off quickly. To avoid trouble, it is better to knead the colored dough over the sink.
How to store salt dough
It is not recommended to leave play dough idle for a long time. Otherwise, our home Play Doh set will dry out. If you do not plan to use all the modeling mixture at once, put it in plastic bag, close tightly. Otherwise, after a while you will have to prepare a new one. The composition should be stored in the refrigerator. Instead of bags, plastic containers with lids are also suitable. You can use yogurt cups.
How to dry crafts
Drying products or baking them is the most crucial moment in working with dough. Even more important than kneading the material. If you do not adhere to the drying rules, then all the efforts and labors of your creativity will end up in the trash. There are three ways. to dry salt dough products.
- Natural. We leave the play dough at room temperature and forget about it for a couple of days or even weeks. You cannot speed up the drying process using hot radiators or fireplaces.
- In the oven. This procedure reduces drying time to one to two hours. However, it all depends on the thickness of the craft. It is important to start drying the salt dough in a cold oven, gradually increasing the temperature. Don't forget to turn the products over so they bake evenly. At a temperature of 50 degrees, the craft is ready in 1-2 hours.
- Combined. You can leave the products at room temperature for a while and then dry them in the oven. To brown it a little, raise the oven temperature to 200 degrees.
Salted play dough that you can make yourself is not much different from store-bought Play Doh and has several advantages. It is safe to swallow if you do not add any glue as per the recipe. It is easy to prepare, you can dry it yourself and paint it with any colors. Varnish coating guarantees the safety of the product for many years.
May 25th, 2017
Modeling with dough – this is not only a developmental direction, but also an incomparable tactile pleasure, a splash of energy and fantasy into a mass that is incredibly pleasant in its sensations. What material is better to choose for your first acquaintance with this world of sensations?
From this article you will learn:
Mass, paste or dough-plasticine: what to choose?
What will you choose - a store-bought or home test?
How to make an analogue of Play-Doh at home?
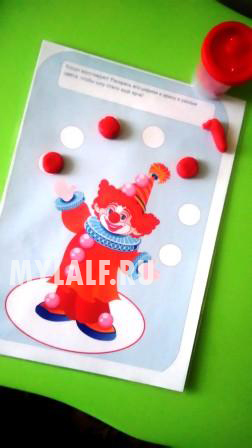
I once already wrote about the benefits of modeling for little ones and shared printable templates ().
Currently on store shelves you can find various options substances to get acquainted with modeling. As a rule, they are divided into dough, mass, paste and dough-plasticine. Let's see if they have any significant differences. Everything about the dough seems to be clear - its basic ingredients are flour, water and salt.
Famous Play-Doh , positioning itself as plasticine, differs little in composition.

Of course, manufacturers do not reveal the secret of making this magical material, but still there is some information on the official website: “The exact composition of PLAY-DOH plasticine is a trade secret, so we cannot tell you it. But we can say that it mainly consists of water, salt and flour. There are NO peanuts, peanut butter or dairy by-products. It CONTAINS wheat.”
Pros: plastic, soft, availability of tools and play equipment in the collection, convenient to store.
Cons: price, parts may not attach well to each other, sometimes crumbles.
Ingredients: flour, water, salt and food coloring.
Pros: mixes well, plastic, convenient storage, low price.
Cons: the aroma is not for everyone, does not stick well to paper, there are caustic colors.
Modeling mass.
In general, the modeling mass has nothing to do with the dough. So be careful! Ordinary modeling mass is completely unsuitable for little ones: it stretches like chewing gum, products made from it quickly harden, so, alas, you won’t be able to tinker and enjoy the process. Unless some manufacturers present dough or plastic under the code name “mass”.
And here it is worth stopping at Masse (paste) for modeling GIOTTO be-be , which is perfect for your first acquaintance with the test!
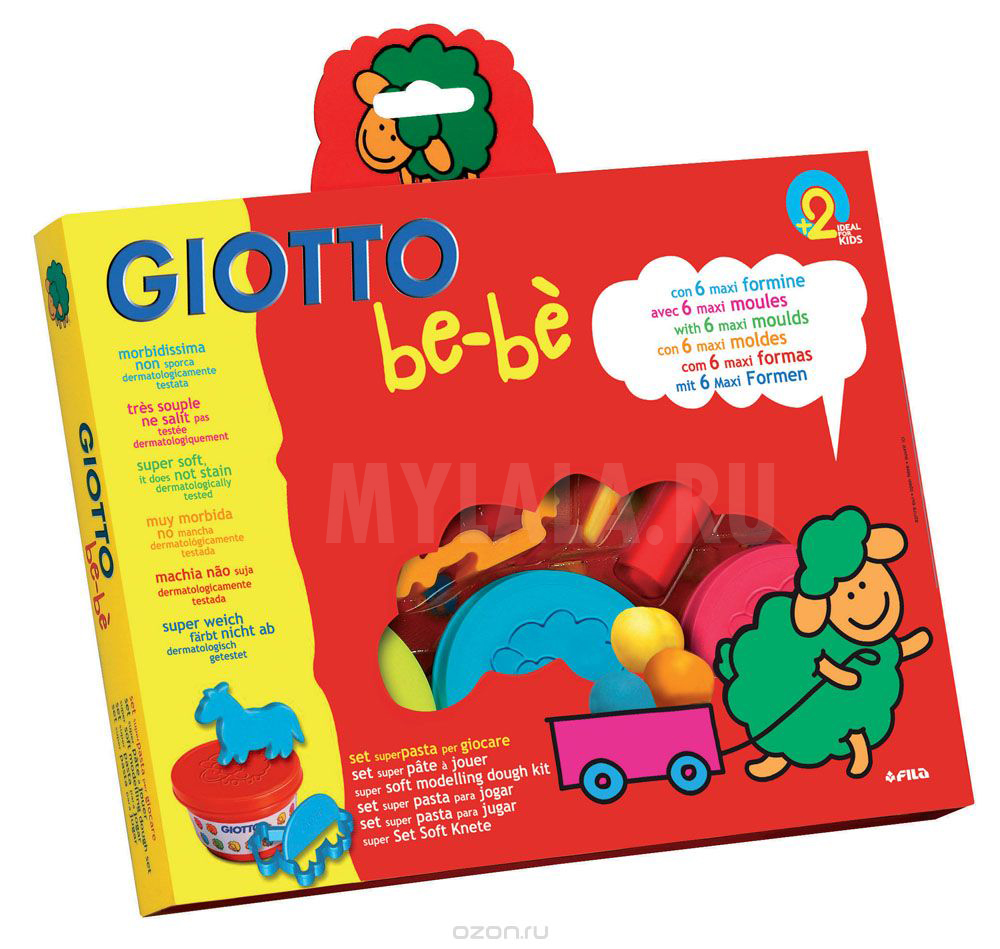
The composition of the mass, like that of Play-doh plasticine, is classified. At the same time, manufacturers emphasize that all components are of plant origin, the mass has a salty taste and is colored exclusively with food coloring. The basis of the mass (paste) is corn starch.
Pros: pleasant airy texture, remains soft for a long time, does not crumble, large volume of jars, easy to mix and get many new colors from a minimal set, the aroma is not intrusive, can be stored for a long time, some sets contain tools.
Cons: some sets contain pungent colors, high price, not sold everywhere.
Is store-bought dough so great?
Ready-made dough kits are convenient for mom: no need to mess around in the kitchen, choosing the right consistency, especially if you are not “friendly” with dough; getting your hands dirty with dyes. This dough can be stored for quite a long time outside the refrigerator (up to a year, and sometimes more), which means that it will not need to be thrown away after a couple of days. It is worth noting that such a long shelf life is achieved by adding various preservatives and additives to the dough, even the most harmless ones. Yes, and they will cost ready-made kits the test is many times more expensive. Some manufacturers often add delicious flavors to factory-made dough, which can be a significant disadvantage - the child will definitely want to taste the dough.
Homemade dough has a neutral smell, it is completely natural, alive, and elastic. There's a lot of it. I just want to dip my hands into this pleasant island of dough on the table, knead it and hold it in my hands for as long as possible! At the same time, it is not always possible to achieve the desired color of the mass at home, and the shelf life will be limited to days. Such dough must be stored in an airtight container in the refrigerator, which means that before giving the dough to the child, it will need to be warmed up in your hands each time.
DIY Play-doh. Homemade play dough recipes.
There are different variations of modeling dough: based on flour and salt, starch, and even gelatin.
Classic salted play dough without cooking
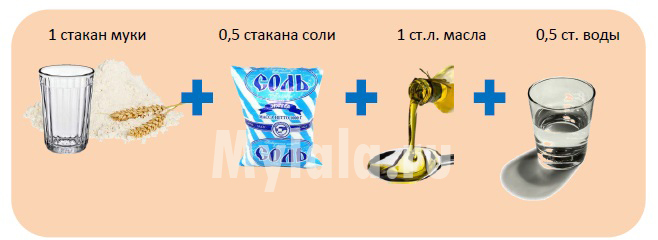
1 cup flour
0.5 cups salt (preferably “Extra”)
0.5 cups water (add food coloring if necessary)
1 tbsp. vegetable oil
Mix all ingredients and knead thoroughly until smooth.
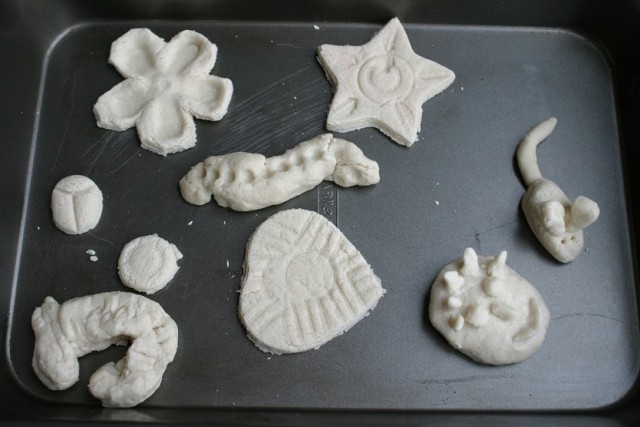
This dough makes wonderful figures that can be dried and painted.
Plastic dough for modeling from flour 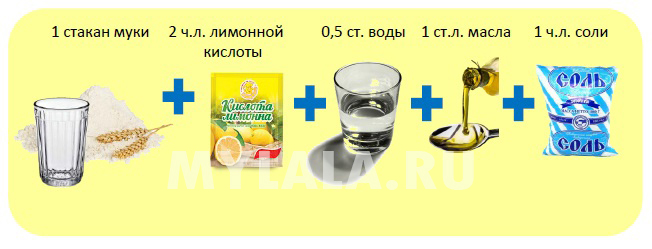
1 cup flour
2 tsp citric acid
0.5 glasses of water
1 tbsp. vegetable oil
1 tsp salt
Mix dry ingredients well in a saucepan. Add oil and water (you can dilute the dye in it). Cook until thickened. Transfer the dough to a table sprinkled with flour and knead until the dough does not stick to your hands.
Tender play dough based on cornstarch
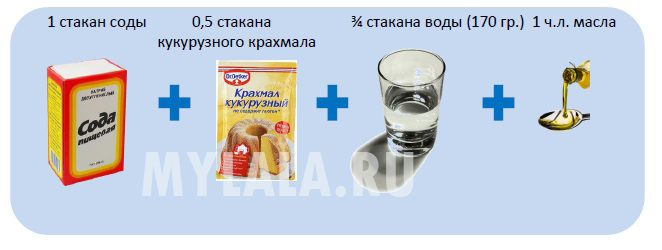
0.5 cups cornstarch
1 cup soda
1 tsp vegetable oil
3\4 glasses of water
Mix all dry ingredients in a saucepan. Add water and mix well so that there are no lumps. Place the saucepan over medium heat and cook until thickened, stirring continuously. When the mass becomes thick, remove from heat and cool slightly. Then knead the dough with the addition of vegetable oil. This mass turns out snow-white porcelain, it is pleasant to hold in your hands. The only caveat is that when adding dyes you will not be able to get primary colors; rather, they will be delicate pastel shades. When using potato starch, the color of the mass will turn out to be dirty gray.
Elastic play dough with gelatin

1 cup white flour
0.5 cups “Extra” salt
1 packet of jelly
0.5 glasses of water
2 tbsp. citric acid
2 tbsp. l. vegetable oil
food coloring
Pour water into a saucepan and dilute the gelatin so that there are no lumps. Add dye, salt, citric acid and oil. Mix well. Then, stirring, add flour. Cook until thick (it should come away from the sides). When the dough has cooled a little, knead it on the table.
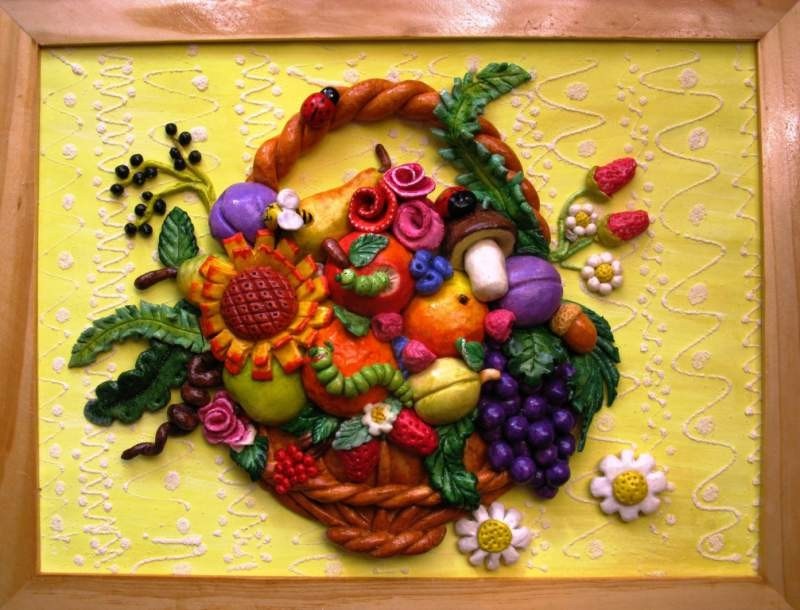
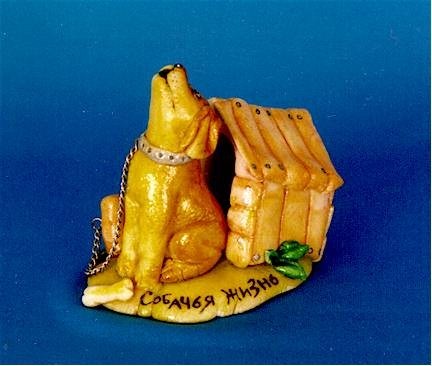
Modeling from salt dough is a fascinating activity that can bring a lot of pleasure to both little fidgets and adult uncles and aunts. Salt dough is an excellent pliable material from which you can make mass interesting crafts, including entire paintings that radiate the warmth of the master’s hands and home comfort.
Video catalog of works and ideas for modeling
To create a real masterpiece, you will have to try hard, but absolutely anyone can master testoplasty, especially since this technique does not require any unique abilities or expensive materials. If you set a goal, you can find everything you need without leaving home, if you wish. For children, making crafts from salt dough will not only be interesting, but also a very useful activity, because fine motor skills hands is directly related to the development of speech, thinking, attention, imagination, visual and motor memory, and any joint creativity brings people together.
How to prepare salted play dough
Almost every master uses his own unique dough recipe, so today we will offer several recipes at once. All recipes are good, but each is good in its own way. One is more suitable for small products, the other for large ones, and the third is suitable for working with children. By experimenting with different components, you can decide on the optimal recipe.
Salt dough recipes
to contentsFirst option: universal dough
- 1 glass of salt
- 1 cup wheat flour
- 1 tbsp. vegetable oil
- half a glass of water
Pour a glass of salt and a glass of flour into a large bowl. Mix with a spoon. Pour in half a glass of water and a tablespoon of vegetable oil. Mix with a spoon and knead with your hands until smooth, just like regular dough. To make the mass more plastic, replace the water with starch jelly. To prepare jelly, dissolve a tablespoon of starch in 1/2 cup cold water. Bring another glass of water to a boil in a small saucepan. While stirring, pour the starch solution into the boiling water. When the contents of the saucepan become transparent and thicken, turn off the heat, let the jelly cool, and then instead of water, add it to the mixture of flour and salt.
If the dough turns out too soft, mix a tablespoon of salt with a tablespoon of flour at the bottom of the bowl. Press the ball of dough into the mixture and knead. If necessary, repeat the procedure.

Second option for simple models
- 200 grams of flour
- 200 grams of salt
- 125 milliliters water
- (before adding to the dough, the glue must be diluted in warm water to the consistency of sour cream)
Third option for large models
- two glasses of flour
- one glass of salt
- 2/3 cup water
You may need a little more water, the amount depends on the type of flour. The density of the modeling dough should resemble softened plasticine. To prepare the dough, pour salt into hot water, wait until the salt is completely dissolved and the water cools. Add flour (the second kind is also quite suitable) and knead the dough thoroughly.
to contentsStrong salt dough for tiles and boards
- 200 grams of flour
- 400 grams of salt
- 125 milliliters water
- 2 tablespoons of simple wallpaper glue
Fifth option: salt dough for delicate work
- 300 grams of flour
- 200 grams of salt
- 2 tablespoons of simple wallpaper glue
- 4 tablespoons glycerin
To ensure that there are no crystals in the finished product and the surface is smooth, the salt for preparing the dough should be finely ground. If you only have coarse salt on hand, before kneading the dough you should grind it in a coffee grinder or dilute it with the amount of water specified in the recipe. It is better to choose inexpensive varieties of flour without emulsifiers, baking powder and other additives.
Ready dough Wrap it in film to prevent it from drying out and put it in the refrigerator for several hours. This will make the dough more elastic and easier to work with during modeling, and it will not break on the sides.
When working with children, choose recipes that do not contain glue.
Uncolored dough will have a light beige color. To give the product a warm bready shade, take half of the wheat and rye flour from the amount specified in the recipe. It is not advisable to use rye flour alone, as the dough will be hard, inelastic and will crumble.
Using watercolor or gouache, you can paint either ready-made figures or color the dough at the kneading stage. Gouache paints, food coloring or natural food coloring are perfect for coloring dough: fruit and vegetable juices (beetroot, carrot juice, parsley juice), cocoa, coffee. Dough different colors stored in separate plastic bags or jars. Just like paints, pieces of colored dough can be safely mixed to create the desired shade:
- blue + white = light blue
- blue + yellow = green
- green + blue = emerald
- blue + pink = purple
- white + red = pink
- yellow + red = orange
- green + red = brown
Crafts made from salt dough
While the dough is cooling and reaches the desired condition, you can prepare your work space and everything you need for modeling. First of all, we clear the table of foreign objects and cover it with oilcloth. We may also need:
- work board for rolling out dough (you can use a piece of thick cardboard covered with a sheet of baking foil on top)
- rolling pin (can be replaced with a smooth bottle)
- knife with thin blade
- cardboard
- pencil
- tassel
- floss threads
- aluminum foil
- various small things: buttons, corks, matches, coins - to create relief surfaces; beads, cereals, foil - for decoration.
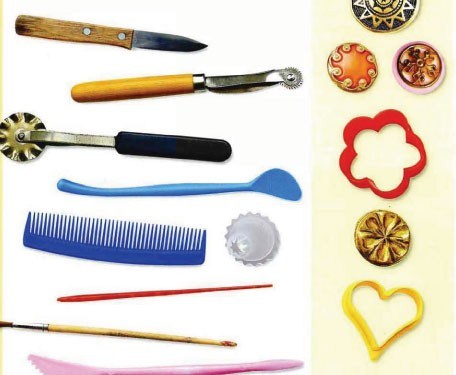
For modeling dough, almost everything is used: buttons and fabrics for textured prints, various seeds and cereals for original ornaments, dried flowers, fresh embossed leaves, twigs, etc. We lightly moisten fabrics and objects with vegetable oil before printing so that they do not stick to the dough. Beautiful buttons, pebbles, glass, bugles, beads, shreds and lace, threads and chains can not only be printed, but also “stamped” directly into the dough. If you fire your products in the oven, make sure that the beads are not plastic, but glass, and the threads are not made of synthetics.
Since the dough dries very quickly in air, it must be kept in tightly closed jars on the workbench. Each time you need to take exactly as much dough as necessary, and immediately fold the excess back.
You can work with the dough in several ways. Firstly, you can roll out a layer of dough, cut out various flat figures from it, and then make a composition out of them. However, to make a three-dimensional product, it is better to sculpt individual parts and then combine them into the intended composition. We wet the joints with a brush and gently press with a finger. A toothpick will help attach the head to the body.
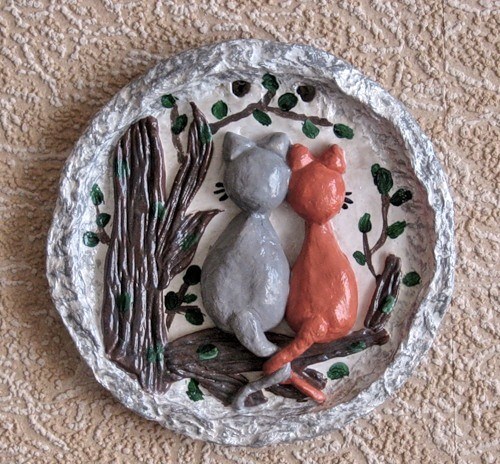
To create a picture or sign based on a board, first roll out the dough one to one and a half centimeters thick, cut out the desired shape from it, let it dry for several days and only after that apply the rest of the details, using the same salted dough, diluted to a mushy consistency, as glue condition. Fresh parts are held together with a brush and water.
To make a nice frame, you can first draw a sketch on cardboard, then cut it out and cover it with dough, and when it dries a little, attach small details.
When working with three-dimensional vertical figures, you should use a wire frame. Inside large volumetric products you can put tightly formed balls of foil for baking, boxes or jars, carefully covered with dough so that there are no holes or cracks. In this case, to manufacture the product you will need less material, when drying it will not deform and will dry much faster.
If you have any unused dough left after work, wrap it in oilcloth or a plastic bag and put it in the refrigerator. This will prevent the dough from drying out and spoiling for several months.

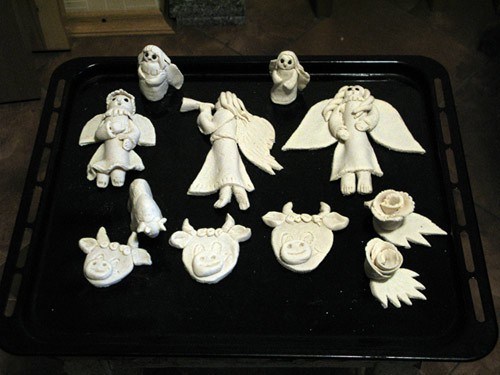
Drying, firing, painting and varnishing
In order for dough products to gain strength, they need to be air dried or fired in the oven. The first option will take quite a long time, since during air drying the moisture from the product evaporates very slowly. In good weather, the product will dry only a few millimeters in one day. It is better not to place dough crafts on the battery, because there is a high probability that they will simply crack.
It is better to use a combined method - first dry the product a little in the sun and then burn it in the oven. You cannot bake the product! It should not be baked, but dried at the lowest temperature, with the oven door slightly open. In this mode, the product should be fired for one and a half to two hours, until it turns brown and the dough hardens. If overheated, bubbles and cracks will appear on the figure.
After drying or firing, salt dough products can be painted and varnished. For coloring, you can use acrylic paints, but artistic gouache with the addition of a small amount of PVA glue is best. After drying, this mixture will give the product a slight shine and will not stick to your hands. Acrylic varnish is perfect for varnishing; it is non-toxic, water-soluble and dries in only 6-8 hours.
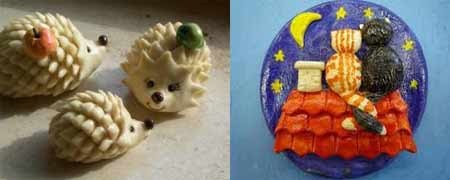
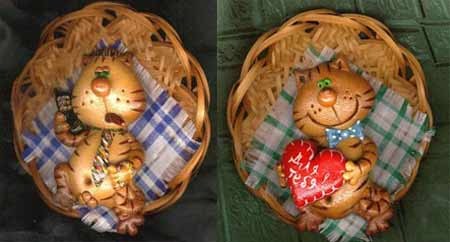
to contentsMaster class on making funny cats
Don't know what to do with your children's naughty hands? There is a great way that your baby will absolutely love, and you too - play dough. An incomparable option that helps develop finger motor skills and young imagination. Colorful, exciting material that does not require large expenses, which you can easily prepare yourself.
Benefits of play dough
Do you remember how long it took to knead plasticine as a child? Play dough will not cause such inconvenience. It is very plastic, pliable and does not stick to skilled hands. With its help, a little sculptor will be able to create a variety of figures or even entire scenes. And the most important advantage of the dough is its absolute edibility. There is no longer any need to closely monitor that the child does not put his hands in his mouth when they are in plasticine. Homemade play dough consists only of natural ingredients. The only drawback of this mass - without special treatment in the oven, it can dry out and crumble.
Which play dough is best?
There are two ways: you can buy the dough in the store, or you can prepare it yourself. Each option combines advantages and disadvantages, which may be mutually exclusive. After familiarizing yourself with them, you can understand which dough suits you best.
Arguments in favor of a home test:
1. Dough prepared at home will be more flexible.
2. You clearly know what products were used in preparation, and this is incredibly important for the child’s health.
3. In terms of money, it will cost much less than purchased.
4. Unlike factory-made paste, homemade paste can be baked and preserved for a long time.
Why do mothers prefer purchased material?
1. The purchased mass is created by manufacturers specifically for small children and consists of natural ingredients.
Advice: be careful, read the ingredients, it’s better to be 100% sure.
2. Availability.
3. Shelf life.
4. A large number of color options.
5. The kit includes various tools for working with it.
If you have factory-made and homemade dough, do not be afraid to mix them, they have the same consistency and the result will not suffer at all.
The best recipes for making homemade dough for children's modeling
 Absolutely all recipes are similar to each other. The base is almost always the same; water, wheat flour and salt are used. The rest varies. May include citric acid, various dyes and cream of tartar.
The difference is the technique of the cooking process. This can be boiling, regular mixing or baking in the microwave.
One of the advantages of such material is its shelf life. It can last for several weeks in the refrigerator if stored packaged.
The simplest recipe
To prepare the dough using the simple mixing technique, you will need the following ingredients:
- 1 tbsp. wheat flour, which has been previously sifted;
- half st. regular salt;
- 1 tbsp. running chilled water;
- 2 tsp. cream of tartar;
- 1 tbsp. l. sunflower oil;
- natural food coloring of your choice (for color).
 Preparing the dough is very simple. Mix the first two ingredients, adding cold water little by little. Pour cream of tartar into the prepared mass and pour in sunflower oil. The last ingredient will be food coloring. Place the mixture on low heat and cook until a lump forms. After cooling, you need to knead it thoroughly with your hands.
Recipe that requires cooking on the stove
IN in this case You will need the same products with the exception of cream of tartar. This is not a popular recipe because the aforementioned ingredient can be difficult to find.
So, you need to take:
- 1 tbsp. sifted wheat flour;
- quarter st. table salt;
- half a tbsp. water, which this time should be warm;
- 1 tbsp. l. sunflower oil;
- food coloring of natural origin.
 At the initial stage, mix salt and flour, add the remaining ingredients from the list and send them to pre-boiled water. Cook all this over low heat and stir persistently until the mass turns into a lump. Next, knead the cooled ball in flour until completely elastic. It should stop sticking to your hands.
Recipe for making dough in boiling water
The third option is how to prepare a modeling mass similar to plasticine. The disadvantage of this recipe is the need to work directly with boiling water. It is important to follow all the rules for safe working with hot water.
To prepare salt dough in boiling water you need to take: 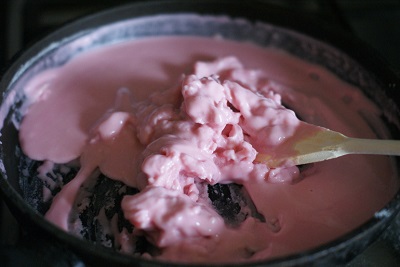
- sifted wheat flour - 2 tbsp.;
- salt - half a tablespoon;
- cream of tartar - 2 tbsp. l.;
- boiling water – 2 tbsp.;
- natural food coloring;
- glycerol.
Tip: By adding glycerin to the dough, you give it a special shine.
And again similar actions. Mix the listed ingredients, except dye and glycerin, they need to be added at the end, and pour boiling water. We get in the way all the time. After the prepared mass has cooled, we begin kneading the dough in flour. Once it stops being sticky, you're done.
Recipe for making dough in the microwave
The main difference between this method is the replacement of a conventional microwave stove. Very convenient for young mothers who cannot devote time to constant stirring while cooking.
To prepare salt dough in the microwave you will need:
- 2 tbsp. flour, sifted in advance;
- 1 tbsp. table salt;
- 1 tbsp. l. cream of tartar;
- various natural food colors;
- 1 tbsp. l. sunflower oil;
- 2 tbsp. running water.
 You need to mix the components in the usual order. Transfer the raw mixture into a baking dish and place in the microwave. Be sure to cover it with a lid. You will only need 4-5 minutes at medium heating power. After cooling, knead with flour until ready. A fairly simple method that does not require unnecessary stirring and cooking.
Play dough recipe without flour
The highlight of this mass is that it does not contain flour. The recipe is ideal for women who do not like to work with this ingredient.
To prepare the dough without flour you need: 
- natural food coloring;
- 1 tbsp. starch;
- 2 tbsp. baking soda;
- 0.5 tbsp. water.
It is necessary to mix the starch and soda, gradually add water, continuously stirring the mixture. Simmer everything over low heat until a ball forms. Then everything is as usual - knead the cooled dough in flour until ready.
Recipe for elastic play dough with jelly
A very interesting way to make homemade clay. It contains jelly, which provides good elasticity.
We will need:
- wheat flour - 1 tbsp.;
- salt - 2 tbsp. l.;
- warm water - 1 tbsp.;
- sunflower oil - 2 tbsp. l.;
- cream of tartar - 2 tbsp. l.;
- jelly -100 g.
Mix all ingredients in a saucepan and cook over low heat until a ball forms. The cooled dough must be kneaded in flour until it stops sticking to your hands.
DIY natural food colors
Food coloring can be difficult to find. It’s okay if they are suddenly out of stock in the store; a replacement can be easily found. Ordinary turmeric gives a bright yellow color, if you have cocoa in the house, then you can make brown dough, in the summer you can use currants to get a purple color, and cherries for red, and finally, a small amount of brilliant green will color the plasticine green.
To get a mass of several colors, first knead the dough without dyes. Divide into parts, and only then paint with any colors you like.


