Manufacturing DIY things for the home- this is a great opportunity to combine an interesting, exciting creative process with the undoubted benefit of filling the interior with useful and beautiful objects. , which we will look at today, can be repeated very simply; in fact, it was the ease of performing them, coupled with their spectacular appearance and undoubted usefulness, that became the main reason for including them in this small selection.
DIY things for the home: photos
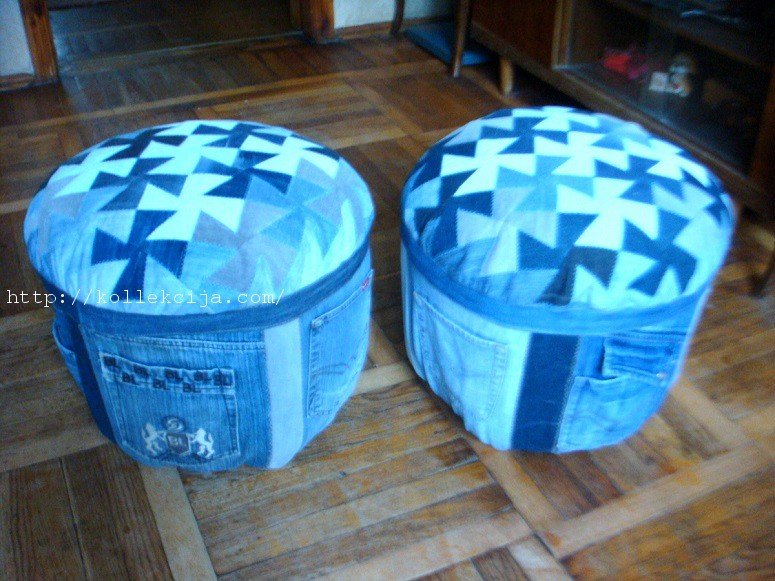
Elegant DIY things for the home, photo which you will see are made in various techniques and belong to different areas of home decor and content. Here is our first idea - a soft floor pouf, analogues of which are quite expensive in a home decor store. But, if you think about it, all you need for this is multi-colored scraps of fabric and filling, as well as a small piece of rope.
Preparation for work will consist of forming rectangles from various pieces of fabric, big side whose length will be equal to the radius of the desired pouf. You yourself can vary exactly what size you want it to be. If it is important for you that the craft is more practical, it can be used not only in the apartment, but also in the country, on outdoors, then select fabric with appropriate qualities. Next, cut the rectangle diagonally into two triangular halves, sew the next rectangle into one, and then cut off half of it. You can initially sew ready-made triangles, but this will make it a little more difficult for you. The wider the rectangular blanks are, the fewer sectors the finished pouf will have. When the circle is closed, the first half of the pouf is ready, while the second, lower half does not have to be assembled from pieces, you can use a whole circle. The rope must be laid inside a rectangle, the length equal to our circumference, and together with it, both parts must be sewn to each other. Leave about 15 centimeters unsewn, through which you can turn the workpiece inside out and fill it with filler. When the desired volume is achieved, close this technical hole with a hidden seam.

Rope or twine will also be suitable for our next craft, because it turns out that in order to make DIY useful things for the home, you need the simplest materials. In this case, we need paste, cling film and a skein of twine or rope. The shape will be a bowl of the size we need, we wrap it tightly with film so that no glue gets under the film, but also so that later this protective layer can be easily removed from the surface of the bowl. Pour the paste into the container (dilute 100 grams of starch with a glass of cold water, and then pour the mixture into 750 grams of boiling water, stirring until it thickens) and put the twine there so that it is thoroughly saturated with it. After this, put the twine on a bowl covered with film, so that you get beautiful, openwork patterns, you shouldn’t do it too tightly, otherwise all the charm of the craft will be lost. When the glue is completely dry, carefully remove the workpiece from the bowl and separate it from the film. You can put fruits, sweets, seasonal and so on in the finished vase.
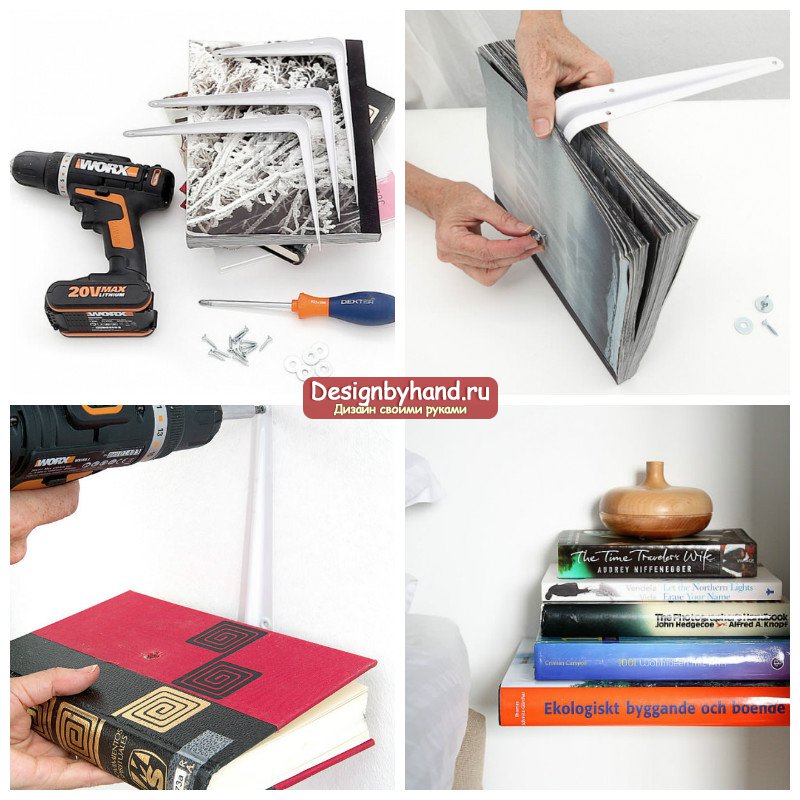
Open shelves are becoming more and more fashionable, but you want not only fashionable things in the house, but also unusual ones. Invented just for such lovers creative DIY items for home, a striking example of which is the invisible shelf, which is made from a thick book. In this case, you will still have to visit a hardware store to purchase the missing parts - these are dowel screws and L-shaped fasteners. One end of this bracket is applied to the book and markings are made at the location of the future hole; you need to drill the cover and a dozen pages. After this, the bracket is placed inside and tightened through the cover with a bolt and washer with a plug for beauty, and the other end is hung on the wall. On top of the shelf you can put a few more books, put a lamp, put a phone, in general, use them as you please.

DIY from unnecessary things for the home
But the home craftsman gets the greatest satisfaction from the work done if he manages to do something do it yourself from unnecessary things for the home. This is at the same time also the process of recycling these most unnecessary things. If your house has recently undergone renovations and there are small pieces of expensive, high-quality wallpaper left, then you don’t dare throw them away. And rightly so, because you can use them in decorating furniture, creating interior details, and so on.

You can see examples of the use of wallpaper that was unsuitable for repair in our photos. You don’t even have to cover thick vinyl or non-woven wallpaper with any protective layers; they themselves are quite strong and will serve you for a long time.

You can even accumulate these unnecessary things on purpose in order to eventually get something useful for the household. For example, when we create a wonderful floor mat made from wine corks. The corks need to be carefully cut in half with a breadboard knife and glued onto a rubberized base. You can do this either in even rows or create different patterns by changing the location of the plugs.
There are many ways to make useful things for your home with your own hands. For this purpose they use different techniques and use different materials. The most unexpected things are used, for example, plastic bottles, from which real masterpieces are obtained. And using completely unsightly fabric or strips of it, you can make an amazing thing that will be indispensable for all family members. From a minimum amount of materials in a short time you can make children happy by creating many useful things for them. It is enough to show patience and imagination.
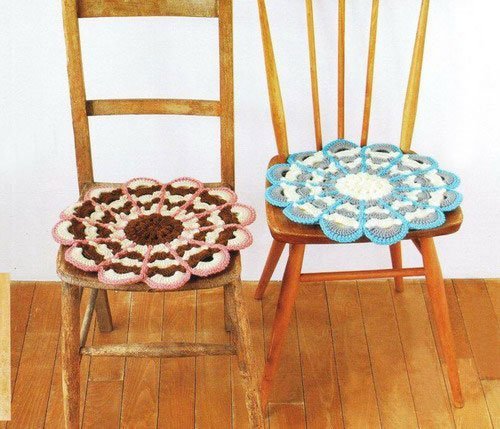
How to make a crochet chair rug
This chair rug can be knitted from anything. It is crocheted from threads, yarn and knitted strips of fabric. You can cut any old clothes, unnecessary pillowcases or sheets into such strips.
- To make yarn, take cut strips of fabric and tie them together.
- The round rug is knitted in the round. A sliding loop is made and six loops are cast on in the first row, that is, a single crochet is made. Six such columns are made in a circle.
- The connecting loop closes the circle.
- Then the second row is knitted, in which there should be 12 loops. In each loop, 2 stitches are cast on.
- The third row should have 18 stitches, etc.
- To finish the work, you need to pull the yarn to the wrong side and fasten.
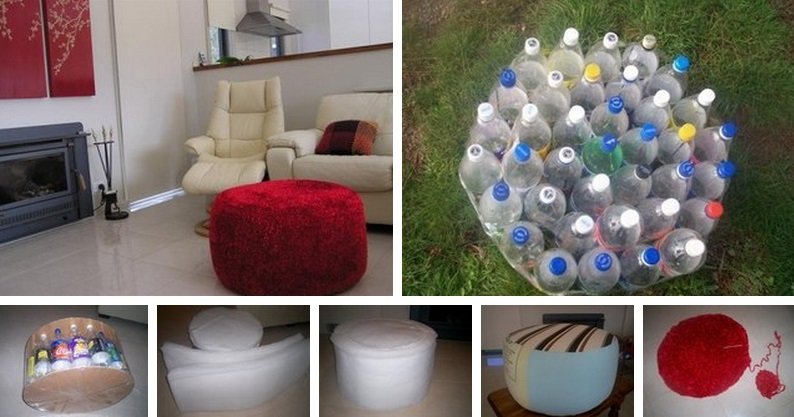
How to make an ottoman from plastic bottles
Few people know that you can make your own furniture from plastic bottles. This ottoman is suitable for home and garden. It has a beautiful shape, light and compact.
To work you will need:
- 37 identical plastic bottles.
- Wide tape.
- Thick cardboard.
- Double sided tape.
- Foam rubber.
- Scissors.
- Textile.
- Needle.
- Threads.
- Hidden zipper.
Manufacturing process:
- Take 1 plastic bottle, wrapped in double-sided tape and 6 bottles glued in a circle. The resulting workpiece is well fixed by wrapping it tightly several times with wide tape.
- This blank is wrapped in double-sided tape and a row of 12 bottles is glued to it in a circle. It is also well fixed by wrapping it with wide tape several times.
- Again, the blank is wrapped with double-sided tape and a row of 18 bottles is glued. After fixing it around the row with wide tape, the entire workpiece is well wrapped and secured with tape several times.
- The diameter of the workpiece is outlined on thick cardboard and cut out. You need 2 such parts. One cardboard piece is applied to the top of the workpiece, and the second to the bottom. All this is well fixed with wide tape.
- The top and side parts are cut from a sheet of foam rubber. They are applied to the ottoman blank in the right places and wrapped with wide tape.
- An appropriate pattern is made on the fabric, taking into account the measurements of the ottoman, the parts are cut out of the fabric and sewn together, leaving a hole for the zipper. A zipper is sewn in and the ottoman cover is turned right side out. The covers can be changed to suit the desired interior.
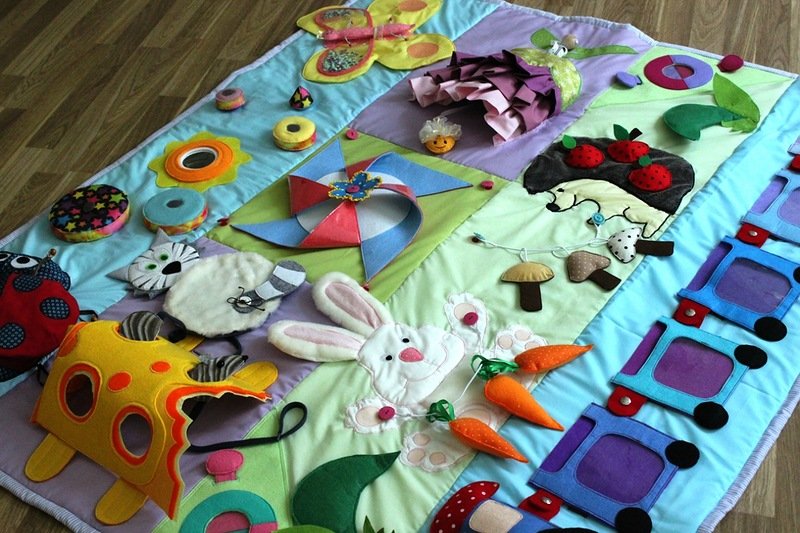
How to make a play mat for children with your own hands
Using craft materials and accessories, you can make an educational mat for children with your own hands. With its help, the child will develop fine motor skills and attentiveness, distinguish colors.
To work you will need:
- A piece of beige cashmere fabric.
- A piece of green velor fabric.
- Blue shiny jersey.
- Plastic bag.
- Velcro.
- Safety pins.
- Paper.
- Pencil.
- Scissors.
- Fabric in yellow, red, brown, green and gray colors.
- Peas, rice, buckwheat, starch, beans.
- Buttons in black, grey, red, yellow and white.
- Animal figurines.
- Multi-colored ribbons.
- Sintepon.
- Laces.
- Lightning.
- Felt in different colors.
Manufacturing process:
- The main part of the rug is made, which consists of two parts. The upper part is made of beige cashmere fabric. The lower part is made of green velor fabric. The size of the main part is 1x1.5 m. Both parts are sewn together.
- A lake is cut out of shiny knitwear, under which a plastic bag is placed and stitched by machine. The second parts of the Velcro are attached to the lake. The first parts will be attached to the fish.
- The fish are made from yellow, red and gray fabric. To do this, use a template that is drawn on paper and cut out. Each fish requires two pieces of fabric. The fish are sewing on sewing machine, placing peas inside each fish. Each fish is attached to the lake with Velcro.
- A lake with fish is attached to the main part of the rug.
- Gray, black and white buttons are sewn around the lake. They will play the role of pebbles.
- An apple tree with apples is made from multi-colored fabrics. All this is attached to the main part of the rug. Each apple is attached with buttons. Rice is placed inside each apple.
- A tree with pears is made using the same scheme. Inside each pear is buckwheat.
- Four are made from different fabrics geometric figures. Starch, rice, peas and beans are placed inside each figure. A rainbow is made using colorful ribbons.
- The sun is made from yellow fabric and padding polyester.
- Clouds are made from blue felt by sewing in a zipper and sewing white ribbons inside. The zipper on the cloud will open, and ribbons will stretch out from there, representing rain.
- A house is made from felt, inside which a plastic bag is placed. There are animal figures around.
- The laces are used to make smoke from the chimney.
- All details are located throughout the rug and are attached.
Using master classes, photos and videos, you can create very useful things with your own hands that will be useful for your home, garden, and children.
Video on the topic of the article
Perhaps everyone has old things in their house that no one needs anymore. But don't rush to send them to the landfill.
In our review there are several brilliant ideas that will allow you to turn the most seemingly “hopeless” things into very useful things for household use.
1. Fairytale box
Box for letters and jewelry.
An old thick-bound book can be turned into a stunning box for storing letters, cards, jewelry or a cash stash.
2. Press organizer
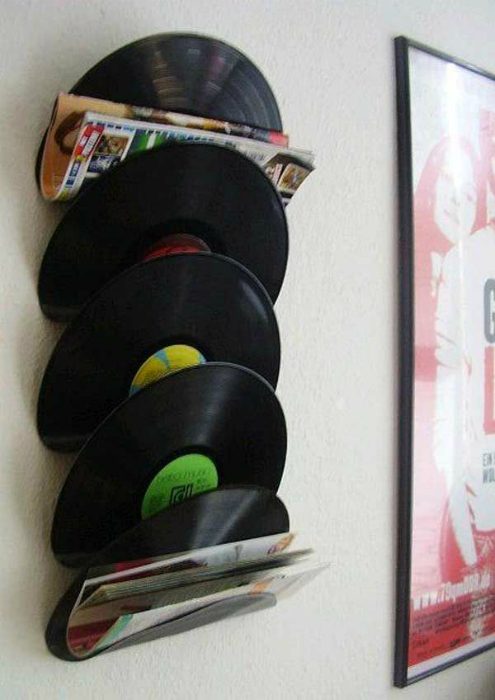
Organizer for newspapers and magazines.
Surely, many people still have old records with children's fairy tales and music. There is nothing to listen to them on, but it would be a shame to throw them away. In this case, you can try turning your record collection into an original wall organizer for newspapers and magazines.
3. Coffee table
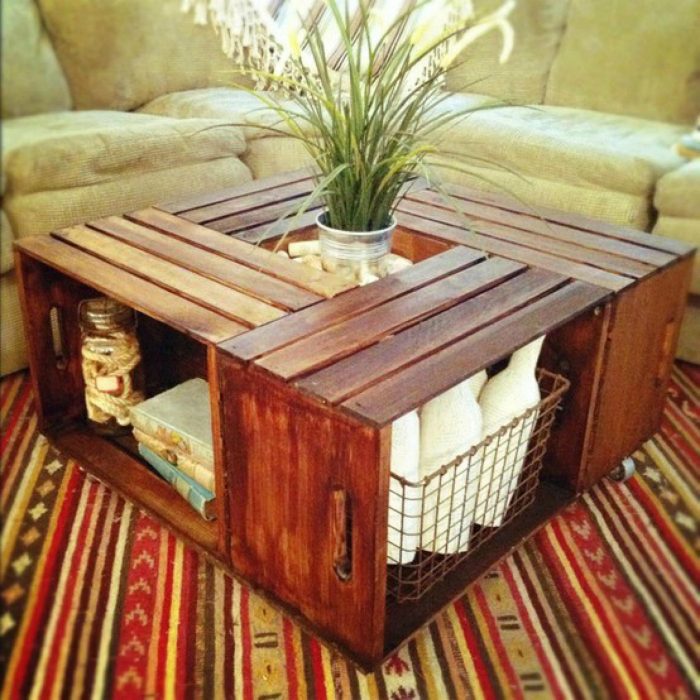
Coffee table with storage space.
Paint or varnish old wooden boxes and use them to make a wonderful coffee table with niches for storing books and magazines.
4. Dog feeder
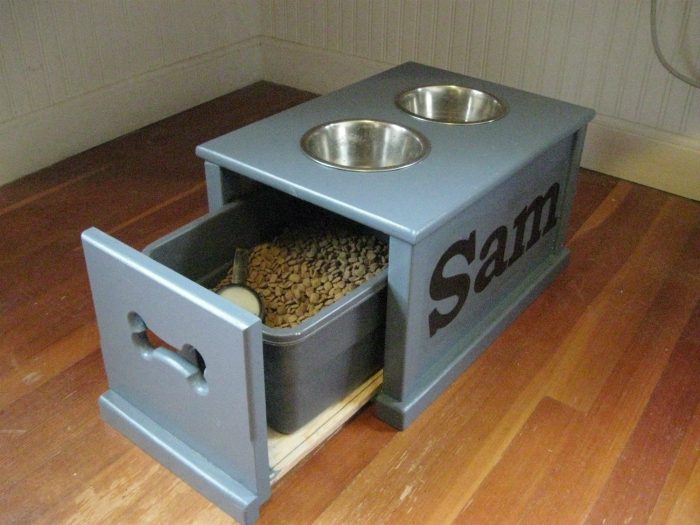
Feeder for dogs with a compartment for storing dry food.
An unnecessary document box can be turned into a very stylish and convenient dog feeder with a special compartment for storing dry food. This design can be installed in a country house or in country house so as not to always carry a bowl rack with you.
5. Cabinet

Vintage cabinet made from old window shutters.
Are you planning to replace your shutters? Never throw away your old ones, because you can use them to make a charming vintage cabinet that will become a real decoration for your porch or veranda.
6. Hanger
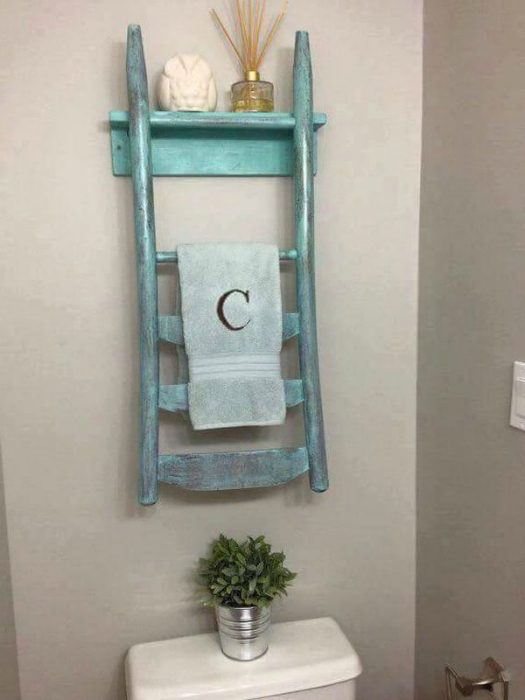
Towel hanger.
A creative towel rack made from the back of a broken chair.
7. Hanger shelf
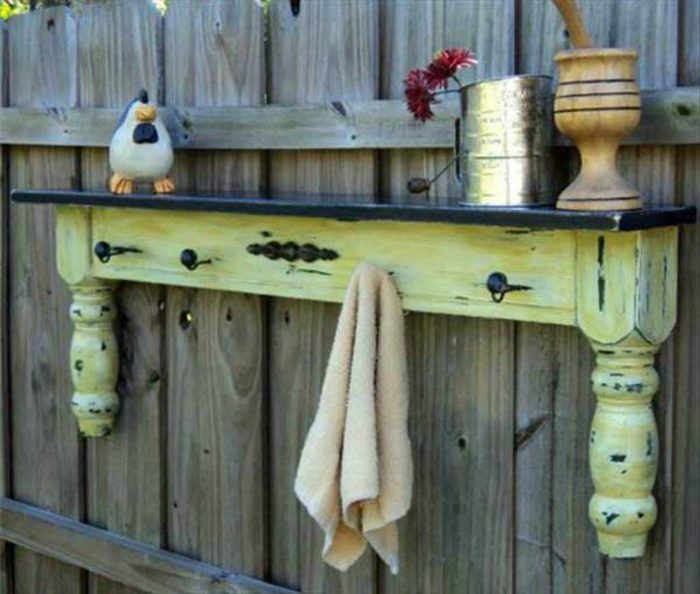
Hanging shelf from the dining table.
Don’t rush to throw away the old, worn-out table; turn it into a shelf and hanger that can be hung above the washbasin on the country porch.
8. Note board

Note board.
One of the desk drawers can be turned into a cute board for notes, photos, recipes and cards.
9. Bookshelves

Charming shelves for books.
Simple manipulations and careful painting will help turn your desk drawers into beautiful bookshelves.
10. Thread organizer
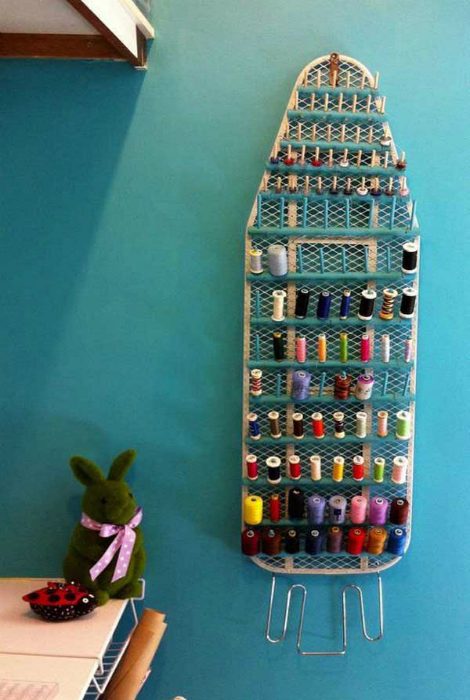
Organizer for threads and accessories.
An old ironing board, which has been collecting dust in the pantry for several years “just in case,” can be turned into a stylish and very useful organizer for storing threads, yarn and other accessories.
11. Decorative shelves
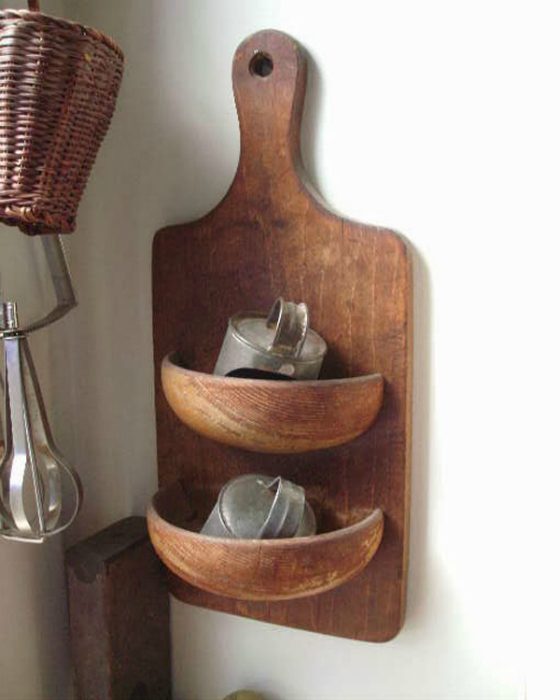
Decorative shelves.
An old cutting board and a couple of wooden bowls can be turned into unique decorative shelves that will be pleasing to the eye and suitable for storing various small items.
12. Garden hose bracket
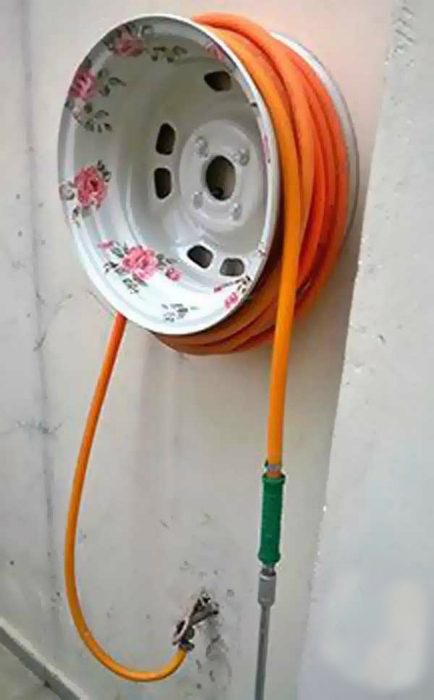
Wall bracket for garden hose.
Painting and some simple decor can transform an unwanted car rim into a charming garden hose wall mount. This idea will certainly be useful to summer residents who are tired of hoses getting tangled under their feet.
13. Wall shelves

Designer shelves.
Convert boards for board games into unique shelves. Such shelves will best fit into the interior of a teenager’s room, and their appearance is in no way inferior to designer shelves.
14. Paper towel holder
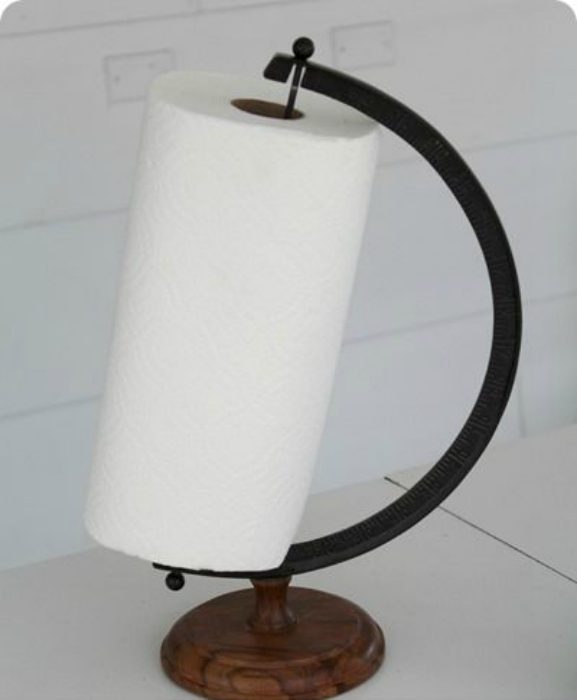
Paper towel holder.
You won't find anything when you're clearing out your closet, attic or balcony. If during your next routine cleaning you come across a globe that has come from nowhere, make a paper towel holder out of it. Such a thing will undoubtedly please the eye and come in handy in the kitchen.
15. Pet bed

A simple pet bed.
It's very easy to turn an old wooden box into a cozy pet bed. You just need to break or saw down one of the walls of the box and cover the rest with cloth. You can put a pad or foam on the bottom.
16. Bottlemaker
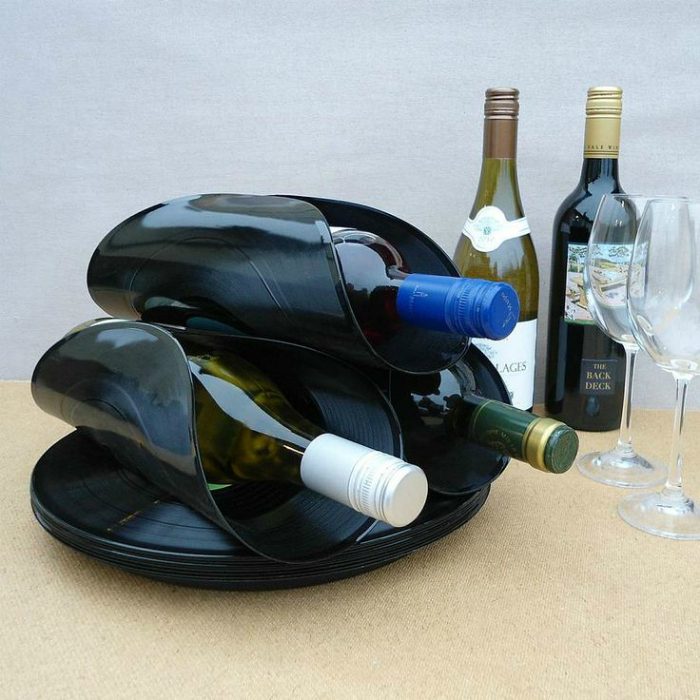
Bottle holder.
Unneeded vinyl records can be turned into a beautiful bottle holder that will become an exclusive decoration in the kitchen.
17. Birdhouse
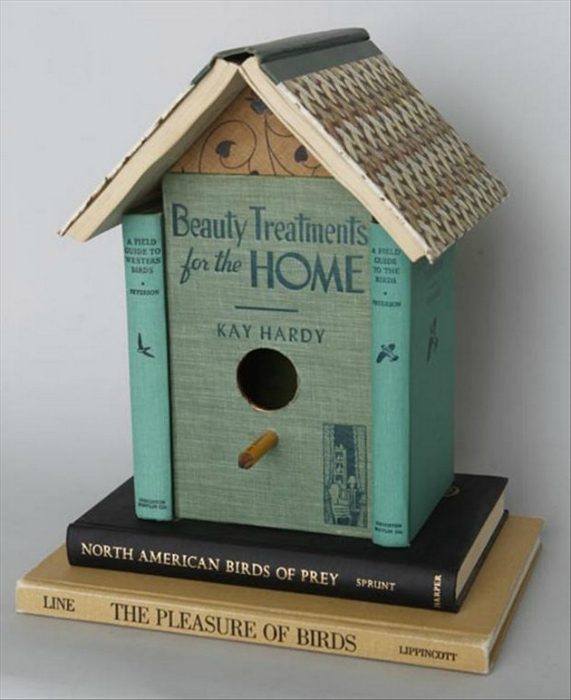
Decorative birdhouse.
From unnecessary books you can make an original decorative birdhouse that will become a real wall decoration. Of course, you shouldn’t make it from good publications. We are talking about old textbooks, romance novels and books damaged by children.
Handmade work has always been highly valued. The art of needlework, on the one hand, brought benefits to people, was in demand in the field of beauty and everyday life, and on the other hand, it brought pleasure to the master’s creativity and contributed to professional self-realization.
Unique, interesting handmade items continue to be popular among buyers today.
Dear readers! The article talks about typical ways to resolve legal issues, but each case is individual. If you want to know how solve exactly your problem- contact a consultant:
(Moscow)
(Saint Petersburg)
(Regions)
It's fast and for free!
The relevance of the “hand made” direction
Creating things by hand or “hand made” is becoming one of the most fashionable and sought-after creative trends today. In the era of mass production, everything that is made with one’s own hands and according to one’s own sketches is highly valued, that is, things that cannot be bought at the nearest market, and maybe even in the country and in the world. They are unique, have a pronounced individuality and dissimilarity, and are intended for a specific connoisseur, lover, or recipient.
Handmade work and the warmth of human hands give things a special energy; one can say about such crafts: “made with love.” It is not surprising that hand made is directly related to home, family, family values. An extraordinary fantasy of a craftsman, unusual ideas for the most ordinary things, they make people take a different look at the already familiar world of home, hobbies, beauty.
Therefore, hand made is often from a favorite hobby turns into a profitable business, which, with a skillful approach, can provide its owner with a reliable financial “airbag” for calm, carefree creativity. Moreover, such activities do not need to be officially registered; you can create and earn money without any difficulties or formalities. In addition, needlework is accessible to everyone, regardless of age and social status. Hand made is beautiful, stylish and exclusive, and masterpieces can also bring money.
Varieties of "handmade" art
Hand made is a multifaceted art that includes a huge number of different directions and styles.
Some of them, such as making ceramics, decoupage, filigree, have been known for many centuries, others, such as creating photo books, making badges and key chains, decorating candy bouquets, etc., are only gaining popularity. There are handicraft traditions and national preferences.
Basic directions and types"hand made":
- decoupage - decorating objects with cut out pieces of paper, scrapbooking - a technique for decorating books, photo albums, postcards, etc. from paper, quilling - creating compositions from strips thin paper, origami - folding original paper figures;
- patchwork - making things from scraps of fabric;
- batik – hand-painted fabric, technology for dyeing and decorating it;
- felting - felting wool;
- sewing, embroidery, knitting, lace-making, macrame;
- filigree - products self made made of thin corrugated wire (earrings, buckles, clasps, bracelets, brooches);
- beading;
- accessories made of thread, fabric, clay, leather (beads, hairpins, brooches, straps, bags, etc.);
- floristry, creation flower arrangements from various materials;
- preparation of exclusive confectionery products, decoration of candy bouquets;
- crafts made of stone, glass, clay, wood, metal, plastic (animal figures, wall panels, original beads, figurines, sculptures, toys, magnets, home decorations, symbols national holidays, miniature copies of attractions);
- production of soft toys;
- soap making, making creams and candles with your own hands;
- weaving furniture for home and office from various types wood;
- toys, clothing and furniture for pets;
- production of handmade badges and keychains;
- applying images to T-shirts, mugs and other items.
Advice for Master Entrepreneurs hand made:

If you have not yet registered an organization, then easiest way This can be done using online services that will help you generate all the necessary documents for free: If you already have an organization and you are thinking about how to simplify and automate accounting and reporting, then the following online services will come to the rescue and will completely replace an accountant at your enterprise and will save a lot of money and time. All reporting is generated automatically, signed electronically and sent automatically online. It is ideal for individual entrepreneurs or LLCs on the simplified tax system, UTII, PSN, TS, OSNO.
Everything happens in a few clicks, without queues and stress. Try it and you will be surprised how easy it has become!
Ideas for creating interesting and useful DIY products
Creation of educational toys for children
Beautiful, useful, high-quality toys are one of the indispensable components harmonious development child. Craftswomen, mostly mothers of children, invent and bring to life their original ideas.
These can be rattles made of wood, wicker, leather, knitted threads; crib mobiles; educational mats with rustling, ringing and different-looking parts; bright sorters; soft puzzles; various lacings; massage paths with pockets filled with cereals, sand, oats, peas, and other interesting products.
The process of making toys from wool using the felting method is discussed in the following video:
Soap making at home
Making homemade soap is a very popular hand made trend and a good business. Such a piece of soap is a fragrant gift that you don’t want to use for its intended purpose. As a rule, handmade soap is created in special molds from ready-made soap base with the addition of various components - essential oils, spices, food coloring. The original final product depends on their combination.
Preparation of confectionery products
Making handmade sweets will be relevant for holidays: themed holidays, birthdays, New Years, Valentine's Day, March 8, etc. Such sweets will be a great addition to flowers. As accompanying components to the menu, exclusive chocolate products will be in demand in coffee shops, restaurants, and confectionery stores will also be interested in them. As decorations, they can be used to decorate cakes and pastries. The difficult aspects in this business are the shelf life of such products and the costs of their production. It is advisable for a culinary specialist to have a high-quality portfolio of his work, so that it is easier for clients to navigate and place an order.
Creation of exclusive jewelry
In ordinary jewelry stores It is not always possible to purchase expensive jewelry, while homemade jewelry is not only exclusive, but also quite affordable. Every fashionista has at least one unusual decoration in hand made style.
 Original earrings, necklaces, beads, bracelets can be made of metal, polymer clay, pieces of leather, threads, ribbons, beads, seed beads and other materials. Homemade jewelry is a piece of goods made according to author’s sketches, so it will always be in demand and will provide the craftswoman with a good income.
Making garden sculptures
Decorating your garden with various figures is a fairly ancient tradition that has both an aesthetic and sometimes mystical, protective meaning. Currently, clay figurines for decorating local areas are in very high demand among owners of cottages and private houses. In addition, due to their fragility, such products require periodic replacement. Their production is characterized by low cost and accessible technology. Therefore, this direction can be recommended as a profitable type of small business even for a novice entrepreneur.
The production technology of these sculptures is discussed in the following video:
Weaving furniture for home and office
The main materials for this type of art are willow, rattan, and wicker. These things not only enliven the interior, but also have high performance indicators. Such furniture is very expensive and is very popular among owners of cottages, dachas, and apartments with spacious loggias. The manufacturing technique does not require large expenses and a lot of time, and the output is durable and beautiful products - armchairs, tables, sofas, ottomans, baskets, etc. Masters develop their own weaving techniques, patterns and designs.
Manufacturing of various wood products
This is a great handmade opportunity. Joinery products are always in constant high demand, they are environmentally friendly and useful for household. These can be souvenir figurines, cutting boards, canes, benches, stools, wood carvings, etc.
It is better to start a business with things that are easy to manufacture and gradually improve the technology. Most often this will be work to order, when the appearance of the product, materials and price of the work are discussed in advance. You shouldn't skimp on necessary tools and devices. It is not difficult to beat competitors - similar craftsmen or large woodworking enterprises - if you offer high-quality unique products at a reasonable price.
Crafts from old things and unnecessary trash
 Paradoxically, sometimes old junk lying around the house, worn-out or broken things can become excellent material for new things, the most daring ideas. Connoisseurs of humor and originality are able to pay decent sums for such an exclusive item.
These can be a variety of cutlery products - kitchen and office organizers, stands for mobile phones, clothes hangers, candlesticks. Old disks, floppy disks, records can be turned into various boxes and book covers. A surge protector will make an original candlestick, and sunglasses will make a nice chandelier. Carefully placed wine corks can take the shape of a comfortable chair, and with the help of beer caps it is easy to create an artistic composition. For how many products can boxes and bottles of juice, coffee, and milk be useful? There is no limit to imagination...
Ideas on how to repurpose old things new life, are shown in the following video:
How and where to promote and sell created products
There are many ways, as well as trading and advertising platforms, to promote and sell your handicrafts.
Advertising and selling products on the Internet
One of the best options: absence of necessity in a special room, payment of rent, a huge audience of users, the possibility of prompt business contacts, etc.
 Basic ways:
- selling through a blog, which can be started even on a free server. However, it will take time to first promote the blog, and only then advertise the product. Promotion through your own website can be characterized in a similar way;
- through specialized websites where you can sell similar products both in Russia and abroad;
- on special trading platforms: Avito, Crafts Fair, e-bay, etc. Participation in some projects is not free, but there is a large audience there, which allows you to attract more attention to the product and sell it;
- on social networks (VKontakte, Odnoklassniki, etc.) is a popular method among many needlewomen. It will be convenient to make a separate page and invite as many acquaintances and strangers as possible as friends. An even more effective option is to create thematic group, which will be easily found by all search engines;
- on local Internet forums. An absolute advantage here is the territorial proximity of clients;
- through advertising on other sites, of course, for a fee.
Sales through private stores, markets and boutiques
A traditional sales method that can also be used. We are talking about specialized stores and departments. However, here you will have to pay commissions to sellers.
Videos on the Internet
Advertising through holding master classes, including videos on the Internet. By sharing experiences and teaching students, you can simultaneously advertise and sell a product.
Distribution through friends and acquaintances
The method is suitable for an active and sociable master who has a rich environment. It’s important not to be lazy and get as interested in your products as possible. larger number of people. Thus, a young mother can successfully offer products for children in places where children walk and relax, telling parents about them, and the clothes and accessories that her child wears will become excellent advertising.
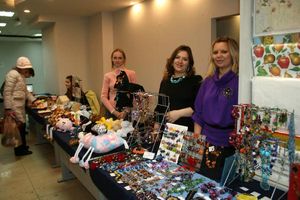
Exhibitions and fairs
Participation in exhibitions and fairs of hand-made products, which are periodically held in cities, usually during holidays. At such events you can meet enough potential clients, because they came here on purpose.
Conclusion
 Whatever method of promoting and selling exclusive products is chosen, a portfolio of work with beautiful and high-quality photographs and attractive business cards with contact information for clients will definitely come in handy.
The desire for individuality is inherent in every person. Many people choose jewelry, accessories, clothing, and interior items that are “not like everyone else,” bright and original. Professional artists and designers, masters of folk crafts, and simply talented amateurs create unique things into which they put a piece of their soul.
At the same time, the process of their creativity lifts the spirits, brings harmony to the world, and fills them with positive energy. In the world of handmade there is philosophical wisdom and mathematical calculation, erudition and inspiration, flights of fancy and strict rules, fashion innovation and the depth of the classics. This amazing art, which has become a reliable business for a huge number of masters, will remain relevant and in demand for a long time.
Creating beauty and comfort in your home is not always a matter of money. Even with a modest budget, you can turn your home into candy if you apply a little imagination, skill and a lot of love. Take a look around your home. What does he need to become more settled and comfortable? We offer several interesting ideas How to make old things beautiful, useful again and use them to add more comfort to your home.
Old pipe - new bed canopy
Even the oldest and seemingly unnecessary things at home contain enormous opportunities for skillful hands. If the interior of your bedroom does not please with creativity or seems too formal, you can make a very elegant canopy for the bed (photo 1) or curved curtain rods for the windows (photo 2) with your own hands.
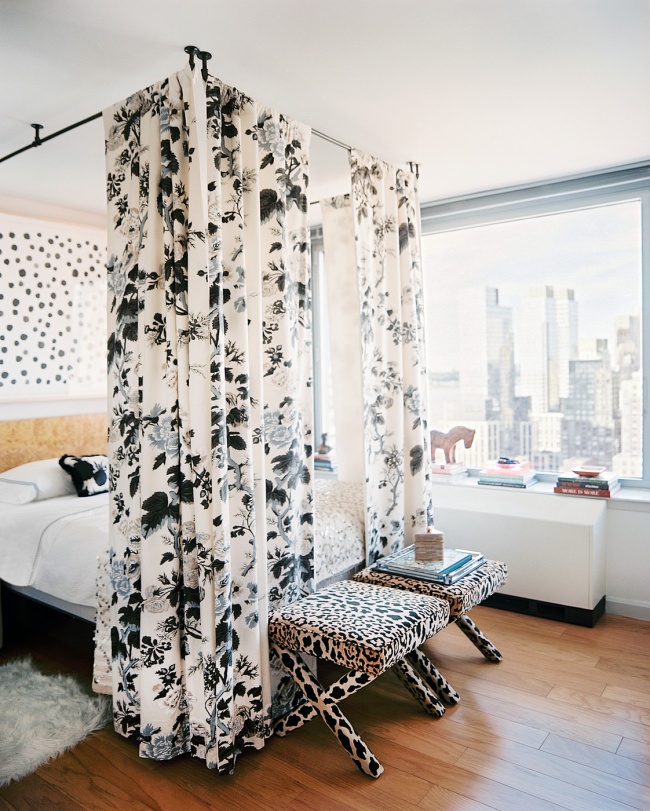 Photo No. 1
1. Rust removal
To do this, you only need the old pipe left after the repair. It doesn’t matter if it has been collecting dust on the balcony for a long time and has even managed to rust a little. You can “etch” rust using white (ordinary table) vinegar. Wet the pipe thoroughly with this product and leave it for several hours.
Vinegar can also be replaced with regular paste. baking soda. Add water drop by drop until a creamy paste forms. Lubricate the pipe with it and leave for an hour and a half, depending on the degree of rustiness of the pipe. At the end of this time, the metal should be thoroughly cleaned using an old toothbrush.
2. Painting the pipe
After the rust has been removed, the old pipe needs to be painted or varnished. Materials for the work can be purchased at a construction and repair supply store. Consult with the seller first which varnish is best suited for metal. If you choose paint, its color should be in harmony with the shade of the furniture or walls in the room.
3. Marking and fastening the cornice
Do not forget that to attach the canopy you will need additional parts, which can be purchased at the same store. After the preparation is completed, markings should be made according to the parameters of the bed. Make a small indentation so that the fabric from the curtain rod does not fall on the bed itself, but next to it.
Then arm yourself with a screwdriver and attach the metal parts of the future canopy to the ceiling. This technique is suitable if the ceilings in the room are made of plasterboard (suspended). Several holes will need to be made in the concrete base using a more powerful “impact” technique.
4. Sewing curtains
No matter how securely you secure the cornice under the future canopy, it should be sewn from light, airy and, of course, light-colored fabric. This will create the impression of weightlessness, filled with light. Such an elegant canopy, made with your own hands from an old pipe, will look especially advantageous in a room where daylight is not too bright.
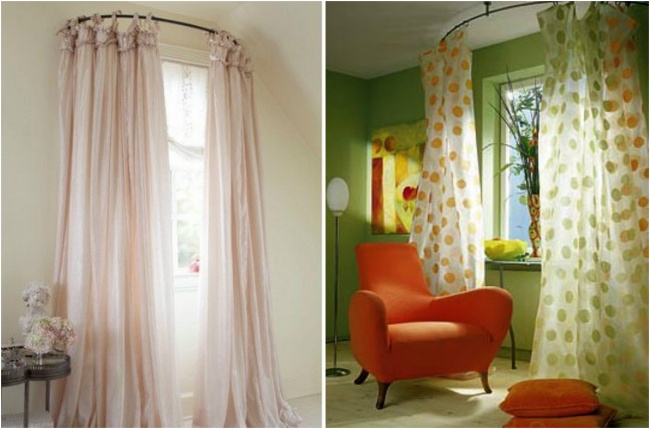 Photo No. 2
For a room whose windows face the sunny side, you can choose a denser fabric. It will protect the bed from the sun's rays and create the necessary comfort and feeling of intimacy.
Pay attention to photos 1 and 2. Since the fastening of the curtain rods does not provide for removable parts, the curtains are attached using Velcro: one strip is sewn to the very edge of the canvas, the second - 10 cm from it. To hang a curtain, just throw the edge of the curtain over the pipe and secure it with Velcro.
Easy and DIY: creative lampshade for an old table lamp
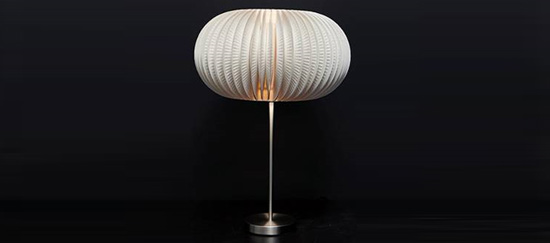
If you are generally satisfied with the lighting at home, but want to refresh the design a little, for example, make a new lampshade for a lamp, you can use the following creative idea. To work you will need:
- 45-50 paper plates, the diameter of which is slightly larger than the height of the lampshade;
- glue gun;
- ruler;
- pencil.
 Photo No. 4
To make it more convenient to work, the old lampshade must be removed from the frame. First we will make a template from one plate. To do this, you need to fold it exactly in half as in photo 4, retreat 0.5 cm from the fold and draw an even line using a ruler. The strip outlined in this way just needs to be cut off. Then it’s easy to make folds on all the other plates by simply applying the template to the arc.
 Photo No. 5
We do not cut the subsequent plates, but simply bend them so that in the middle there is a place for fixing (a strip 1 cm wide). We apply glue to this strip and attach it to the lampshade, as in photo 5. When this simple work is completed, you will have such an unusual and creative lamp (photo 3).
Another creative home lighting option
Smart and thrifty owners never throw away things from which they can make something necessary, useful and interesting for their home. And you don’t have to be a super master for a real masterpiece to come out of your hands. The main thing is to love making something with your own hands and at the same time have a certain amount of imagination.
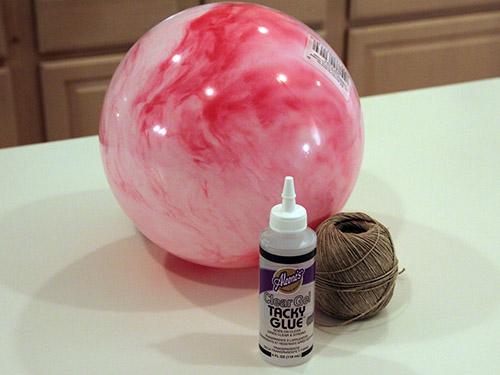
If you are tired of a chandelier you once bought in a store, using a basic set of simple materials you can create a very beautiful thing– a round “openwork” chandelier made of twine. For this you will need:
- an old children's ball made of soft rubber (diameter - about 40 cm);
- a tube of transparent glue;
- marker;
- 20 m of coarse waxed twine;
- a can of golden paint.
The work is carried out in stages, as in the photo:
1. First you need to draw a circle on the ball. It will mark a place that does not need to be covered with twine.
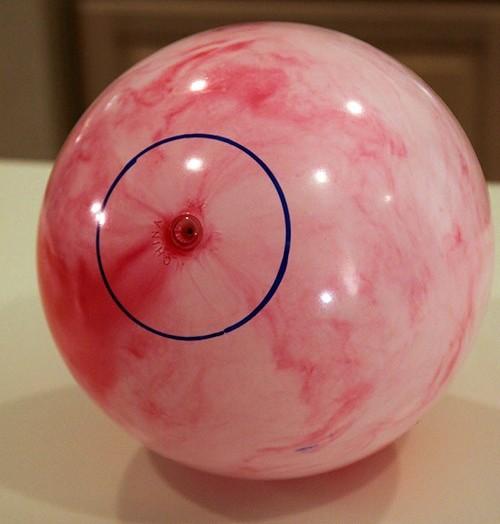
2. Then the ball is braided once with a rope in a random order. The outlined circle must be left free!
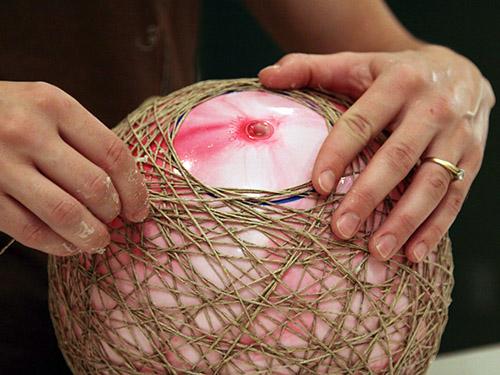
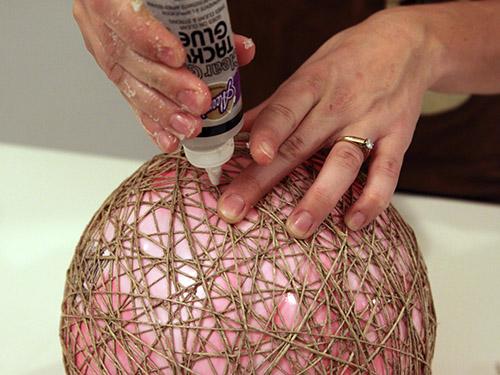
3. Each subsequent layer of twine is glued to the previous one at the joints. This work must be done carefully so that the future homemade lampshade does not stick to the ball.
4. When the work is completed, the product must be left to dry.
5. After the glue has dried, the ball should be pierced and very carefully removed from the lampshade.
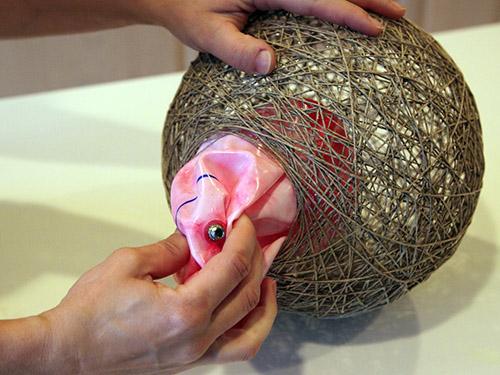
6. At the end of this work, the twine is coated with gold (bronze, silver or colored) spray paint and fastened in place.
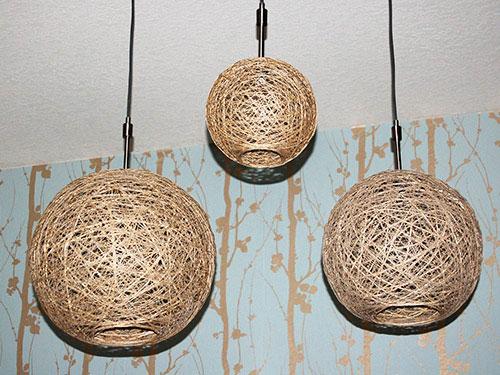
In this simple way, you can make a very beautiful, original, and most importantly, useful thing for your home with your own hands. Believe me, the lighting of your room will look completely different with this chandelier. Penetrating through the gaps between the string, the light will scatter beautifully and draw interesting patterns on the walls.
A “minute” idea: festive lighting for home decor
Preparing for the holidays is always associated with large expenses. There are many things to buy: gifts, food, home decor. Do-it-yourself things will help you save a lot. And this applies not only to sweets, cakes and snacks, but also to home decor.
Now in stores you can find a huge number of bright and interesting things with which you can decorate your home for the occasion. However, all this is very expensive. Purchase of balloons, garlands and decorative candles can seriously drain your wallet.
But is it worth purchasing expensive home decor if you can do a lot of things yourself? For example, update the lighting with a new chandelier, cut out festive garlands from colored paper, or stick magic foil stars on the windows.
Lighting touches another level of genius simple idea. To decorate your home with very colorful gold and silver candles, you don’t have to go broke on buying them. To begin with, “scratch the bins.” Surely there will be a couple of candles on the farm. Clean off the carbon deposits from each so that it is even, and cover the entire length with gold or silver tape (as in the photo below). Such solemn lighting will turn even a modest apartment into a fairy-tale castle.
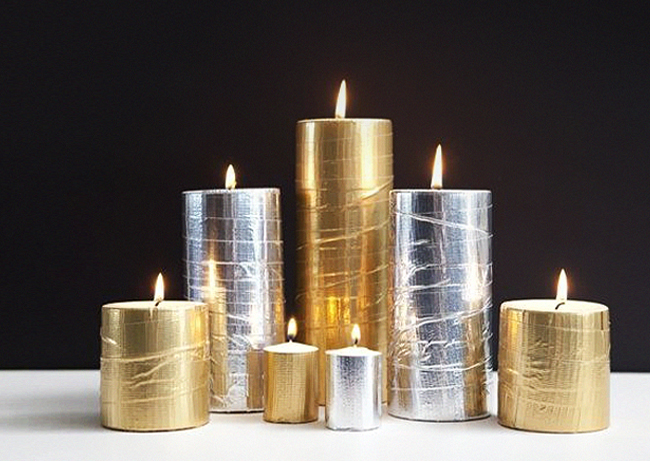
If there is no gold/silver, do not despair. The simplest one will do. After the candle is completely covered with it, the tape should simply be painted with golden spray paint, which probably remained after the production of the “rope” chandelier. This is how, with your own hands, in just a few minutes you can prepare everything for unusual lighting of your apartment for the holidays.
Interesting DIY things from scrap materials
You can create not only accessories for lamps, chandeliers and other lighting with your own hands from old things. Look around you and use your imagination. There are a lot of things in our apartments that we simply don’t notice. Meanwhile, they can serve well.

Take at least the bushings from toilet paper. Millions of these pieces of cardboard end up in the trash bin over the course of our lives. But even they can be used if you try. For example, on New Year's party from cardboard sleeve you can make a very stylish crown for a little princess (see photo).

You can make a spectacular flower vase from a simple bottle if you simply paint its bottom with bright spray paint as in the photo.

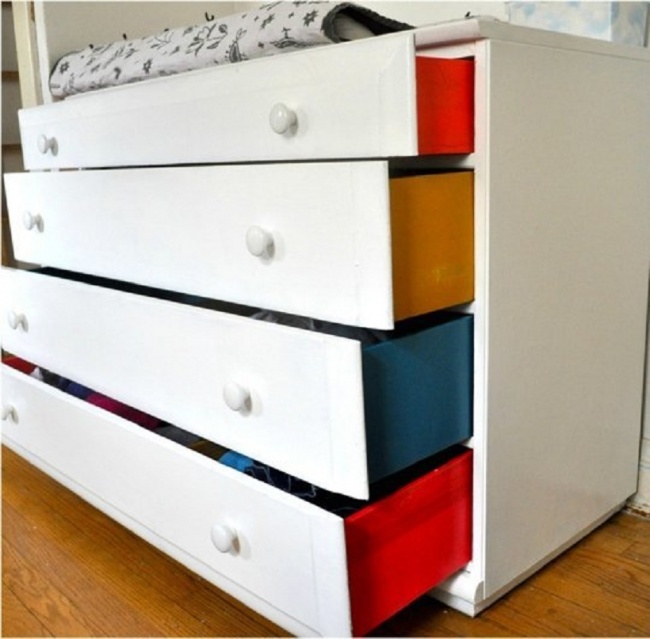
And even if you just paint the side walls of the dresser drawers different colors, you will get a very impressive and fun thing that will delight your child.
Create useful and bright things from the most simple materials, which lie idle on the balcony or gather dust on the mezzanine, is very simple. A little imagination, effort, our little tips - and your home will shine with new colors. Good mood You're guaranteed!


