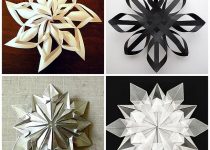
Herringbone
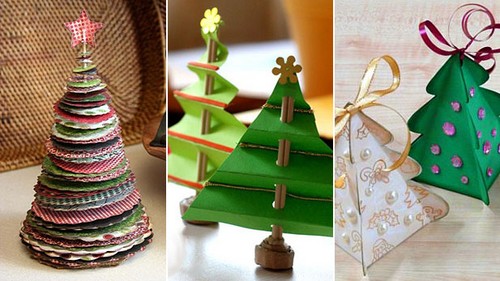
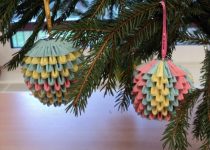
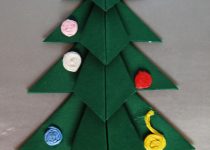
A voluminous Christmas tree pendant for a real Christmas tree can be made in several ways, and the simplest of them is to glue two bent cardboards in the shape of the actual Christmas tree. Take colored cardboard, glue, scissors, an awl, thread (to hang later) and a pencil. Draw a Christmas tree - in the most primitive, childish form, with funny splayed branches - “paws”, but always symmetrical, and cut it out, and then trace it on another sheet of cardboard to get exactly the same blank.
Do the same twice more - you will get 4 Christmas trees. Bend all the blanks along the line of vertical symmetry, and then glue them together internal parts with each other. You will get a large Christmas tree on each side, assembled from them and voluminous, with four sides. You can make exactly the same toy from three blanks - then the Christmas tree will have three sides. Decorate it with glitter or metallic markers, punch a hole for the thread at the top, thread the thread and hang it on a real tree or houseplant.
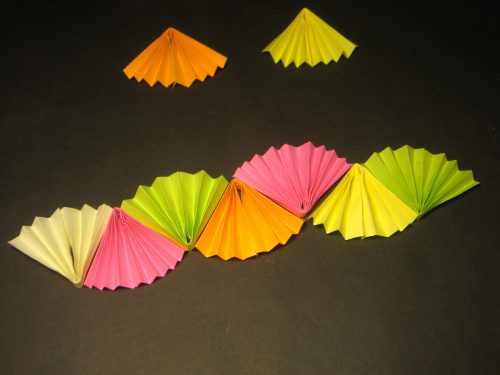
Flashlight
An ancient toy, the manufacturing principle of which has not changed for at least a century. Take two rectangles of brightly colored paper, one wider than the other, and the wider one, fold lengthwise and make cuts every 1 cm, 1.5 cm not reaching the edge of the sheet. Cut out the outermost of the resulting “ribbons” completely, leaving two small “tails” of paper sticking out from the side.
Then unfold the rectangle and straighten, bending it outward as much as possible, all the other ribbons. Fold the second, smaller sheet into a tube and glue it, and glue the first rectangle on top, spreading glue only on the top and bottom, solid strips of paper. Tie a thread and the flashlight is ready!
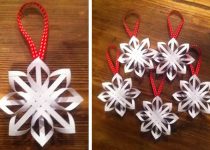
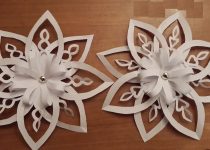
Snowflakes
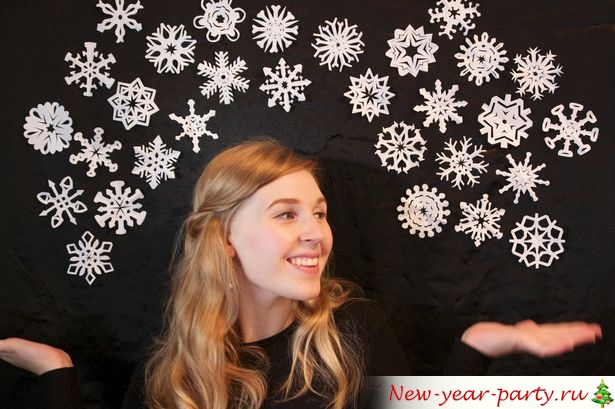
Simple paper snowflakes To do this, you need to take a square piece of paper, fold it in four, and use scissors along the fold to cut out several abstract holes (not forgetting to round or, if desired, jagged the outer corner so that the snowflake is not square). It looks more complicated if you fold the paper five, six, seven times. It's better to take colored paper- for example, silver. Most often they are attached to windows, but sometimes they are hung on the ceiling or cabinets - so that the snowflake spins in the air at the slightest breath and creates a festive atmosphere.
You can complicate this craft a little more: dress a cardboard silhouette of a dancer in a snowflake, like a tutu, cut out according to a template or inspiration - if you want to decorate the room more elegantly. Most likely, you have seen snowflakes on glass and mirrors in stores, as if stenciled with white spray paint. You can make these at home, using a paper stencil, and you don’t have to take paint, which is very difficult to wipe off the glass - regular paint will do. toothpaste if she is white.
Attach a snowflake cut out of paper in the usual way to the glass with adhesive tape, put a little paste on a brush or toothbrush, bring it closer to the mirror, and then run your finger forcefully along the bristles - the paste will splash forward onto the mirror and the snowflake stencil. Do this several times, and then peel off the stencil. Now you have an elegant snowflake-shaped frost on your mirror or window, which can also be easily washed off with soap and water!
Unusual DIY crafts for the New Year made from paper and cardboard
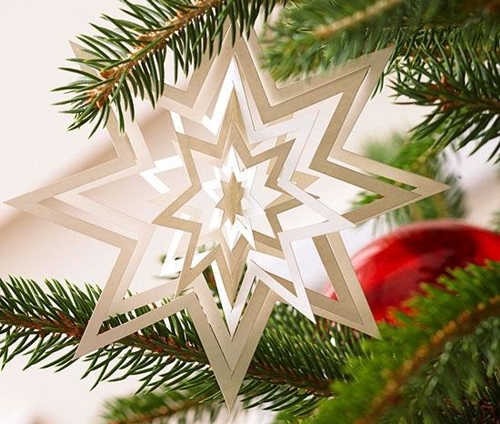
Crafts on New Year: snowflake on the Christmas tree
Christmas trees - DIY crafts from colored paper and cardboard for 1st grade
Lanterns, garlands, snowflakes - paper crafts known from childhood - will never cease to be interesting and delight children during the holiday season. Together with your children, you can plunge into the magical atmosphere of the holiday and take a short break from adult affairs.
Paper is the most affordable and easy-to-use material. We have prepared both traditional crafts and unusual ideas, which will allow you to look at creativity in a new way!
For such a star and Christmas tree it is best suited double sided paper for scrapbooking: it is dense and beautiful. Kids will really enjoy making crafts with it.
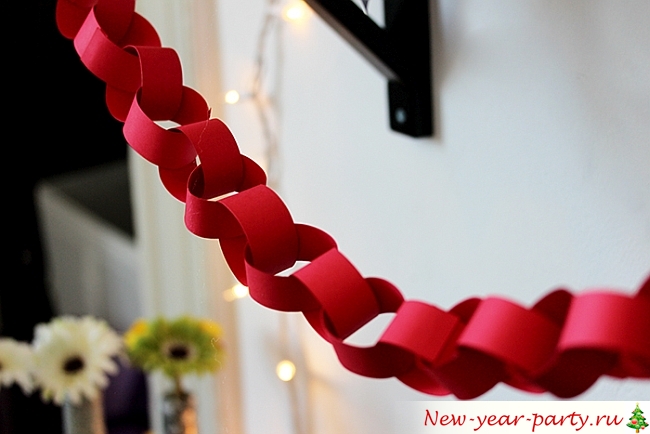
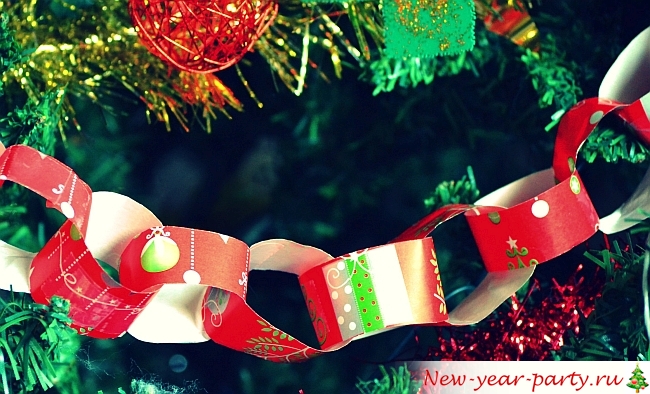
A garland made of strips of paper is a well-forgotten old thing. The more colorful the stripes, the better! This craft is suitable for diligent children; in addition, making it develops other skills. For example, ask your child to continue the sequence of colors on a garland - two blue, two red, one yellow...
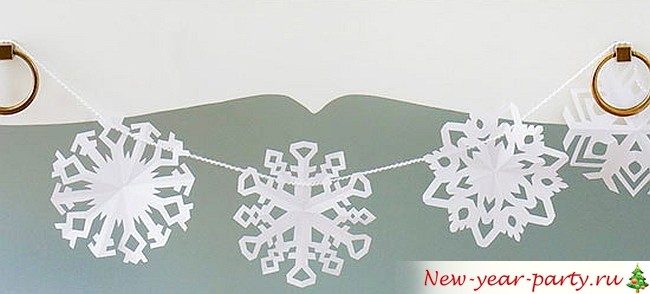
Not a single New Year is complete without snowflakes; you don’t even need colored paper, plain white paper is enough. We have prepared a huge number of cutting templates for you.
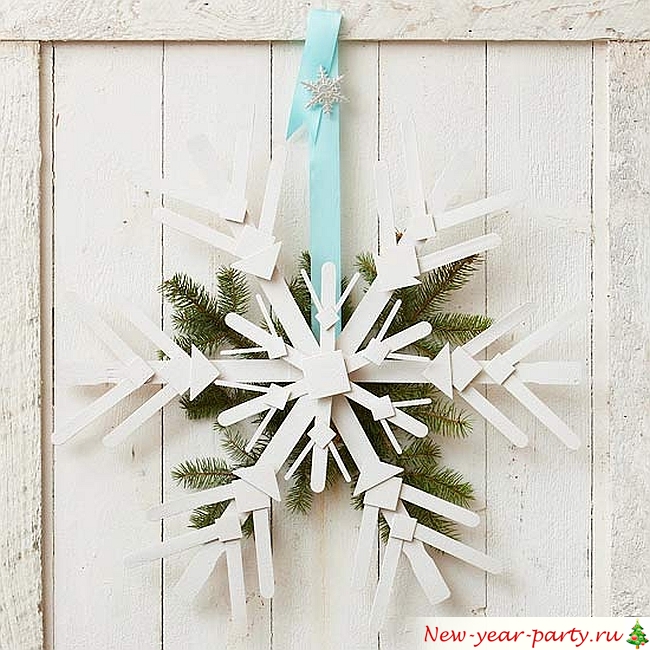
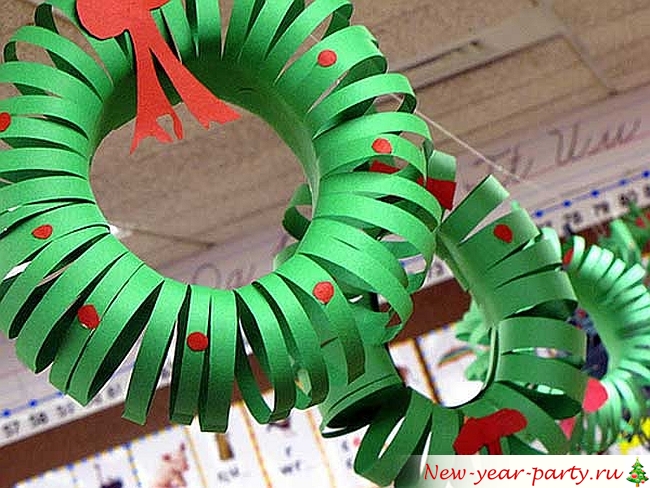
But big snowflake made from strips of paper, you can decorate a door with it or hang it on the wall.
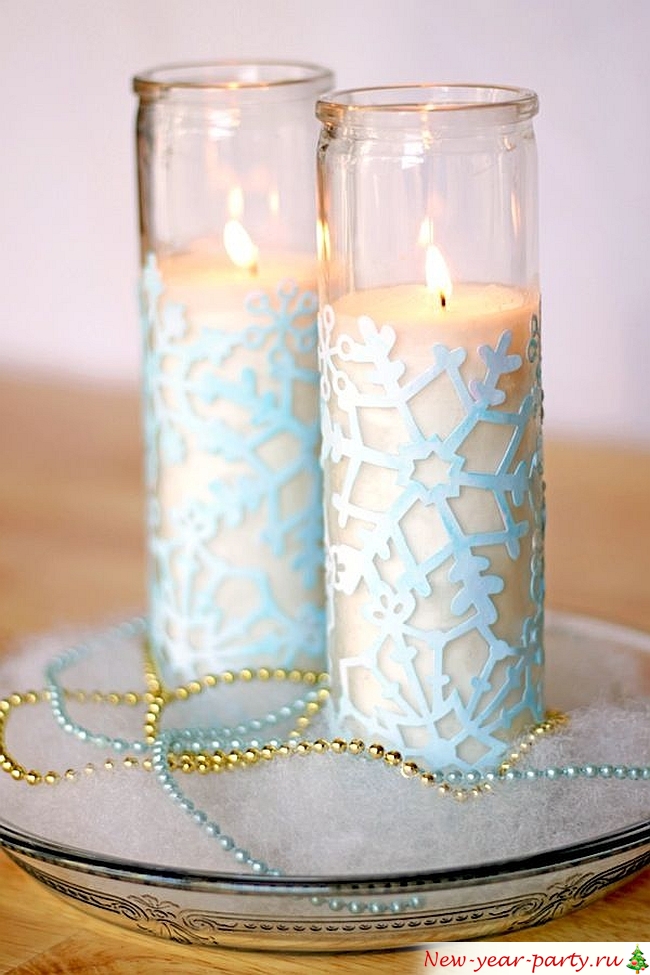
Unusual patterns of snowflakes will be an excellent decoration for a New Year's candlestick.
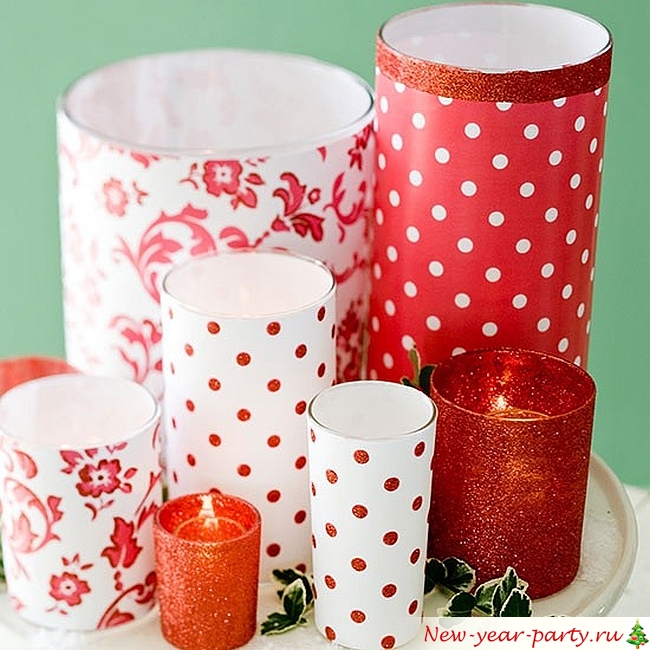
Very young children can simply wrap the glasses in colored paper and then watch the color of the flame change (under adult supervision, of course).
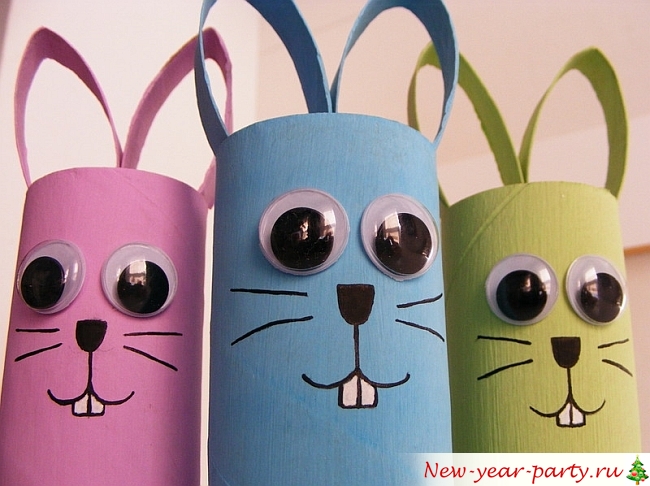
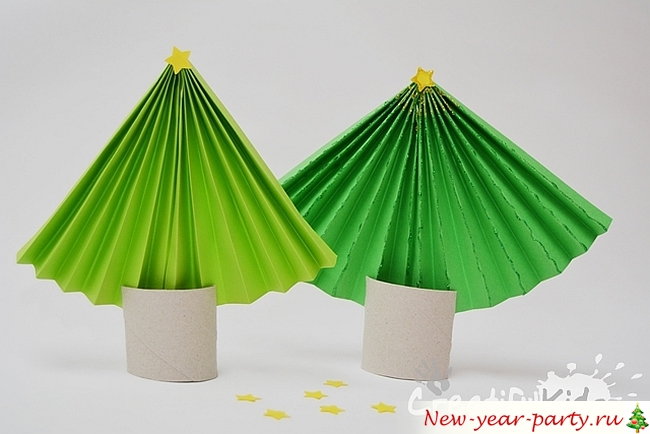
New Year's crafts can be made not only from ordinary paper, but also from toilet paper. That is, from a tube from her :) Paint the tubes in different colors, draw funny faces, glue on eyes.
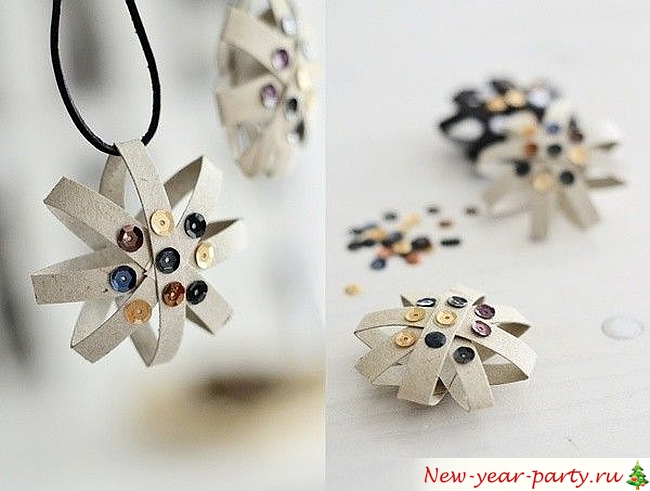
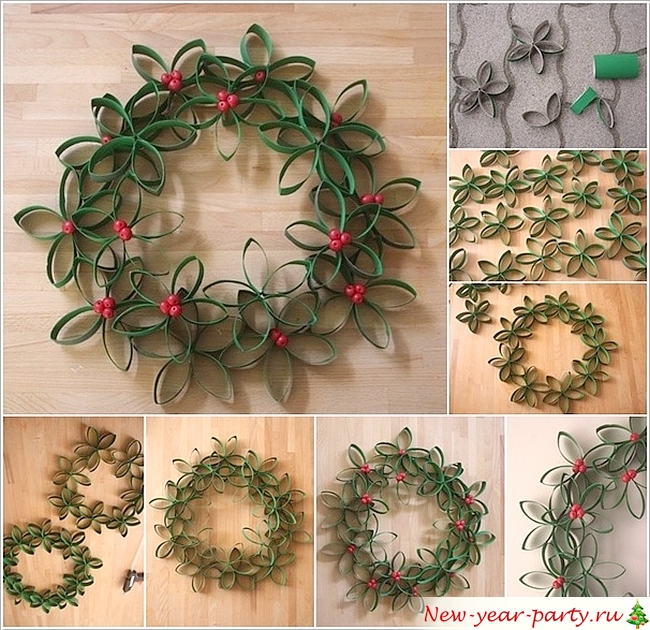
The vintage star and wreath on the door are made from the same material.
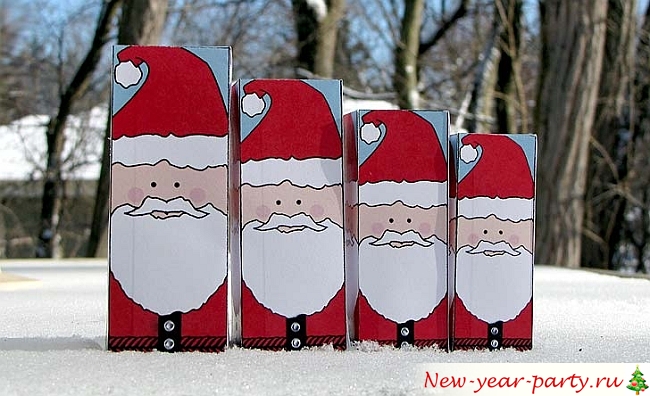
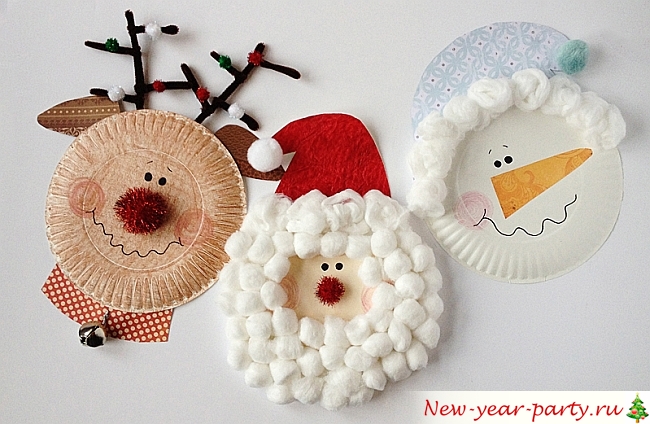
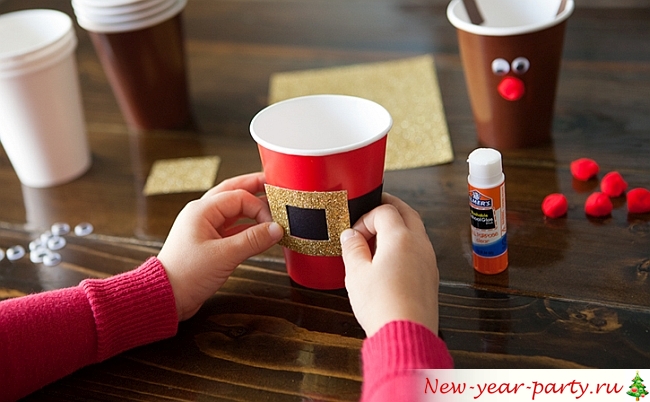
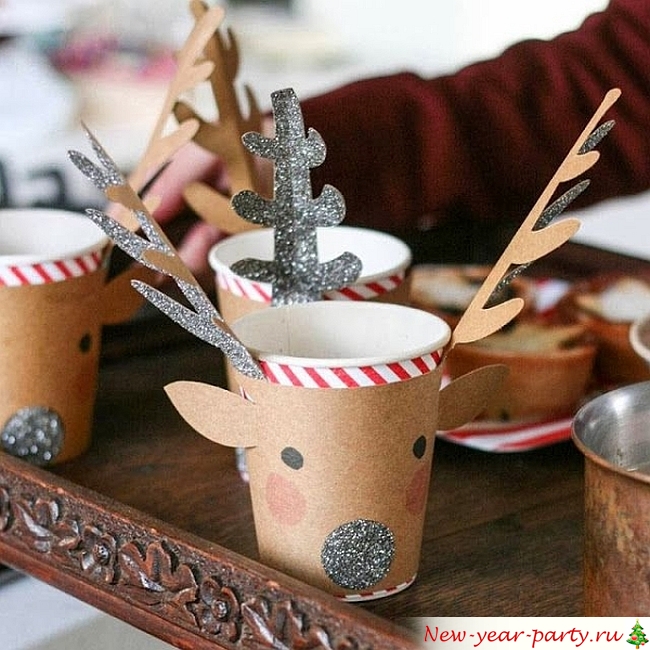
Not only toilet paper can help create New Year's decor, you can use juice bags, paper plates, cups.
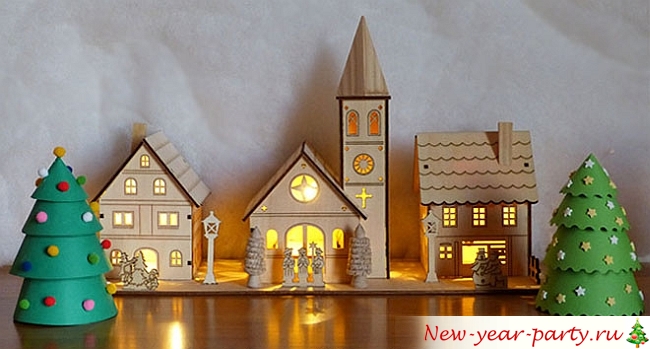
A beautiful house made of cardboard or paper is a creative option for older children. By following the link, you can download a large number of templates and diagrams.
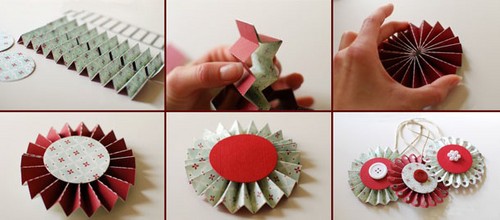
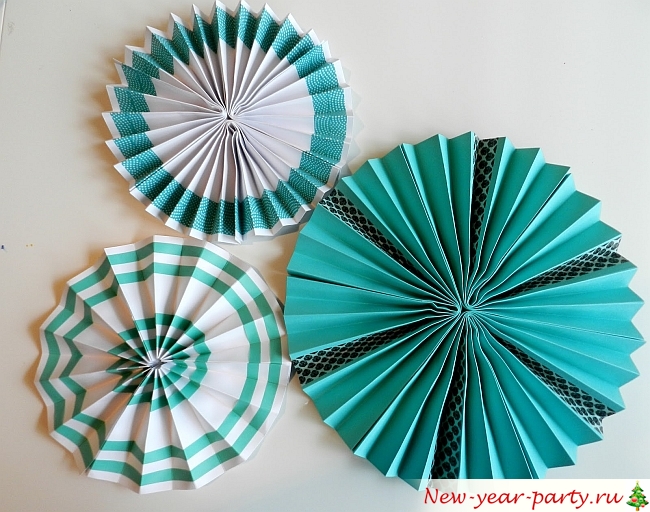
Crafts using the accordion technique provide great scope for creativity and imagination. Look what you can create! 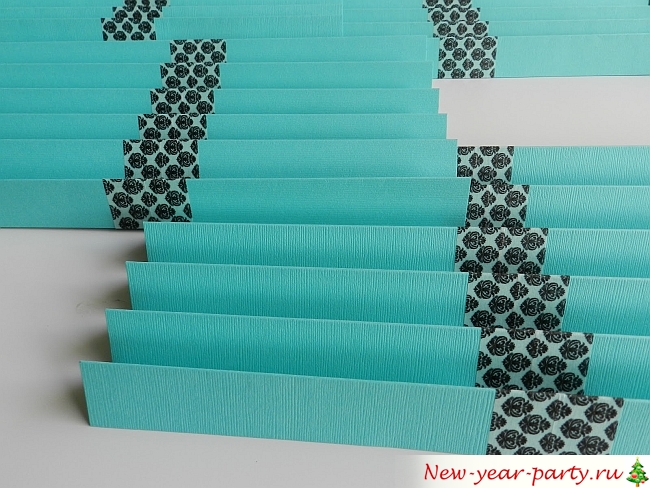
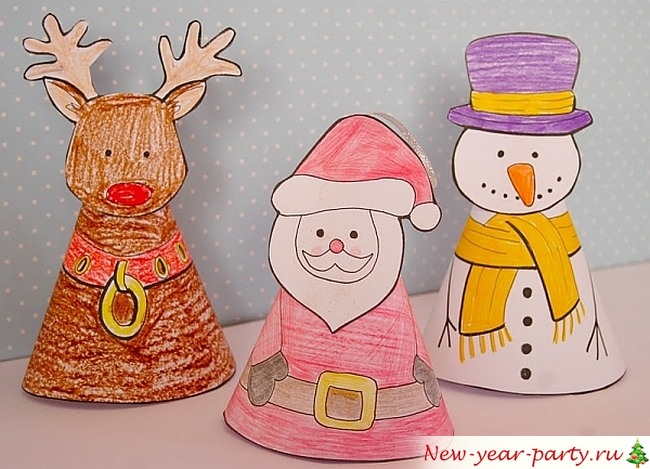
Very little craftsmen can be given the opportunity to paint figures of snowmen, grandfathers, frosts or snow maidens. And then cut them out. The result will be visible immediately, because kids don’t like to wait so much!
We hope these photo ideas help you in your family preparations for the holidays. Happy creativity and happy new year!

Decorating your home for the New Year is a wonderful tradition that has come to us from time immemorial. We transform houses and apartments in different ways, but in general, everything is similar: the same rain showers and garlands from specialized stores. Have you ever wanted to make your rooms for the New Year holidays different from your friends’ homes? Everything is not so complicated, and is accessible to literally everyone. There are many options for beautiful products made independently at home, which are quite capable of competing with the most bright toys from the supermarket. So, our article will provide you with 49 photos of ideas for easy origami crafts for the New Year 2018 with your own hands, which will enchant you and your guests with their unusualness and subtlety of execution. Don’t worry, our master classes will explain to you in detail how to work in this direction. Even if you have never encountered such work, you will learn without any problems and this activity will become your way of life.
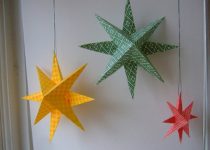
Christmas tree toy “Star”
For New Year 2018, the main decoration of the house is, of course, the Christmas tree. Therefore, all the attention of your visiting guests will be focused on it. Considering this important point, it’s worth putting some effort into her festive outfit. Beautiful colorful toys can, of course, be purchased at the nearest store, which, on the eve of New Year's holidays will simply be overflowing with similar products. But it’s still better to create the image of a New Year tree using original toys, made with your own hands from any materials you like, especially paper. It is so malleable that people have learned to make wonderful origami crafts from it, even for New Year's Eve. Let's create something interesting and simple, for example, a star for a Christmas tree, which is perfect for beginners.
To work you will need:
- colored thick paper or cardboard A4 format - 8 sheets;
- a simple pencil;
- scissors;
- decorative thread.
Work progress:
- Take thick colored paper or cardboard and fold it in half. We have a rectangle.
- We bend the corner of its small left side, pulling it towards the center of the folded paper, then you need to straighten it. Now big side We pull our rectangle to its second parallel side. We straightened out the sheet of paper again and thus we got the intersection of the lines, which will be our center of the star. Let's mark it with a simple pencil.
- Next, take the corner of its right side and pull it to our marked center. Iron it thoroughly.
- We attach the right corner, which we connected to the center, to its opposite side and fix it with a finger, pressing the resulting line. We have a kind of quadrangle.
- We connect the right side of the paper, on which we marked the center, to the resulting quadrangle, tightly pressing the straight connecting lines to each other. We also got a triangle this way.
- Two geometric shapes fold them in half along the seam line, bending them inside out and carefully ironing all sides with your finger.
- Then we take scissors and trim the excess edge of the figure so that we get a small triangle.
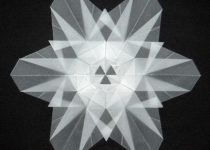
- After this, we open our paper product, completely straightening it. As a result, we have formed a five-pointed structure, on which we draw all the fold lines with a simple pencil. Now it will be easier for us to navigate and assemble this New Year's craft with your own hands.
- When you finish using the origami technique, don’t forget to attach a shiny thread to our five-pointed star, as this is a Christmas tree decoration.
This is how, with hard work, you can create a wonderful decoration for your Christmas tree for the New Year 2018. To help you quickly understand this sensitive matter, we provide our training video.
Master class on making five-pointed star using origami technique
Browse our selection of photo ideas on this topic to make a lot of charming New Year's things.


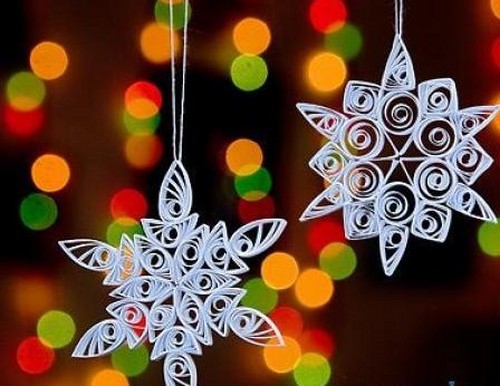
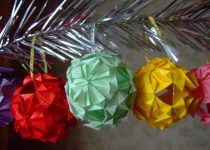
Snowflake made from origami modules
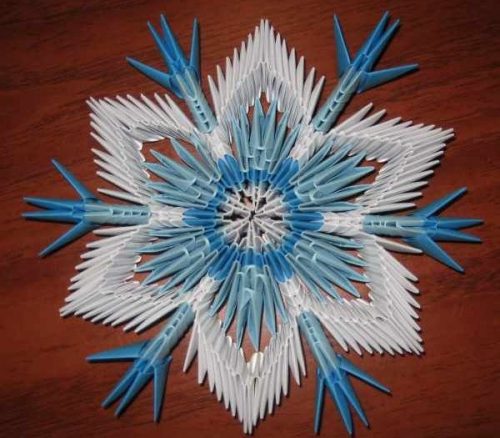
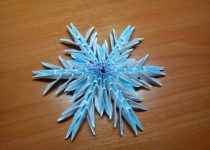
Very beautiful craft For the New Year 2018 there will certainly be a snowflake created from origami modules. Naturally, making such a miracle with your own hands will require a significant amount of time, and especially effort. But this should not scare you, because the end result is a fragile and elegant product made from ordinary paper. Let's see how all this is done at home.
To work you will need:
- paper white, A4 format - 5 sheets;
- blue paper, A4 format - 4 sheets;
- pencil;
- ruler;
- scissors;
- glue.
Work progress:
To create this craft, you need to create 150 white and 120 blue modules.
- Let's start making origami modules with our own hands. To do this, take all the A4 sheets and divide them into 32 rectangular parts, then cut them out.
- Next, take one resulting rectangle and fold it in half horizontally, and then vertically, marking the center line.
- We bend the upper right and left corners to the center, after which we turn the workpiece over and bend the lower right and left corners.
- We lift the lower part, fold it in half and get the first module. We manufacture subsequent modules in the same way.
- Having completed the work of creating the modules, we immediately begin assembling them. In order to securely fix all the parts of our product, we use glue. We combine 2 rows of 6 white elements into a ring, inserting them into each other.
- Be careful, as the number of modules is doubled on the third row. This is achieved by dressing two by one, resulting in 12 modules.
- To make our decoration look more elegant for the New Year 2018, we decorate it with blue modules, starting to introduce them from the fourth row. It is identical to the previous one, so at this stage there are also 12 modules.
- In the next row we must double the number of elements in the row. This means that in the fifth row there will be 24 modules. We do the next sixth row in exactly the same way as the fifth.
- So we have done part of the work. Now we proceed to the seventh row, in which we collect 24 modules, alternating the combination in a circle: 3 blue, 1 white module. 6 sharp blue corners appear.
- Next we work only with blue rays. To each of the three blue modules we add two more, and then one part. A narrowing occurs.
- Now we are making white arches, which consist of 17 modules. In the seventh row, white modules remained - this is the basis of the arches. One module is taken, another pocket is put on it, thus framing the blue beam. It remains to collect 5 more white arches.
- And the last stage of assembling a snowflake with your own hands using technology modular origami- this is the composition of small rays. They are made of 5 modules inserted like a column and three modules on top that make the tips fluffy. We attach them to our craft. There you go! This will definitely be the best thing for everyone. holiday decoration, especially, it will seem interesting to your children.
Check out our interesting selection of photo ideas to enrich your imagination and thereby expand your capabilities.


For those people who are doing this business for the first time, it will not seem so simple, but after watching our video, you will quickly learn how to make such beauty.
Master class on making snowflakes from origami modules
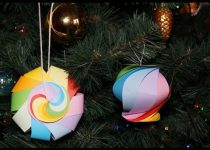
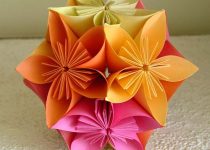
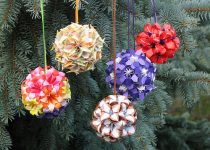
Christmas tree toy “Ball”
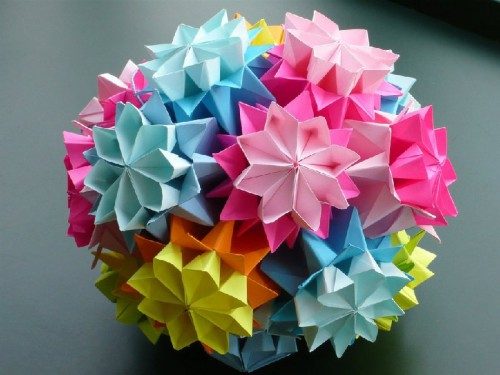
Even simple products made from colored paper will help to perfectly decorate a room for any holiday, especially winter ones. So create origami crafts for the New Year 2018 with your own hands in a rather interesting form, using a simple master class for this. You'll see, you'll get a wonderful Christmas tree toy in the form of a ball consisting of stars.
To do this you will need:
- Colored paper;
- Scissors;
- Glue;
- Rope.
Work progress:
- You need to make your own envelopes from small squares of colored paper.
- Then you need to make triangles from the resulting envelopes, which are then folded in half.
- To make one star you will need 14 parts. They need to be collected in a circle and glued together.
- You should thread a string onto one of the parts of our craft. So the wonderful one is ready Christmas tree decoration for the New Year 2018, made using the origami technique. Your family will definitely like it, and for children it will be an incentive to create something of their own, but less complicated.
Look through our selection of photo ideas and you can create excellent Christmas tree decorations for the New Year holidays.
To understand this in more detail creative work, you should check out our video tutorial.
Master class on making New Year's ball to the Christmas tree
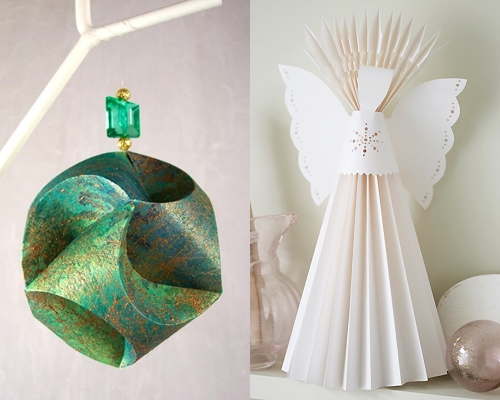
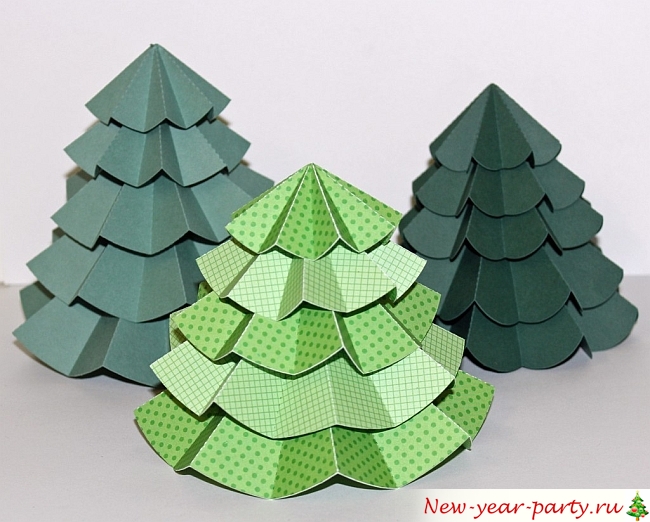
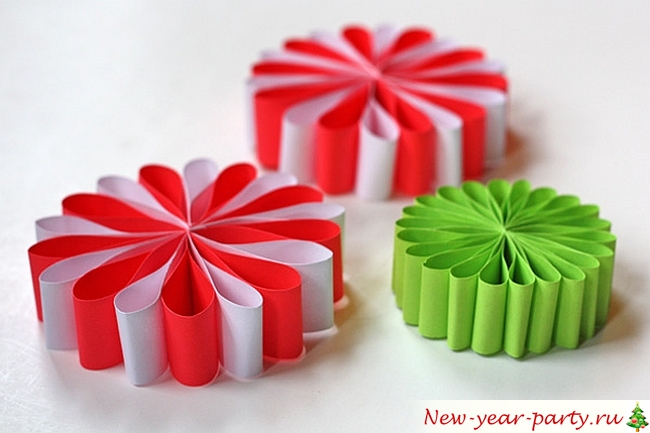
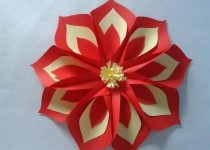
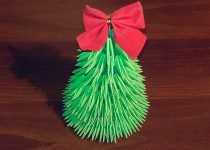
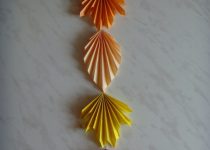
Herringbone
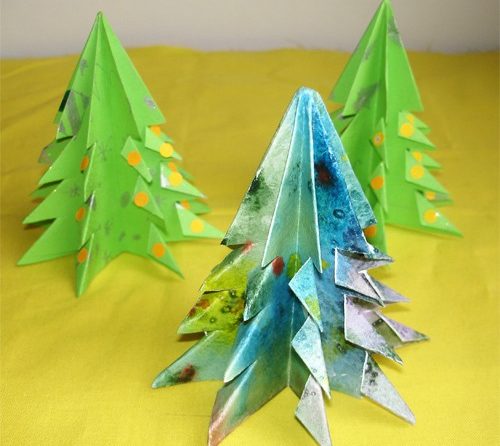
A craft in the form of a three-dimensional Christmas tree made of colored paper for the New Year 2018 can turn out very well if you use the origami technique. This handmade paper product is perfect as a decoration for the Christmas tree or just for indoors.
To do this you will need:
- Green and red colored paper;
- Scissors;
- Glue.
Work progress:
- On colored green paper you need to draw a Christmas tree, then cut out five such details.
- Then they should be carefully glued together, after which you will get a voluminous craft.
- To decorate our Christmas tree, you will need to cut a star out of paper for its top. Ready!
Thanks to the origami technique, we have created an excellent home decoration made from colored paper, made with our own hands for the New Year 2018. We recommend our training video, after watching which you will become familiar with all the intricacies of this work step by step.
Master class on making a Christmas tree from colored paper
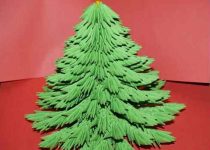
There are a huge number of Christmas trees made using this method. They are so diverse and quite original that you can’t take your eyes off such excellent Christmas tree decoration. Our photo ideas will prove this to you.
![]()


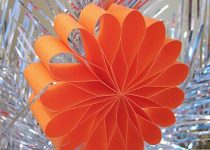
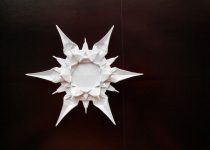
Volumetric snowflakes
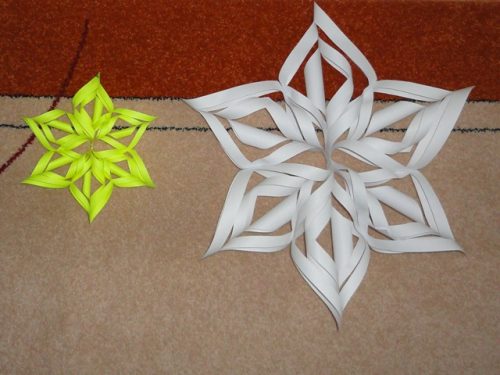
It’s great to decorate your interior using origami crafts for the New Year 2018 with your own hands, thus making a three-dimensional snowflake from colored paper. This is a fairly traditional method that is used in probably every home. Given christmas decoration it is done very easily and quickly, you just need to choose the material at hand in the color and texture you like, because your festive mood and a pleasant atmosphere in the house depend on this, which is very important for your children.
To do this you will need:
- Colored paper;
- Scissors;
- Glue;
- Thread.
Work progress:
- To get a three-dimensional snowflake created using the origami technique, you need to create two parts of this craft and connect them together. First you need to cut out a small square and fold it in half, and then do the same.
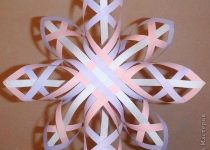
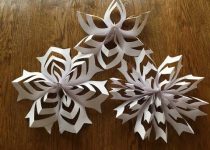
- To make the snowflake round, the edges of the part need to be rounded. And all over the surface of the snowflake you need to cut out various patterns. When it is deployed, it will turn out beautiful drawing, made with your own hands. And after the two parts are connected, an unusual three-dimensional snowflake will come out. You can hang it on the Christmas tree for the New Year 2018, but make not just one copy, but several, and, preferably, different forms and flowers. This way you will achieve liveliness and a dazzling effect. Of course, snowflakes can be created in other ways, but this craft instruction is considered the simplest and most accessible, especially for beginners. Watch our video tutorial to understand this work.
Master class on making three-dimensional snowflakes
Don't forget to look through our photo ideas that will amaze you with their unusualness.

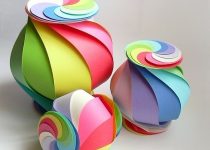
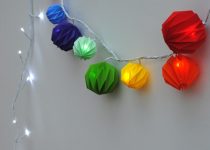
Christmas garland made of colored paper
You can quite original and beautifully transform your home for the New Year 2018 with a garland consisting of three-dimensional figures, made with your own hands from ordinary paper of any color. This is produced interesting craft Using the origami technique is quite easy. You just need to prepare the necessary materials at hand, such as:
- colored paper;
- scissors;
- glue;
- stapler;
- threads
Work progress:
- First you need to make the base of the garland. To do this, strips 5 cm long and 1 cm wide should be cut out of colored paper. Then these parts should be fastened into a ring, connecting to each other.
- After this, we need to start working on creating decorations for our paper crafts. To do this, you need to cut the same strips as for the garland. For one toy you need to use 2 parts. They need to be folded like an accordion and fastened in the middle with a stapler. Then the resulting decoration must be unfolded, and the disconnected edges must also be connected using a stapler. It is these decorative elements that are added to the garland. If you hang such a product around the room for the New Year 2018, it will look great. And given the fact that this work was done with one’s own hands, and even using the origami technique, which, at first glance, seems difficult and inaccessible to many due to the abundance of small details in it, which require maximum perseverance and patience to create, it becomes more value in the eyes of your environment.
Photo ideas on how to decorate your home in an original way for the New Year holidays.


To avoid difficulties in this handicraft, you need to familiarize yourself with our video lesson, which will step by step tell and show you how to work in this type of art.


