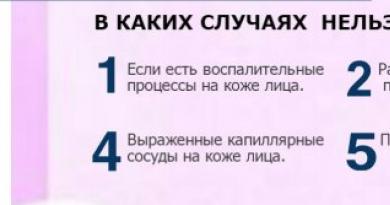
Learning to sew on a sewing machine is not easy. You need to study all the capabilities of a sewing machine, be able to use special feet and devices, skillfully make buttonholes on a machine and other operations. It is also important to be able to adjust the sewing machine so that there are no skipped stitches in the line and the thread does not break.
It is quite difficult to sew knitted fabrics. Some older sewing machines, such as Podolsk and Chaika, often skip stitches and loops appear in the bottom line. To “cope” with such fabrics, you need to use the tips from the article Sewing knitwear without skipping or looping.
In addition to the simple stitching of the edges of parts, there are a number of more complex operations, which require not only knowledge, but also experience. For example, it is quite difficult for an inexperienced seamstress to finish stitching the corner of a collar, replacing a zipper on a leather jacket, etc. Even to hem jeans with a sewing machine, you first need to learn how to do it correctly.
Adjust your sewing machine before sewing

Before sewing on sewing machine, it is necessary to adjust the stitching, i.e. the tension of the upper and lower threads. The thread in the stitch should not loop, the interlacing of threads or otherwise the stitch knot should be in the fabric and not on the surface.
The seam should not be pulled together after joining on the machine. It is easy to check the correct thread tension as follows. Take a piece of fabric that will be worked with in the future, fold it in half and grind it almost along the fold (at a distance of 0.1-0.2 cm). Stretch the resulting seam, if it breaks, see which thread has broken - the top or bottom, and loosen the tension of one of them. Check the stitching and adjust until the stitching stops tearing.
If the tension of the upper or lower thread is insufficient, a defect sometimes occurs - a “grin” of the seam. When ironing, the parts of the product move apart and threads become visible in the seam. To eliminate this defect, you need to increase the tension of the shuttle thread and adjust the tension of the upper thread.
1. Before how to sew on a machine Prepare the cutting details first. Check the accuracy of the alignment of the parts being sewn, be sure to sweep the seam or pin it with tailor’s pins.
22. Elastic seams on knitwear and other stretchable materials are best done with a zigzag stitch 0.1-0.2 cm wide, stitch length 0.2-0.3 cm.
23. If the seam on an elastic fabric should not stretch, you can put a non-stretch braid under it.
24. Before sewing velvet parts on a sewing machine, the sections are basted with two parallel lines, and a stitching line is placed between them. Sew parts made of corduroy and velvet with low thread tension.
25. Seams that carry a large load (shoulder seams, sleeve stitchings, bodice-skirt connections, trouser seat seams, etc.) are made with two lines, and in some cases a braid or fabric edge is placed in the seam.
26. Finishing stitches are laid on the front side of the product, but in cases where Lurex threads or thick iris threads are used, they are tucked into the shuttle and the stitching is done from the reverse side.
27. In products made of knitwear and fabrics with metallized threads, when sewing, the threads are often pulled out and puffs appear. To avoid this, you need to use only new, sharp needles and silk or polyester threads. In addition, you can place a strip of paper or tracing paper under the stitching seam.

28. Strips of paper can be laid in cases where the machine skips stitches on some fabrics (very dense synthetic knits, silks, natural leather, suede). You can try replacing the needle with a thicker one without changing the thread. But it is better to install in advance a special needle for leather, knitwear or other fabrics that are difficult to sew on a sewing machine.
See Sewing Machine Needles.
29. In all types of garments, collars, cuffs, sides, leaves, pocket flaps are made with padding. The padding material depends on the fabric of the upper. For a coat, this can be a trim, thick non-woven fabric, or calico with an adhesive coating. For costume and dress fabrics, thin interlining, calico and madapolam are used. For very thin silk and cotton fabrics, you should use transparent nylon, cambric or very thin interlining.
30. Do not make stitching and finishing stitches too small; the stitch length should not be less than 1-1.5 mm. The standard needle pitch for forming a straight stitch is usually within 3-3.5mm.
Many women want to learn how to sew or practice other type of needlework. This requires certain knowledge, attention and a desire to learn. Cutting and sewing is a difficult and painstaking form of creativity. Much will depend on what goals you set for yourself: to sew for yourself and your family or to master sewing at a professional level. Where to start sewing lessons for beginners and how to acquire skills for a beginner in this business?
In any business, it is impossible for a beginner to do without the first lessons. For those who want to learn how to sew independently and correctly at home, you need to separate two concepts:
- learn to sew and cut;
- know how to sew on a sewing machine.
Almost everyone can master a sewing machine at home, if they have one desire to master technology basic sewing skills. In this matter, systematic repetition is important in order to get better at it.
Sewing things is another matter and for this you need to master the basics of cutting and sewing. At the very beginning, you should determine for yourself the direction in needlework:
- clothing creation;
- sewing soft toys for children or bags;
- working with home textiles.
Any of them is associated with a certain sewing technique, purchasing special sets of tools, mastering sewing techniques. The modification of the sewing machine will also depend on this.
To master any trends in sewing art To begin with, you will need a minimum set of devices, without which a beginner will not be able to start sewing:
- tailor's scissors capable of cutting efficiently different types fabrics;
- an accessory for correcting incorrect seams, it will rip the fabric without damaging the products;
- measuring tape;
- chalk for patterns or soap;
- pins and thread.
It is also necessary to acquire a sewing machine and begin to master the device and how to work with it.
 Learning to sew on a sewing machine is easy. The lessons will not take much time and effort. Experienced craftsmen advise taking paper, not fabric, for practice. It is more rigid and will not drape in the stitching. Best option- these are ordinary sheets of paper from a notebook. You won't need threads for the first lesson. The paper should be placed under the folder and you can start scribbling. You need to learn how to make straight seams, especially with turns. The needles in the machine immediately become unusable after using paper and are no longer suitable for further work. The needle should not be thrown away, as it can be used to work with flaps.
To make it easier to master the seam technique, no need to press on the pedal of the machine. This will make it easier to control the stitch and evenness. You need to learn how to adjust the device. Both threads - upper and lower should be tensioned equally, evenly and tightly. This will allow them not to tear, but to lie evenly in the stitching, without pulling the fabric together. If the threads are loosely tensioned, they will get tangled, tear, and the seam will end up with an obvious defect.
It is necessary to achieve straight, even seams that follow the markings. Bartacks should be made after each seam to prevent them from coming apart. Training should begin with mastering simple seams and then move on to more advanced ones. complex finishing seams.
Before using the machine, you should carefully read the instructions for using it. You need to understand the settings and be able to thread a needle. As a last resort, you can take a free online course with videos and photos, where the master will tell you step by step all the basics and secrets for beginners with a description of hand and sewing.
 Experienced seamstresses advise beginners sewing start with sewing textiles:
- pillowcases:
- bed for a child;
- apron;
- potholders.
If such items are not needed in everyday life, then you can try sewing a straight-cut skirt. Nowadays they sell magazines with specially designed models for beginners. Basically, they offer basic things that beginner seamstresses can do. Such products can be sewn in 1 evening. The cut pieces are pinned together and then hand stitched using a basting stitch. If everything fits after trying on, then they should be sewn together by machine.
After choosing a model, you need to buy fabric for it. The most suitable material for the first works - cotton with a dense structure. It will be easier to cut and process with a sewing machine. The fabric is inexpensive, so if it gets damaged, this result will not entail large losses. If the first item turned out to be successful, then you can move on to another type of product or sew a more complex skirt or clothes for your child. Mastery skills come with time and only with experience can you sew complex things, for example, an evening dress.
Basic mistakes made by beginners
 Beginning seamstresses often make mistakes, but they can always be corrected and they must strive for this.
You cannot rush in any handicraft and it is very important that haste does not develop into a habit. It occurs not only among beginners, but also among experienced masters.
You cannot stitch without trying it on, because after this it is more difficult to make the necessary changes. Stitching without fitting is acceptable if patterns are used that were previously used to sew clothes, and the size of the figure has not changed.
Very often when sewing clothes magazine patterns are used, which can also be found by visiting the tutorial website of cutting and sewing. However, individual parameters do not always coincide with them. As a result, the product will not fit perfectly. It is necessary to take into account your parameters and adjust them to the basis of the pattern.
To achieve the desired result, you need experience and a desire to learn. It is advisable to buy special literature, study it and consult with experienced specialists. Making your own mistakes will be costly as the fabric may be damaged.
You cannot buy fabric for tailoring items. If a newbie suddenly miscalculates or messes it up, then without a supply of material it is unlikely that anything will be corrected. Before cutting the fabric, it must be ironed. Wet processing of the material will cause natural shrinkage, after which you can draw on it.
How to learn to sew and is it possible to learn to sew from scratch?
Today I decided to devote the conversation to needlework, since I recently received this letter:
Please tell us about your sewing in a separate article. How and where did you study? What are you sewing? Sew according to ready-made patterns(for example, Burda) or do you model yourself? I really want to learn how to sew; there was no work at school. My husband supports me in my endeavor and said he will buy a car. I have no idea what to do with her next. I'm sure your story will be useful not only to me. And of course we are waiting for photos of your home clothes. Thanks in advance!
I have been sewing for 20 years now, today I sew my entire wardrobe: dresses, skirts, blouses, coats and even fur coats.
My interest in sewing did not appear during labor lessons, but after I saw Burda Moden magazines for the first time; at that time they had not even been translated into Russian. It was difficult to use the patterns; everything was on German, but I made up my mind, and I sewed my first skirt from this magazine, on an old manual machine. A simple skirt without a zipper with an elastic band, without any knowledge or courses, well, my mother gave me a little hint.
For a very long time I sewed only simple things. 16 years ago I took a sewing course at Burda Moden. At these courses we were taught only how to sew and process products. We were not taught to cut or model. We sewed all our products from Burda Moden magazines. Since the choice of models is very large and the patterns are very good, I never learned how to cut myself. I always sew everything from a magazine. The sewing instructions are detailed and easy to understand.
And the description in the magazine is very good: there is fabric consumption, what allowances to make, how to cut. There is a plan for laying out the patterns, as well as all the details on how to sew the product. Very convenient and simple.
Today this is the best magazine, which is convenient and pleasant to use, and most importantly, everything in it is clear, and even a beginner can easily cope with it. What is important is that each magazine has illustrated courses on how to sew this or that product, unique master classes for beginners.
Where to start?
If you want to really learn how to sew, buy Burda Moden magazine. Look through, dream and fantasize about what would suit you, what you like, what fabric you would like to make this or that model, what color. This will begin to form the intention and motivation to start doing something in this direction. For a woman, what is important is to want, to wish, and everything will begin to work out.
As for magazines. My advice to you is to buy every issue. I used to buy selectively, but time goes by and I’m starting to like what I didn’t like six months ago. Or I just didn’t see some model, and then I urgently wanted it. It’s better to buy all the magazines so you don’t have to run around and look for them later.
Then you need to buy a sewing machine. The choice is very large, different manufacturers and different prices. Naturally different functions. If you are just starting out, then you need a machine that makes a regular straight stitch and sews buttonholes, everything else is finishing stitches, rarely used.
You will also need an overlocker. It's difficult to sew without an overlocker good thing. Although at first you can still do without it. Now there are special presser feet on sale that process the edge of the product, simulating an overlock stitch. Of course, you can’t compare it with an overlocker, but you can compare it in price - a presser foot costs 200 rubles, and an overlocker costs 10,000 rubles. I've been using this foot for a very long time.
If you don’t want to figure it out on your own, it’s better to sign up for courses. As a rule, first the skirt is sewn separately, then the trousers, the blouse, and then the jacket. Every city has such courses. In St. Petersburg, I can recommend the “Style” sewing school. It is important that if you only want to learn how to sew, then choose only sewing courses, without cutting and modeling.
But you can learn on your own, my friend didn’t study anywhere, but she sews better than me. I studied at the course for three years. Today, with the development of the Internet, you can learn everything at home, find some online course or watch lessons on YouTube. At the end of the article, I will offer you a lesson on how to sew in a hidden zipper; I sew it myself differently, but this method seemed easier to me.
Then you need to go to a fabric store to look and choose what you like. In any store they will tell you and help you: how many meters you need to take for this or that product, and whether it is worth taking this fabric. But it’s better to make a pattern from tracing paper in advance, you need to buy it, lay it out on some piece of fabric - the standard width is 150-140 cm, which means it will be 75-70 cm in half. And decide how much length of fabric you need.
In Burda Moden the consumption is always much higher. As a rule, 15-20 cm is always extra; if the fabric is expensive, then preliminary layout and clarification of the length will give significant savings.
I also recommend the Burda Moden website www.burdastyle.ru to all beginners. Just recently they updated it and it has become very convenient and interesting. Women post on this site already sewn models that are presented in one or another Burda Moden magazine. You can also contact any woman and ask what you need, everyone is very friendly and will always answer you. If I like, for example, the fabric of a dress, I can always go to the user’s page, find out what city she is from and ask where this woman bought this fabric. Even so! If you really liked it!
This site also helps me a lot in finding models. Let me explain: while flipping through a magazine, I don’t even notice some models, and some models I can’t imagine how they will fit on my figure. Or I see a model in a magazine whose color I don't like, and I subconsciously reject it. And then I see the same model on an ordinary non-model figure or in another color that I love, and I understand that I want to sew the same product.
the first photo from the magazine, I didn’t even notice such a jacket...
and I didn’t notice this gray “support”, but I liked the white jacket. Everything is sewn using the same pattern.
But I didn’t pay attention to this model at all. .
first photo from the magazine
And the women who sewed it wrote this review: “We need to come up with a monument to this dress model)). In my opinion, there is no fabric from which it would look bad, there is no figure that it would not fit, there are no accessories that would not suit it)). It takes as little fabric and time as a dress.”
You can also easily understand which fabric should be sewn from, and which one should not be sewn from.
and it turned out to be a dress that no one else has (second photo)
And these models didn’t suit me at all, although I really liked them. It helped to see a sample made from chintz.
These models are suitable for women with small breasts
As for fabrics, I love natural fabrics linen, wool and silk. And I really like thick knitwear, really beautiful dresses turn out.
All natural fabrics need to be soaked in water and dried, and then ironed. This applies primarily to linen, viscose and silk. Woolen fabrics should be ironed through damp gauze to avoid shrinkage of the product after washing.
my new linen suit. Very comfortable, especially in hot weather.
Today sewing is a pleasure. Large selection of fabrics and accessories. All modern sewing equipment performs many operations automatically: buttonhole sewing, button sewing, bartacks, thread tension, etc. And even beginners can sew efficiently and quickly.
And if you have small children, I highly recommend learning to sew. Until the age of two, I sewed everything for my child myself, I didn’t buy anything: overalls, jackets, and suits. It is very beautiful and brings a lot of positive emotions. You can put so much love into these things that your baby will be the most beautiful and happiest.
Previously, I approached the sewing process from a purely pragmatic point of view. You can sew it yourself beautiful thing and save enough money, then it began to bring pleasure from the creative process, from the choice of fabric, from the choice of color and model, from the fact that the thing fits like a glove, which means the skill increases. Today for me manual labor- this is an opportunity to calm down, stop, return to feminine energies. This is a kind of meditation. An opportunity to get out of the information flow and return to yourself.
Linen too, I really love linen fabrics in the summer.
And of course it’s economical, this dress was made for the home from linen for 200 rubles, there was a piece left over, so there was a discount.
I will be glad if my article is interesting for you and in the end you start sewing. This is a very exciting, creative and feminine activity. Try it!
ATTENTION! The material is protected by Copyright Law. Any use of this material (publication, quoting, reprinting) is NOT PERMITTED without the written consent of the author. For questions regarding the publication of this material, please contact: [email protected]
Tatyana Dzutseva
Video “How to sew in a hidden zipper.”
Having mastered the types hand stitches, you can do sewing. Master classes will help you sew a bow, fold it, tie it neckerchief by first creating this accessory.
Types of seams
Even if you don't have a sewing machine yet, you can create things using a needle and thread. First master simple stitches, then you can use finishing stitches to decorate your products.

The basting seam is one of the simplest; it is used for preliminary connection of parts.

- If you say to yourself: “I want to sew, where to start?” - by threading a thread into the eye of a needle. Now tie a knot in it if you are sewing with one thread. But for beginners it’s easier to start with a double thread so as not to get confused. To do this, connect the ends of the thread, align them, and make one knot.
- Pierce the fabric from the wrong side with the tip of the needle, bring the tool to the front side, pull it up so that the knot remains on the wrong side. After retreating 7 mm, run the needle in the opposite direction to bring it to the wrong side.
- You will have a 7mm stitch on your face. You can make it a different size - 5–10 mm. Sew the entire line in this manner.
- If you are joining two pieces, then fold them right sides together and make this seam on the wrong side.
- Make your stitches wide enough. After all, when you then sew with the main seam on a machine, the preliminary basting needs to be unraveled.
Practice to master this simple science. Now you can go further, telling us what other types of hand stitches exist.
The running stitch is made with threads of the same color as the fabric. Once you master it, you will be able to sew by hand, without using a machine. To ensure the job is done efficiently, secure the thread well. To do this, start your work with two small parallel stitches. Next, perform them on the same horizontal line, making sure that the stitches and the distance between them are the same size.

To secure the thread at the end, sew a back stitch. See how it's done.

- Also start working with two parallel seams, then bring the needle to the front side, make a stitch 5 mm long.
- The needle is on the wrong side, make another seam here of the same length, bring the needle to the face, pierce the fabric with it in the opposite direction.
- Complete the entire line this way. If you do it evenly and carefully, it will look like a machine seam.
- You can adjust the stitch length as you wish, making it a little shorter or a little longer. The main thing is that they are the same size.

As you can see, having stepped back from the edge of the product 5–7 mm, you need to pierce the fabric here with a needle, make an arcuate movement with your hand, then perform exactly the same stitch, which will be equal in size to the first one. Between them you will have a small arc of thread, which will beautifully decorate the edges of the product. Continue in the same manner, making parallel stitches.
These are the main types of hand stitches that will be needed to perform sewing work. Speaking of where to start sewing, we can say that by remembering how they are done. After this, it’s time to move on to other types of processing of fabric products.
Auxiliary stitches for beginners
If you need to transfer a marking from one part to another, you will sew along it, connecting these two pieces, then open the seam between them. And the desired outlines will be reflected on two details at once.

In this photograph, this copy seam, which is also called a “snare” in another way, is indicated by the number 3, and by the number 2 is the gasket seam. It is similar to basting (Fig. 1), but the distance between the stitches is less than the stitches themselves.
Further, under the number 4, the transfer seam is indicated. It is used to adjust the pattern or connect parts that have shaped cuts. To do this, a cut is bent on such a workpiece, aligning it with the face of the second part. Secure it in this place with pins.
Then these blanks are swept away, making parallel injections, the distance between which is 2–5 mm.
At number 5a 5b there are seams for processing the edges of parts, such as waves, frills. This is a round seam. To complete it, you need to bend the cut 3-4 mm to the wrong side and pick up 2-3 threads. To speed up the work, you can not tighten them, but do this after completing 20–30 or more stitches.
You are already familiar with the static seam (Fig. 6), above it was called “back needle”, which is the same thing. Marking is also called “by the needle” (Fig. 8). The technique for doing it is similar to stitching, but you need to leave the same distance between the stitches.
Some of the types of hand stitches presented below will help to finish the edges of the product.

If you are using thin fabric, then hem them using an oblique overcast seam to press them (Fig. 1 a). That is, both edges of the product are ironed in one direction.
The next type of their design requires ironing in different sides. This is an oblique overlock seam, pressed (Fig. 1 b).
To make a buttonhole stitch (Fig. 2), first make diagonal stitches in one direction, then in the other.
You are already familiar with the buttonhole stitch (Fig. 3).
The next one is an open simple sewing stitch (Fig. 4). Having turned the edge of the product, guide the thread diagonally, you will hem it.
To prevent the threads from being visible on the front side, here you need to take only a few fibers from the underside of the fabric with the tip of the needle. This is how a blind hem stitch is made (Fig. 5).
In order to neatly and beautifully decorate the bottom of the product, it is better for beginners to first tuck it evenly and secure it with a basting (Fig. 6), and only then hem it.
A figured hemming stitch will allow you to sew it on the back side of the product so that the elements look like even crosses (Fig. 7).
Frequently used terms in sewing
Decoding them will help beginners understand which stage of work is meant.
- Sweep away- this refers to the temporary joining of sections using simple running stitches. Such seams are used to then be sewn on a machine or during fitting, then the item will fit well on the person for whom you are creating it.
- Baste- means attaching a decorative detail to the base, for example, a neck facing, a pocket.
- Sweep- this is to process the edges of the seam to prevent the fabric from fraying.
- Sweep in, means connecting the parts along rounded lines. For example, sew a sleeve into the armhole, a collar into the neck.
- Sew on- this is to attach hooks, buttons, braid, buttons with a few stitches.
- Hem, means attaching the edge of a product, for example, the bottom of a shirt, using hidden stitches.
- Lay a snare- this is to make stitches to form small loops of 5–7 mm in order to transfer the chalk line from one workpiece to a second identical one, for example, to mark a dart from the left shelf to the right. These terms are used when sewing by hand. When using a sewing machine, you also need to know what certain words mean.
- Stitch- connect the cuts with a simple seam.
- Turning- This is the processing of the edges of parts with a simple seam. For example, trim the sides with hems and the flaps with lining.
- Stitch, means connecting a small part with a larger one using a stitch. For example, sew pockets, wedges, cuffs. Sewing will be easier for beginners if they learn other terms found in descriptions of patterns and products.
- Hem- this means folding the edge of the part and stitching it. This is how the bottom of trousers, shirts, and shirts is hemmed.
- Stitch, means making a finishing stitch on the front side, parallel to the edge of the part. This is how a pocket is sewn to trousers or a skirt, a yoke to a bodice.
- Sew in, if you come across such a term, you will know that you need to sew a collar to the neck or a sleeve to the armhole.
- Unstitch- iron with a steamer and sew two lines with a finishing seam on the front side near the main seam.
Handkerchief: where to start sewing
You must have such a thing with you. It would be good if a woman’s scarf was trimmed with lace or designed differently. It’s better to take natural for him cotton fabric which absorbs well. Also, a handkerchief can be an item of decoration for a men's suit, then both types of fabrics should be combined.
To sew a handkerchief, take:
- piece of cloth;
- a needle;
- scissors;
- ruler;
- chalk;
- spool of thread to match.

After you have prepared everything you need, you can get to work to sew a beautiful accessory for your beloved man.

Using a ruler, mark a square from the corner of the canvas the right size. It can be a rectangle with a side from 25 to 43 cm. But for a man it is better to take the maximum size.
Iron the edges of the future scarf on all sides to the wrong side by 4 mm. Turn it in again by 5 mm and iron again. As a result, the edge of the product will be inside the seam, so the fabric will not fray when cut. Sew from the wrong side, parallel to the hem line.

You can first fold the edges of the handkerchief twice and pin them together. When you make a stitch, gradually take them out and pin them into the needle bed.
By the way, you will simply need this item. Read.
If a men's handkerchief is your first such project, and you have never sewn on a machine before, then you need to talk about it in even more detail. Carefully lift the foot and needle, lower the foot, then the sewing machine needle by hand. Sew three stitches forward, then set the feed control to reverse side, sew backwards, thereby securing the beginning of the stitching.
Trim the ends of the handkerchief on all sides. To secure the thread well at the end, also sew a little back, then forward. Rotate the wheels, raise the needle, then the presser foot. Cut the thread from the starting side and the end of the stitch. Now you have it well secured.
See how to fold a handkerchief.
Presidential fold

Place the scarf in front of you, bring the left side to the right to fold it in half vertically. Fold the scarf horizontally in the same way. Place it in your pocket so that the neat fold line is at the top.

Two corners
Here's how to fold a handkerchief using this method.

First, also roll it vertically and horizontally. Now pull the bottom corner up, creating a triangle. In this case, position the upper corners so that the lower corner is slightly visible from under it. Place its right edge on the left one bent inward. Turn it over and put it in your pocket so that the top corners peek out.

If you want to make a women's handkerchief, then its dimensions should be smaller than those of men's. Once you have stitched it on all four sides, place a small lace band on top and stitch it to cover the seam of the handkerchief. If you want to make flounces, then add folds after a certain number of centimeters. You can first gather the braid onto a thread, tighten it, and then sew such a lush decoration along the edge of the handkerchief.
This is where to start sewing for those who are just learning the basics of this interesting wisdom.
There are other things that are easy to do. If you are thinking about how to tie a neckerchief, you should sew it first. Of course, you can buy this wardrobe item, but it is not always easy to find a neckerchief of the right size and color. If you like the fabric, it is better to purchase it and make this item yourself.
Before tying the neckerchief to create it, take:
- fabric sheet measuring 85 by 130 cm;
- scissors;
- thread and needle;
- sewing machine;
- iron;
- measuring tape;
- chalk.

In this case, the front sides will be on the inside, and the back sides will be on the outside. Having retreated 5 mm, stitch on three sides, through the fourth, shortest one, you need to turn this workpiece right side out. Now tuck the edges of this hole inward by 7 mm, stepping back from the edge 5 mm, and sew this slot.

Let's make a tightening seam. Thread a needle with a thick eye double thread, fold it in half, tie a knot. As a result, you have four threads. Sew along the machine stitch on your hands from one end to the other, but try not to pierce the scarf through, pull out the thread.

To fix the scarf in this position, without cutting this tightened thread, sew it in the opposite direction. Tighten again here.
Pass a ruler inside the resulting curtain. Sew these loops on your hands on one side, as well as in the center, only then cut the thread.

This is how the neckerchief turned out.

You can dress it in completely different ways, transforming yourself and your attire. See how to tie a neckerchief using different methods.

Thread a wide edge through the loop and straighten it or leave one end free.

And if you stick only a small corner into the drawstring, you can straighten the large one and lower it down to show all the beauty of the neckerchief.

Also, this large angle can be on the back, for example, to cover open back evening dress for the time being or simply decorate a plain turtleneck. Place the neckerchief in ruffles at the front.

You can add symmetry to the large edge of the handkerchief, which is opposite the loop, straighten it to get this result.

To know even more about this topic, watch the video review, which talks about the types of machine seams.
Using the example of creating a bed set, familiarize yourself with linen seams.
Research the various tools you may need. Sewing clothes requires a ton of different tools for sewing, for making patterns, and for measuring samples to make sure they will fit you. You will need to learn each type of tool and know how to use it. In the beginning you will feel uncomfortable with all these tools, but the more you practice, the easier you will feel.
- Iron and ironing board. It's fine to use one you already have as an iron, but you'll probably want to invest in a higher quality iron. You will use it as a press when you sew as this will ensure that the seams settle properly.
- Seam ripper. You'll use it when you get stitches wrong and need to rip them out.
- Chalk for marking fabric so you know where to sew and cut.
- You will need really good, sharp scissors that are designed for cutting fabric only, otherwise the scissors will quickly become dull and this can lead to damage or fraying of the fabric.
- Tracing paper for developing patterns and changing models.
- Rulers for measuring as you create your design (both during the design stage and while sewing).
- Measuring tape, especially a flexible tape measure. You will use it to take measurements and make appropriate adjustments if necessary.
- Pins to hold the fabric in place before you begin sewing. Pins should be used sparingly as they can damage the fabric you are working with.
Buy a sewing machine. There are two main types of sewing machines: those that fall into the home/domestic category and those that fall into the industrial category. There are pros and cons to both categories, so figuring out which is best for you will take you some time.
- Household sewing machines tend to be more portable and more versatile. They can make various types of stitches. However, they are not very good in terms of speed and power and they are not very good for heavy fabrics.
- Industrial sewing machines are much more powerful and much faster, but they are usually only able to do one type of stitch (such as a straight lockstitch). They do this stitch very well, but unfortunately they are not that versatile. They also tend to take up a lot of space.
Learn the components of your sewing machine. Hopefully it comes with an instruction manual because you will need to know which direction the spool spins and where the bobbin case is. However, you need to know at least the basic components of a sewing machine before you can make fun things.
- The spool holder holds the spool of thread and sets the direction of thread as the fabric passes through the sewing machine needle. Depending on the type of machine, the spool holder can be horizontal or vertical.
- A bobbin is a threaded bobbin on which thread is wound. You must wind the thread onto the bobbin threads and place the cap on top (which is located under the needle plate).
- Your sewing machine should also have different stitch adjustments to determine the length of each one, the amount of tension needed to make sure the stitches go as expected, and various types stitches (if you have sewing machine, which makes different types of stitches).
- Pay attention to the lever that controls the thread tension. If the thread tension is not at the correct level, the thread will form a knot at the top and stop the sewing machine from working.
- You can check with a nearby sewing shop to see if they have any classes or someone willing to help you learn how to sew on a sewing machine, or you can ask a knowledgeable family member or friend.
Start simple. When you decide to make clothes, you'll want to start with simple designs, otherwise you can easily get frustrated and give up. It's best to start by sewing a skirt because it's easier to do than sewing a 3-piece suit and it requires fewer measurements to sew a skirt.
- When you're first starting out, try to avoid making clothes with snaps or zippers. Sew an apron or pajamas with elastic bands. Once you become proficient with your tools and machine, you can begin to move forward.