New unusual drawing techniques are an excellent development tool for kids preschool age, which has a comprehensive effect on their psyche and improves psychomotor skills. The use of non-traditional technology helps kindergarten teachers turn activities with children into an exciting game, which instills artistic taste and reveals the creative abilities of boys and girls.
The traditional method of drawing in many cases is too difficult for growing young artists, so alternative methods of obtaining paintings are very popular among preschool teachers. Constant self-education is very important for every worker in this field, so we bring to your attention an overview of original drawing techniques for preschool institutions.
The relevance of these techniques lies in the fact that with their help, fine motor skills develop, which directly affects the formation of speech skills. Teaching Methodology fine arts for the little ones helps children develop attentiveness, perseverance and patience, learn to manage their emotions and take initiative. The technical emphasis in classes is on the creative process itself, and not on a specific result. The lesson schedule is designed in such a way that children draw, alternating different techniques.
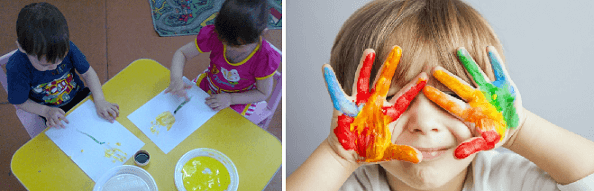
Drawing using the fingerprint technique is interesting for children in elementary and middle group. Even in senior group You can conduct exciting activities using this method.
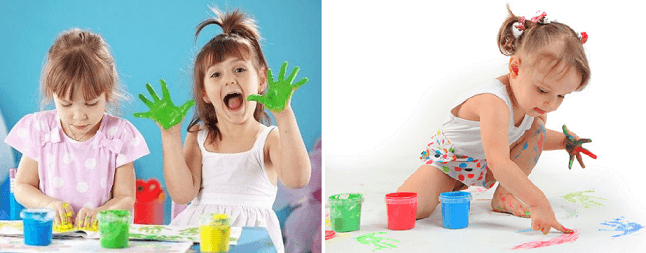
The child performs the work by applying painted fingers (liquid watercolor, gouache, special finger paints) to a paper sheet. Then, with a thin brush, under the guidance of the teacher, the children complete the details of the resulting composition.
A drawing drawn in such an unconventional way is not only a bright child’s creativity, but also an opportunity for every child to learn to feel their body better. After all, when drawing using these techniques, there is intense stimulation of the nerve endings at the fingertips, which means a qualitative development of fine motor skills.
Blotography
Blotography is an unconventional drawing technique, where the basis for the drawing is splashing paint with a brush or a thin plastic tube (watercolor paints diluted with water). Next, using their imagination, kids think about what this or that blot looks like and add details using a brush. similar to using liquid watercolor.
Using this technique, you can gradually apply splashes of several shades to the drawing, paint over the contours obtained through a stencil, and add color to white grain appliques. The simple technique of spot painting is accessible to the youngest artists and can be easily adapted to any creative project.
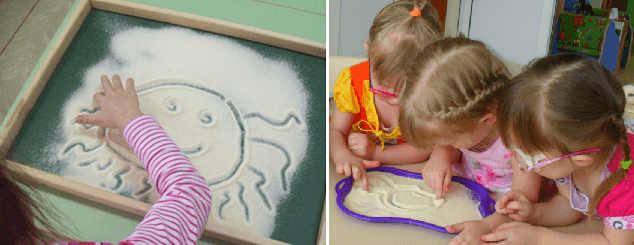
Sand painting
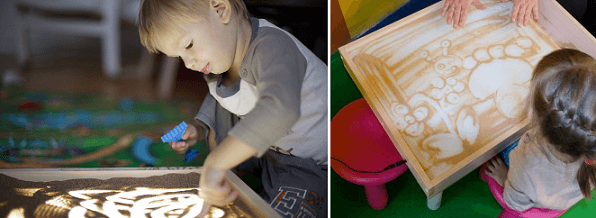
Sand painting technique is a young spontaneous art, an original way to create images on glass with your fingers by working with fine-grained sand material. For this type of creativity you will need a wooden or plastic tablet with frosted glass, light source (located under the tablet), clean sifted sand. Classes are held in a darkened room in a quiet, calm environment.
The relevance of this direction lies in the fact that, like nothing else, it develops fine motor skills, helps relieve stress and teaches children to express their emotions in a creative act. Older children in art school can also draw with sand. younger preschoolers at the age of 2-4 years. The presence of an adult is mandatory, who shows the child certain techniques and guides the children’s work process.
Unconventional sand painting technique
Palm drawing
Palm printing is a technique of painting with gouache or other paints safe for children, during which children leave prints of the inner surface of the palm on a sheet of paper. Further decoration and detailing of the design is done using a soft squirrel brush. Other quick drawing techniques mentioned above can also be used at this stage.
Using different types of hand drawing, you can create images of animals and birds, simple landscape compositions, greeting cards for the New Year, March 8, May holidays and Mother's Day. Be sure to include this drawing technique in your lessons; your lesson plan will become better and more varied.
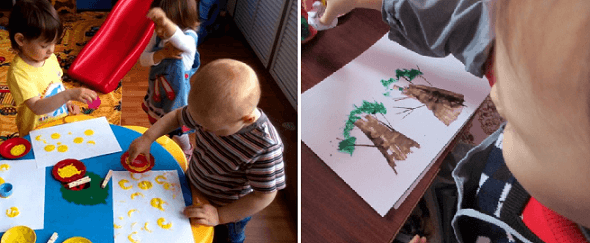
Drawing by grain
Drawing with grains is a fine art technique that involves filling the contours of the depicted object first with grains (semolina, wheat, corn, peas) and then with paints. You can also immediately prepare colored powder for work using a mixture of ground wax crayons and fine grains.
Using one of the pencil drawing techniques, an outline is drawn on a sheet of paper, the area from the inside of which is then filled with glue. The paper is sprinkled with cereal. For uniform filling, it is important to apply a uniform layer of adhesive. The resulting drawing is painted with watercolors or gouache. Conduct a master class for your students on non-traditional techniques for painting with grains - a fruitful topic for this.
Through unconventional techniques of drawing with grains, children expand their knowledge of the world around them and learn to creatively convey on paper what they see around them. Semolina is considered optimal for children, since with its help you can make the most beautiful applications. When using other cereals or their mixture, the surface of the composition becomes embossed, which additionally stimulates the development of tactile sensitivity and fine motor skills in preschoolers in the second younger group.
Printing
Printing (stamping) is a technique for producing images on paper using stamps previously immersed in jars of paint. Stamps are made from pieces of foam rubber, polystyrene foam, chopped fresh vegetables and other similar materials. They also use ready-made factory stamps with images of animals, cartoon characters and alphanumeric symbols.
The brush painting technique goes well with stamping. Using a thin brush or using graphic techniques, children draw the outline of an object or living creature on a sheet of paper. Then, if the dot technique of drawing with stamps is used, you can invite the child to depict fruits on an apple or pear tree, colorful leaves in the crown of a tree in the fall, spots on the skin of a leopard, etc.
Through an unconventional method of drawing with stamps, you can study certain geometric shapes with children if you make prints of the appropriate shape on paper, combining them with each other. In this way you can get a house, some kind of animal, and even show kids how to draw a person. In the fall, lesson notes traditionally include lessons on printing techniques, in which dry leaves (maple, chestnut, linden and others) are used as stamps.
Drawing using the poke method
Poke painting is a technique that involves using a hard glue brush. Children apply paint prints on paper with a dry brush, holding their hand vertically, perpendicular to the sheet. Thanks to this, the texture of the strokes differs significantly from the standard one and allows you to easily and quickly draw realistic pictures of living nature.
Kids can be asked to use this method to depict their favorite teddy bear, a cute fluffy kitten or puppy, trees in the forest or the sea. This technique also allows beautiful New Year cards when pine needles are drawn using the poking method.
Unconventional drawing techniques in kindergarten in the second younger group make it possible to achieve significant progress in the psychophysical development of children of early preschool age. These imaging methods can be successfully used in different conditions and can be easily adapted to a specific lesson topic.
Non-traditional drawing technique in kindergarten (poking and printing)
In the second younger group, drawing classes, as a rule, are not focused on traditional drawing techniques - it is still difficult for children to create pictures taking into account proportions, children have difficulties with fine motor skills, and most importantly, focusing their attention on drawing the elements of the picture is simply an impossible task. And in order for the little ones to find it interesting and spend a minimum of time on the task, teachers actively use non-traditional drawing techniques. Let's consider the main varieties of this method of creativity.
This is interesting. WITH early age kids try to reflect their impressions of the world around them in visual arts through visualization of sensations. Hence the desire to draw with fingers on foggy glass, with a stick on the sand and with chalk on the asphalt.
So, existing techniques unconventional drawing have the main advantage - they allow you to quickly see the results of your activities. And, really, putting a blot on paper with your own finger and seeing a funny design in it is fast and fun. In addition, unusual techniques allow
- develop creative abilities;
- form a non-trivial view of the world around you;
- help develop imagination and creativity;
- develop fine motor skills;
- cultivate independence.
Review of original techniques for the second junior group
This is interesting. The outstanding children's writer Eduard Uspensky wrote: “...It's true! Well, what is there to hide? Children love, love to draw! On paper, on asphalt, not on a wall, and in a tram on a window...”
The use of non-traditional drawing techniques not only realizes educational objectives in working with children 3–4 years old, but also allows you to carry out interesting activity on drawing.
Cotton buds
This is interesting. In some methodological sources, this drawing technique is called the “poke method”.
- actual cotton swabs;
- small containers with paint (for example, yogurt or drink caps), it is better to use gouache, as it is thicker;
- wet wipes.
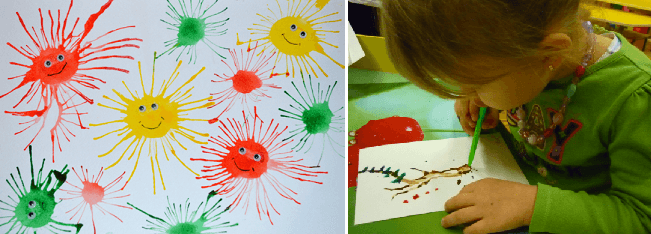
The drawing process involves children dipping a stick in paint and making imprints on the specified area of the drawing. This way you can draw precipitation (rain, snow), patterns on clothes (for example, when coloring the costumes of heroes). The main thing is to show the children that in order to get the right poke, the stick must be held vertically in relation to the sheet of paper.
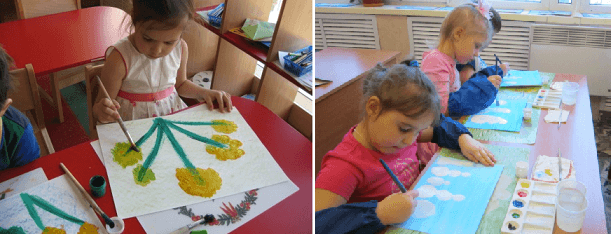
Drawing with cotton swabs “Trees in autumn”
Work on the drawing is preceded by a conversation about the changes that occur in nature in the fall, as well as looking at the color palette of foliage on trees and bushes while walking.
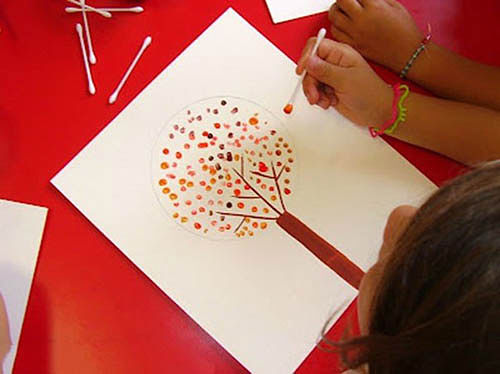
The teacher must outline the boundary of the location of foliage on the tree
Instructions:
- Children receive blanks of tree trunks with branches, cotton swabs and paints. Important! To make the task easier, you can outline the area where the foliage is located in a circle.
- “Guys, dip a stick in the paint of the desired color and poke it on or near the branches. Don’t forget to keep the stick level.”
- “For leaves of a different color, we take a new stick.”
- “After finishing work, we wipe our fingers with napkins.”
Photo gallery of creations with cotton swabs
If the foliage should be within certain boundaries, then these boundaries should be limited to a contour for the child. The contours of the boat should be drawn by an adult. Autumn foliage is a theme ideal for drawing cotton swabs in the second junior group
Video. We create art with cotton swabs and a pencil eraser
Fingers
This is a method that is called “everything at hand,” that is, to implement it, you do not need to prepare the tools in advance, because you will need your fingers. In addition, you need to take
- paint (you can use watercolor - it’s easier to wash off your fingers);
- wet wipes.
Please note that this technique is an ideal solution for creating collective works. For example, foliage autumn trees. In this case, the teacher gives the kids a common substrate - a large tree, and the kids put their fingerprints by dipping them in one color or another of paint. This makes it easier to wash (since your fingers will only get dirty once), and each child will feel like an equal member of the team.
Finger drawing “Snowflake”
This is a custom design option. To create it, both paints and pencils are used.
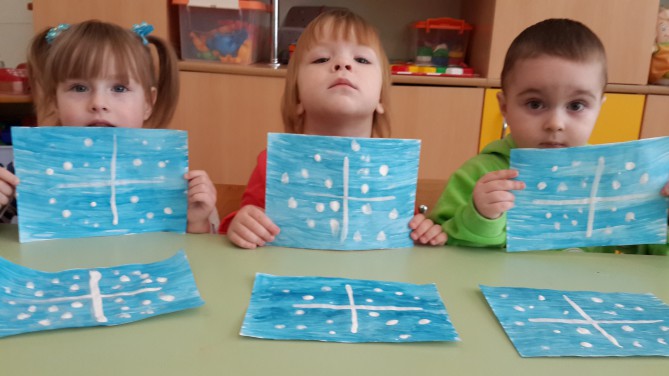
To create a background, you can use pencils or wax crayons
Instructions:
- The teacher distributes A4 sheets (you can take half of this format).
- “Guys, today we will draw a snowflake. Let's take a blue pencil and sketch out the entire sheet."
- The teacher goes through and draws a plus on each sheet of paper.
- “Now we dip our fingers in the paint and make prints around the base of our snowflake.”
- “Now I’ll take a napkin and wipe each finger.”
Photo gallery of finger paintings
In this drawing, children not only draw berries, but also leaves. The teacher draws twigs and green leaves in advance. For this drawing, you do not need to draw contours
Palms
This method, of course, is the most sloppy, but the image appears faster, so children really like drawing with their palms. To create drawings using this technique you will need
- a shallow plate with paint (pour a little water and drip gouache - this way the paint will come off the skin faster, and this trick will not affect the brightness of the drawing in any way);
- wet wipes.
By the way, using your palms is also convenient for creating collective drawings. Such as, for example, “Fish in an Aquarium”.
Hand drawing “Our aquarium”
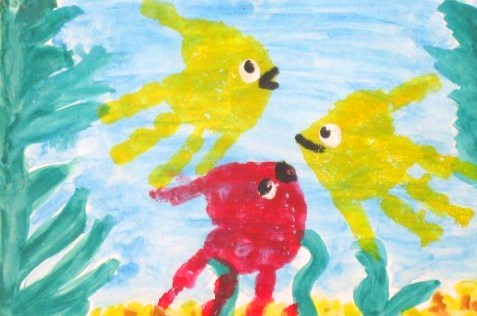
In this drawing, children need to complete the print with separate strokes.
Instructions:
- The teacher shows the children the finished background - an A3 sheet with a blue background, outlines of algae, etc.
- “Guys, dip your palm into a plate of paint.”
- “Come up to our aquarium table and leave your thumbprint with a thumbs up or to the side. Just be careful: you don’t need to put a mark on the one your friend has already put, and you shouldn’t place the fish too close to each other.”
- “Now dip your thumb in the white paint and give your fish an eye.”
- “We dip the index finger in black paint, make a pupil and carefully draw a line for the mouth.” The mouth and pupil can be made by the teacher with a thick brush.
- “Now we wipe our palm with a napkin and go wash our hands while our aquarium dries.”
"Cockerel"
The palm can be painted different colors, for example, for a drawing of a cockerel to show its multi-colored tail. It is convenient to use a piece of sponge to apply paint.
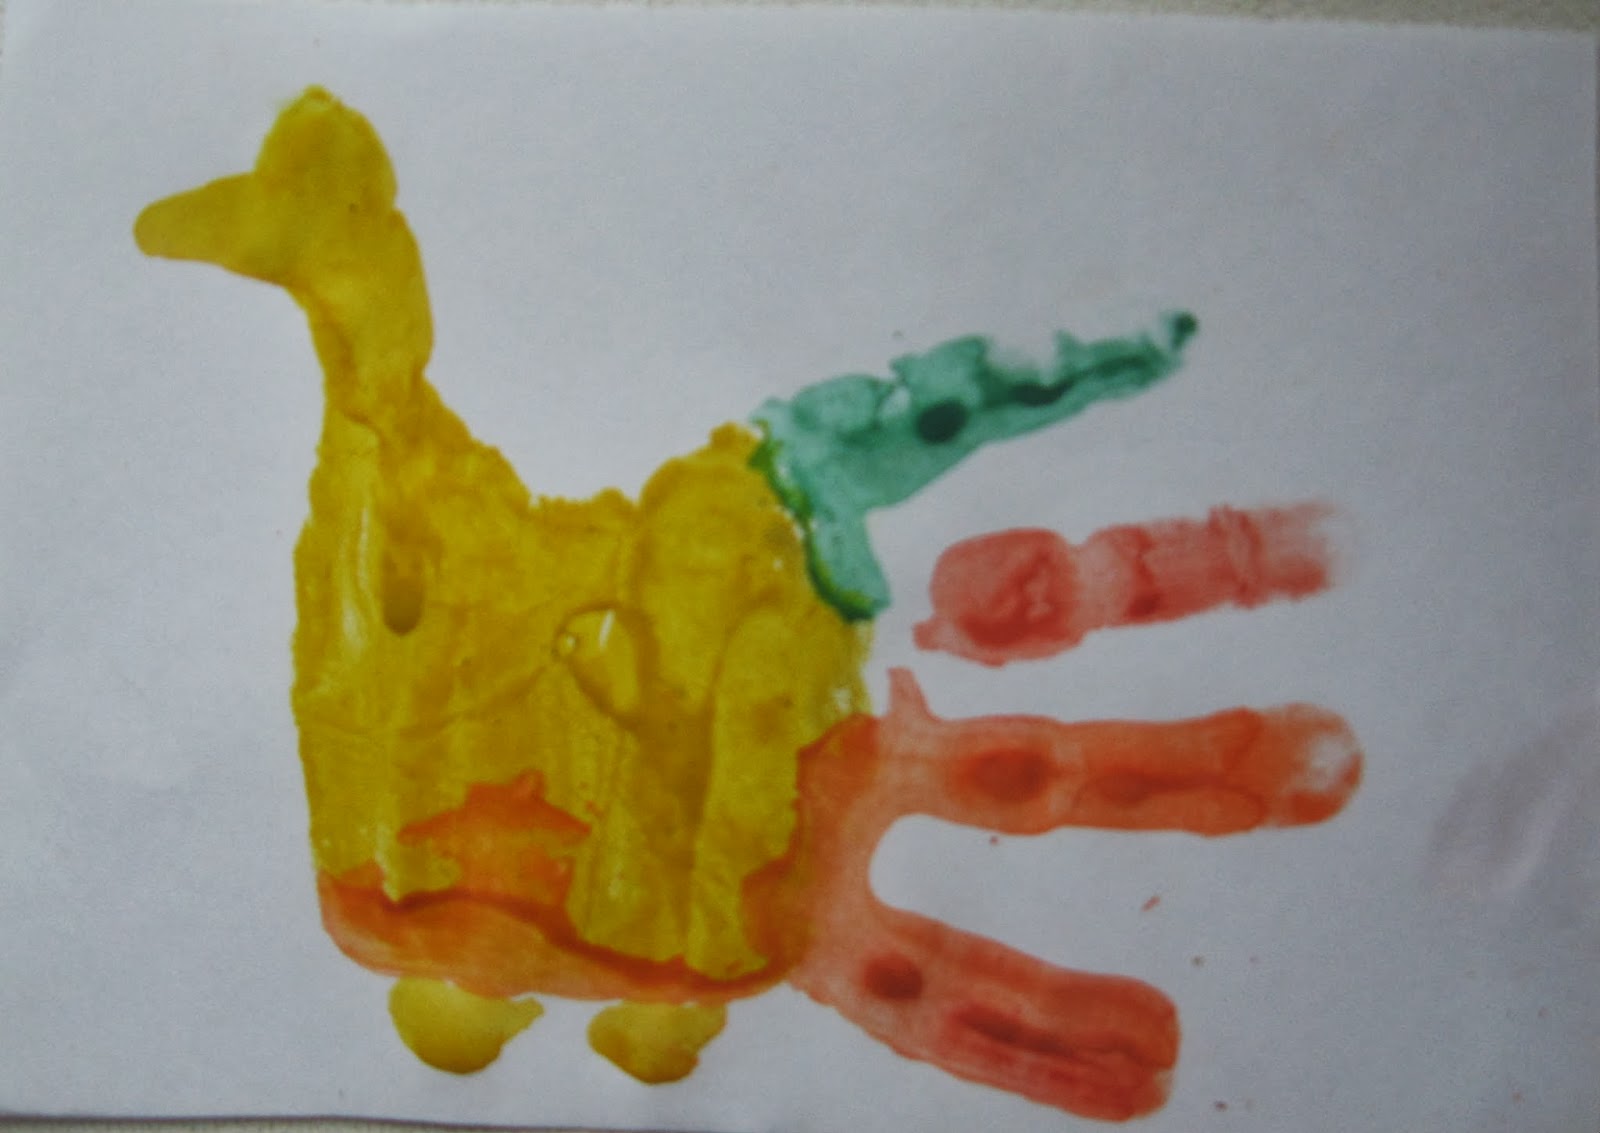
Children complete the finished print by adding a beak and paws.
Instructions:
- “We paint the palm and thumb with yellow paint, the middle, ring and little fingers with red, and the index finger with green.”
- “Let’s put a fingerprint.”
- “Wipe our hands.”
- “We take a brush, dip it in yellow paint and make a stroke on the mark of the thumb to show the comb.”
- “Let’s do one more stroke for the beak.”
- “Add one stroke at a time for the paws.”
Photo gallery of hand drawings
You can draw such a vase for your mother on the eve of March 8. The drawing with palms can be supplemented with fingerprints. You can decorate such a Christmas tree with small stickers
Video. How to draw a clearing with flowers with your palms and fingers
Soap bubbles
This technique is more difficult than the previous ones from the position preparatory stage. Although working with the material also requires the manifestation of the child’s imagination. But first things first. Let's start with the necessary "ingredients". We will need
- liquid soap or baby shampoo;
- water;
- gouache or watercolor (food coloring);
- cocktail straws;
- spoon.
The teacher prepares the mixture and then pours it into cups for the children. To prepare the “paints” you need
- Mix soap and water in a ratio of 10:1.
- Add dye and a little gelatin or glycerin to the mixture (to make the bubbles stronger and retain their shape longer).
- Mix and place in a dark place for 2-3 days.
- Strain the mixture through cheesecloth and place in the refrigerator for 12 hours.
It is more convenient to handle such material, since the shape of the prints is more defined and regular. But if you don’t have time at all, you can simplify it: add liquid soap and dye to the water. There are two ways to work with bubbles.
- With a straw. We take a tube and foam the solution - blow into it to form bubbles. Then we place thick paper against the bubbles to make prints.
- A straw and a spoon. We also blow into the tube, remove the resulting bubbles with a spoon and place them on a sheet of paper.
Drawing with soap bubbles “Balloons”
This is interesting. This technique is considered one of the most difficult in drawing.
This is the first association that comes to mind when you see prints of bubbles on paper. That is why this theme is perfect for our age category - kids won’t have to think long about what they can turn the resulting image into.
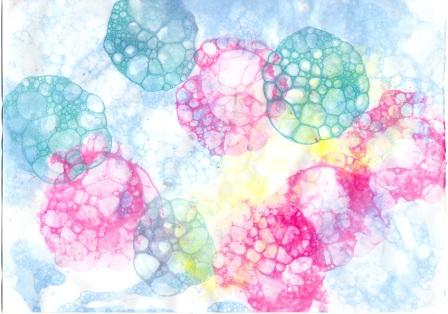
Balloons can be of different colors
Instructions:
- The teacher distributes sheets of paper, jars of soap solution, straws and disposable teaspoons.
- “Children, blow into the tubes to create foam.”
- “Now scoop up foam of the same color and place it on the sheet.”
- “We make foam in another glass and also scoop it up with a spoon. We just lay it out carefully so that our balls don’t cover each other.”
- When the print dries, children can add a thread to each ball.
Photo gallery of drawings with soap bubbles
In this task, children put bubbles on a ready-made basket. The teacher supplements the bubbles with leaves. The kids make prints of the bubbles, and the teacher helps them decide what shape can be created from them.
Video. Funny pictures with soap bubbles
Signet
This option also requires a lot of time to prepare the material. Typically, the technique of making a signet drawing is mastered with older children. But in a simplified version, it can also be used in the second younger group. So, you need to prepare
- several potatoes (carrots);
- form for cutting out dough for baking;
- PVA glue;
- paint (gouache will be more convenient).
The teacher will have to complete a number of preparatory procedures.
- Cut the vegetable in half
- Apply a drawing using a form. (Some teachers manage to cut out these shapes with a knife! It takes several times longer).
- Prepare signets for the number of children in the group.
- Mix paint with glue (1:2).
The actual work of the children is that they dip the signet into the coloring mixture and put the print on a sheet of paper.
Signet artwork “Handkerchief for Mom”
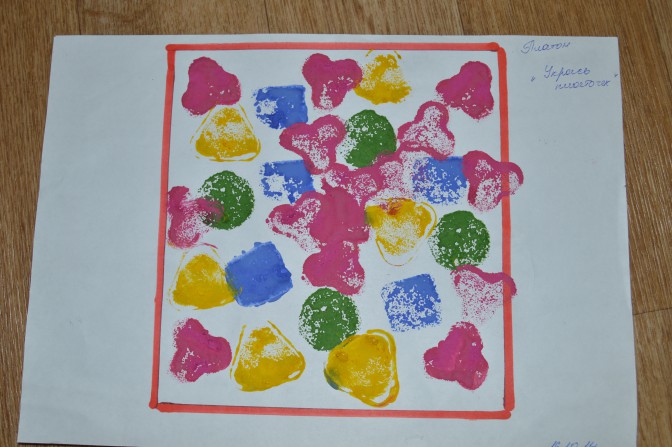
The signet is easy to use, but takes a relatively long time to prepare
Instructions:
- “We dip the heart-shaped signet into the paint and make an imprint.”
- “In the same way we make prints in the form of triangles and circles.”
Photo gallery of signet drawings
Apple prints are the most popular type of creating drawings using signet in the second junior group. Hot pepper gives prints of beautiful flowers, but you need to be very careful when working with this material so that the skin does not bake Leaves can also be a material for prints on paper
Candle
The principle of making a drawing in this unconventional technique is that a candle drawing is applied to a sheet of paper, which appears in the form of unfilled contours when paint is applied to the entire substrate.
Candle drawing “Sea”
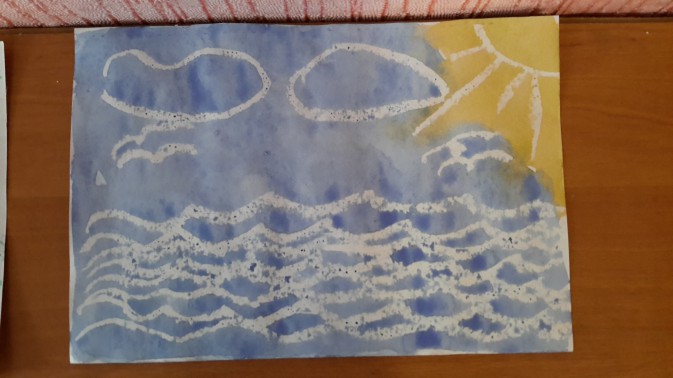
You should not use colored candles for drawings.
Instructions:
- “Take a candle and draw waves, clouds and the sun with rays on a horizontal sheet of paper.”
- “Now dip the brush into water, then into blue paint and start sketching the leaf from bottom to top - the sea will “appear” to you.”
- “The area where you painted the sun needs to be filled with yellow paint.”
Photo gallery of candle paintings
It is better to choose a background for drawings with a candle in the second younger group that is not too colorful. Snowmen allow you to practice studying geometric figure- circle The complexity of the drawing is that children themselves create the outline
Video. How to Paint with a Wide Coarse Brush and Crumpled Paper
Scheme for drawing up lesson notes
This work must begin with the formulation of goals and objectives through visual activity. As for the goals, to those that were identified in the context of non-traditional drawing techniques in general, we can add some specific ones:
- practice the ability to recognize and name colors;
- introduce children to different types of drawing materials (gouache, watercolor, etc.);
- cultivate accuracy and goodwill in group and individual work.
During drawing classes using non-traditional techniques, the following educational tasks are solved:
- children learn to work with signets, soap bubbles, cotton swabs, and also learn to draw with their fingers or palms;
- an idea of paint concentration and basic skills in creating shades are formed;
- expressive images are created, while maintaining the liveliness and spontaneity of the child’s worldview;
- the joy of receiving a product of one’s own creativity is fostered.
The success of the lesson also depends on how carefully the teacher distributes time between all stages of work. As you know, a lesson in kindergarten lasts 30 minutes, during which you need to go through 3 stages of work:
- introduction (about 5 minutes) – implementation of motivational techniques (conversation on a topic, playing with visuals, role-playing, reading poems, listening to songs, etc.);
- the main part (about 20 minutes) is to complete the drawing;
- conclusion (about 5 minutes) - summing up, praise of the teacher, reflection of the kids (in the form of answers to questions - “Did you like drawing like this? in an unusual way?”, “Do you think you succeeded?”, “Whose work do you think is the most beautiful?” etc.).
Whatever technique you choose, children must be helped to realize their intended image.
Please note that some techniques (such as signet painting) do not require much time to complete. In this case, you can increase the timing of the introductory part using dramatization, role-playing game, that is, techniques that require large amounts of time.
Examples of lesson notes on drawing in non-traditional techniques
Eremenko Dina “Umbrella”. Summary of GCD for children of the second junior group. Finger painting" (fragment)
| <…Ребята, я сегодня для всех вас принесла подарок - это зонтик! Но зонтики у меня грустные, потому я не успела их украсить. Вы мне поможете? Украсим зонтики вместе? Скорее занимайте свои места за столами. The teacher explains and shows the sequence and methods of drawing: - We will decorate the umbrella with small peas using our index finger. Show your index finger. Children show their index finger. I show you how to decorate an umbrella with polka dots using your finger. - Hold the sheet of paper with your helping hand. I carefully dip the index finger of my right hand into the paint and leave an imprint on the paper, this is how I got one pea, and another, and another. What did I do, Sasha? (Child's answer). I interview every child. -And now you do the same. Children complete the task. As I work, I remind you that you only need to apply the paint with your finger to the top part of the umbrella. I help children who have difficulties with questions, joint activities, and encourage children to draw more peas to make the umbrella more fun. The children examine their drawings, the teacher praises the children for their work and reads L. Brailovsky’s poem “The Umbrella” to the children: There's a cloud in the sky, oh-oh-oh! Everyone is running, hurrying home. I'm the only one laughing I'm not afraid of a black cloud. I'm not afraid of rain and thunder, I'm walking under an umbrella!..> |
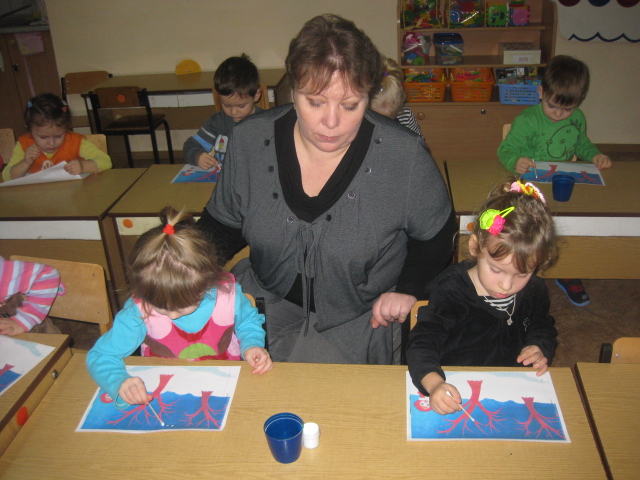
Sidnina Svetlana “Summary of an art lesson (collective drawing with palms) with elements of appliqué in the 2nd junior group” (fragment)
| <…Воспитатель. Ребята, какое время года у нас сейчас? Children. Winter! Educator. Right! Well done! And the most magical holiday is approaching, and which one, let us guess now. The teacher reads the riddle: “The whole tree to the top Decorated the toys! Get up in a round dance! Meet…..!” Children. New Year. Playback Well done! Guys, a bunny came to visit us today and brought us a gift, but the bunny doesn’t want to say what. He wants you to guess it. The riddle reads: “She looks like a hedgehog, Like a hedgehog, she is covered in needles too, There are fruits on it - cones. The girls are waiting for her, the boys, When it's New Year's Eve He’ll come to stand with us for the holiday!” Children. Christmas tree Educate That's right, Christmas tree! Oh, guys, look, the bunny brought us a Christmas tree! Guys, please tell me what she is like? Children. Green, prickly, fluffy, beautiful. Educate Well done guys! How about we draw the same beautiful Christmas tree? Children. Yes! Let's! Educate What color paint do we need? Children. Green! We open the box of paints and the children themselves take out a jar of green paint. Educate Guys, let's do some exercises for our fingers to draw better? The teacher does finger exercises with the children. The teacher shows and the children repeat. “The thumb stood alone. The index finger is behind it. The middle one will be nameless. He raised his little finger. Everyone stood up - “Hurray!” It's time for them to get to work! » We repeat this gymnastics alternately on each hand 2 times. Educate Now our pens are ready to draw. But today we will paint not with brushes, but with our palms. The teacher paints the children's palms with green paint and the children put their palms on the Whatman paper (with the help of the teacher) so that the sheet gets an imprint in the form of a Christmas tree branch. This is how all children leave their imprint on the sheet. It turns out to be a Christmas tree. Educate Look guys, what a beautiful Christmas tree we got...> |
Non-traditional drawing techniques in the second junior group are a way to introduce children to visual arts, to instill in them an interest in the unusual use of their own fingers, palms, and household items. Creating pictures in unusual style, children learn to see the beautiful and unusual in simple things, develop their imagination, learn to create. The teacher's task is to introduce children to different techniques and create a situation of success for each little one in the classroom.
Maria Krishtal
Subject project: «».
Compiled by project: Educators of MDOU No. 72 Krishtal Maria Aleksandrovna, Omaeva Tatyana Mikhailovna.
View project - creative.
Duration - short-term.
Performers project - children, teachers, parents.
Target project:
Development of artistic and creative abilities of younger children .
Tasks project:
1. Introduce younger children preschool age from unconventional ways of drawing, to develop interest in visual arts;
2. Contribute preschoolers mastering the simplest technical techniques for working with various visual materials.
3. Encourage students to independently apply (monotype, leaf printing, finger painting, embossing, poking, etc.)
4. Help parents get acquainted with; stimulate their joint creativity with children.
Expected results of implementation project:
1. Formation younger children preschool age knowledge about unconventional ways of drawing;
2. Preschoolers’ knowledge of the simplest technical techniques for working with various visual materials;
3. Students’ ability to independently apply unconventional drawing techniques;
4. Increasing the professional level and pedagogical competence of preschool educational institutions teachers in the formation of artistic and creative abilities of younger children preschool age through the use unconventional technology drawing;
5. Increasing the competence of parents of pupils in the matter drawing using unconventional techniques, active participation of parents in joint creative projects.
Preschool childhood is a very important period in life. children. It is at this age that every child is a little explorer, discovering the unfamiliar and amazing world around him with joy and surprise.
The child lives in a huge real world, in which much is still inaccessible to him due to his age characteristics. We, adults, are intermediaries between the world around us - the world of nature, people, things, art and the tender, fragile, emotional and responsive to everything new, amazing, bright soul of a child. Nurturing a child's feelings begins with beauty. The need for beauty and kindness appears in the baby from the first days of his life. life: he reaches for beautiful toy, freezes when he hears the sounds of music; Having matured a little, he looks at the bright illustrations in the book, trying to depict on paper the beauty that only he understands.
Modern children are actively exploring the virtual world. At the same time, they experience a decrease in interest in their surroundings; in children’s minds, the lines between good and evil, beautiful and ugly are blurred.
Undoubtedly, the foundations of a developing personality are laid in childhood, and there is a danger that society in the future may receive a soulless generation, indifferent to painting, not understanding music and poetry. Therefore, today aesthetic development comes to the fore; there is a need to revise its ideas, search for new approaches that allow building the process aesthetic development in accordance with the interests of the child, his needs, abilities.
From a very early age, children actively try to reflect their impressions and feelings about the world around them in visual arts. There are many techniques with which you can create original works having no artistic skills. Drawing is of great importance in shaping the child’s personality. Communication is especially important drawing with the thinking of a child. At the same time, visual, motor, and muscular-tactile analyzers are included in the work. Besides, drawing develops intellectual children's abilities, memory, attention, fine motor skills, teaches the child to think, analyze, compare, compose and imagine. But most importantly, by creating an image, the child acquires various knowledge; his ideas about the environment are clarified and deepened; in the process of work, he begins to comprehend the qualities of objects and remember them characteristic features and details, master visual skills and abilities, learn consciously, use them.
However, standard sets of visual materials and ways transmitting information is not enough for modern children, since the level of mental development and potential of the new generation has become much higher.
Drawing in an unconventional way, a fascinating, mesmerizing activity that surprises and delights children. Kids are attracted to unconventional theme technique what is possible paint whatever you want and how you want, also these ways allow children to quickly achieve the desired result, which with the help of conventional technology drawing is still difficult to do, especially for children 3-4 years old. There is no development of creativity here borders: blotography, drawing fingers and palms, poking with a hard semi-dry brush, rolling paper, imprinting with crumpled paper, wax crayons + watercolor, candle + watercolor, bitmap, spraying, leaf prints, foam rubber and vegetable stamps, nitcography, monotype, drawing on wet paper, collage, cork printing, painting with cotton swabs, sand painting, soap bubbles, stencil printing, plasticineography, paint blowing.
Each of these techniques is a kind of game where children feel more relaxed, more confident, where they are given the opportunity to express their own fantasies and self-expression in general. Unconventional drawing techniques demonstrate unusual combinations of materials and tools. The advantage of such techniques is the versatility of their use. Variety of techniques promotes expressiveness of images in children's drawings. Mastering image techniques brings joy to children if the activity is structured taking into account the specifics of age children. Usage non-traditional the technician makes it possible to use also collective form creativity. She brings you closer children, develops communication culture skills, creates a special emotional atmosphere.
Aristotle also noted: class promotes drawing diversified development of the child.
Stage I – preparatory:
1. Study and analysis of scientific research, methodological literature, Internet resources on this issue; selection of software and methodological support for this problem; visual demonstration, handout material.
2. Content development project: « Unconventional drawing methods for children of the second younger group».
3. Planning upcoming activities aimed at implementation project.
4. Sociological survey of parents.
Stage II - main:
1. Creation of conditions, promoting stimulating the development of creative abilities of children of the younger group.
2. Skill development artistic activity younger children preschool age, organization joint activities teacher, children and parents.
With children junior preschool age recommended use:
- finger painting;
Signet imprint,
- palm painting.
Children middle preschool age can be introduced to more complex technicians:
Poking with a hard semi-dry brush,
Foam rubber printing,
Cork printing,
Wax crayons + watercolor,
Candle+watercolor,
Leaf prints,
Drawings from palms,
- painting with cotton swabs,
Magic ropes.
And in older preschool age, children can master even more difficult methods and technology:
- sand painting;
- drawing with soap bubbles,
- drawing with crumpled paper,
Blotography with a tube,
Plasticineography,
Monothepy.
Each of these techniques is a little game. Their use allows children to feel more relaxed, bolder, more spontaneous, develops imagination, and gives complete freedom for self-expression.
Stage III – final:
1. Consultation for parents and making a folder - extensions on the topic " Unconventional drawing methods".
2. Exhibition of drawings "Kalyaka - Malyaka"
3. Presentation project on the pedagogical council.
Conclusion:
Our project« Unconventional drawing methods for kids» aimed at developing creative imagination in younger children preschool age through the use unconventional drawing techniques.
Visual activity is perhaps the most interesting view activities of preschool children. It allows the child to express his impressions of the world around him in his drawings. At the same time, visual activity is invaluable for comprehensive development children, revealing and enriching his creative abilities. Unconventional The approach to making images gives impetus to the development of children's intellect, encourages the child's creative activity, and teaches him to think outside the box. Important condition child development is an original task, the very formulation of which becomes an incentive for creativity.
Children are very attracted to non-traditional materials The more diverse the art materials, the more interesting it is to work with them. Therefore, introducing preschoolers to unconventional drawing techniques allows you to not only increase interest children to visual activity, but also promotes development of creative imagination.
Currently the guys own many non-traditional techniques: finger painting, palm painting, foam rubber prints, vegetable stamps, blotography, candle or wax crayons with watercolors and others, etc. Kids really like the variety of techniques, children's work has become more interesting and varied. Thanks to involvement in our parents project, their family leisure time has become more exciting. Children with their mothers and fathers began to invent their own non-traditional methods of representation.