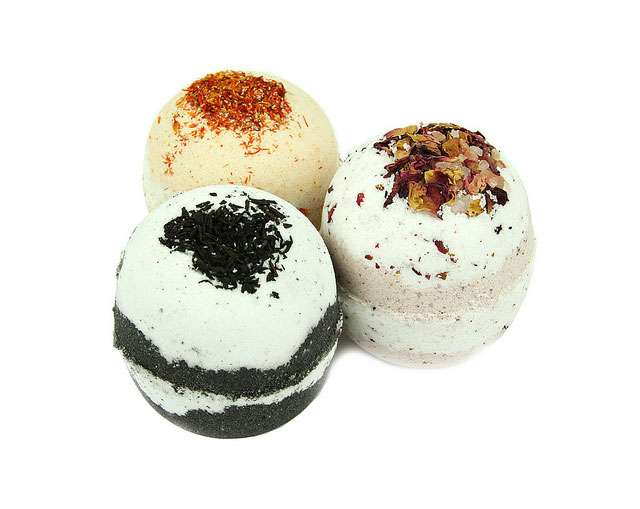
On this page you will find a master class on Bath Bombs, learn a lot about these products and, most importantly, understand how to make a bath bomb with your own hands!
Bath bombs are small products designed to soften your skin and relax your entire body! The finished products are placed in a bathtub filled with water and begin to hiss, creating a geyser effect. Everything is really simple, and you can get such an amazing handmade product practically for free, without buying expensive store-bought analogues!
Below we present our step by step instructions, according to which we are able to create these products.
Bath Bomb Ingredients
Baking soda
Lemon acid
Dyes
Sea salt (read more about sea salt)
Fillers (dried flowers and others)
Baking soda and citric acid are the main ingredients for bath bombs. Their attitude in any recipe should be 2:1. Add the remaining components as desired and in the desired weight. The variety of ingredients is amazing - some like to make a confetti-shaped filler, others manage to make a big bomb and make a surprise in it (for example, the bomb begins to fizz, and as soon as the shell of the product begins to gradually dissolve, a rubber toy appears there).
Step-by-step instructions for making bath bombs
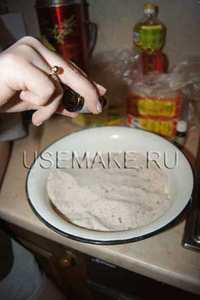
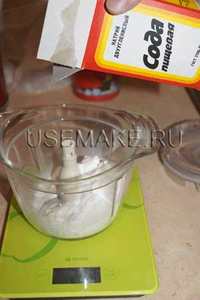 Weigh the required amount of your ingredients. This can be done very simply using electronic scales- you are unlikely to get the necessary proportions by eye.
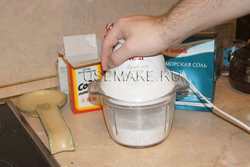 Take a mixer or blender and alternately grind baking soda with citric acid (be careful with crushed citric acid - do not allow it to enter your respiratory tract! Use a respirator and work in a well-ventilated area!). After all, bath geysers fizz thanks to the reaction of baking soda + citric acid + water, and citric acid is a very active substance.
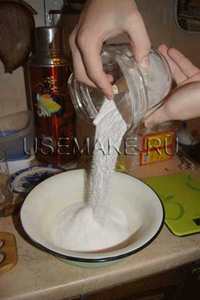 Do the same with all the other components (except for any decorations like flower petals, grass, etc.). The finer the soda, citric acid, salt and other components, the stronger your bombs will fizz.
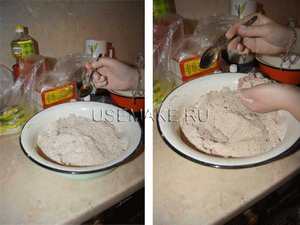
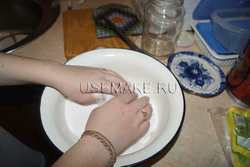 Mix the entire mixture together. If you have skin diseases, such as eczema, or wounds, then wear rubber gloves. If there are no skin problems, you can do this calmly with your bare hands.
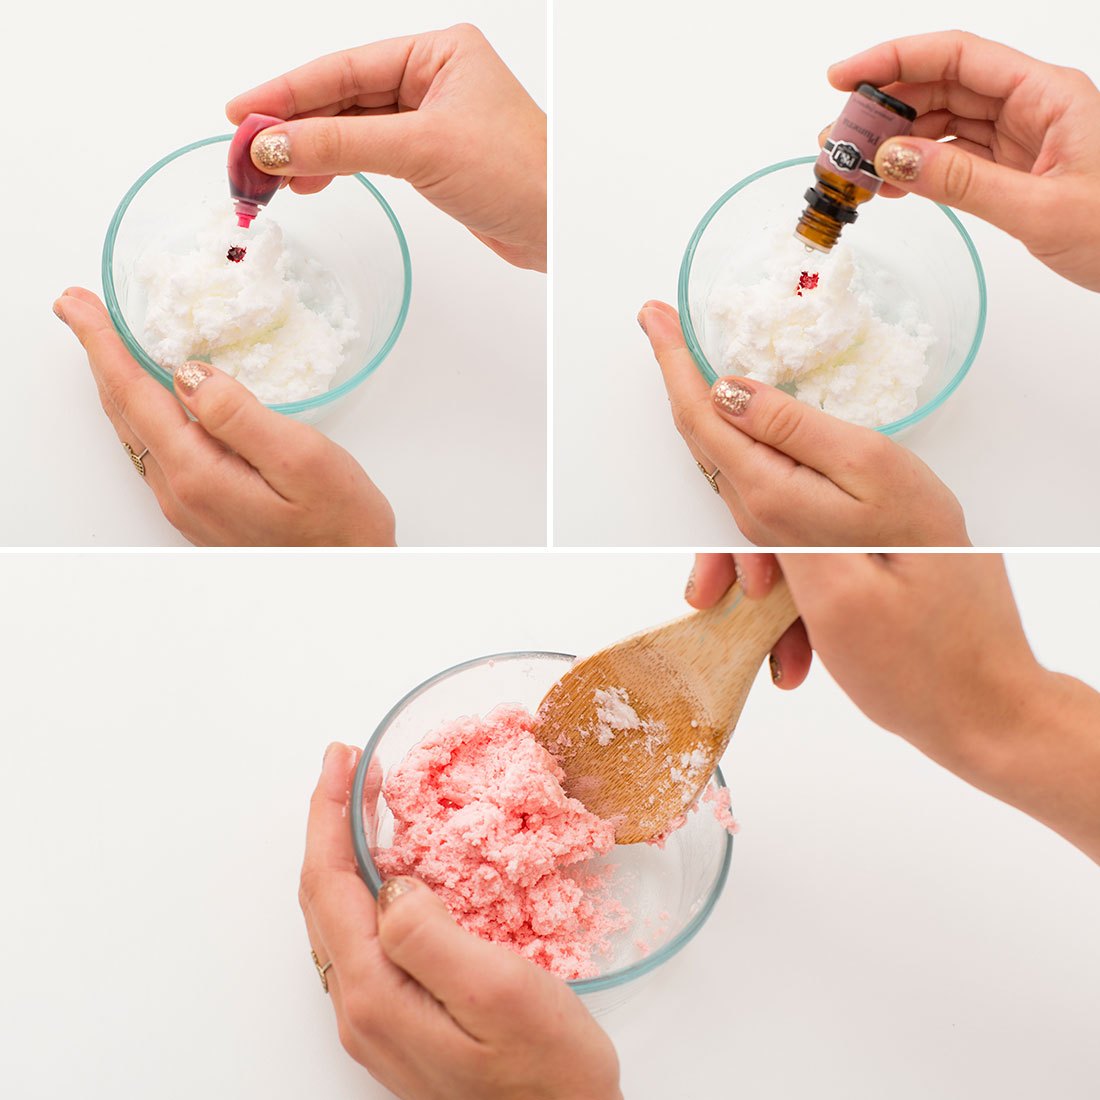
 Add a small amount of essential oils (or fragrances, but not both!), dyes (see section) and mix gently with your hands.
 Take a small drop of water on a teaspoon and add to the resulting mixture - it will start to fizz, so start stirring again to quench the reaction.
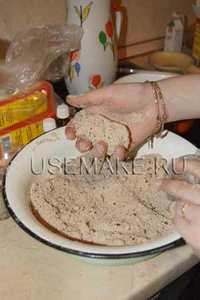 Take a small piece of your mixture and try to squeeze it. Does it feel like damp sand? Great! This means your DIY bath bombs are ready to be packed into a mold!
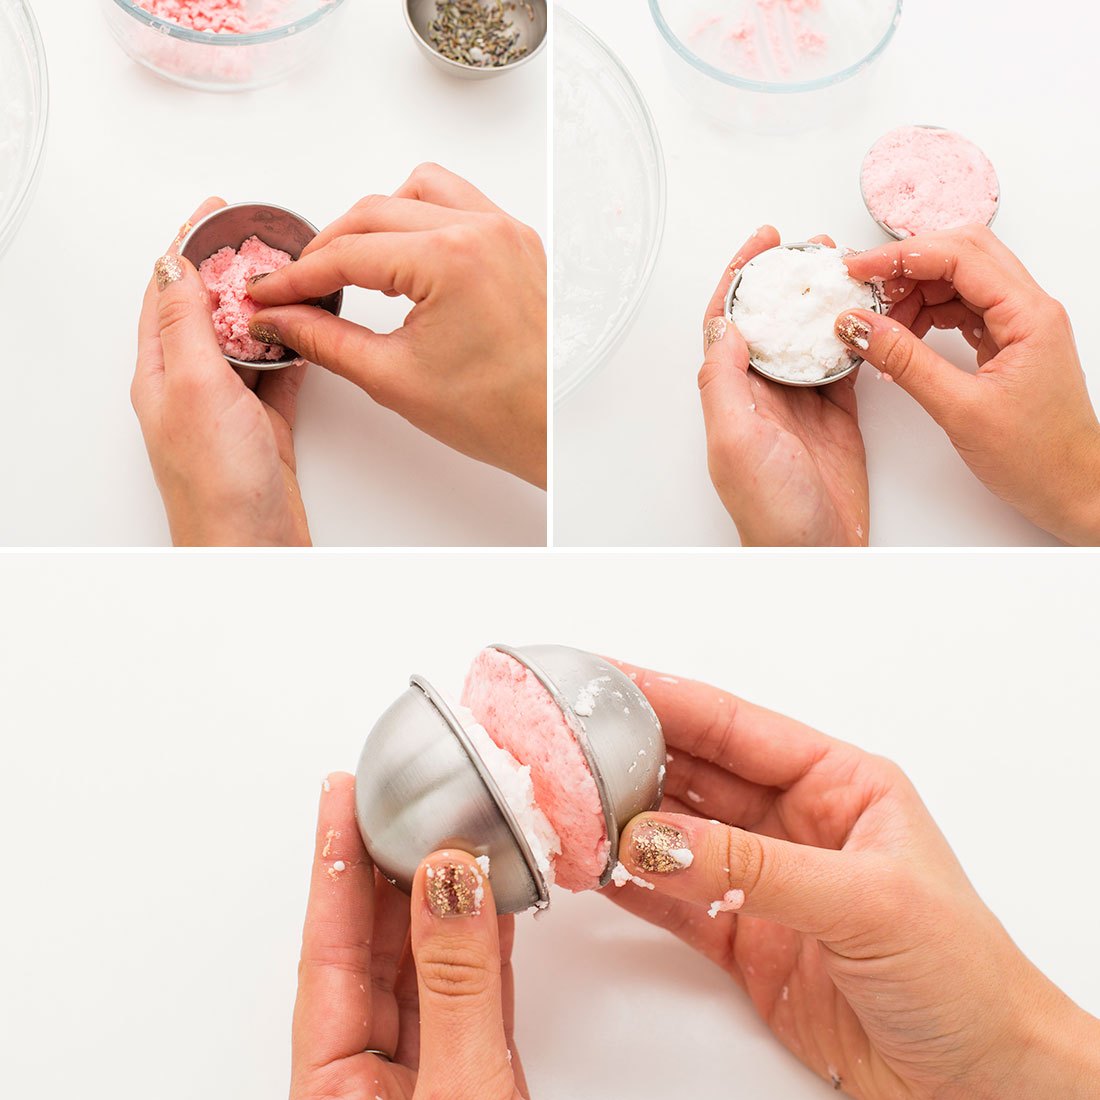
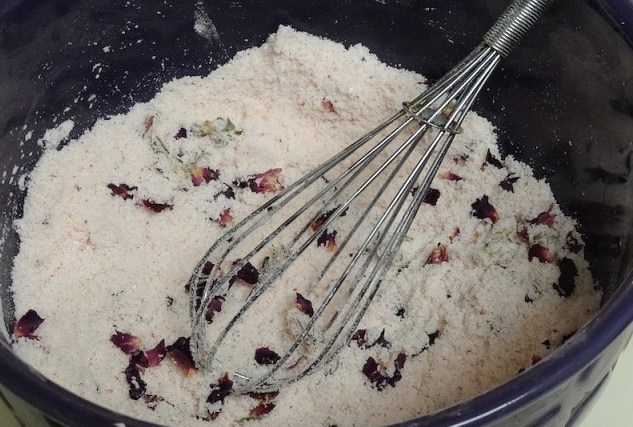
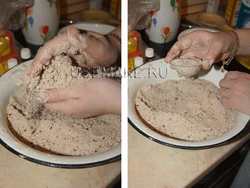 If desired, add herbs and petals to the ramekins for decoration. Now pour the resulting mixture into each half of the mold and compact it tightly, and pour a small pile of the remaining mixture onto one of the molds. This is necessary so that both halves penetrate each other when fastened.
 Take the two halves and squeeze them tightly with both hands - hold for 10 seconds.
 Secure the two halves at the edges with clamps and leave for 6 hours, or better yet, all day. You can put it on the battery - it will be even better, or in the sun - in the summer it’s a pleasure to make bombs.
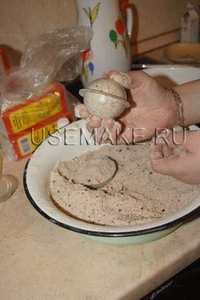
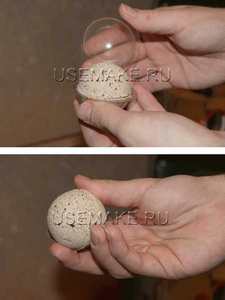 After drying, carefully remove the molds. Take the mold, hold one part of the mold firmly with your left hand, and use the other hand to twist the other part of the mold in a circular motion.
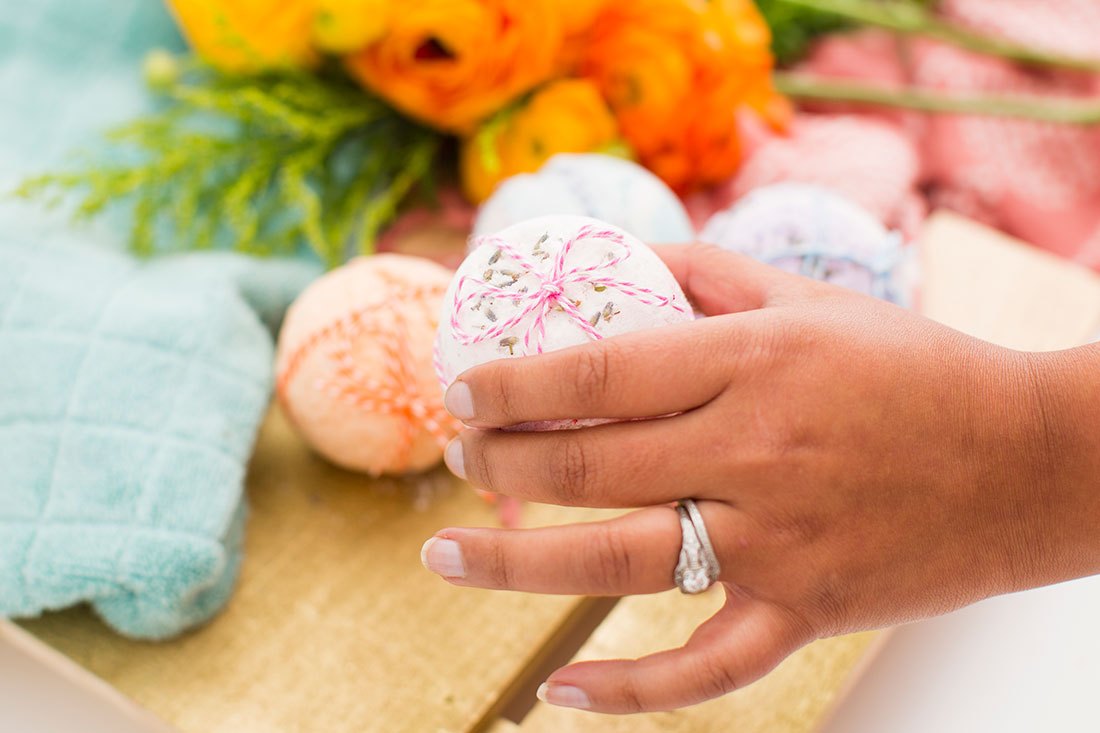
Everything is ready and you can use these lovely bombs!
Store finished products in a dry, cool place.
This is a general outline of how to make a bath bomb. In this section you can find ready-made recipes for your future creations!
We hope that you liked this DIY bath bomb master class and that you share this page with instructions with your friends! Until next time!
Karina Moroz |04/08/2015 | 1701
Karina Moroz 04/8/2015 1701 In this article you will find step by step instructions
How to make your own bath bomb. Manufacturers want to extend shelf life at any cost. cosmetics , so they add chemicals such as preservatives. And even if the packaging says “ handmade
“, this does not guarantee that there is no “chemistry” in the composition.
Unfortunately, such cosmetics do not bring any benefit and can also cause allergies. That's why we recommend making your own home remedies, particularly bubbling bath bombs. This process will take you only 20 minutes, and staying in the bath will bring a lot of positive emotions.
A homemade bomb can be thrown into the bathtub in which one is bathing. Small child. After all, you know that there are no dangerous “chemicals” in this product. And besides, it will be very interesting for the baby to watch the bubbling balls.
Bath Bomb Recipe
We suggest making effervescent bombs with the aroma, which, in our opinion, is the most universal. You can choose the scents that you need or just like better. For example, lemon will perfectly lift your mood, and mint, eucalyptus and tea tree will disinfect the skin and help cope with colds.
So, you will need:
- 200 g baking soda;
- 100 g citric acid;
- 40 g whole milk powder;
- 10 g grape seed oil;
- 30 g of solid coconut oil or other butter;
- 10 ml of any essential oil (in our case, lavender);
- some peels from fruits or flowers of dried plants;
- 1 large bowl;
- cup or small bowl;
- silicone molds;
- spray.
How to make bubbling bath bombs?
1. Mix dry ingredients
Pour the baking soda, citric acid and milk powder into a large bowl and mix everything well with a spoon or your hands.
If you have any wounds on the skin of your hands, wear latex gloves. Otherwise, this “explosive” mixture will burn your hands.
2. Melt the butter
Place the butter in a cup or small bowl and pour in the grape seed oil. Melt the mixture in the microwave or in a water bath. You should get a homogeneous liquid mixture.
3. Mix everything
It's better to do this by hand. Add melted butter to the dry ingredients a little at a time and mix everything very quickly. At the same time, rub each drop of oil thoroughly in your palms. If you pour in a lot of oil at once, the mixture will start to sizzle, and we don't need that for now.
The finished mixture should have the consistency of wet sand, from which you can easily mold any figure in your palms. If the resulting mass is dry, you can lightly wet your palms with water and quickly mix it, sprinkle a little water from a spray bottle, or add a few more drops of grape seed oil.
4. Flavor the mixture
Add a little essential oil to the resulting mixture. At the same time, mix each drop thoroughly, avoiding hissing.
If you don't want a lingering smell while taking a bath with bombs, you can add just a few drops of ether. Also, keep in mind that all oils have different scent levels.
5. Place in molds
Pour some dry herbs into each mold. Then spread the resulting mass, compacting it tightly with your fingers. Leave the molds for about 15 minutes so that the mixture in them hardens a little.
If the room is quite hot and humid, place the molds in the refrigerator.
After the mass has hardened, carefully turn the mold over a wide plate or board and lightly tap it with your fingers. The bombs should fall out. Carefully place them on a plate and let them completely harden. This will take several hours.
Effervescent balls are ready for use.
The soda and citric acid contained in them exfoliate the skin well, milk moisturizes it, and essential oil saturates it. useful substances and gives a pleasant aroma. Enjoy your bath!
Based on materials from the website www.dziecisawazne.pl
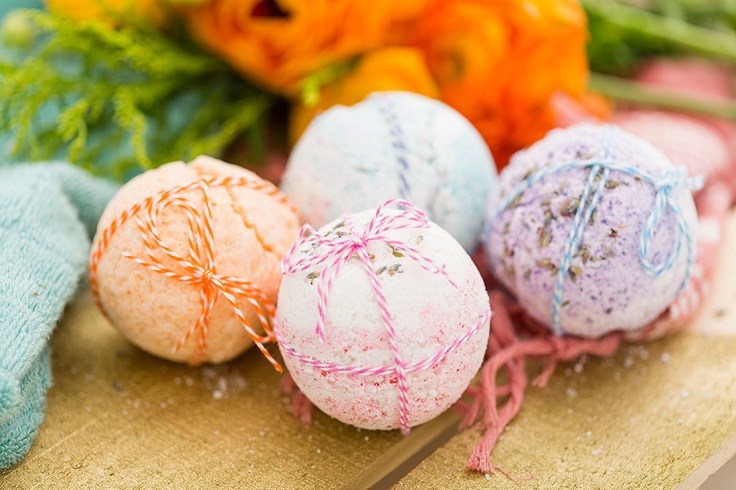
After an exhausting day - what could be better and more enjoyable? Make it good for your skin too. Fragrant geyser bombs will help you with this. They are easy to create yourself, to your taste, using only natural ingredients.
FL offers you a master class on making such bombs.
Classic white bomb
liveinternet.ruSoda: softens water, relieves irritation, its vapor cleanses the mucous membranes of the upper respiratory tract.
Citric acid: cleansing and whitening effect.
Almond oil is suitable for all skin types.
You will need: a bomb mold, a deep dry bowl, a spoon and gloves.
Ingredients:
- 2 tbsp. l. citric acid;
- 4 tbsp. l. baking soda;
- 3 tbsp. l. powdered milk (optional);
- 1.5 tbsp. l. almond butter (optional);
- 5 drops coconut fragrance (optional)
Preparation:
1. Wear gloves. Prepare a mixture of basic ingredients: grind citric acid in a coffee grinder and mix it with baking soda, sifted through a sieve. Stir.
2. Add dry milk. Stir again.
3. Pour almond oil and fragrance into the mixture. Carefully rub the ingredients with your hands to distribute the oils throughout the entire structure and obtain a uniform consistency - you need to achieve wet effect. The resulting mass, when squeezed in a fist, should form a lump.
4. Carefully press the molds into each half and connect. Press and twist firmly for better grip.
5.Carefully remove from pan. Leave to dry in a dark place at room temperature (4 hours to 1 day).
6. Store by wrapping the bombs in cling film.
We prepare other bombs in the same way, the recipes for which are posted below.
Bomb with anti-stress effect
pinterest.com
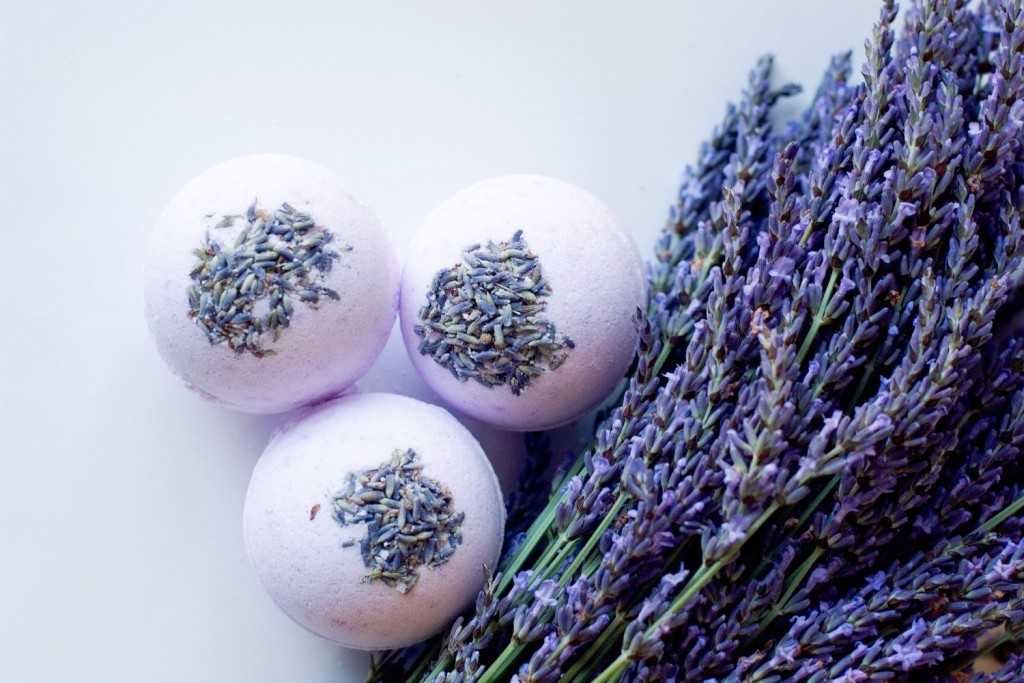
Lavender oil has a beneficial effect on nervous system. It is advisable to use it for neuroses, stress, insomnia, depression, and increased fatigue.
Wheat germ oil nourishes and softens the skin.
Ingredients:
- 4 tbsp. l. milk powder (cream);
- 2 tbsp. l. wheat germ oils;
- 5 drops of lavender essential oil;
- 5 drops of neroli essential oil;
- 1 tbsp. l. crushed dry lavender or powdered extract.
For decoration: dry lavender or its extract.
Bomb "Romance"
pics-zone.ru
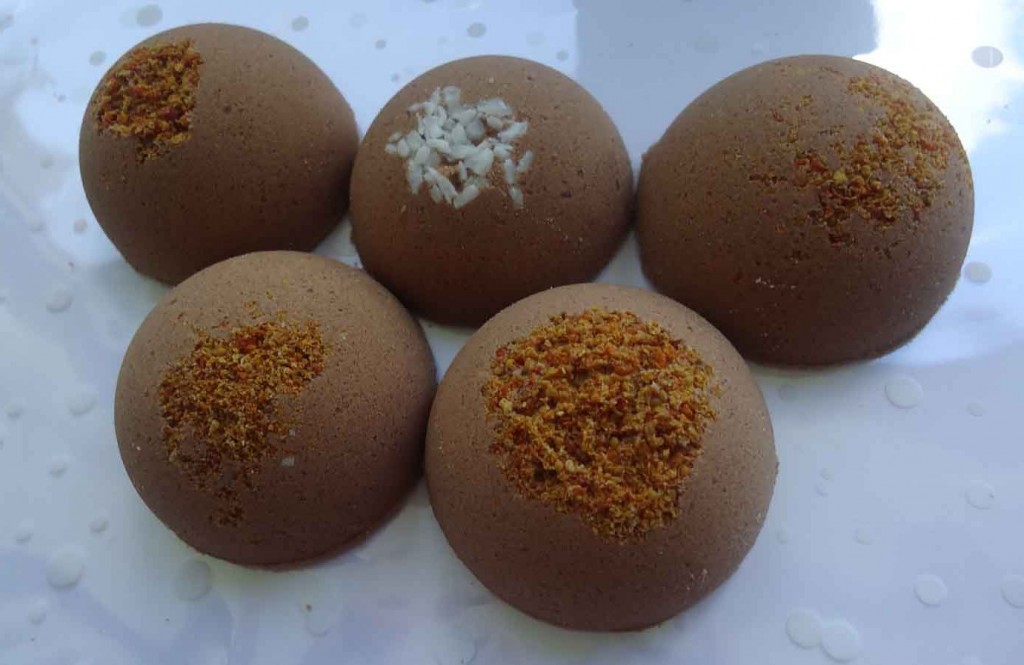
Cocoa has a good effect on the skin - moisturizes and tones. It becomes smooth and silky.
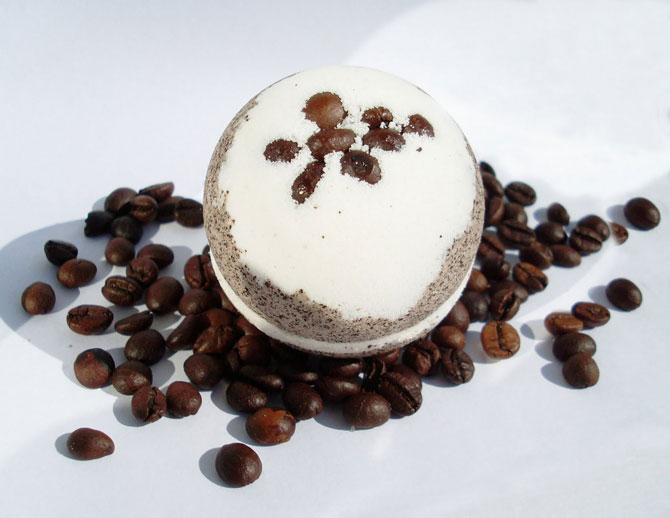
Ingredients:
- base mixture ( baking soda, lemon acid);
- 3 tbsp. l. cocoa;
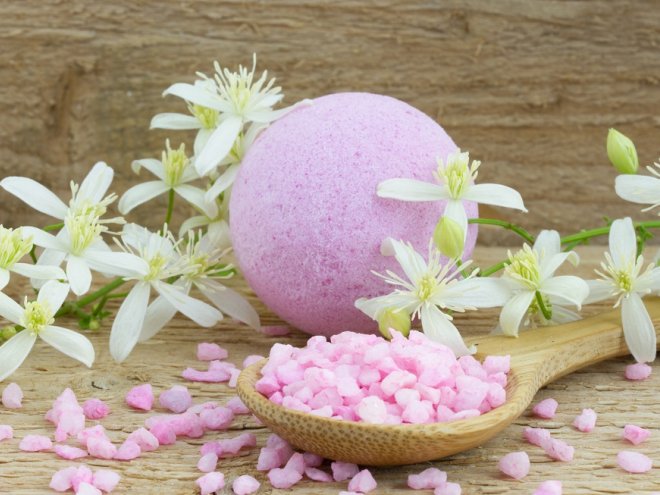
- 1 tbsp. l. sea salt (colored);
- 3 tbsp. l. green coffee;
- 5 drops of orange essential oil;
- 10 drops of grapefruit essential oil;
For decoration:
- soap shavings;
- lemon zest;
- orange zest.
Place in the mold like this: place soap shavings and zest in the center. Add the rest of the mixture to the mold, not reaching the middle, add a layer of sea salt and add the mixture again. Connect both filled halves.
Mineral bomb
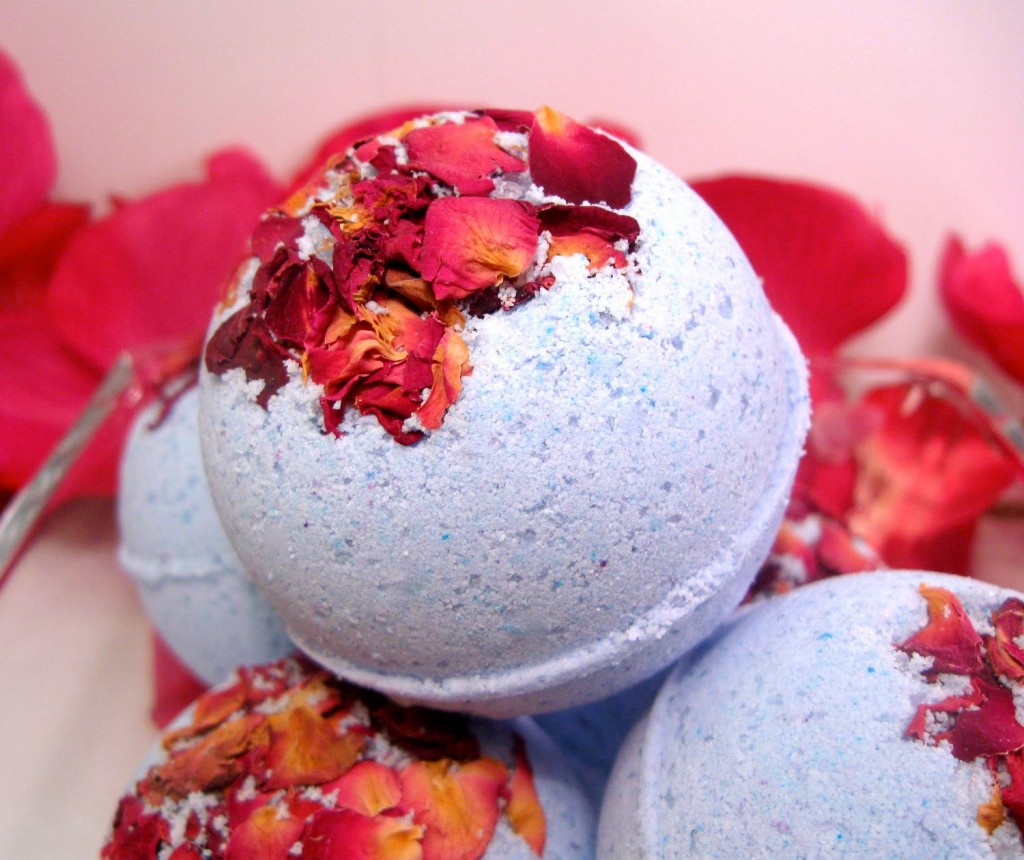
pinterest.com
Ingredients:
- base mixture (baking soda, citric acid);
- 3 tbsp. l. magnesium sulfate (sold at pharmacies);
- 1 tbsp. l. glycerin;
- 1 tbsp. l. almond oil;
- 10 drops of rose essential oil;
For decoration: fresh or dry rose petals.
Bomb for cleansing skin from pimples
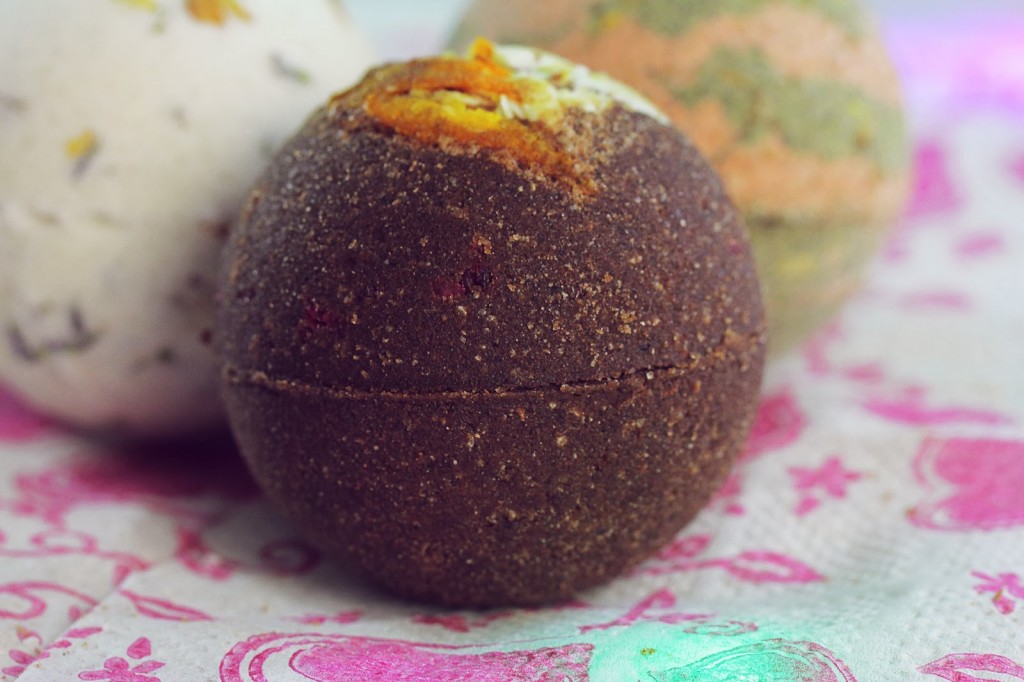
pinterest.com
Black clay improves metabolic processes in the body, relieves skin redness and removes toxins. Red clay is suitable for sensitive skin, saturates it with oxygen and tones.
Ingredients:
- base mixture (baking soda, citric acid);
- 1 tbsp. l. milk powder;
- 1 tbsp. l. black clay;
- 1 tbsp. l. red clay;
- 5 tbsp. l. jojoba oils;
- 5 drops of tea tree essential oil;
- 5 drops cubeb essential oil;
- 1 tbsp. l. chopped yarrow herb;
- 0.5 tbsp. l. neem herbs
For decoration: orange, lemon peels.
Preparation:
1. Prepare the base mixture (see first recipe).
2. Add dry cream. Stir.
3. Divide the mixture into two parts. Add black clay to the first, and red clay to the second.
4. Add yarrow and neem herb to the black clay.
5. Add the oils into both mixtures in a thin stream. Stir and place in molds. Remove and leave to dry.
Helpful Tips:
- Be sure to make sure you are not allergic to them before using.
- For a child under 3 years old, you can put a small toy in a bag inside.
- It is good to take such a bath for 20 minutes (only after a shower, otherwise the essential oils will be washed away).
Natural cosmetics made with your own hands - what could be better! Today we are offering a master class on making fragrant and healthy bath bombs. They may become a good gift for a close relative, friend or colleague for almost any occasion.
Agree, after a working day it’s so good to relax in a warm bath, and if you add aromatic fizzy bomb- it will be doubly pleasant.
For our master class, we chose the most popular and simple recipe. But based on it, you can come up with your own - for example, replace milk powder with starch or oatmeal. You can add any base oils, sea salt and other healthy ingredients to the mixture. The scent and color of the bomb is also your choice. Experiment!
We will need:
4 tablespoons soda
2 tablespoons citric acid
1 tablespoon milk powder
1 tablespoon sea salt
2 tablespoons of base oil (in our case, peach oil)
5 drops bergamot essential oil
5 drops rosemary essential oil
dried heather flower
Cooking process:
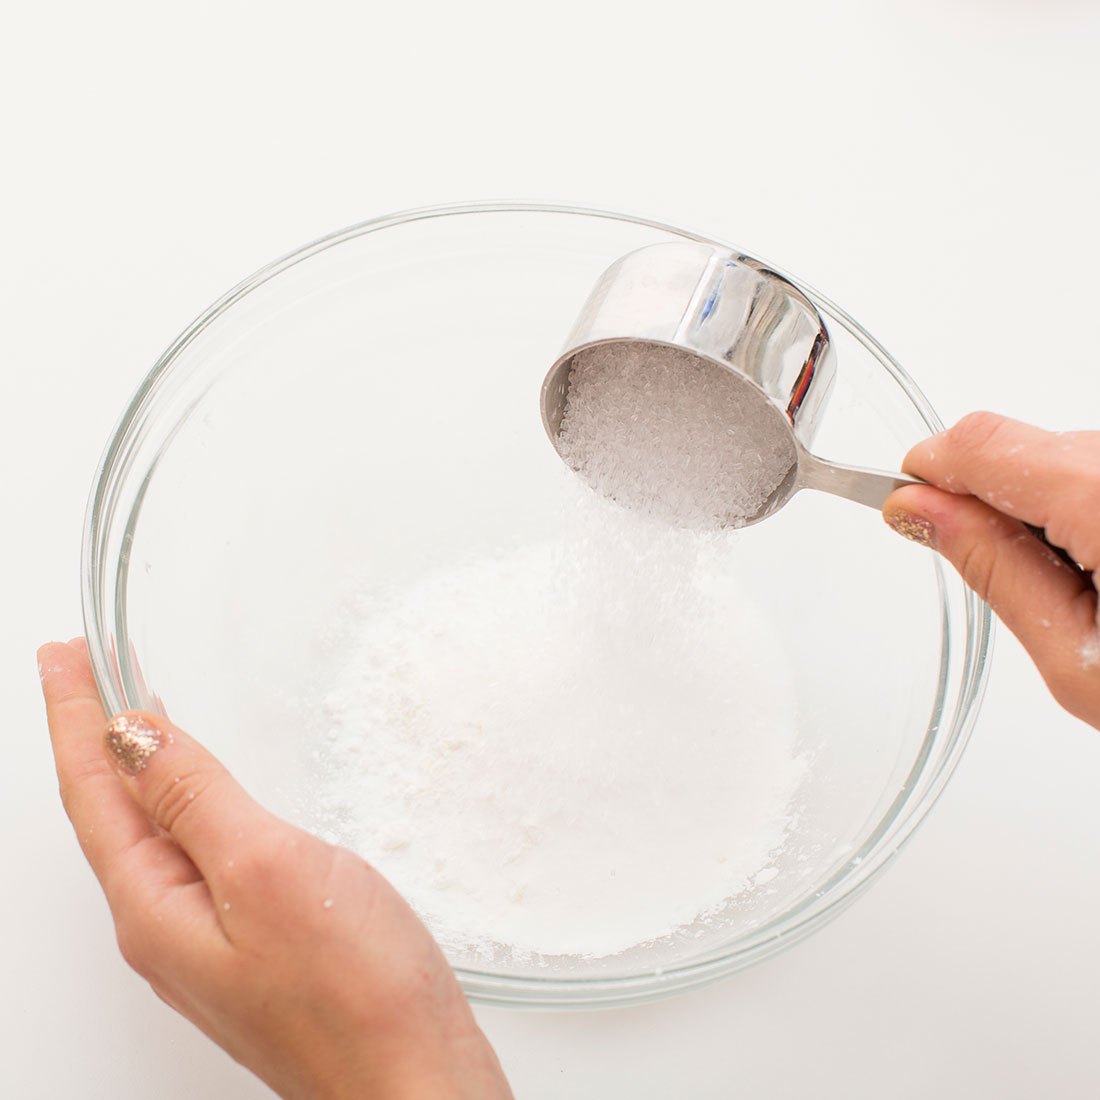
First, sift the soda so that there are no lumps left. Pour into a clean, dry container. Add citric acid, dry cream and sea salt, previously crushed in a coffee grinder.
Mix everything very thoroughly so that the components are evenly distributed.
Please note that the filler can be anything: milk powder and sea salt, as in our recipe, corn or potato starch, even powdered sugar and much more.
We take base oil (in our case, peach oil, but it can be almond or olive. Everything is to your taste). In a separate container, mix it with essential oils bergamot and rosemary. You can add a few drops of vitamin A and E.
Add the resulting oil mixture to the main dry mixture. Mix thoroughly with your hands (be sure to wear gloves).
If the dough is too dry and crumbly, carefully moisten it with water from a fine spray bottle and quickly mix. 1-2 sprays will be enough. You need to make sure that the mixture does not start to sizzle. The dough will be sufficiently moistened if the lump does not fall apart when squeezed in your fist.
So, the dough is wet enough, which means it can be distributed among the molds. Place a pinch of dried heather flowers on the bottom of the mold and layer it with a teaspoon. We compact each one thoroughly. Instead of heather you can put cereals, dried cornflower, rose petals, coffee beans, it all depends on your imagination and availability.
There are special molds for bombs, but you can get by with children's plastic ones for the sandbox, or a chocolate egg case. For round ones, a candy ball is perfect. The shape can be any, the main thing is that it does not bend.
Leave to dry at room temperature in a dry, dark place overnight. Then carefully remove the bomb from the mold and keep it for another day. Now our pop is ready to use!
Remember, you need to store the finished bombs in cling film to preserve the aroma of essential oils and the level of humidity.
And some more advice from the “experienced”.
If the bombs began to increase sharply in volume immediately after you took them out of the mold, or the next morning you discovered a flattened pancake rather than a neat ball, do not be alarmed. You need to know that this could happen for several reasons:
Too much oil or water has been added;
- high air humidity indoors or outdoors (it’s raining, the kettle is boiling, food is being cooked with the release of a large amount of steam, etc.).
If you realize that the bomb is “exploding”, do not remove it from the mold. Wrap tightly plastic bag and put it in the freezer. If the humidity in the room is high, try the waterless method of production, using alcohol or adding more oil for this purpose.
These simple tips will help you create your own unique fizz quickly and without hassle.
- These are thin elastic strips coated with whitening gel. They precisely follow the unique shape of your teeth. Active components provide a whitening effect and do not damage the enamel.
The effectiveness of the strips has been clinically proven: after the first use of Celebrity Smile strips, your teeth will become significantly lighter, and after 7 days they will lighten by 4-5 tones.
If you are one of those people who adore comfort and are also looking for some zest in everything, you probably know something about bombs that are rapidly gaining popularity, which are also called geysers. It is these little sizzling balls that add a special touch to the usual bath time and turn it into a kind of art that you don’t really want to part with. They are the ones who can bring a touch of grace, amazing sensations and even bright colors to this daily ritual.
And what if DIY bath bombs are made, so their advantages simply increase significantly. Firstly, they become 100% useful. After all, at home you can make them only from natural and food ingredients. Moreover, you can easily create various options for any level and direction of usefulness. Such crafts look very stylish and can be perfectly packaged to give to your loved ones. Well, and, of course, a very pleasant moment in all these processes with home production is the opportunity to get a high-quality, extremely useful and very cheap product. After all, buying ready-made bombs is often a very expensive pleasure.
In general, the benefits of creating such mini-cosmetic masterpieces are enough to give them a try. And here the question arises for many: how? Indeed, despite their popularity, these small magical spheres still remain an intriguing mystery for many. Although in fact, everything is very simple here: they rush into the bath while bathing and begin to hiss, reacting with the water. This allows all the components in the bomb to actively fill the bath with all the useful things that are in this very bomb and enjoy the result of their action on your loved ones. You can see how all this happens in the video:
What are the benefits of bath bombs?
Since the main ingredients of such creations are soda, salt, citric acid and various oils, you can first consider the benefits of these components.
So, soda softens water and has a beneficial effect on the skin, acid becomes a conditioner and removes toxins, and benefits of salt has long been known - strengthens the immune system, fights cellulite, improves cell turnover, maintains skin elasticity, relieves fatigue and calms the nervous system. And if you add it to such a cocktail essential oils, then the benefits will be absolutely invaluable. All this is contained in such wonderful bombs, which are prepared quickly, and are easy to use, and in general, a bath with them becomes a heavenly pleasure. But this is, of course, if you know exactly their composition. Therefore, if you want to be sure of the exceptional benefits of the bomb you use, best option I can't find anything to do with my own hands.
How to make bath bombs
The essence of creating such interesting balls comes down to two methods.
First way involves mixing all ingredients (soda, citric acid, natural filler, base oil and essential oils) without adding water.
Second way, practically does not differ in composition from the first one (except perhaps in the amount of added base oil), but water is already used here.
Important! Whichever method you choose, there are certain rules that will ensure you get the perfect result:
- It is better to grind salt and citric acid first. For example, a coffee grinder.
- When working with acid, it is very advisable to use a mask and rubber gloves, since without them there is a risk of irritation of the skin, mucous membranes and respiratory tract from citric acid dust.
- If possible, it is better to give preference to silicone options as molds. They are more convenient and make it easy to separate the mass from the walls.
- The mixture must be compacted well into the molds so that there are no voids left. If both halves of the vessel are filled, you need to connect them without twisting, but simply press down well.
- To avoid a premature reaction, make sure the surface of the molds is completely dry.
- After removing from the mold, the bombs must be given time to dry before use. As a rule, 8-10 hours are enough for this.
- Corn starch, oatmeal or milk powder can be used as natural fillers.
Bomb recipes
Basic bomb
2 parts (take 100 g as a basis) soda;
1 part (50 g, respectively) citric acid;
1 part (50 g) sea salt.
And essential oil (about 10 drops are enough for this amount).
Water in a container, thanks to which it can be sprayed onto the mass. A standard spray bottle works great.
And, of course, molds.
All these ingredients are mixed (do not forget that the salt and acid must be crushed first). Then, little by little, you need to spray water on them, constantly mixing the mass. The texture of the bomb mixture should be like slightly wet sand. 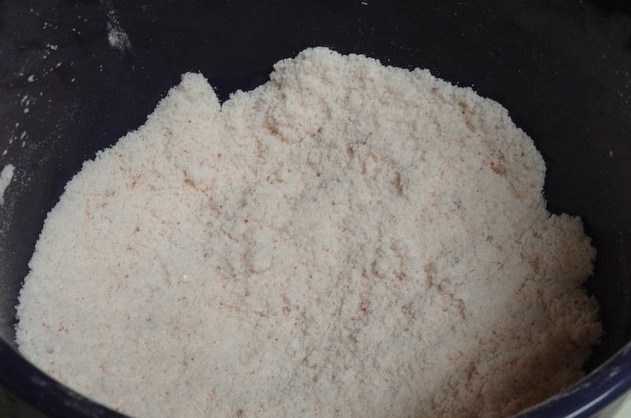
If it is ready, you can compact it into molds for 8-10 hours. After this you can take it out and use it.
Advice: Since the bomb does not contain various cosmetic oils, it may be difficult to remove it from the mold. To prevent this from happening, the container can be greased with vegetable oil or covered with cling film.
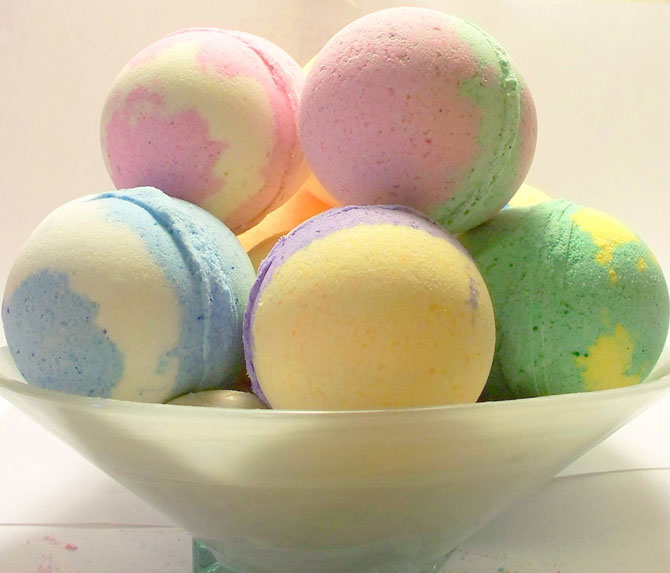
Bright colorful bombs
This recipe will be more complicated. But the bath will be filled with additional oils and unusual colors.
You will need:
1 cup sifted baking soda;
0.5 cups each Epsom salt (Epsom), cornstarch, ground citric acid;
3 tsp each water and melted coconut oil.
About 10 drops of essential oil;
Color palette of food dyes;
Dried flowers (optional).
Molds.
Advice: If you use different essential oils, you can add them later, when the mass has already been divided into different dishes. Then the finished bombs will not only be different colors, and also with different flavors.
Advice: You can mix different colors in one form, then you will get beautiful wavy transitions.
Advice: Here you need to be very careful, since the mass may crumble.
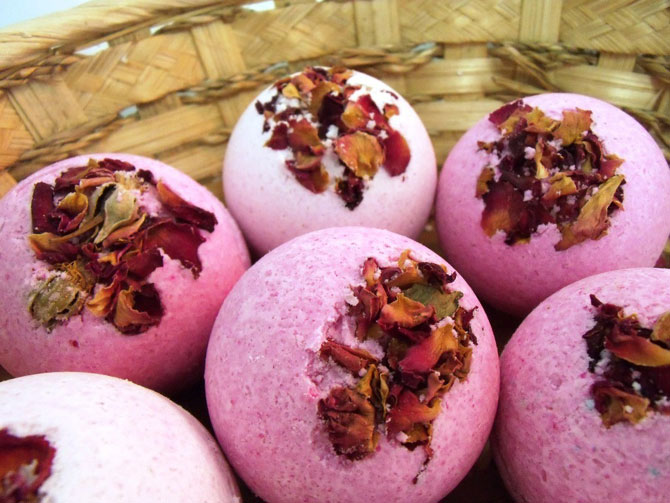
Exquisite pink bomb
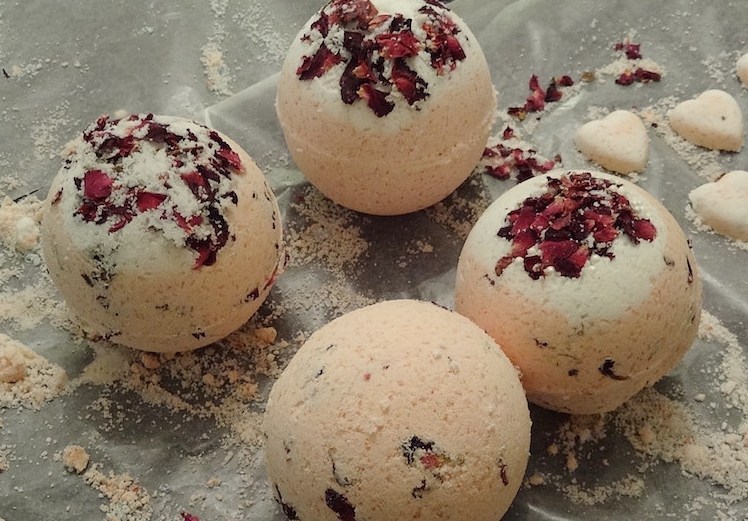
This bath will be covered with your favorite rose petals.
We will need:
1a glass of soda;
½ cup dry and sifted cornstarch;
½ cup crushed citric acid;
½ cup of salt (it will be ideal if you mix two types: sea and English).
2 tsp spoons of essential oil (you can use any oil);
You will also need a base oil. You can take coconut or any other that is available to you. You will need from 2 to 4 tablespoons. Here you will need to watch the preparation progress. First add 2 tablespoons, and if the mixture does not stick well enough in your hands, gradually add the rest to the desired consistency.
If desired, you can add food coloring (a couple of drops).
Possibly water in the spray bottle;
Parchment;
Towel;
Forms;
And, of course, dried rose petals.
Preparation:
By the way, such geysers can be beautifully packaged and presented as a gift. 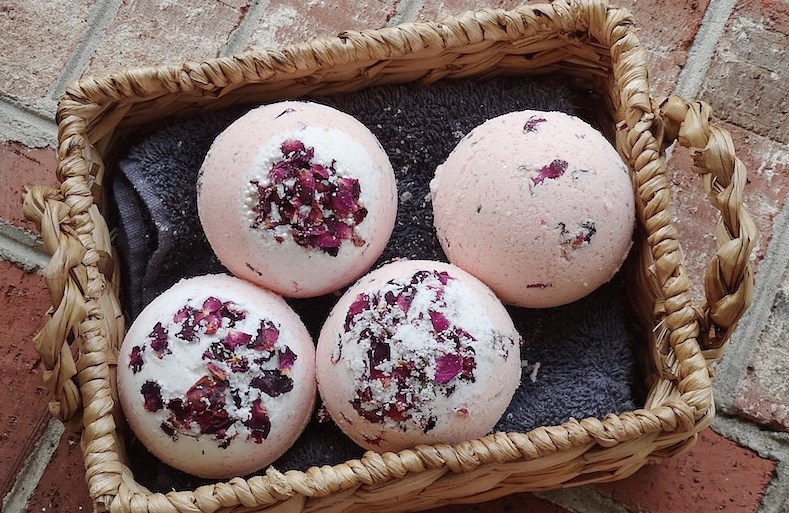
The most common mistakes made when making bombs.
- The ball does not fizz enough in the water. Perhaps you just overdid it with adding water. Next time try reducing the amount.
- The mass does not stick together well in the mold. Try adding more oil.
- When removed from the mold, the bomb cracks or falls apart. Try leaving the mixture in the molds for a few more hours. Another reason could be the wrong consistency, it may take several tries to guess the right one.
- Even after a day in the form, the bomb still falls apart. Here you can try letting it sit for a couple more days, and if this doesn’t help, then the reason is insufficient water. This can only be corrected during the next preparation.
- Geysers hold their shape, but crack a little. This indicates that a little more water was added than needed and a slight reaction occurred. As a rule, this does not spoil much appearance and even adds zest to the product.
- The bombs became soft during storage. This is due to high humidity. It is better to store such items in a dry place.
Now that you have all the information you need about bombs, you can become a true expert at making them. And after trying to make at least a couple of the suggested recipes, you will easily understand that you can make other types of small geysers. All you have to do is experiment with carrier oils, essential oils and food coloring. These experiences can be very exciting and incredibly creative. And you will be able to become not only a pro in preparing such homemade cosmetics, but also get the opportunity to get healthy, relax, preserve your beauty and, of course, delight your friends with pleasant gifts.


