By eastern calendar the coming 2017 will be held under the auspices of Fire Rooster. The Rooster loves rich colors in clothes and interiors, natural materials and original items. All these characteristics correspond to New Year's crafts that are suitable as souvenirs for friends and family. You can make a beautiful rooster with your own hands from different materials: paper, cardboard, cotton pads, fabrics. A to New Year's party in kindergarten or elementary school you can sew a costume for the symbol of the coming 2017. In our article today, we have collected for you the most vivid and interesting step-by-step master classes with photos and videos of cockerel crafts for children and adults. Be sure to use them to create original gift for the New Year! And such a rooster with his own hands will certainly attract good luck to you!
Symbol of 2017 Rooster made from cotton pads with your own hands for kindergarten - master class with step-by-step photos
The first master class on creating the 2017 Rooster symbol with your own hands for kindergarten contains two options for crafts - from cotton pads and colored paper. An ordinary plastic spoon is used as the basis for the bright cockerel. Find out how to make a rooster symbol for 2017 with your own hands from cotton pads for kindergarten from the instructions below.
Necessary materials for a rooster made from cotton pads with your own hands for kindergarten
- disposable plastic spoon
- cotton pads
- white and colored paper
- scissors and glue
- marker
Instructions for a master class on a rooster made from cotton pads for kindergarten
- For the first option for kindergarten we will need: two cotton pads, a plastic spoon, paper and glue. First we make the wing blanks. Cut out wings from a piece of white paper folded in half, as in the photo below. Cut out a beak and scallop from red paper.

- Let's move on to assembling crafts for kindergarten. First, lay out a cotton pad, then the wing blank, and a spoon on top. Coat the second cotton pad with glue and place it on top, pressing it tightly with your fingers. Set aside until completely dry.

- Let's move on to the second option. For this in kindergarten we will need: yellow paper, a plastic spoon, glue, a piece of red paper. We cut out the shapes of the scallop and beak from red paper.

- Turn the spoon over and coat it generously with glue. Then wrap it in a piece of yellow paper and let it dry.

- Cut out a square from yellow paper and thread it through the leg, as in the photo. Fix with glue or tape.

- Glue the scallops and beaks to the blanks, and draw the eyes with a marker. Ready!
A simple do-it-yourself paper rooster for an elementary school or kindergarten - step-by-step photos of a children's craft
The next master class is devoted to simple DIY rooster crafts made from paper and cardboard and is perfect for elementary school or kindergarten. And don’t think that such a craft is purely decorative. A simple do-it-yourself paper rooster for an elementary school or kindergarten can be used, for example, as a cap for a New Year’s costume.

Necessary materials for a paper rooster for elementary school or kindergarten
- cardboard
- colored paper
- scissors
- pencil
- eyes

Instructions for a master class on New Year's crafts DIY paper rooster for school or kindergarten
- We roll a sheet of yellow cardboard into a cone shape and mark the joint line with a pencil.

- Apply glue to the cardboard and press firmly for several minutes. When the cone has set a little, cut off the excess edge.

- On orange paper we make marks for the tail blanks. We measure strips approximately 2-3 cm wide along the entire length of the sheet.

- We cut out the strips and wrap them tightly around a pencil.

- We remove and get wavy “feathers” for the tail of our cockerel.

- On white paper we outline two blanks 5 cm wide and cut them out.

- We fold each strip like an accordion and glue it to the base of the cone - these will be the legs of the rooster.

- We make wing blanks and small circles for the feet from orange paper.

- Glue the wings. We cut out two blanks for the scallop from red paper.

- Carefully glue the comb to the top of the cone, clasping it on both sides. We also cut out the blank for the beak and attach it.


- All that remains is to glue the eyes and ours New Year's craft ready for kindergarten or school with your own hands!
DIY craft for the New Year 2017 of the Rooster from salt dough for school
Salt dough is an excellent material for DIY crafts for school, including for the 2017 New Year of the Rooster. Our next master class is suitable for both kids and adults. How to do original craft for the New Year 2017 Rooster to school with your own hands from salt dough, read on.

Necessary materials for the New Year's toy DIY salt dough rooster for school
- salt dough
- watercolor paints
- water and brush
- beads
- plasticine knife
- cardboard
Instructions for making a rooster for the New Year 2017 from salt dough for school
- Salted play dough is easy to make. You need to mix 1 cup of flour with half a glass of coarse salt and half a glass of water. Knead a non-sticky dough and get to work. Roll the dough into a thick sausage and distribute it over the cardboard in the shape of a heart.

- From pieces of dough we form an eye and a beak. We attach them to the main part, lightly lubricating the joint with water.

- Add a comb and use a plasticine knife to make textured simple patterns on the body.

- We make 5 small balls and form a tail out of them.

- We make the wing from a larger ball and add texture to it with a knife.

- We decorate the rooster using beads or pearls.

- We use watercolors to paint a craft for school in bright colors.

- Let the paint dry a little and add color. We dry the craft with our own hands in the sun.

DIY Christmas toy Rooster made of felt, master class with photo
The next master class will tell you how to make a New Year's rooster toy out of felt with your own hands, for example, for school. Felt is a very simple and pleasant material, so don’t be intimidated by it. I'm ready New Year's toy in the shape of a felt rooster with your own hands will become a decoration for any Christmas tree.

Necessary materials for making a New Year's felt rooster with your own hands
- foam ball
- thin felt white and red
- red threads for knitting
- pencil, paper, scissors

Instructions for a DIY Christmas rooster toy made of felt
- Measure the diameter of the ball using a paper strip.

- Divide the strip into five equal parts and mark it on paper.

- Transfer the marks to the ball.

- We make markings on the ball, as shown in the photo below. Using a utility knife, make shallow cuts along the marks.

- We make 5 sheet-shaped blanks from white felt.


- We place the blanks on the ball and use a thin nail file to fix their edges in the slots.

- Now we cut out the blanks for the wings and head - two pieces each.

- Between the two parts for the head we fold a red thread imitating a comb. We also make a beard out of it. Glue and add eyes and a beak made of red felt.

- We trim the wings with red thread and glue them to the main part of the craft.

New Year's rooster for a DIY gift, step-by-step master class with photos
DIY New Year's rooster from step-by-step master class Below is perfect for a gift. It won’t be possible to do it in kindergarten or primary school - it’s too complex craft for children. But for creative adults, a DIY New Year's rooster as a gift (master class with photos) is perfect. In addition, the finished craft turns out to be of good quality (this is not a craft made from cotton pads or paper), although it is made from a cardboard tray of eggs.

Materials for a New Year's rooster for a DIY gift
- cardboard egg tray
- scissors
- acrylic paints
- ball
- newspapers
- cardboard
Instructions for making a DIY New Year's rooster craft for a gift
- We cut off the internal partitions, cut them in half and connect the two pieces together.

- We cut off the side convex parts of the tray, as shown in the photo. We form the beak from a small triangular piece.

- From the flat part of the lid we cut out 5 blanks for the tail. From the remaining parts of the tray we cut out oblong blanks in the shape of leaves.

- Glue the leaf blanks onto cardboard in the shape of a wing (2 pcs.). We assemble the neck from the first blanks, add a beak and a comb made of cardboard. Inflate the balloon and wrap it with strips of newspaper dipped in glue.

- Let the papier-mâché dry and deflate the ball, cut off half of the workpiece and proceed to assembly.

- Paint the finished rooster with acrylic paints.


DIY crafts in the shape of roosters will be relevant not only during the holidays in New Year 2017, but also every year at Easter. And without them it is simply impossible to imagine an interior in Provence, country or rustic style. In this material we presented 6 step-by-step master classes, how to make cute crafts in the form of roosters to decorate your home, Christmas tree or holiday table from scrap and even waste materials.
Master class 1. Candy bowl in the shape of a rooster
Looking at this elegant candy dish, it’s hard to imagine that you can make it yourself, and even from... cardboard boxes for eggs. In fact, to make such a handsome man it will not take much time or the skills of an artist-sculptor. By the way, even a child can do most of the work, so this is a great idea for a New Year’s craft for school or kindergarten.
With this candy bowl you can decorate festive table and surprise your guests. However, it can be filled not only with sweets, but also with tangerines, small gifts for competitions, and notes with predictions. You can also put a cockerel under the tree along with a gift.
Materials:
- 7 packages for a dozen eggs;
- Scissors;
- Acrylic paints and brushes;
- Hot glue gun;
- PVA glue (at least 250 g);
- Balloon;
- Old newspapers;
- White paper.
Instructions:
Step 1. Cut out the cones located in the middle of the tray, then cut their sides into feather petals. Each cone should have 4 feathers.


Step 2. Now we need to make blanks for the head and throat of the rooster according to the principle of adding feathers to cones: the head will consist of 5 feathers, the second cone (throat) - of 6 feathers, the third cone - of 8, the fourth - of 10, the fifth - of 12 feathers. And finally, make the sixth piece, but in the form of a fan of 8 feathers, and not in the form of a cone, since this part will cover the beginning of the back. To extend feathers, use tape, gluing it with inside blanks

Step 3. For now, set the cones aside and cut out the beak, comb and wattle of the rooster. The comb just needs to be drawn and cut out. To make a beard, you need to cut a blank from two sidewalls of adjacent tray cells (see photo).

The next two photos show the principle of making the beak of our craft. Please note that the beak consists of two cones, because our rooster must crow!

Step 4. Now we begin to form the figure of the rooster, namely the head and throat. Glue all the cones together, starting with the smallest and ending with the largest, using a hot glue gun. Also glue the beak, beard and comb.

Step 5. Draw and cut out two blanks in the form of wings 15 cm long, then use a glue gun to cover them with feathers... from the same cones.

Step 6. Cut out the feathers for the rooster's tail from the tray lids (you should get 4 feathers from one lid).

Step 7. Let's move on to making a belly-bowl for candy using the papier-mâché technique:
- Blow up a balloon and cut strips from white office paper and strips from old newspapers.
- Cover the entire ball tightly with strips soaked in PVA glue (the glue can be diluted slightly with water). The first and last layers must be white. There should be at least 4 layers of paper in total.
- The next day, when the paper is completely dry, burst the ball and cut the resulting “egg” into two unequal parts (one half should be slightly larger). Then place the small part in the larger one and glue it to make the bowl strong.

Step 8. Attach the rooster's head to the belly using a cardboard backing (from the inside). Hot glue the wings and tail to the rooster's body. Our craft in the shape of a rooster already looks surprisingly realistic!

Step 9. It's time to paint the candy bowl. You can choose the shades of paint to suit your taste, because roosters are different and it is not at all necessary to achieve complete realism. Perhaps your rooster will be beautiful in all-gold plumage? In the same project, shiny paints were used for the legs, beak, comb and beard, and pearlescent paints were used for painting the feathers.

Please note that the color transitions on the cockerel are smooth - from pearl white to gold and then to green.

Step 10: To provide more stability to your candy bowl, glue some kind of square support to the bowl and of course two legs made from 3-leaf cones. Finally, paint the paws, fill the bowl with candy and place your handsome one in a prominent place. Now he is ready to cheer up all the guests at the New Year's or Easter table!
Master class 2. Christmas tree decorations in the form of roosters
In the coming 2017, the Christmas tree must be decorated with decorations in the form of roosters. Do it yourself Christmas tree decorations lighter and best made from felt, because it is so bright, affordable and easy to work with.

And here is a video instruction on how to make crafts in the shape of roosters-hearts with your own hands.
In this video you can see general principle making felt crafts in the form of cockerels.


In addition to the egg with the cockerel, make some more felt pendants and decorate the willow branches with them for Easter
Master class 3. Paper roosters with hanging legs (for children)
Here’s an idea for children’s crafts on the theme of the symbol of 2017, which can be made both for school/kindergarten and for decorating a Christmas tree or walls at home.

Instructions:
Step 1: Download and print the template, then cut out all the pieces.

Step 2. Cut one rope, glue the paws to its ends - these are the legs.
Step 3. Place the legs on the bottom loop, bend it along the dotted line and glue it to the body.

Step 4. Glue the top loop.
Step 5. Well, that's all, now all that remains is to color the cockerels to your taste.

Master class 4. Panel with a silhouette of a rooster in Provence style
The silhouette of a rooster, painted on rough old boards, will be an excellent decoration, rustic or. And a panel with the symbol of 2017 can be excellent New Year's gift. The following selection of photos presents several ideas for such crafts.


Materials:
- Wooden boards of small thickness. In this master class, boards from a pallet (pallet) were used; boards disassembled from a wooden fruit box are also suitable. Whatever boards you choose, fresh or old, you need to clean and dry them before making the craft.
- Saw or jigsaw.
- Small nails.
- Hammer.
- Stain or acrylic paints of the desired color for the background. If you wish, you can use chalk paints, which are sold in finished form or diluted independently (from acrylic paints with the addition of gypsum). With their help, it will be easier to create the effect of an old tree.
- White acrylic or chalk paint to depict the silhouette of a rooster.
- Colorless matte primer for wood (preferably).
- Matte varnish (preferably).
- Brushes.
- Fine grit sandpaper.
- Pencil.
- Paper.
- Stationery or breadboard knife and scissors.
- Wood wax, clear or dark (optional).
Instructions:
Step 1. Estimate how many boards you will need to put together a panel of the desired size.
Step 2. Take measurements and cut the boards to the same length. Also prepare two smaller boards - they will act as crossbars and connect all the other boards.
Step 3: Place the main boards face down, line them up, then lay two smaller boards across them as shown in the photo below. Now nail each board to the cross beams.

Step 4. Clean the surface from dust, then apply primer to the panel in 1-2 layers, allowing each layer to dry. This step is not necessary as we want a rough and antique look to the wood and paint, but a primer is still necessary if you want to extend the life of your painting and make it easier to care for.
Step 5. Now we need to paint the boards, that is, create a background for our rooster. To create the effect of faded paint, in this project water stain was used white and blue color, which was applied unevenly. There is another way of antique painting: paint the boards with acrylic paint in 1 layer, wait for the paint to dry, then wipe the surface with sandpaper in some places or over the entire area.
Step 6. It's time to start making the stencil. If you are making a small panel of approximately A4 size or less, then you can simply print the picture below, having first adjusted its dimensions in any photo editor. Then all you have to do is laminate the paper with transparent tape and cut out the silhouette of the rooster using a stationery or craft knife. Voila, the stencil is ready!

If you want to make a larger panel, for example, A3 format, then the picture will have to be printed in two parts (or more). To do this, upload the rooster silhouette to rasterbator.net, print the resulting PDF file, cut out the parts, then assemble them like a mosaic. Next, you can laminate the stencil with tape or transfer the outlines of the stencil from office paper to thicker or laminated paper (see photo).

As you can see, on this stencil, in addition to the silhouette of a bird, the French word “Le Coq” (translated as “rooster”) is carved out. You can repeat this idea or come up with your own signature, for example, “Bon appétit!”
Step 7. Secure the stencil to your panel using masking tape and begin painting the silhouette with white paint. Once the paint is dry, sand some areas of the design with fine-grit sandpaper to create an antique effect.

Step 8. Hurray! Almost ready, all that remains is to apply a layer of wax to the panel and polish it. Keep in mind that dark wax will give your panel an even more “shabby” look, while clear wax will simply protect it.


This thematic section of the MAAM portal is dedicated to the colorful and proud leader of the chicken family, the “winged alarm clock”. In addition, the cockerel is a character in many fairy tales and other works. folklore; an unchanging prototype of folk crafts; souvenirs, crafts and compositions for Easter.
A large collection of original master classes on the artistic depiction of roosters and cockerels is compiled on these pages. In addition, there are ready-made ideas for making a rooster costume for theatrical performances.
The brightest and most cheerful cockerels are in our “poultry yard”.
Contained in sections:Showing publications 1-10 of 568.
All sections | Rooster, cockerel. Master classes, DIY rooster crafts
Collective work of the "YABLONKA" family Leader Salikbaeva Gulsima Basimovna "Vesely" Cockerel"given master-the class is intended for children of preschool and primary school age, educators, teachers additional education, parents, creative people. Target:...
 In any kindergarten there are graduates every year and the children of the younger group wanted to give them gifts for the holiday. We decided to make them with your own hands. To prevent older preschoolers from oversleeping for class, it was decided to make multi-colored cockerels screaming loudly in the morning. We are doing the work...
Rooster, cockerel. Master classes, do-it-yourself rooster crafts - Summary of the lesson on visual arts “Painting the Dymkovo rooster” in the senior group
Publication “Summary of a lesson in visual arts “Painting of Dymkovo...” Goal: to create conditions for the development of skills in painting a toy based on the Dymkovo ornament. Objectives: to expand students’ knowledge about characteristic features painting toys; develop aesthetic perception, the ability to create patterns according to your own design, creative...
 Image library "MAAM-pictures"
 So, let's try to make such a wonderful cockerel together with the children. Let's arm ourselves with all the materials necessary for the creative process - we will need: colored paper in yellow, pale yellow and red, a sheet of white paper, a glue stick, a black felt-tip pen. Let's print...
 Photo report of the lesson on the topic “Filimonovskaya cockerel toy. Modeling from clay" Second junior group Topic of the lesson: Introducing the Filimonov toy. Modeling a cockerel. Goals: To introduce children to the Filimonov toy, modeling a cockerel based on folk sculpture. Tasks: Expand...
 The napkin rolling method is a type of applique made using napkins. Currently popular. Crafts made using this method are very beautiful and unusual. Applications made from napkins allow you to develop motor skills using children's creative activity....
Rooster, cockerel. Master classes, DIY rooster crafts - Master class “Fire Rooster”
 The lesson is designed for young and middle-aged children, teachers, and parents. An activity for children is possible after preliminary development of labor skills: placing and tracing stencils, cutting with scissors, tying knots. Purpose: making a talisman toy,...
 Master class “Easter Cockerel” patriotic education we introduce preschoolers to the traditions of the peoples living in the territory Russian Federation. Easter is an annual holiday that is celebrated not only in the Russian Federation, but also abroad. TO...
New Year 2017 is the year of the Red (Fire) Rooster, and the most popular gift will be its figurine or image. The Krestik needlewomen have good tradition: To New Year's holiday prepare thoroughly. And this year will be no exception. Many of us will make or are already making a rooster with our own hands, or even not one, but several at once! After all, you must definitely please your family and friends with a handmade symbol of the year, and yourself with the fascinating process of creating this very symbol using various handmade techniques.
Creating a kind of GUIDE TO MASTER CLASSES from the Internet is also a tradition of our handicraft site, which was born a year ago. For you, dear craftswomen, we have selected only the best master classes online. Admire, look closely, discuss and choose the most colorful rooster! And then sew/knit/draw/blind/weave it. So, what technology can you use on the eve of the New Year holiday?
If you don’t have time to work, it doesn’t matter. The article contains links to craftswomen who sell finished works.
Cockerels made of paper and on paper
Making cards with the kids
If you are not a professional cardmaker, then before you start creating cards, be sure to read our article “Learning to make New Year cards with your own hands using the Scrapbooking technique.” In it you will not only find many ideas, but also get acquainted with the basic rules for creating postcards.
Any cockerel drawn by your child can be placed on a postcard. If it’s difficult for your child to figure out how to draw a rooster with his own hands, then show him this step-by-step instructions:

And then, it’s a matter of technology. Cut out the cockerel and make it the centerpiece of the composition. For example, your card can be this simple but cute. Use in your work New Year's paper and a bright red ribbon, add snowflakes, twigs and other holiday paraphernalia. Once you have a basic idea, the process of creating a card becomes much easier!

Photo from the site http://itsapatchworklife.blogspot.ru
If your child likes to color black and white pictures, give him this opportunity. Print the card template with a cockerel on thick cardboard and let your child get to work. Next, by cutting out the ball blank, you can add to the card voluminous snowflakes, adhesive half-beads imitating christmas balls etc. etc. Give free rein to your imagination with your baby))

YOU WILL NEED IT
8 more templates for coloring, as well as 2 step by step instructions for drawing more realistic roosters you will find in the archive, which you can download quickly and for free!
Take note of the idea with a cockerel on a stick, like on Elena Yurchenko’s postcard. Her cockerels are cut out of felt, or you can cut them out of paper.

Roosters made of colored paper
An applique made of colored paper can also be placed on greeting card. But such an application can itself act as a postcard. To draw and carefully cut out all the details, children will need the help of their parents, but they can glue them themselves.

Olga-15 suggests making funny cockerels out of paper in her master class.

The Rooster blank is a rectangular sheet of flexible paper or thin cardboard, folded in half lengthwise. Its size is 13.5x10 cm. We make 7-10 inclined slits along the fold line (approximately every 1 cm). Their angle of inclination is 50-70 degrees, and their depth is ¾ of the height of the folded sheet.
Ekaterina Ivanova in her video tutorial shows how to make a red rooster using the Origami technique:
Roosters using Quilling technique
A very interesting idea is to lay out only a luxurious rooster tail from quilling paper. It's not as hassle as laying out a whole rooster, and it can turn out very impressive! Here is a rooster without a tail as a basis (see the photo below for how it looked in the original).

Print it on a color printer, and then fantasize about the tail. As an example, here is one such work (although the tail here is modest, but you will try, right?))

And if you are not afraid to make a whole rooster using the Quilling technique, then you can use this ready-made postcard as a basis:

Or this template:

A cheat sheet on the basic elements of Quilling to help you:

Button applique
And here are absolutely stunning handsome roosters, made of multi-colored buttons, half beads, rhinestones and beads! You can take the contours of the cockerels from our archive as a basis (link just above).


Crochet cockerels
Many needlewomen are familiar with the crochet hook and will be happy to knit a cockerel from multi-colored threads. And Krestik will help you decide on a model and offer several master classes on this type of needlework.

You can also buy knitted cockerels from Svetlana.


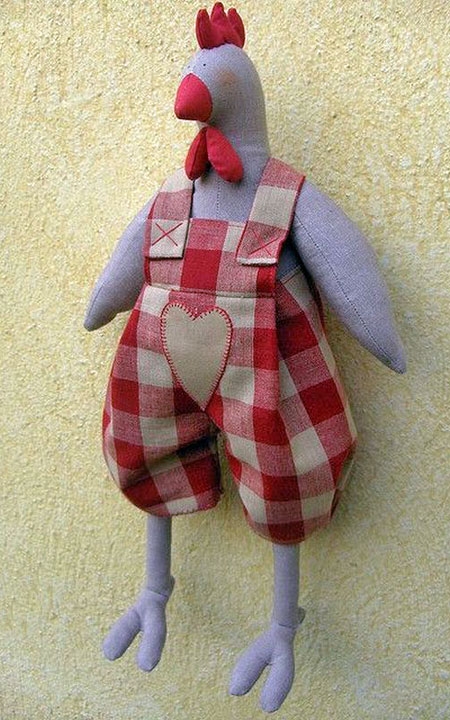
Felt roosters
The fastest and not complex options creation of the symbol of 2017 - felt roosters. The material is easy to process, holds the shape of the toy well, and does not require processing of seams. Vice versa, hand stitches the products give it a special flavor and charm.


Photo from the site https://madeheart.com


Photo from the site http://ktototam.ru/
A rooster figurine carefully cut out of thick felt will be both a Christmas tree decoration and a pendant.

Photo from the site http://ktototam.ru
And if you decorate the felt cockerels with embroidery, flowers and other decorative elements, it will turn out incredibly beautiful!

Photo from the site http://mmmcrafts.blogspot.ru

Roosters in Tilda style
Well, how can we manage now in our lives without the tilde-Rooster? On the ToySew website there is a master class on sewing this popular toy.

Master Vetic on her blog posted patterns for the Rooster and Chicken Peas based on the tilde pattern. An interesting couple will turn out if you put in the effort and patience!

And for inspiration:

Cockerel Yurik from Orange Toys
Maria Fedorova made a funny video about her tilda roosters (the link to the patterns is in the description of the video!):
Coffee cock toys
Aromatic, or coffee, toys compete with tildes in popularity. There are roosters using this technique.

A coffee cockerel can be like this:

Photo from the site http://zabavochka.com
You can easily sew it yourself using one of the patterns suggested above. “Cross” talked about all the intricacies of creating coffee toys in this master class.
If you think that you cannot cope with such work yourself, contact a specialist. Yulia Charikova made enough branded toys with the smell of coffee and put them up for sale at this address.

Fur interior toys
Oksana Svyatkovskaya will show her vision of a rooster and show how to properly sew it ready-made patterns. Her Rooster is made from faux fur, but who’s to say that this doesn’t happen or that he’s not good?)


In the workshop Everything for creativity (dljatvorchestva) there are a lot of blanks for painting and decoupage. Choose and create!

This is the beauty you can get:


If you don’t want to make a souvenir in the shape of a rooster, then you can decorate any wooden surface image of a rooster. The scope for creativity here is simply limitless!!! Here are just a few examples for inspiration:


Roosters felted from wool
Some craftswomen make wool toys that look like real ones! Let's admire and be inspired! And if you really want to buy one of these beauties, then look for them at the Masters Fair (the link is on each photo).


Elenia collected in one place many different Roosters felted from wool and suggested to MK how to create one of them. It turns out very cute!
Roosters embroidered with cross stitch, beads and ribbons
Perhaps you love embroidery more than other types of needlework. Then you can place the symbol of the year on a pillowcase, decorate it in the form of a panel, a picture in a frame or a brooch. The main thing is that the image of the Rooster warms your soul. And if you give away your work, find out the preferences of the recipient.
You will find more than 50 different patterns for embroidering roosters and cockerels in a special album
Craft for children: paper cockerel. Five master classes for children of preschool and primary school age with step by step photos and creative tasks.

Craft for children: paper cockerel
In this article you will find five options for making crafts - a cockerel with children of preschool and primary school age.
Master class 1. Craft - cockerel based on a cone
In the first master class, the children and I will make a toy - a cockerel - very simply and quickly. The finished craft can be either a toy for the Christmas tree, or a toy for dramatizing a fairy tale, or just a gift - a souvenir. Even kids can do it together with adults.
Tools and materials for making paper cockerel
To work you need to prepare:
- yellow and red colored paper,
- multi-colored strips of paper for quilling (you can use ready set or cut them yourself from colored paper),
- glue - pencil,
- black felt-tip pen,
- scissors,
- pattern - circle.
Step-by-step description of making crafts
The base of the cockerel should be made from half a circle. Any round shape, which can be traced onto paper: a tea cup, a lid or any jar. Decide for yourself the size of the toy.
Step 1. To make the blank, draw a circle of the size you need on paper (I used the lid from a jar of hand cream as a circle template). Cut out a circle and cut it in half.

Step 2. Twist a cone from half a circle and glue it together.

Step 3. Cut out from red paper:
- two parts for a cockerel comb,
- detail of the rooster's beard in the shape of an inverted heart (you need to cut out half of the detail along the fold),
- part for the beak (we also cut out half of the part along the fold in the shape of an equilateral triangle; when you unfold it, you get the shape of a rhombus).
By the way, we drew these details by hand, by eye.

Step 4. Lubricate the upper part of the cockerel comb parts with glue halfway and glue them together. Then bend the bottom part of the part and coat it with glue.

Step 5. Glue the parts onto the craft.
- Glue the resulting scallop blank onto the cone.
- Glue the beak and beard parts onto the cone.

Step 6. Make a rooster's tail from strips of paper and wings. To do this:
— Cut multi-colored strips of paper 10 cm long, fold them in half and glue 3-4 together different colors. These are the tail parts
— Wings can be made in a similar way, only smaller in size. Or you can simply glue short strips together and slightly twist the edges, giving them a concave shape.

Step 7. Finish the design of the craft.
— Glue the resulting blanks to the cone in the area of the tail and wings of the cockerel.
- Draw the rooster's eye with a black felt-tip pen.

The cockerel is ready. If you want to hang a craft, all you have to do is thread a thread through the comb, make a loop and hang the toy on the Christmas tree.
Creative tasks for children
It is very important that a child, having mastered making crafts based on a cone, learns to come up with his own versions of similar crafts according to his own plans, changing the details.
Think and discuss with your children:
- What animals can be depicted using a cone?
- Which Christmas decorations can it be made based on a cone?
- Try to make yourself, based on the cone, toys of Santa Claus and Snow Maiden or others that your child wants to invent and make.
Creative success to you!
Master class 2. Cockerel - bookmark for books made of paper
In the second master class we will learn how to make a cockerel together with the children, which will be a wonderful gift. It can serve as both a toy and a bookmark. Children of senior preschool and primary school age can make such a cockerel together with adults.
We will not just make crafts, but also try ourselves as a designer! So let's begin.
Tools and materials for making a cockerel
To work you will need:
- double-sided colored paper,
- any glue,
- black gouache and brush,
- scissors.
How to make a cockerel: step-by-step description
Let's imagine a little and test ourselves in the role of a designer in making a craft - a cockerel made of paper.
Step 1
First, let's work with the template. We need to cut out such a pentagonal blank from paper of any color according to the template (see photo below).

Step 2
Like any designer, you and I must be able to use the tool. Our tool will be a ruler.
— Apply a ruler so that the angles align along it: the top of the pentagon and the right corner at the base.
— Pressing the ruler tightly against the workpiece, lift its right corner up.

This is how it should turn out (see photo below).

Step 3.
Fold the left corner of the pentagon up in the same way.

Step 4. Cut out and glue the details of the craft.
- The beak, legs and comb of the cockerel can be made according to the template. But the children and I decided to express ourselves each in our own way and cut out these details without a template, but independently, whoever could and whoever came up with it.
— And the beard can be made in the shape of a heart and glued by turning it upside down.

— Glue the folded edges of the cockerel body blank together. Glue the comb and paws to the workpiece.
— Downside brushes, using gouache, put 2 dots - the eyes of the rooster.
And already the image of the cockerel appears!
Step 5.
— Glue the beak (it is made in the shape of a diamond or can be flat, triangular in shape).
- Glue on the beard.
And now the mischievous cockerel is ready!
Step 6.
If you want to hang a craft, you need to thread the thread through the comb.
You can also make a bookmark from this craft. To do this, you need to cut out a strip of paper and stick the resulting toy - a cockerel - on it. Daryana and Vika wanted to make bookmarks. This is what happened with the children.

Creative task for children
— What other image can you come up with using the pentagon template as a basis?
— Try to make a toy based on the model and come up with a new image yourself.
Good luck in your creativity!
Author of the first two master classes: Vera Khiglod, technology teacher, head of the children's club artistic creativity, a regular reader of the “Native Path” website. The article presents photos of crafts made by Vera’s little pupils - children preschool age from her studio.
Master class 3. Cockerel made of paper using the origami technique
This cockerel is a more complex craft for school-age children. It is made using the traditional origami technique from a large square of paper measuring 20 x 20 cm. The detailed sequence of making such a cockerel is shown in the video. This craft is intended for beginners in the origami technique - try it!
Master class 4. Craft - a cockerel with a surprise
This is a basket designed like a toy cockerel, made of paper. You can put sweets, gifts or surprises in it. Very interesting craft and a clear description in the video. Video taken from the youtube channel “CreativeClub”.
Master class 5. Cockerel made of self-adhesive paper

The cockerel is a traditional children's craft, the hero of many children's songs, fairy tales and games. We hope that the options for cockerels from this article will help you make crafts with your children and get pleasure and joy from it. We wish you creative success!
Or on the course cover below for free subscription


