Making paper figures is fun for both children and adults. With the arrival of spring, children quickly run outside to launch their ships, made with small hands from materials found at home, along streams or puddles. The simplest and most affordable option is a paper boat. Every child has a question about this: how to do paper boat yourself. There are several the best ways modeling ships from paper. All paper crafts can be made from. To make the boat float on the water longer, it is better to make them from coated magazine paper.
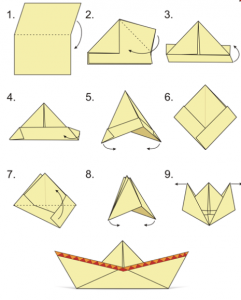
Method 1. A simple paper boat. Step-by-step production.
To solve the problem of how to make a paper boat according to step-by-step instructions, you need to follow these steps:
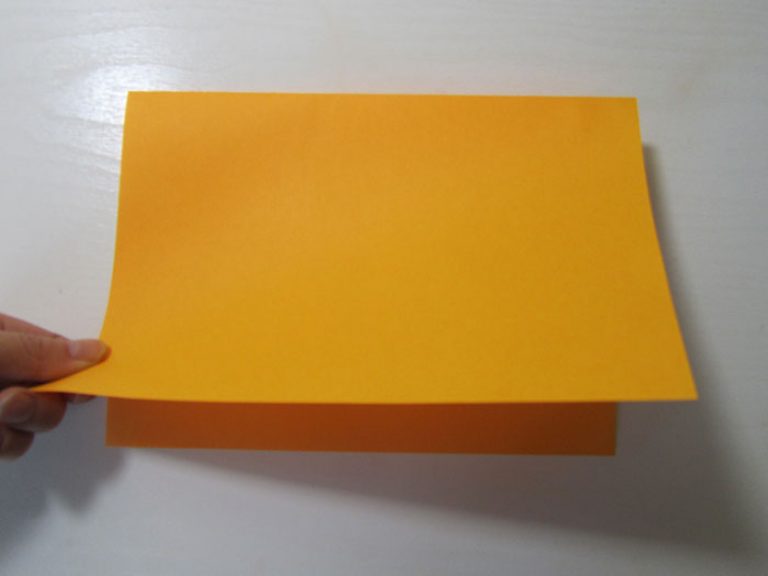
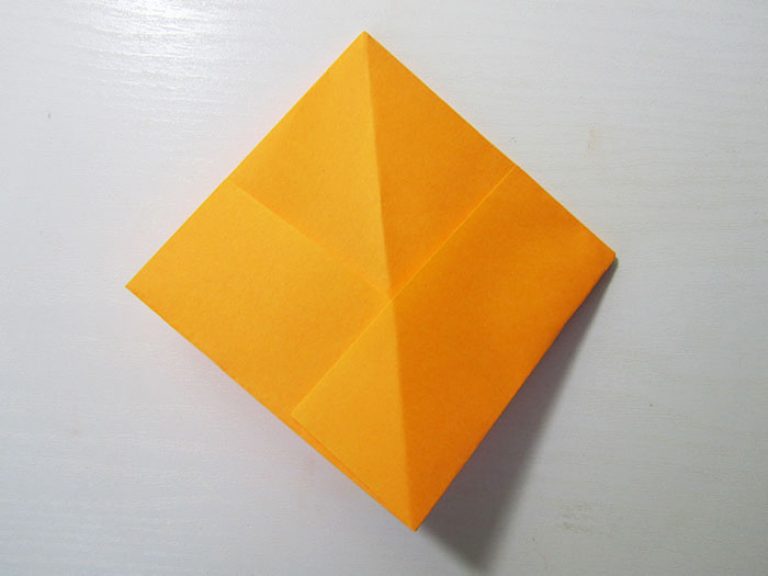
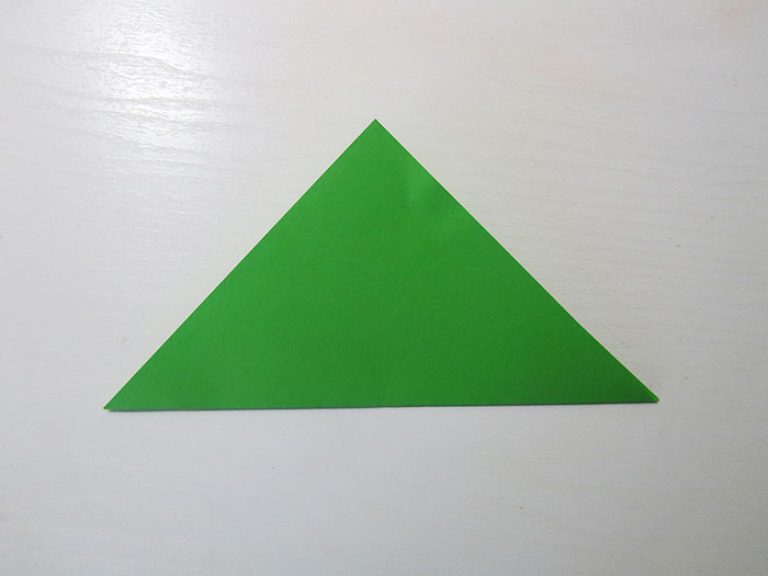
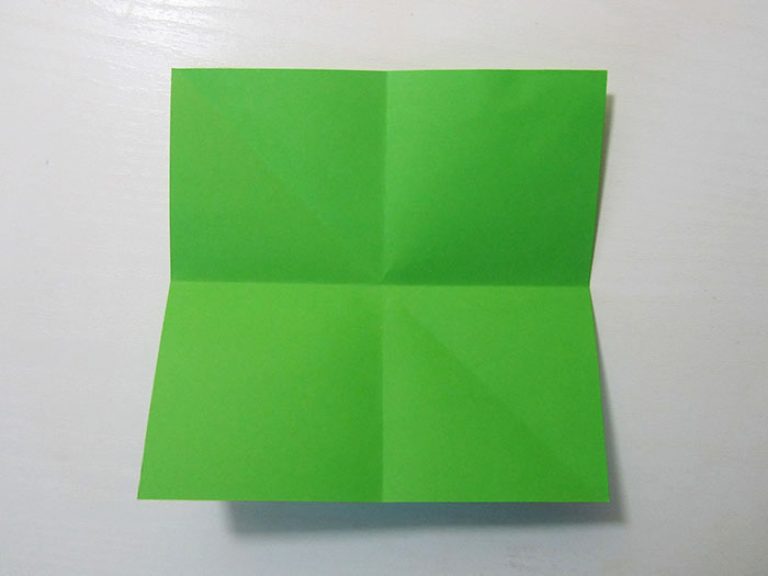
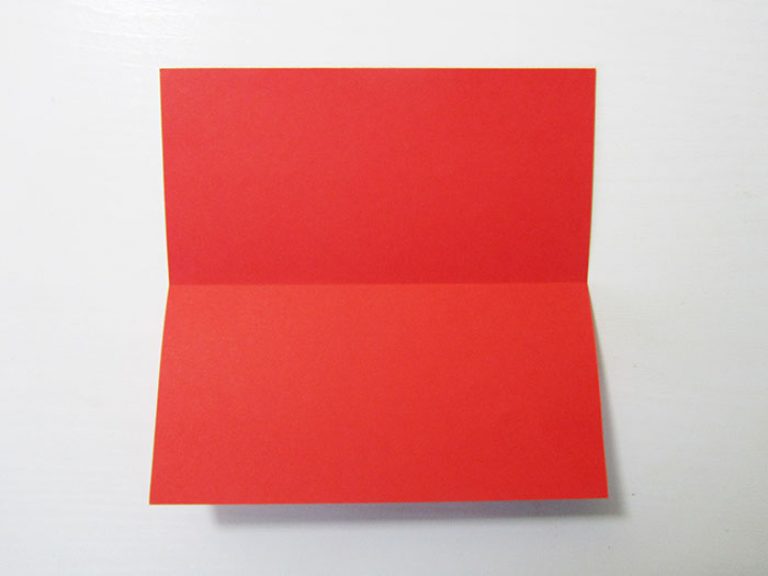
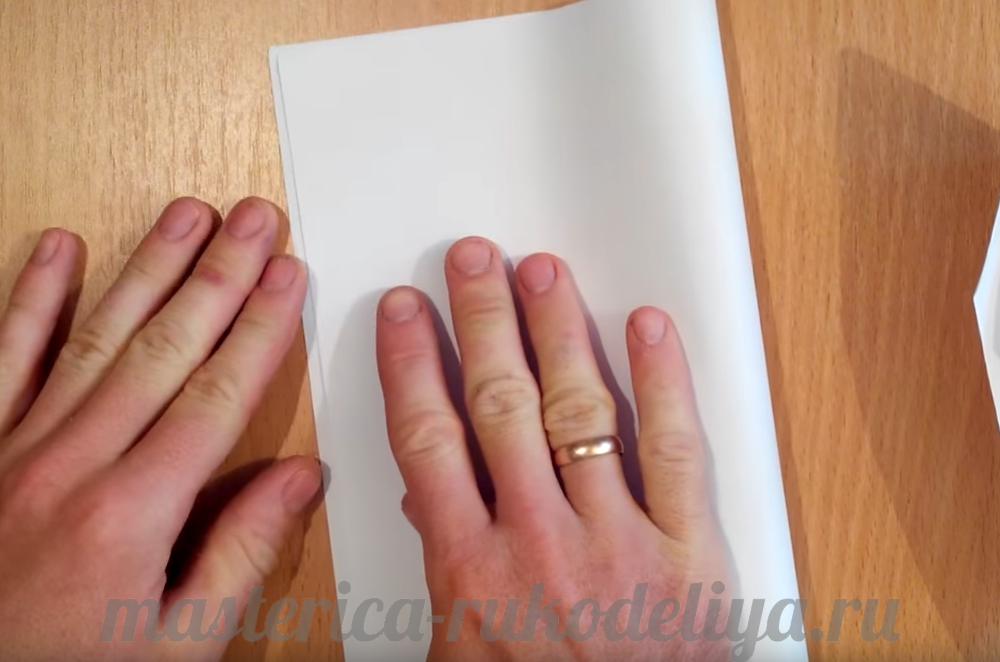
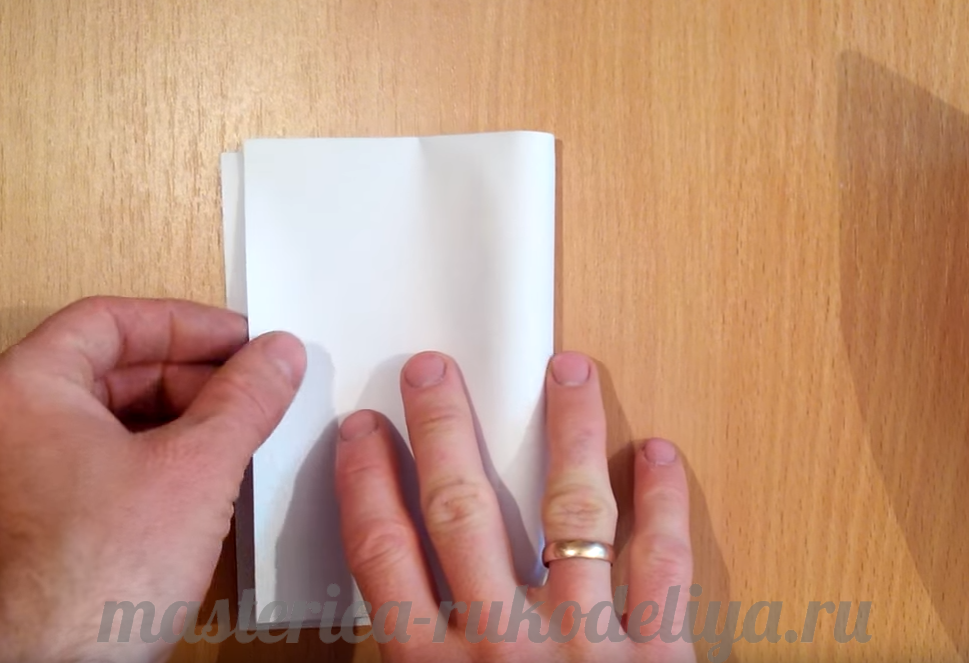
Step 1. Take a landscape sheet, most often it is in A4 format. This material is denser than ordinary paper, so the product will have a rigid shape and beautiful appearance. We bend the sheet in the middle along the narrow side.
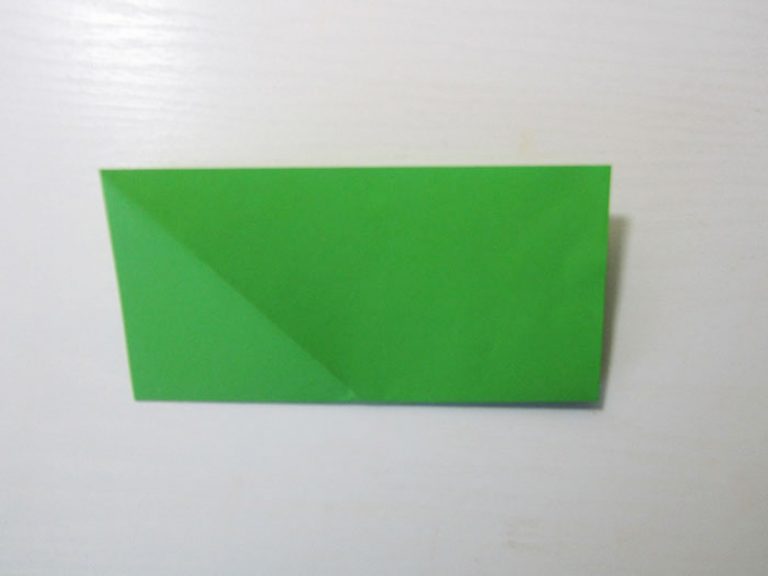
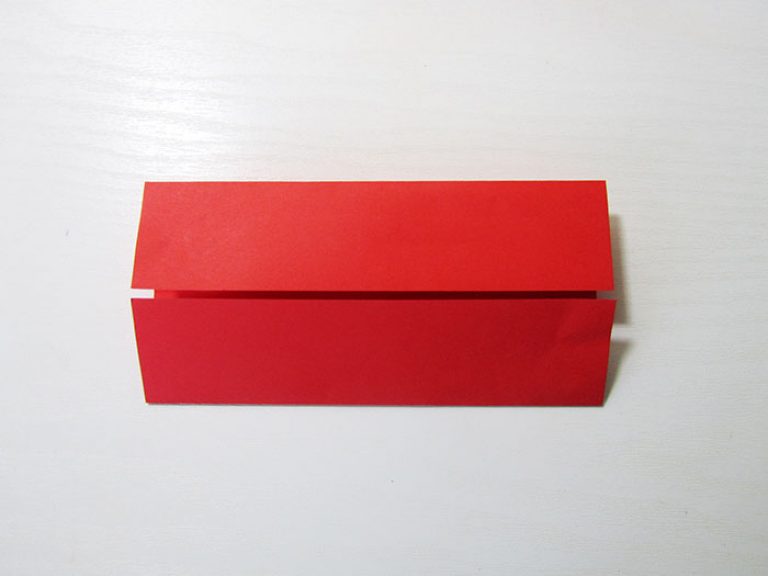
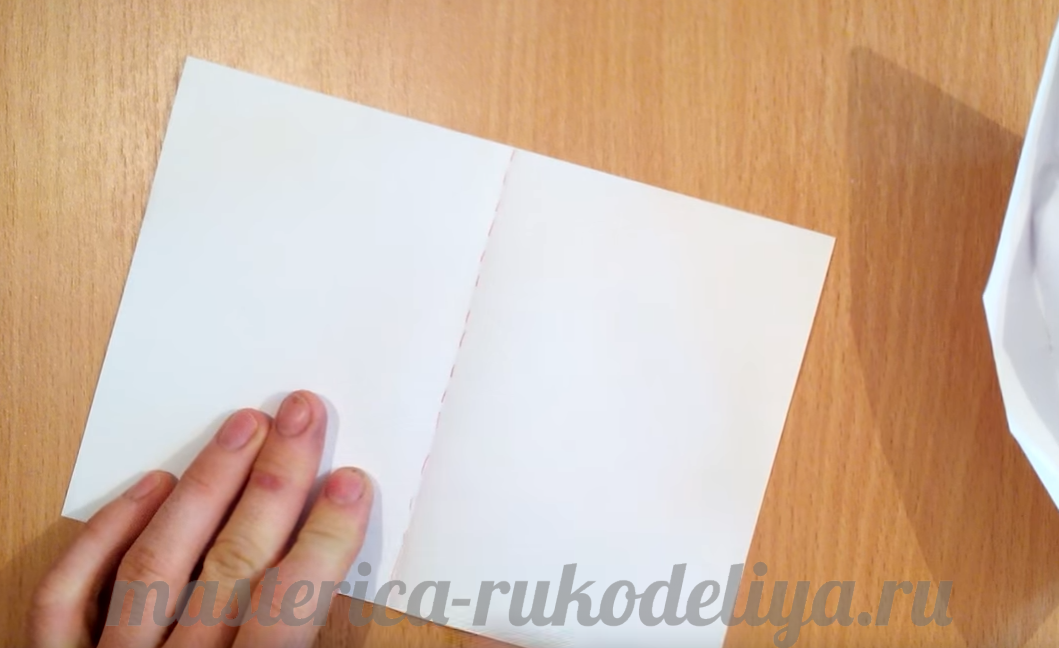
Step 2. Fold the resulting workpiece again along the short side. Let's turn it back.
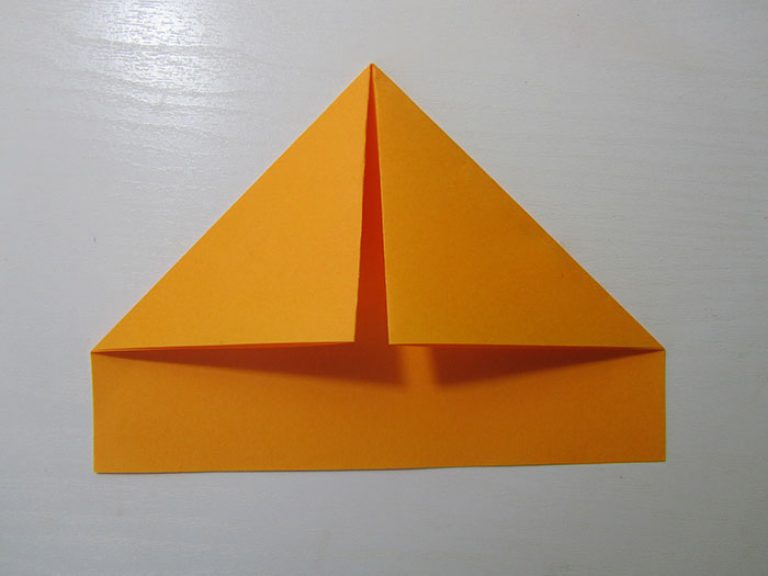
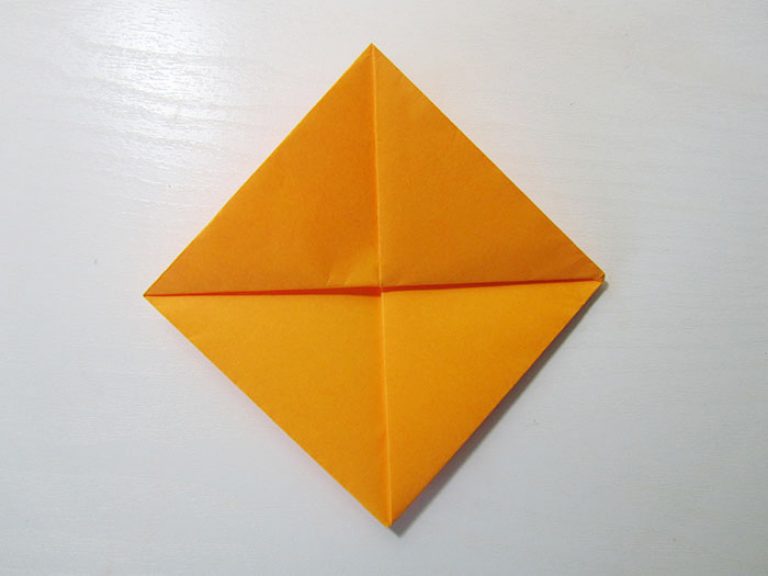
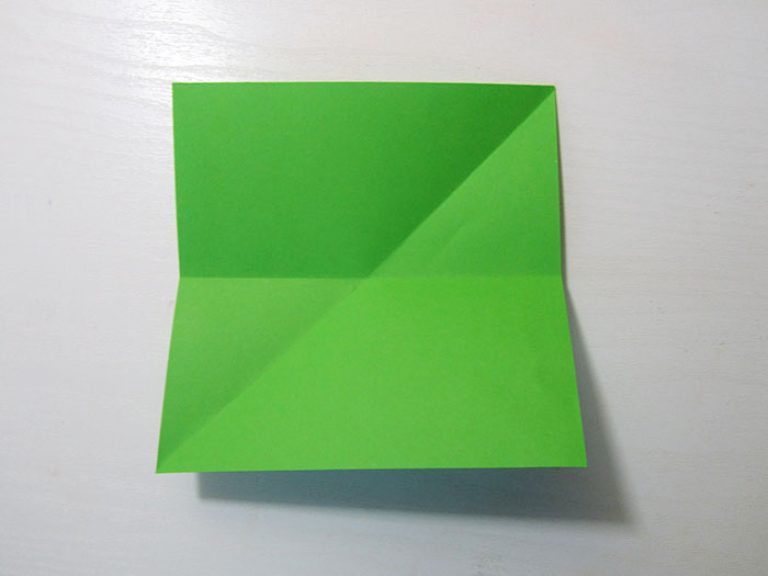
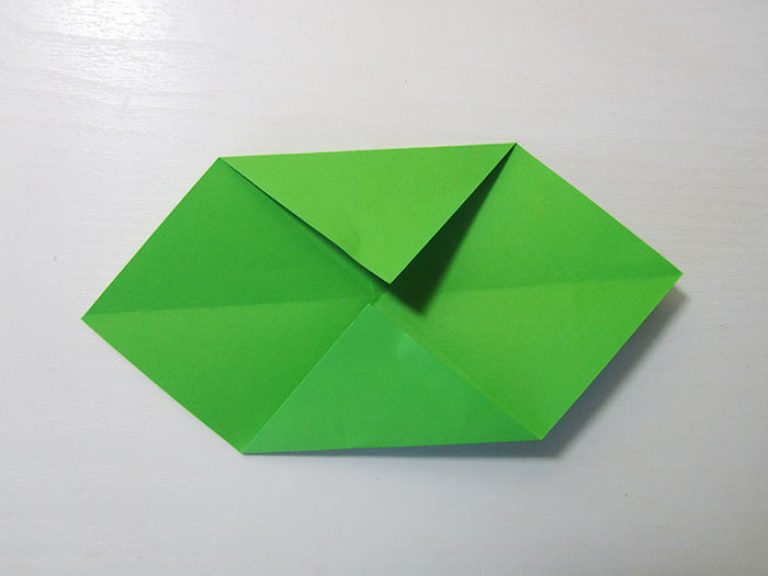
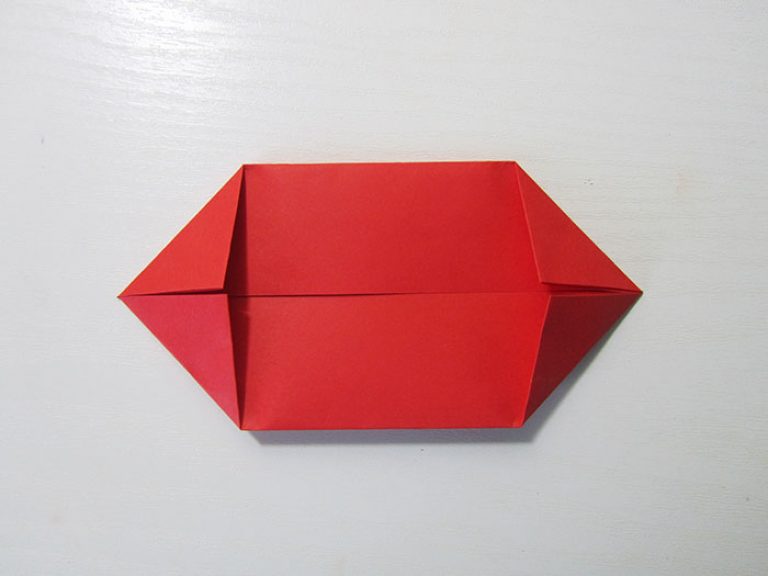
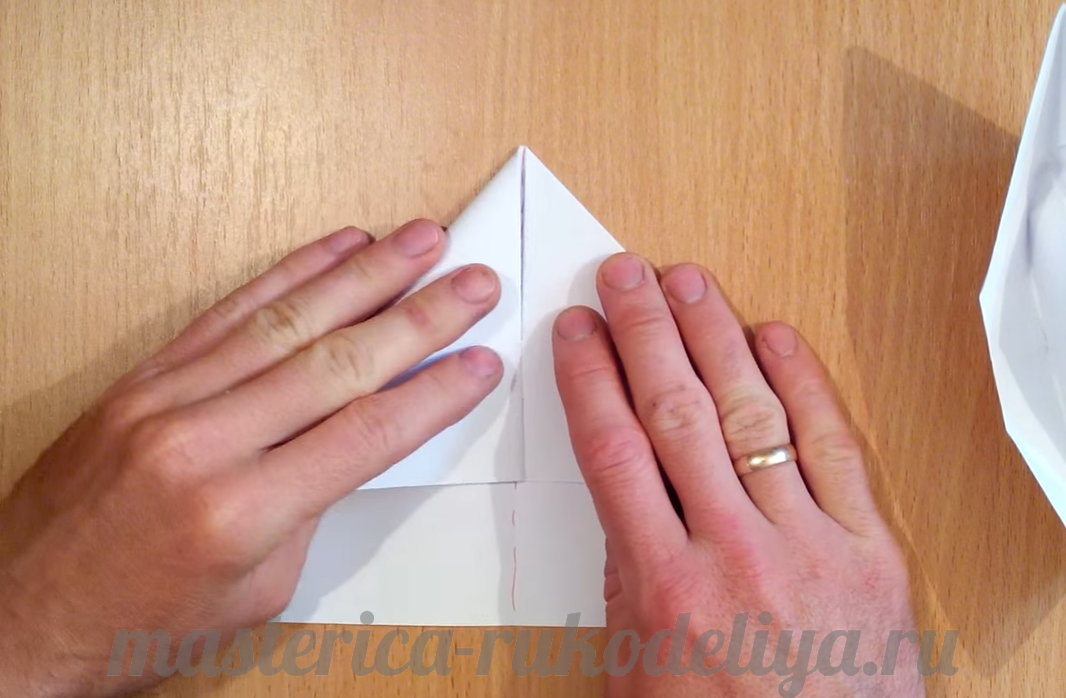
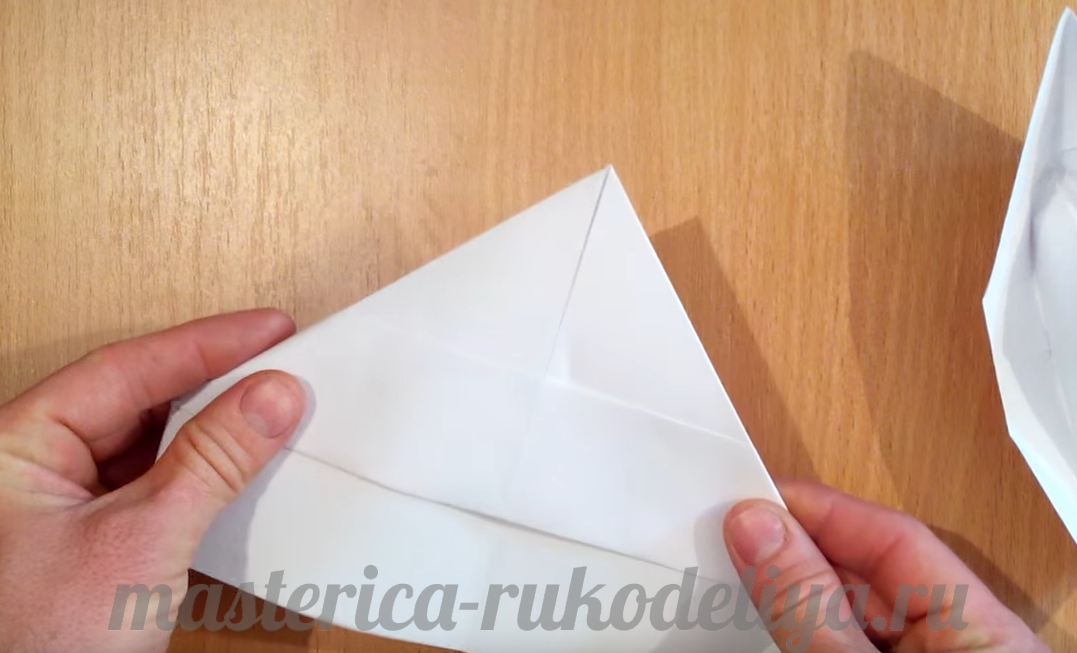
Step 3. We connect the corners where the folded sheet is folded together.
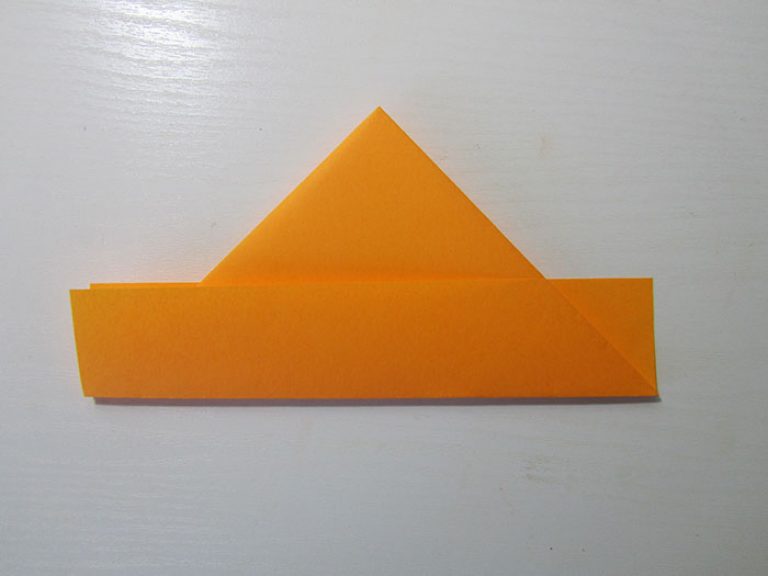
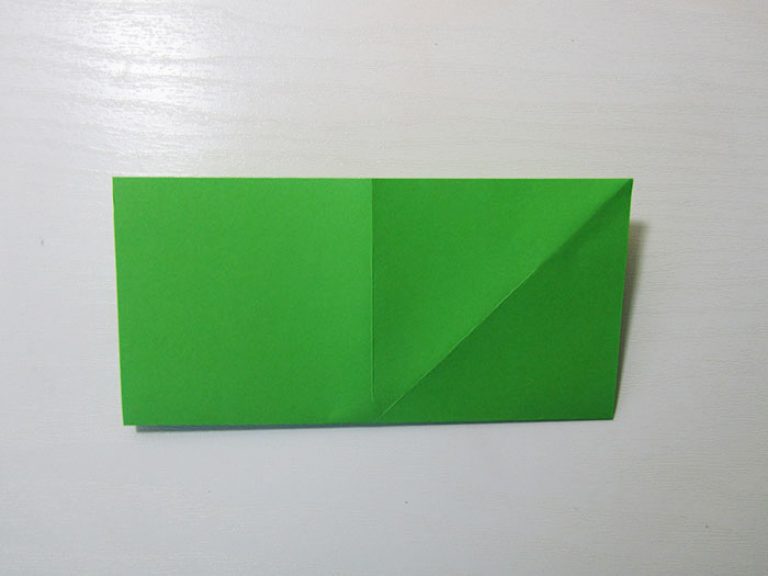
Step 4. Bend the rectangle upward at the bent corners.
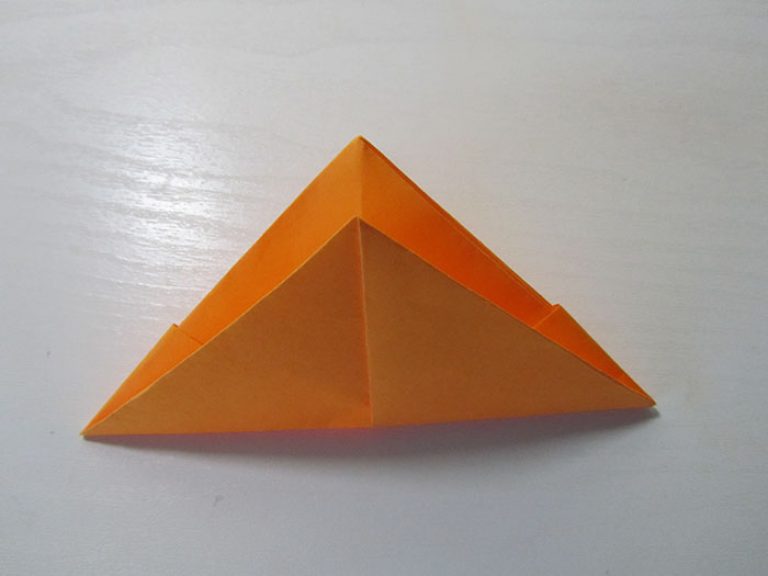
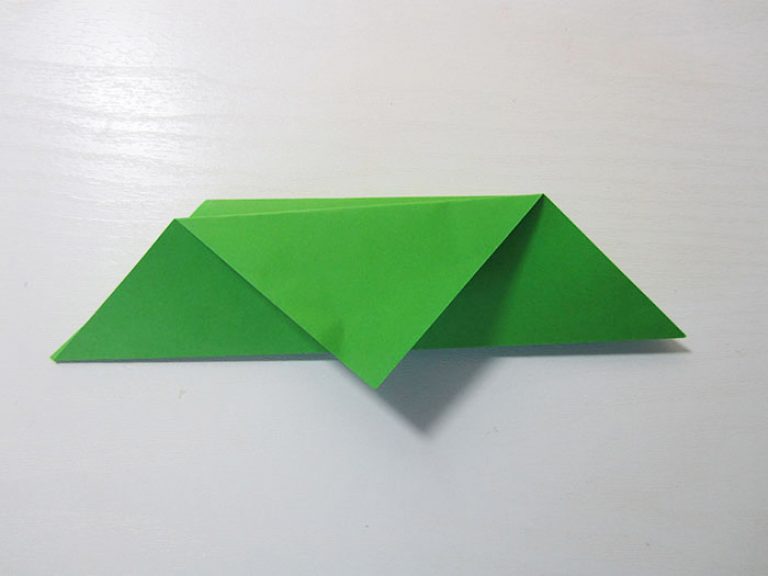
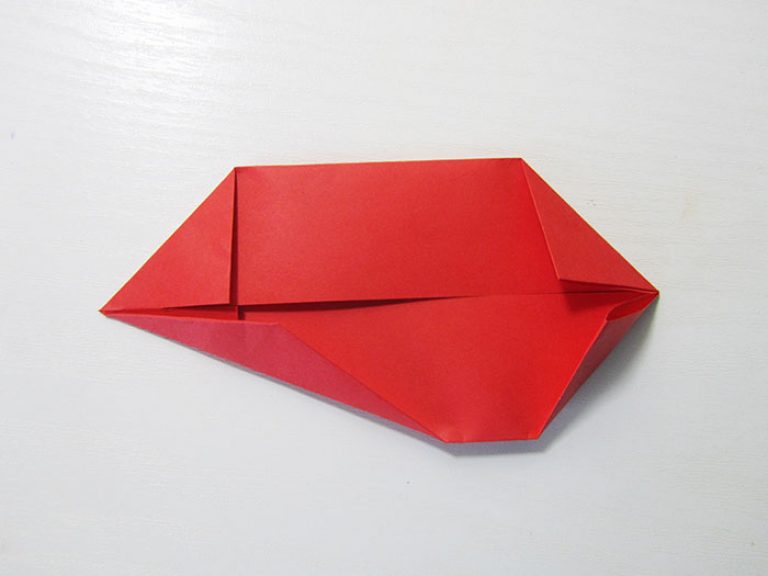
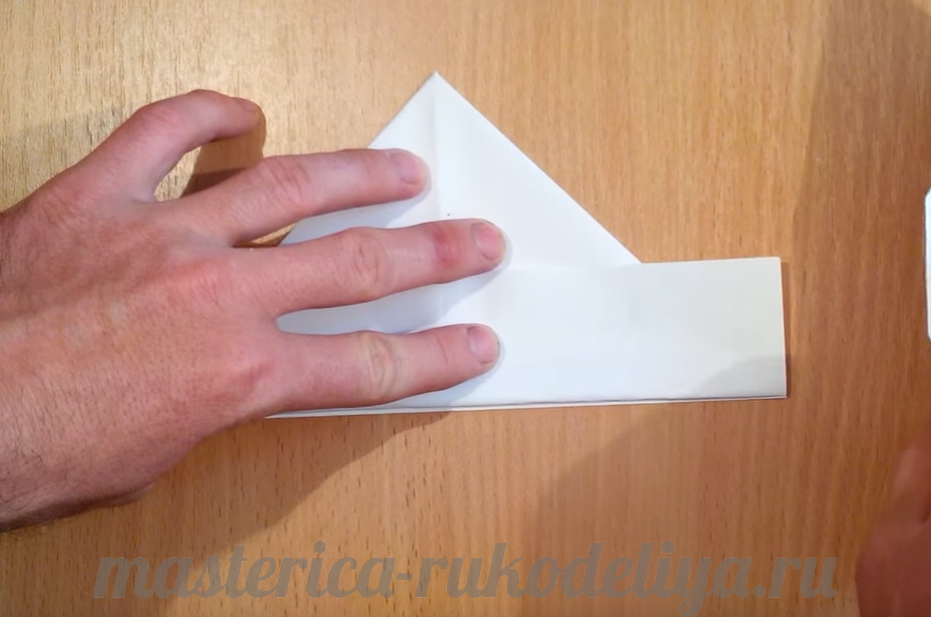
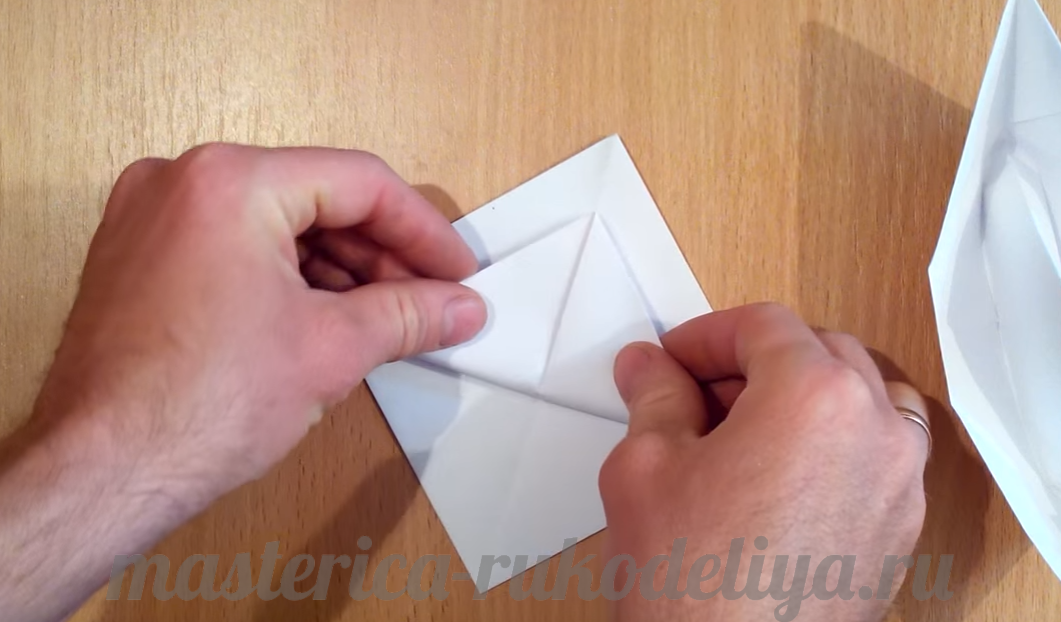
Step 5. Turn the workpiece on the other side and bend another rectangle. We bend the corners of the folded strips on both sides to form a triangle.
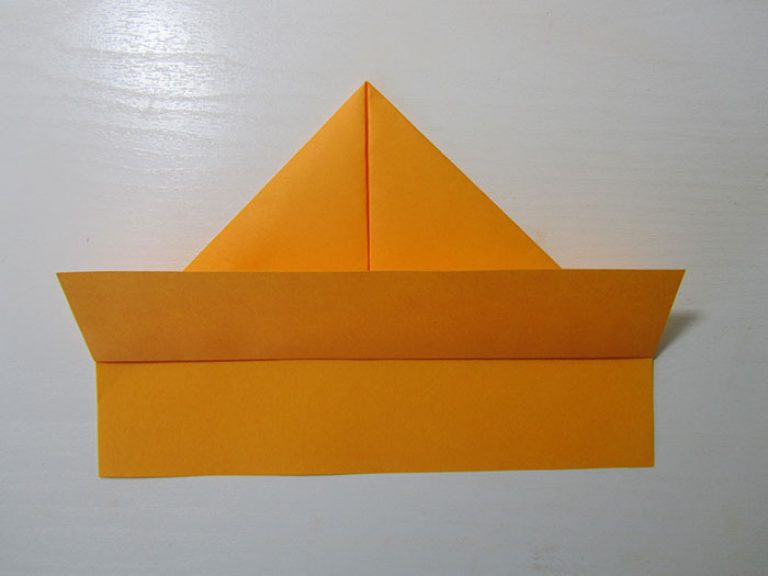
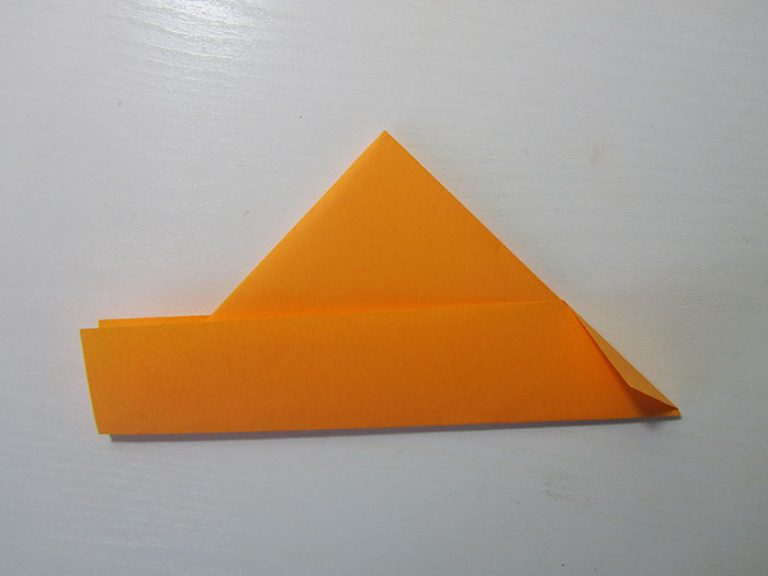
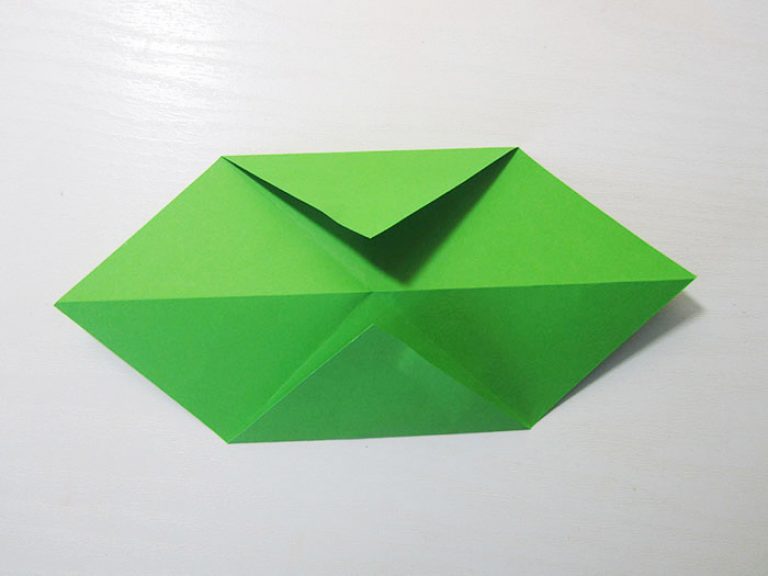
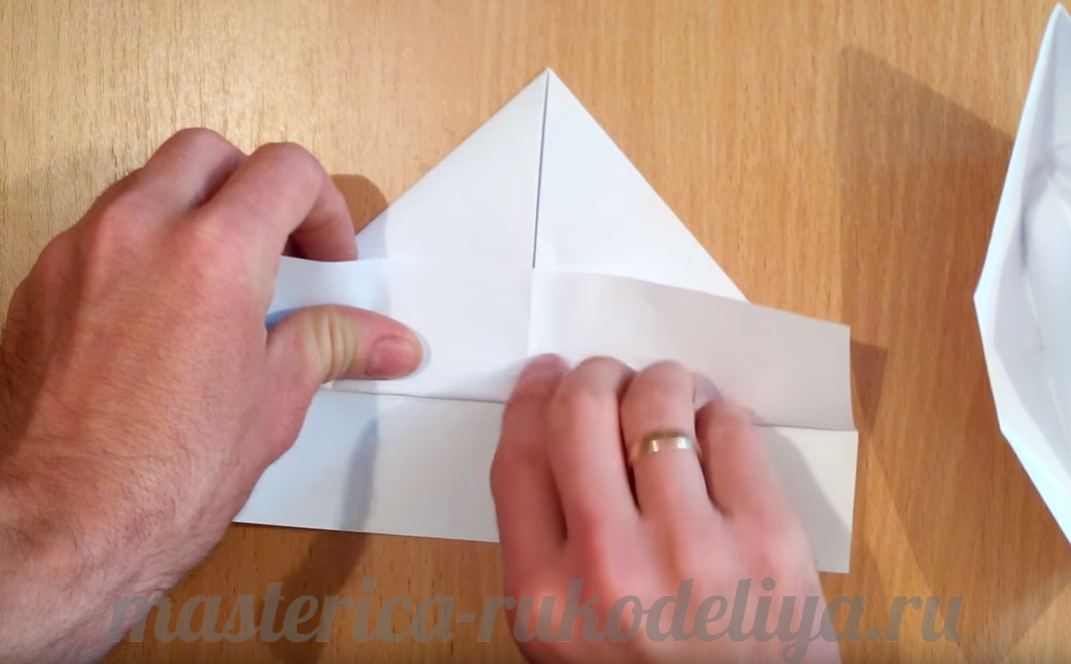
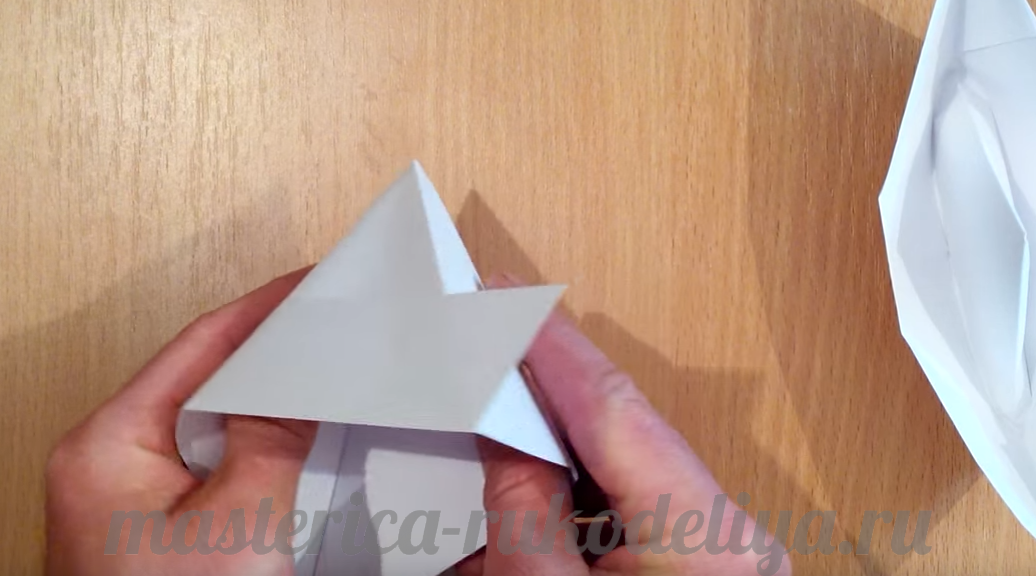
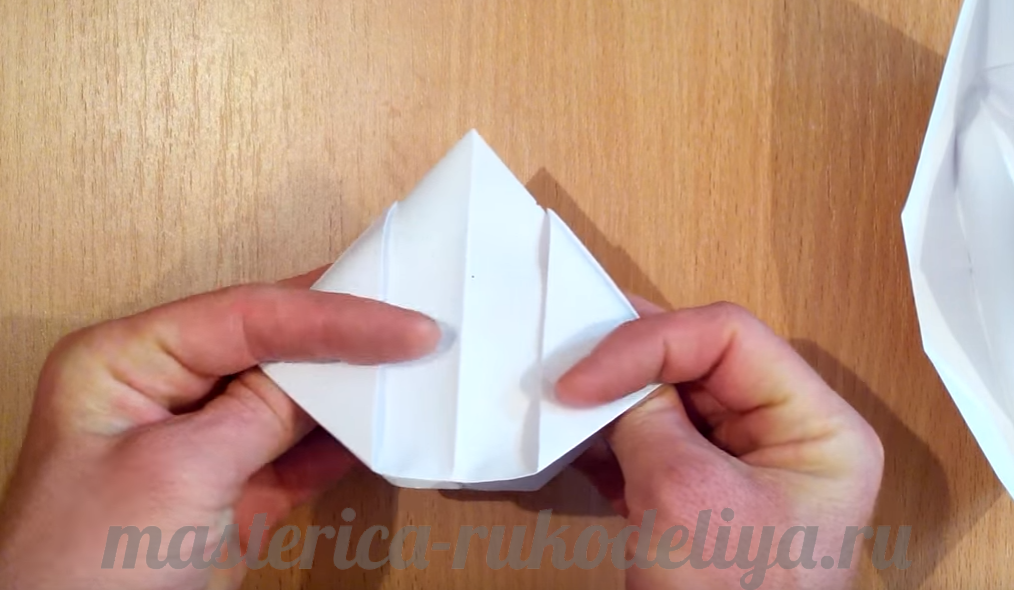
Step 7. Bend one of the separate corners up. We perform similar actions with the other angle to form a triangle.
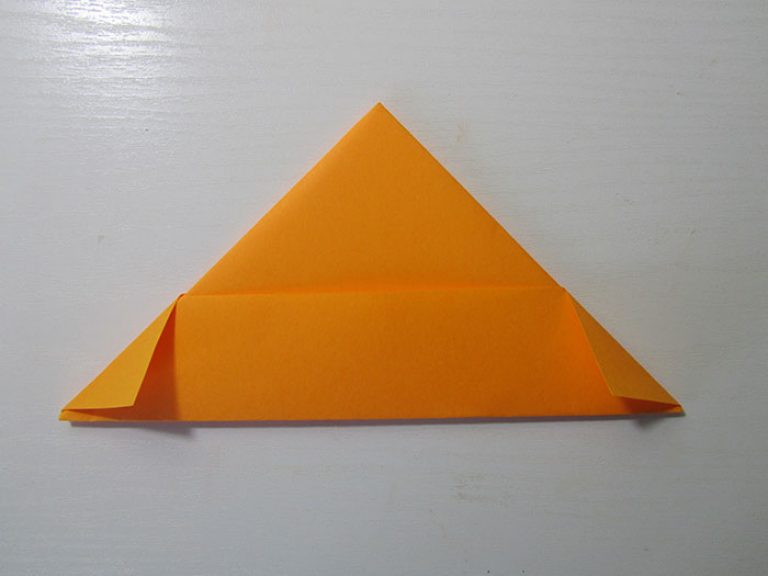
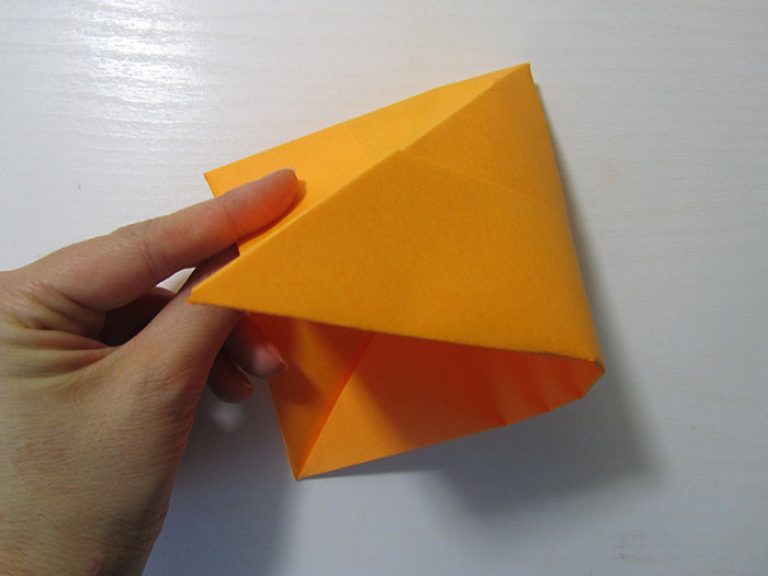
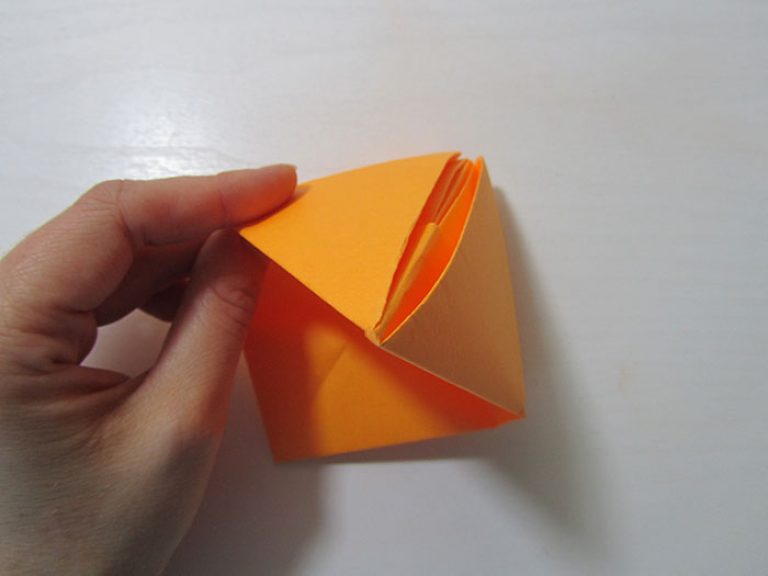
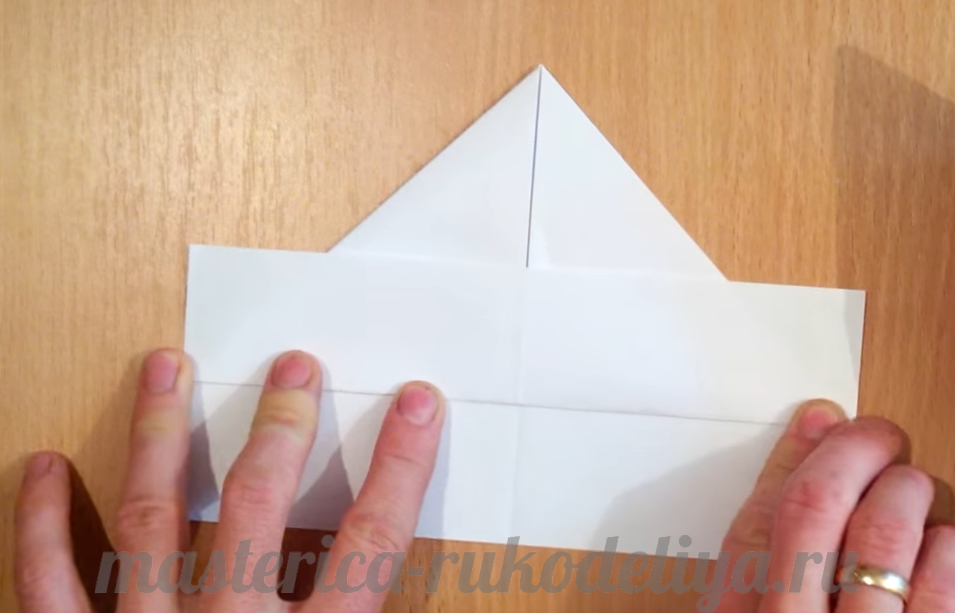
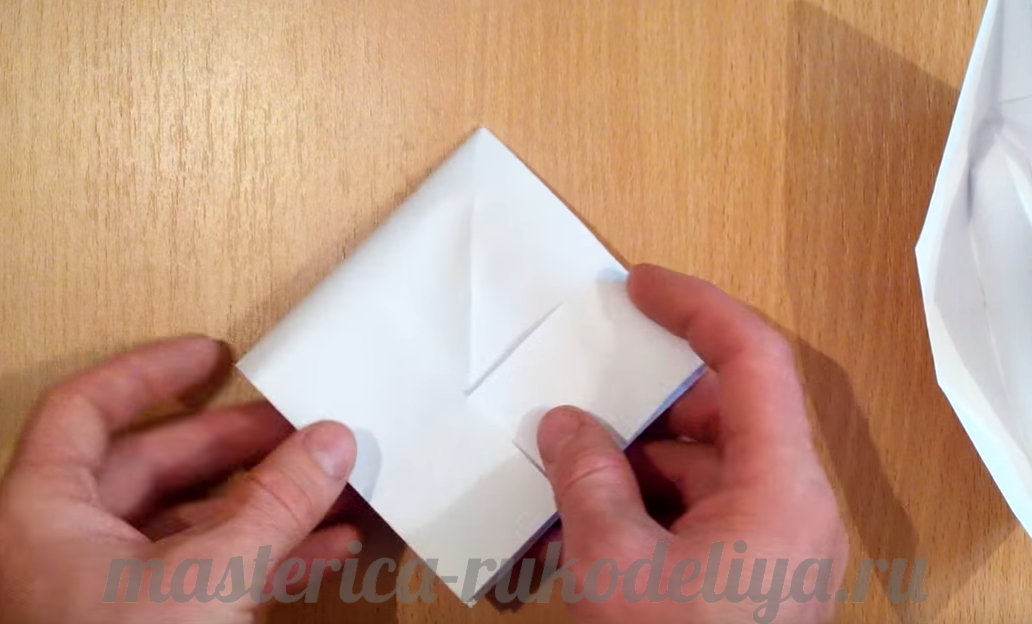
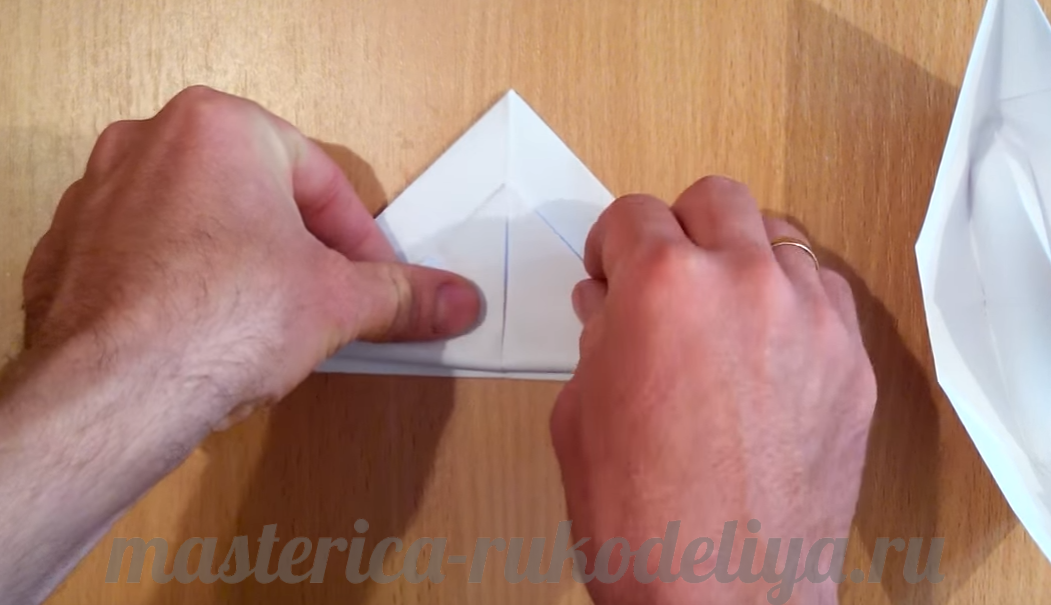
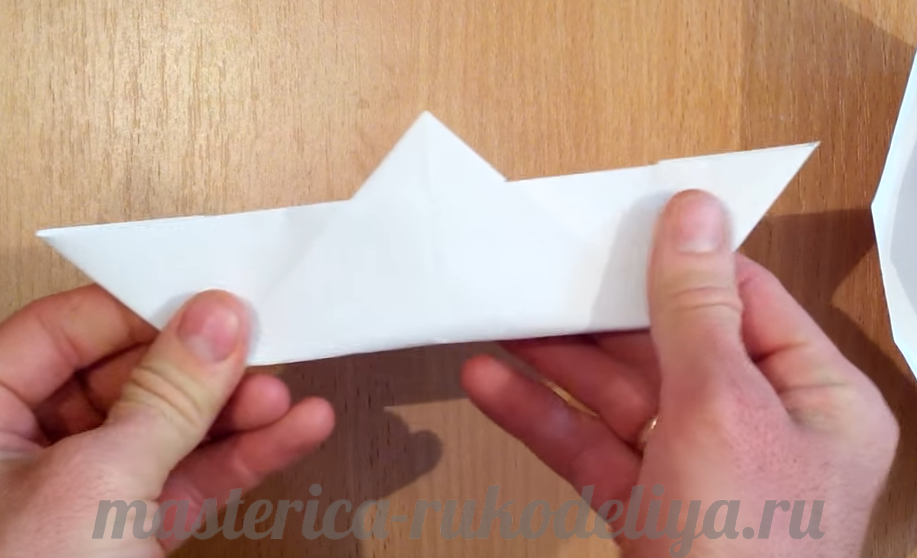
Step 8. Open the bottom again and connect the opposite corners. Now you need to pull the corners at the top of the triangle to open the boat. To do this, one hand takes one bent end, the other takes the second.
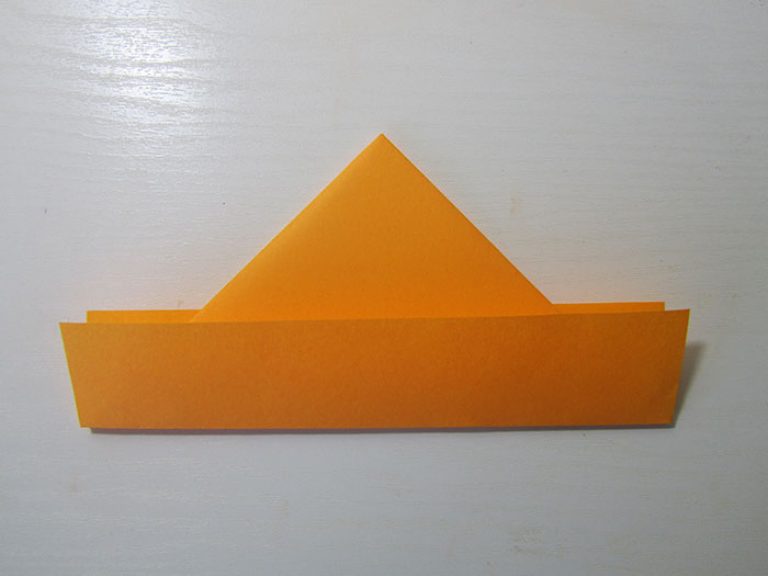
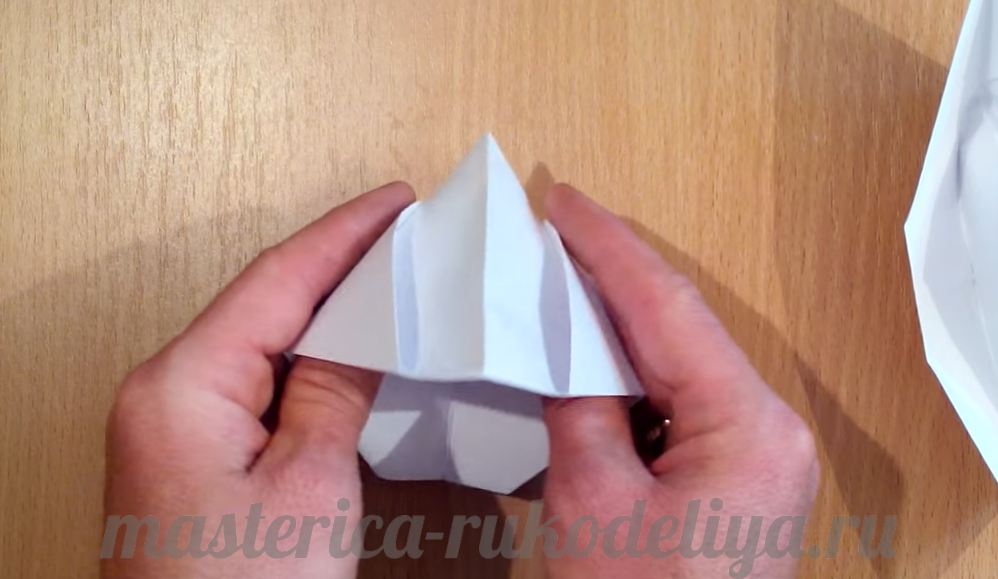
Step 9. For stability, you can slightly expand the base of the paper boat. Amazing paper ship ready!
Step 2. We bend the corners of the square again towards the middle to get another square. We turn the workpiece again and bend the corners to the center again.
Step 3. Turn the square over one more time and perform similar actions with the corners.
Step 4. Turning the paper ship over one last time, straighten the two opposite corners until you get a rectangle. The result will be a kind of ship's pipes.
Step 5. We take the workpiece by the remaining corners and unfold the boat, while the pipes are connected.
A steamer with two funnels is ready to set sail. A more detailed diagram of how to fold a paper boat can be seen in the video below.
Method 3. Making a boat from paper.
To answer a child’s question of how to make a paper boat with your own hands, you also need the best step-by-step instructions.
To work you will need a square sheet of paper. You can take a regular landscape piece of paper and make a square out of it. To do this, connect the top of the sheet to the left side, and cut off the remaining part. We then follow the instructions:
1. Bend the square in half, connecting the top and bottom of the workpiece.
2. Now we bend the free edges of the workpiece towards the middle to make a rectangle like this.
In this article I tell you how to make a paper boat with step-by-step photos. As a result, you will get a beautiful three-dimensional toy for a child. The article contains 3 master classes with detailed photos, which will help you quickly and easily learn the intricacies of origami techniques. Thanks to these master classes, you can easily build a whole fleet of all kinds of boats of different sizes and colors.
In this master class I will tell you how to make a simple, simple boat using the origami technique.
If you don’t know how to make these yet, I recommend that you definitely learn and then show them to your children. Such boats are known for their good buoyancy and ease of manufacture. Usually, when we talk about paper crafts, the idea to make just such a product immediately appears in our minds.
Step 1. Take a sheet of A4 paper. In general, any paper can be used, but if you plan to launch a boat on the water, it is better to take a sheet with a glossy surface. This way the craft will last you longer.
Step 2: Now fold the piece of paper in half.
Step 3. Fold the two upper corners towards the middle.
Step 4. Fold the bottom layer of paper upward.
Step 5. Do the same with the opposite layer of paper.
Step 6. Fold the corner into the middle, as in the photo.
Step 7. Fold the second corner as well.
Step 8. Do the same with the corners on the left side of the craft.
Step 9. Now grab the two corners with your hands and bend the craft into the middle.
Step 10. This is how it turns out in the end.
Step 11. Fold the bottom corner up.
Step 12. Do the same with the opposite corner.
Step 13. Now take two opposite corners and bend them into the middle as shown in the photo.
Step 14. The result is an envelope like this.
Step 15: Grasp the bottom two layers of paper with your hands and bend them outward.
Step 16. This is the final boat we get. As you can see, it is not at all difficult to make. Now you can go and launch a boat along a spring stream or summer river. And if it’s winter in the yard, then just pour water into the bathtub or basin and let your boats sail along with small passenger toys.
Master class “Sailboat using origami technique”
In this tutorial I will show you how to make a simple but cute sailboat from a regular square piece of paper.
Making it will take you no more than 5 minutes. The interesting thing is that not every child, and not every adult either, knows how to make such a craft. But it's not scary - there is always time to learn.
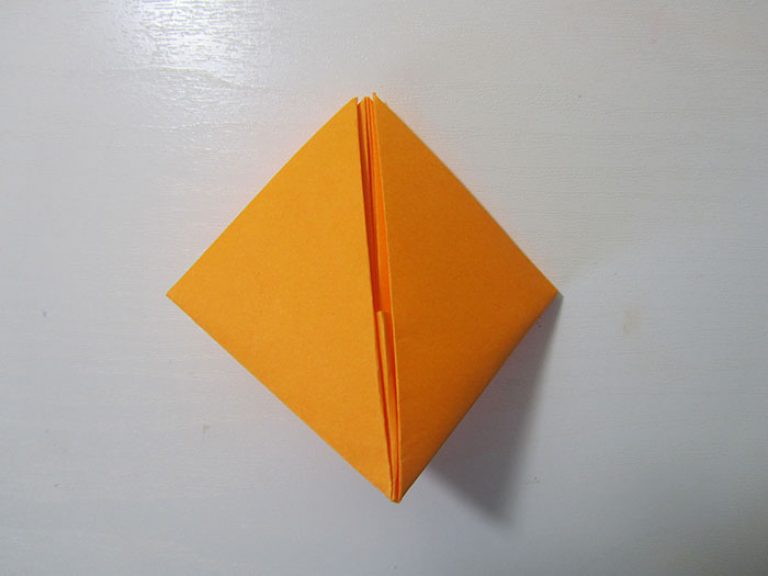
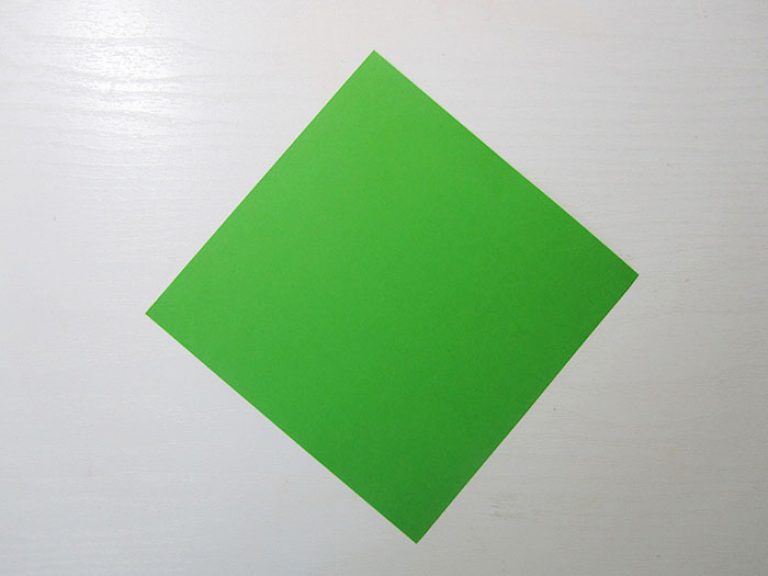
Step 1. So take a square piece of paper. I recommend using ready-made paper for crafts, but of course you can simply cut a square from regular A4 office paper.
Step 2. Fold it in half diagonally.
Step 3. Unfold and fold in half.
Step 4. Unbend again.
Step 5. Fold in half the other way.
Step 6. Unbend. The result is these additional lines.
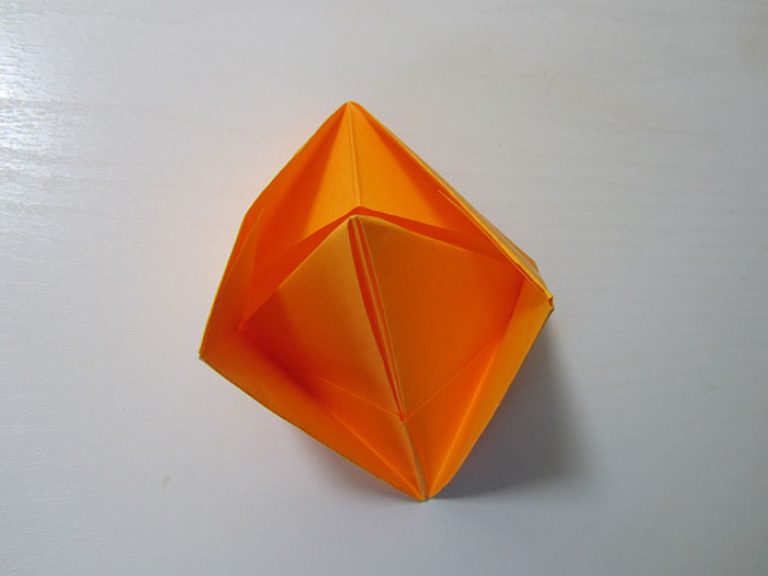
Step 7. Now fold the corners towards the center on those squares that do not have a fold line.
Step 8. Fold the shape in half.
Step 9. Accelerate the workpiece.
Step 10. Fold the left corner towards the center.
Step 11. Bend the left edge slightly to the side.
Step 12. Now fold the left corner inward.
Step 13. It should look like in the photo.
Step 14. Now fold the right corner towards the top.
Step 15. Fold the bottom center corner up.
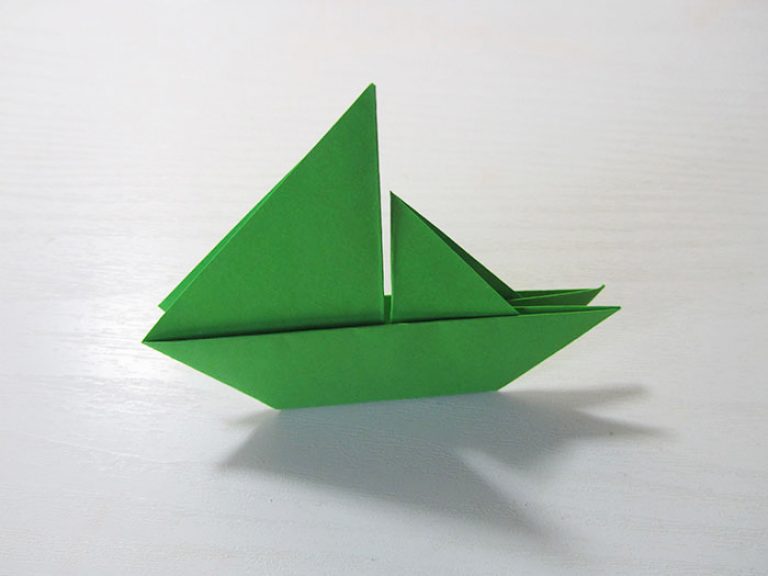
Step 16. This is how you get a sailboat. It turns out that it can be done quite simply. This boat can’t swim, but in any case it looks good on a table or bedside table.
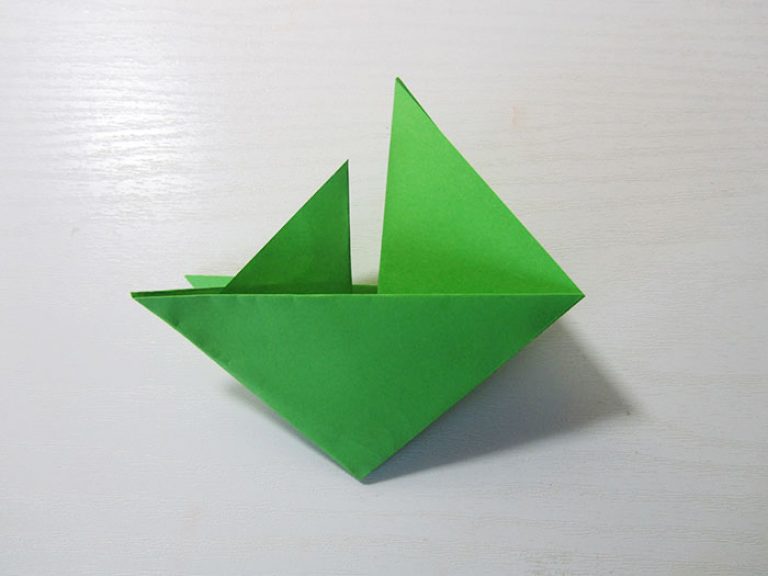
Master class “Boat using origami technique”
In this master class I will show you how to make an interesting boat using the origami technique.
This is a rather unconventional method that will require some sleight of hand. But as a result, you will get a wonderful boat that also floats great. And by the way, it holds up on the water much better than the first version of the boat.
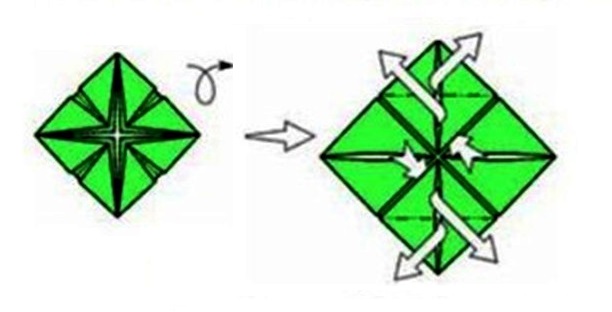
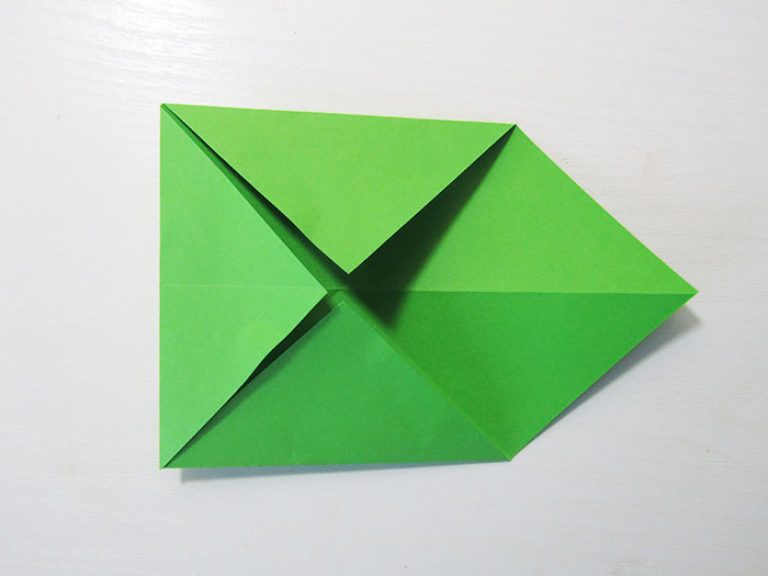
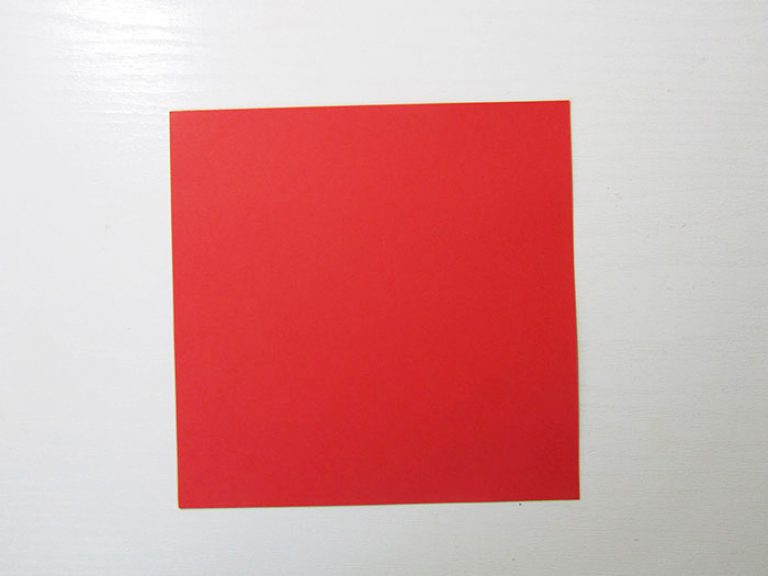
Step 1: Take a square piece of paper.
Step 2: Fold it in half.
Step 3. Bend each side towards the middle.
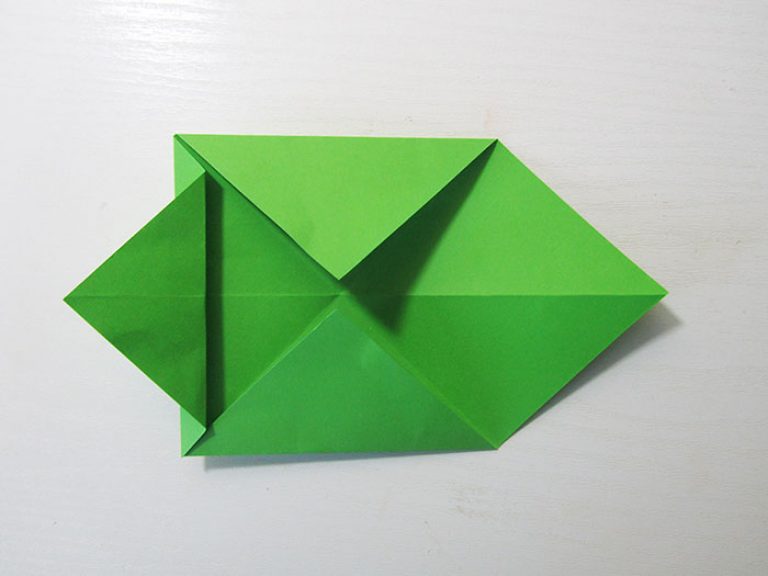
Step 4. Fold the two corners on the right towards the center.
![]()
Step 5. Also bend the two corners on the left towards the center.
Step 6. Now fold the bottom left corner towards the center.
Step 7. Fold the other three corners in the same way.
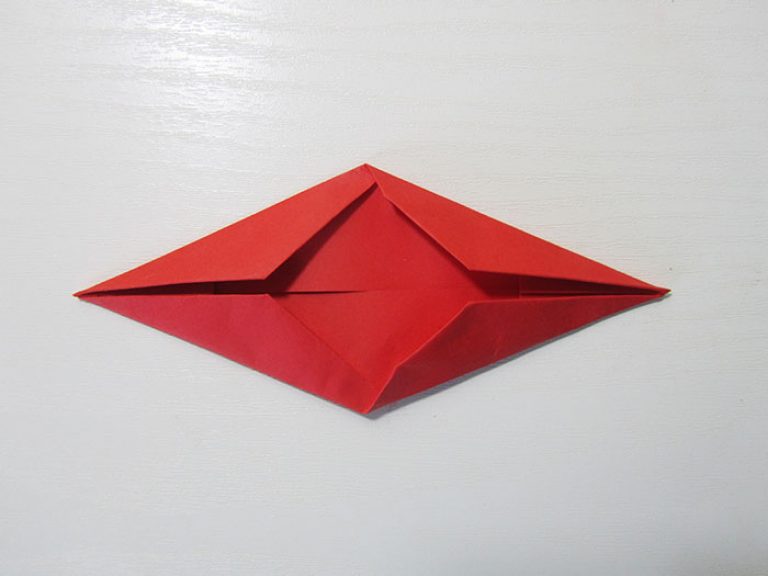
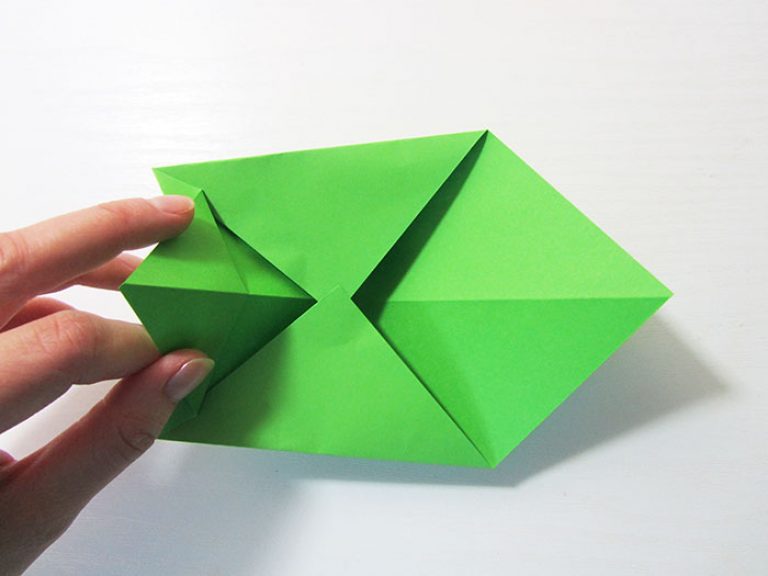
Step 8. Now fold the bottom corner of the paper blank towards the center.

Step 9. Do the same with the top corner.
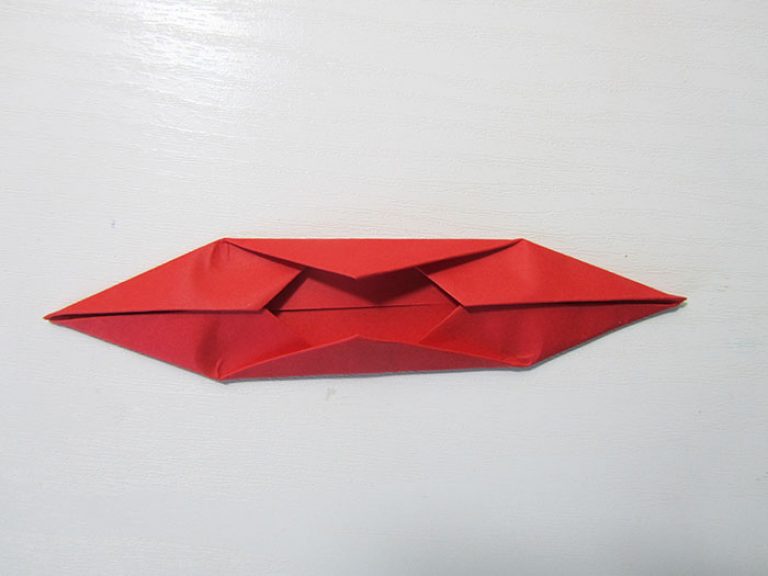
Step 10. Now the most difficult moment in this craft. Begin to unbend the workpiece from the center outward.
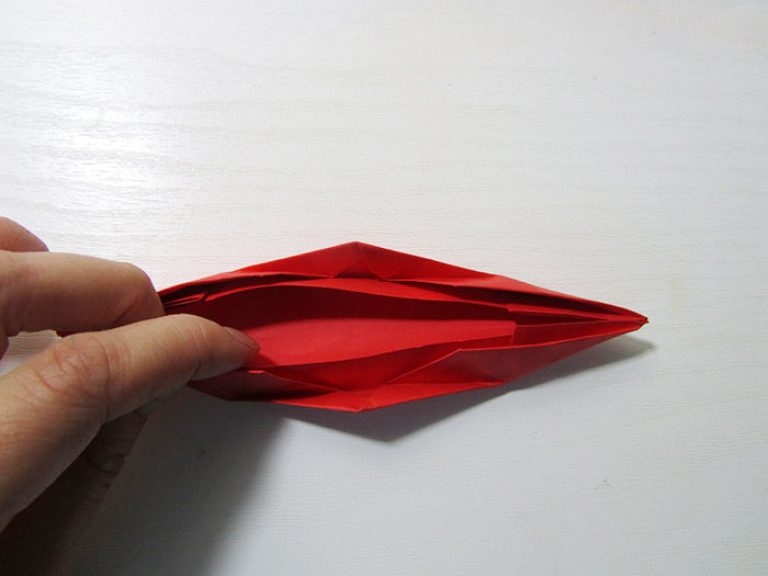
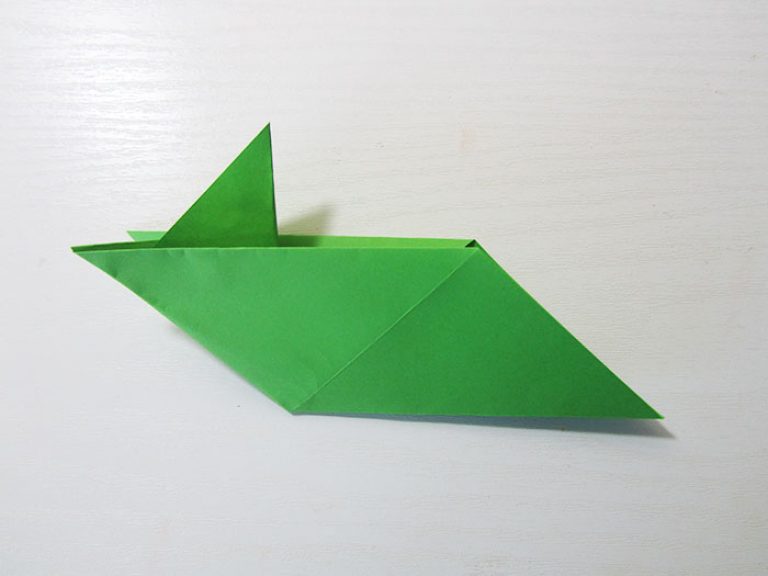
Step 11. This is what it looks like in the process with reverse side. It may be difficult to do this carefully at first, but it will definitely work out the second time!
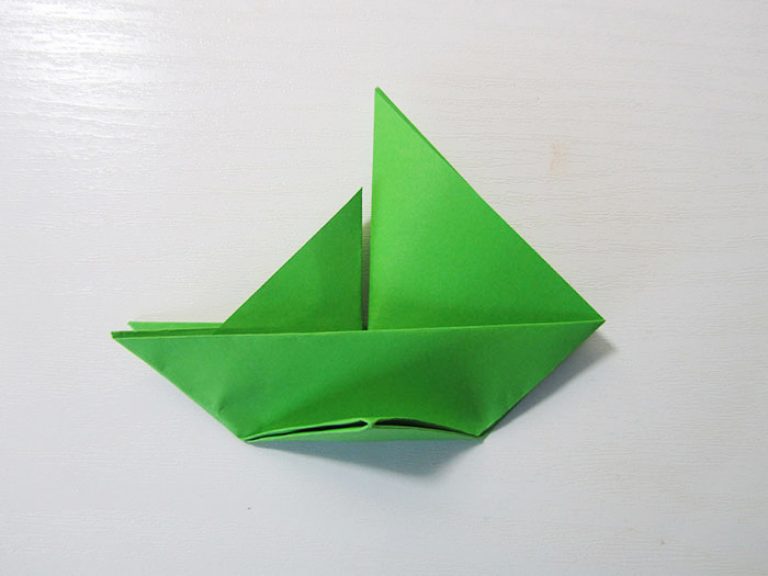
Step 12. Now touch up all the kinks.
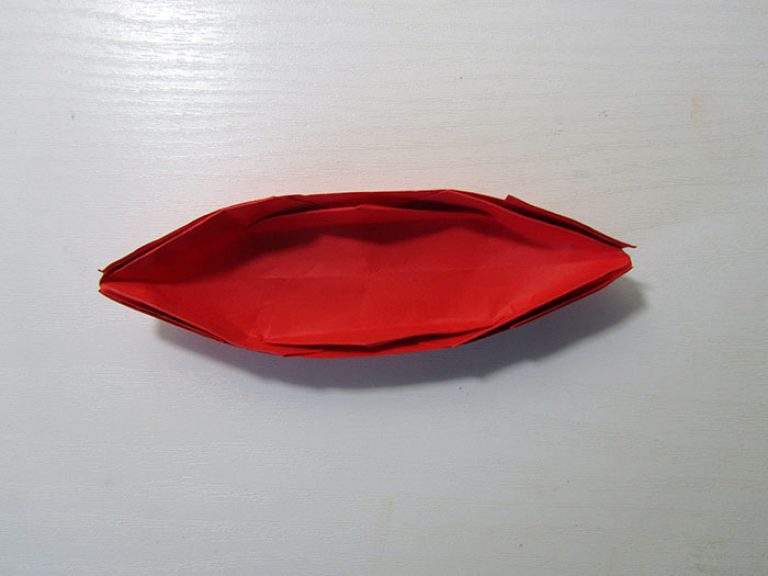
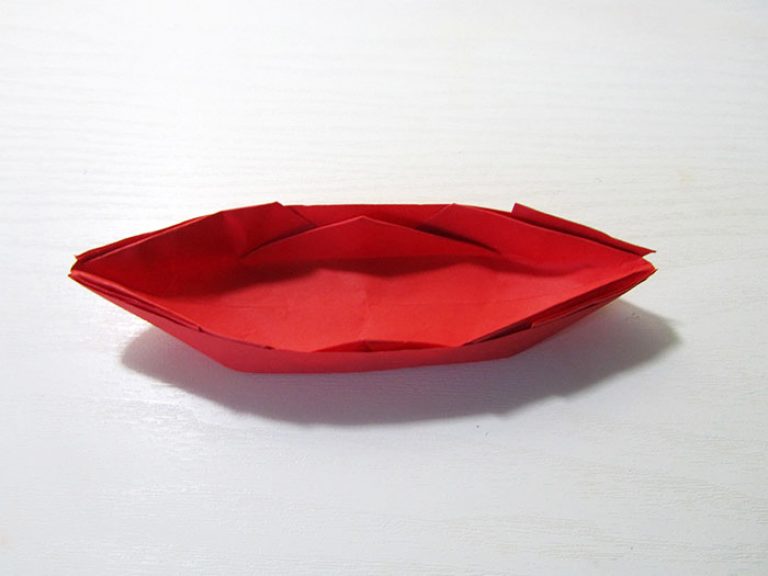
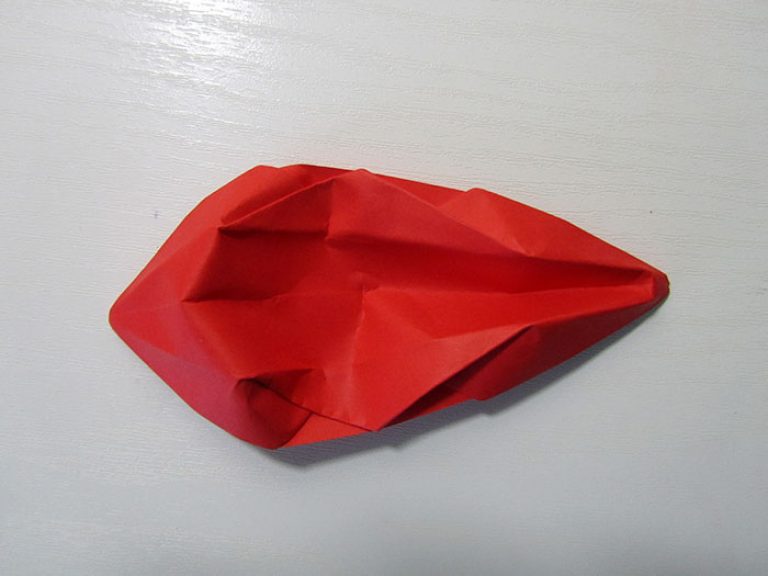
Step 13. This is the boat you end up with.
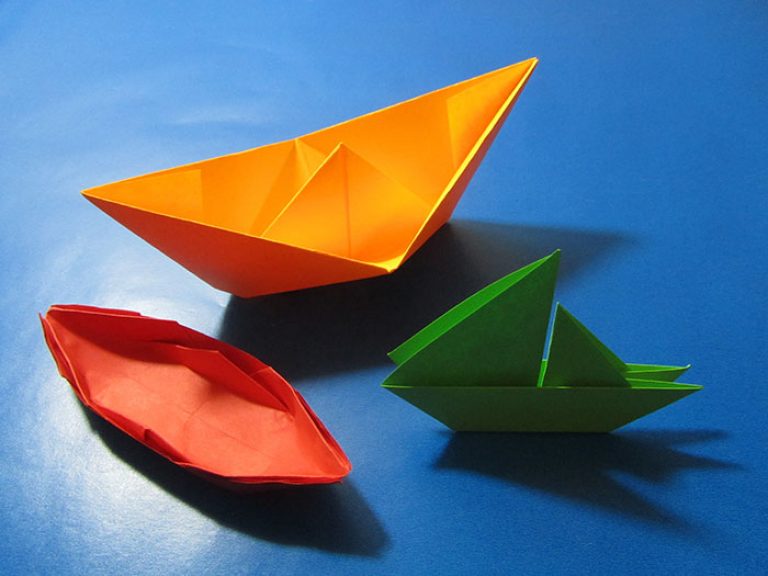
And here is our entire navy.
Now you know how to make a paper boat, and step-by-step photos will definitely help you in the process of making it. Happy crafting!
Good afternoon, dear needlewomen!
Many will remember unforgettable moments from childhood - how great it was to do paper boats and launch them along a river or at least a puddle! Years have passed, and now your hands have forgotten how to make boats. Now that you have your own children, it’s time to remember and introduce your child to this exciting spring activity - making paper boats and putting them on the water!
You can come up with a game: put together several boats with a child and send them to the river for a bet: whose boat floats the longest is the winner.
In this article you will learn how to make a paper boat with your own hands, and also watch the video instructions.
How to make a paper boat
Did you know that the origami technique is useful for a child because it develops thinking, attentiveness, logic and fine motor skills? Therefore, arm yourself with a piece of A4 paper and start crafting. For work, you can take a white sheet, which you can later repaint in any way you like, and it is also better to take paper that will not get wet after 30 seconds spent in water. There is another secret of “survivability”: a paper boat can be coated with melted beeswax or paraffin, this will make the paper moisture resistant.
First, we will introduce you to the diagram of a paper boat, then we will proceed to step by step photos and video.
Paper boat folding diagram
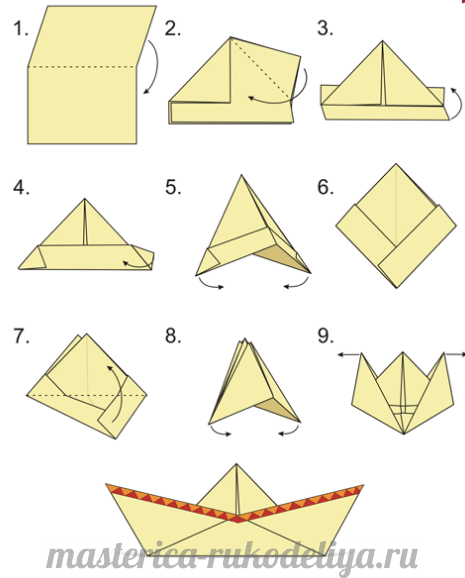
1. Fold a white sheet of paper in half. (Fig. 1) Bend the two upper corners of the rectangle at right angles to the central point (Fig. 2)
2. We bend up on both sides the free edges of the sheet on both sides (Fig. 3)
3. Tuck the corners as shown in Figure 4 so that the overall composition forms a triangle (Figure 4)
5. Bring the corners of the bottom of the composition together (Fig. 5) so that we end up with a square (Fig. 6).
6. Fold the bottom part up to form a triangle again (Fig. 8)
7. Hold the composition by the corners and carefully place it into a square.
8. Pull the corners until you get a boat, do not forget to align all sides of the ship well, this will give it stability and accuracy.
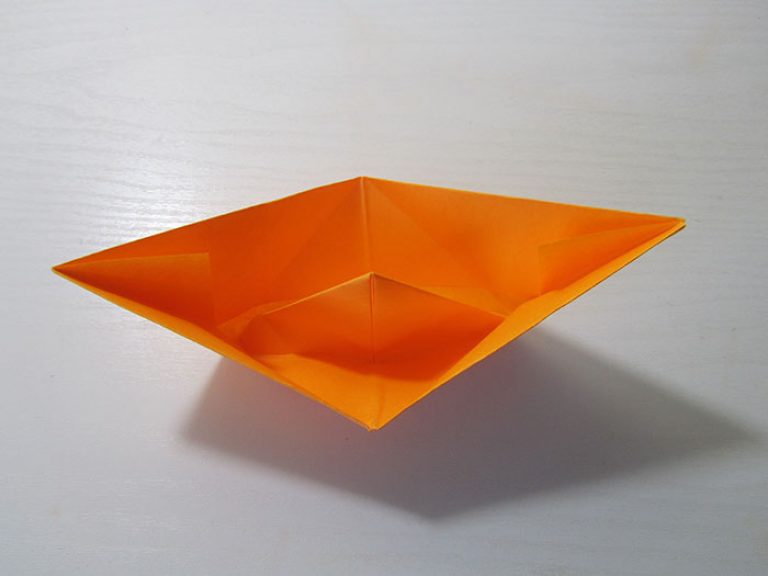
Paper boat.
Perhaps every boy folded paper boats in childhood, and most likely, having become a parent, not everyone will be able to fold a paper boat just once or twice. Let's refresh our memory and origami technique and fold a boat with our own hands together with
As we have already said, make a craft from thick paper that will retain its appearance on the water longer. Beeswax or paraffin will increase the boat's moisture resistance.
How to make a stable and beautiful ship, and how to decorate it? You can decorate the boat, firstly, with acrylic paints, and secondly, from toothpicks and fabric, napkins or paper, you can make a flag for the ship and attach it so that balance is maintained.
Now let's move on to the paper boat folding technique.
We only need a sheet of A4 paper.
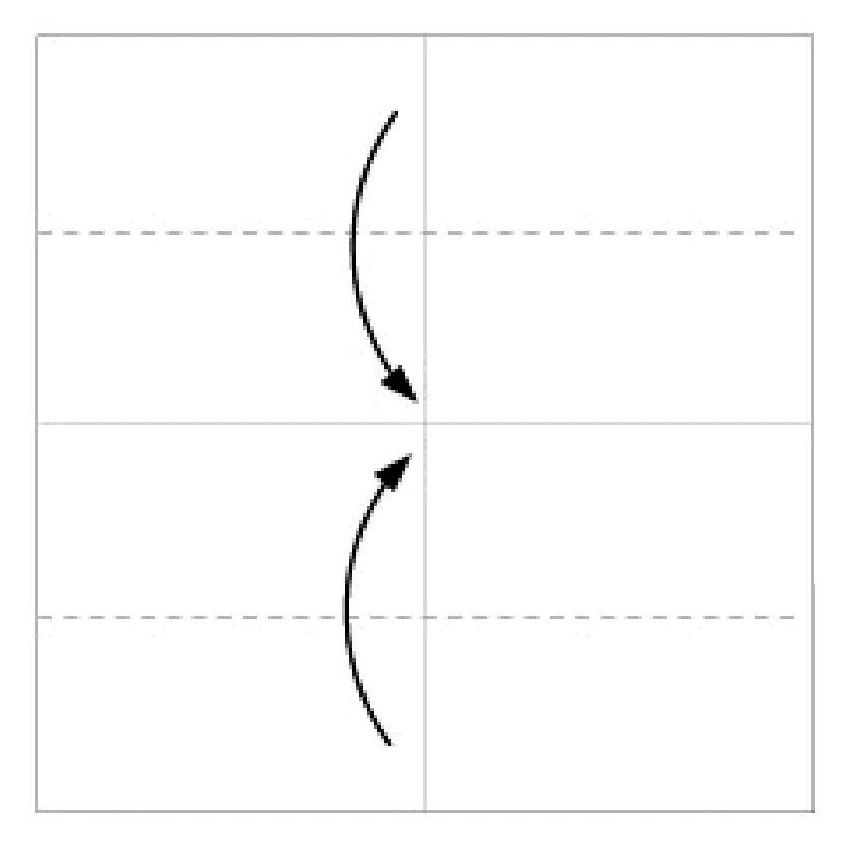
Fold the sheet in half.
And again in half - to make a fold line.
Unfold the last fold.

We will schematically denote it with a dotted line.
We bend the upper corners to this dotted line.

Be careful that both ends are symmetrical and meet in the middle of the craft.
Bend the lower free ends upward on both sides.

Carefully bend the protruding corners.
This is what happened on one side.
Do the same on the other side.
Fold the workpiece crosswise, as shown in the photo.
Open the boat to make a diamond shape.
Measure a short distance from the top corner, mark it or eyeball it. Fold the bottom edge to this point. 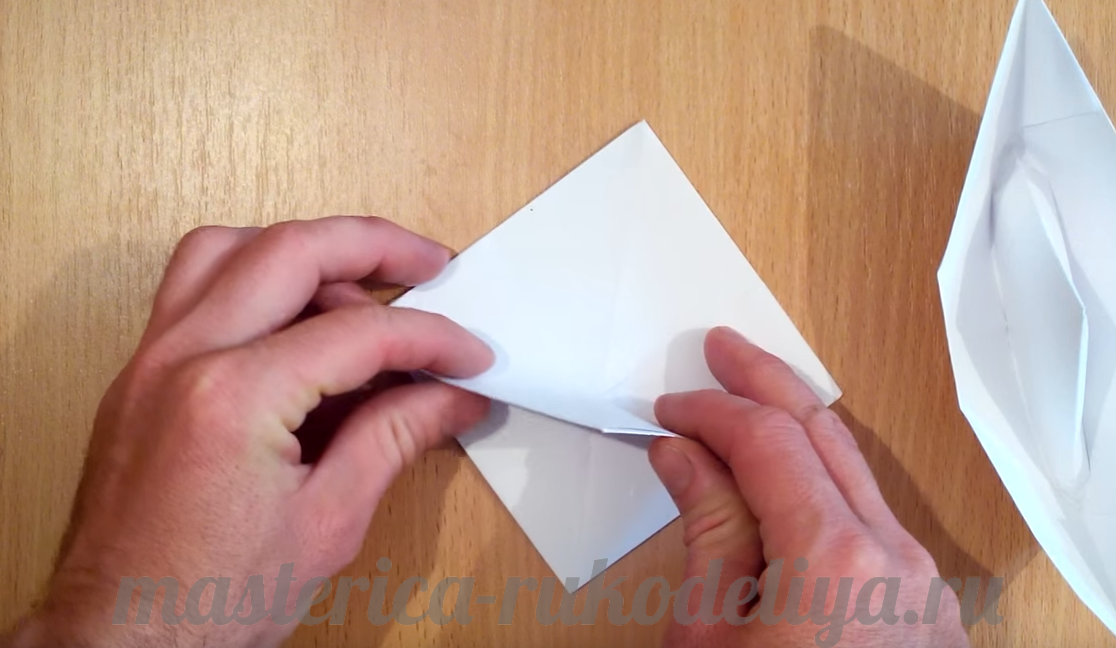
We do the same on the second side.
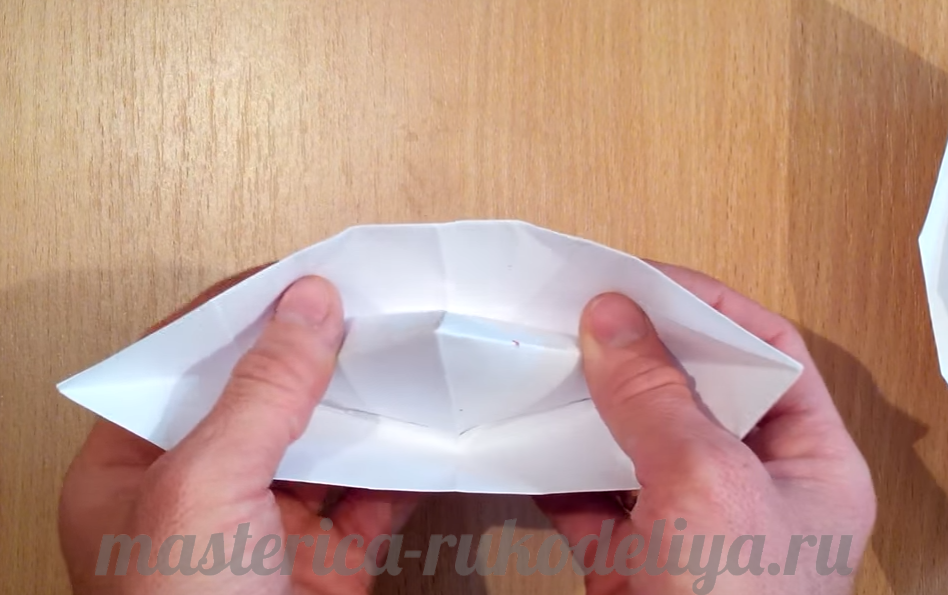
Now we need to open our paper boat again. A little more and it will be ready!
Now grab both sides of the ship with your fingers.
Pull them and open the boat.
![]()
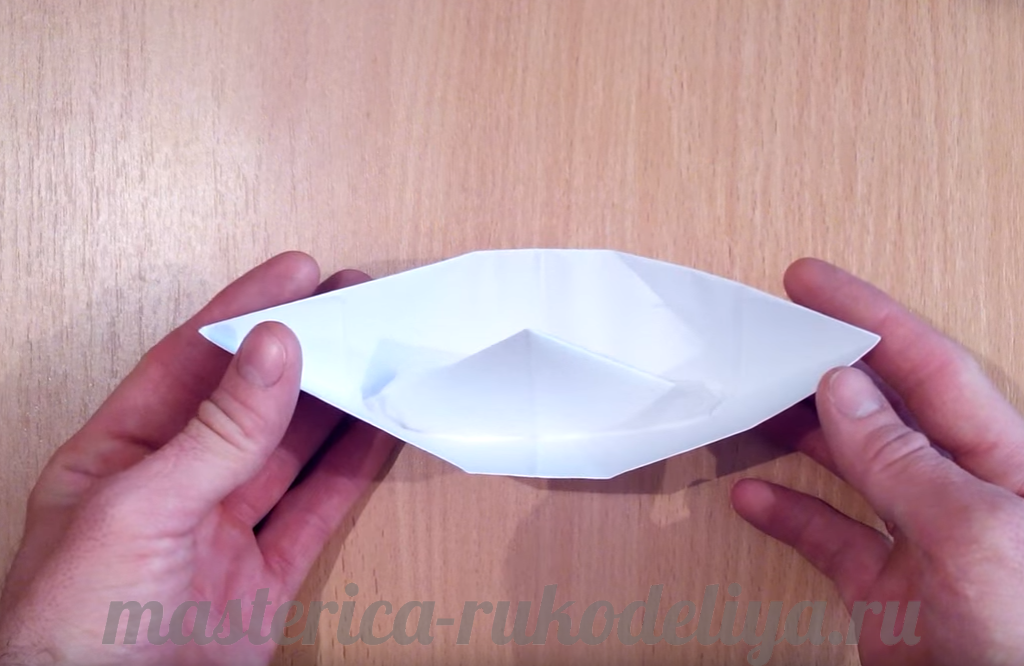
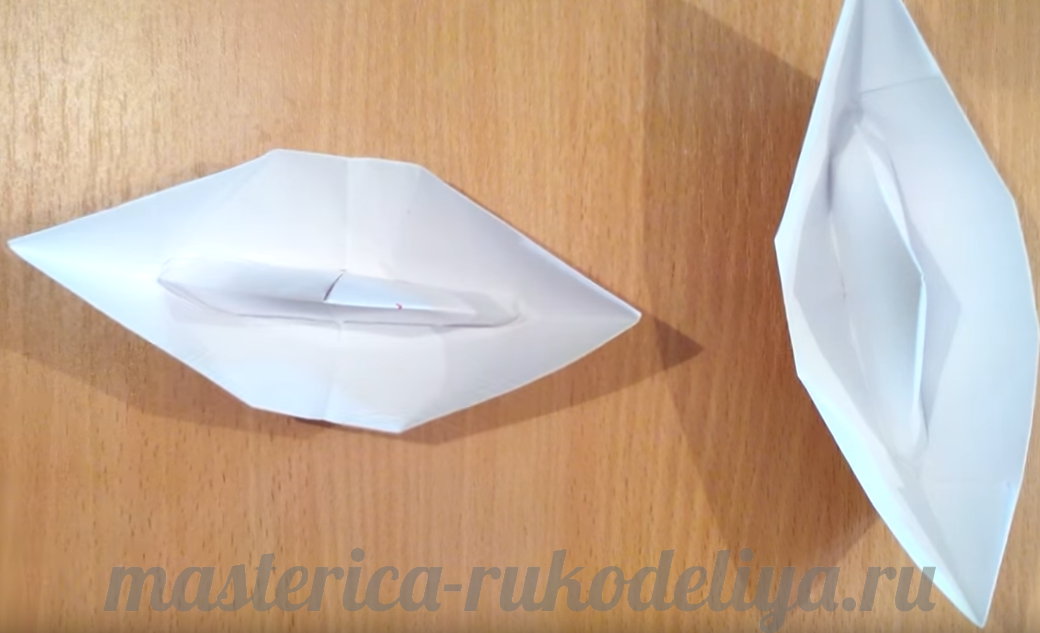
This is how it should turn out. Now we need to straighten the boat well.
It is important to properly straighten the boat, otherwise it may lie on its side in the water; pay special attention to the bottom.
Learning how to make a boat out of paper is simple, you were probably convinced of this by looking through the instructions. Systematic folding of paper using the origami technique develops creative thinking, logic, hands, outlook and eye. Using the origami technique you can make anything: boats, airplanes, flowers, animals - whatever your heart desires!
Therefore, a paper boat is just the beginning! Next, make a paper boat, a paper cruiser, and so on with your child! Below are video tutorials on how to make them.
How to make a paper boat video
How to make a boat out of paper video
How to make a sailboat out of paper video
Text prepared by: Veronica