Abstract of the educational activity "Boy with a Thumb" preparatory group
author: Koryakina Alena Vasilievna, teacher of MBDOU "Kindergarten of a combined type No. 53" Sverdlovsk region, Asbest cityDescription of material: I offer you the outline directly educational activities for children of the preparatory group (6-7 years old) on the topic “A little boy.” This material will be useful to teachers of the preparatory group.
Summary of direct educational activities
Group: preparatory (6-7 years)Educational area: Artistic creativity
GCD type: drawing
GCD type: combined
Subject: Tom Thumb
Planned result:
-Children know the work “Tom Thumb.”
- Children are friendly towards their peers and their work.
- They try to achieve high-quality results and perform the work carefully.
-Demonstrate activity in a conversation about the work, know how to conduct a dialogue;
-Actively use previously learned methods of depicting a person (size, body shape);
-Demonstrate the ability to work with visual materials (watercolor) and tools (pencil, brush);
-Try to achieve a high-quality result by performing the work carefully;
- Show kindness towards peers and their work;
-During the drawing process, they maintain their posture and take an active part in physical exercises;
- Maintain correct posture, demonstrate the ability to draw small parts in a drawing, take an active part in physical exercises;
-Together with the teacher, they plan the sequence of drawing a person, carry out self-control, mutual control, self-esteem, mutual assessment, introspection, mutual analysis.
Target: Improve children's human drawing skills.
Tasks:
Educational:
To foster a moral culture of the individual (goodwill towards peers and their work).
Foster the need to achieve high-quality results and accuracy.
Developmental:
Develop integrative personal qualities: “Curious, active” (interest in drawing; ability to conduct a dialogue);
“Physically developed” (maintain posture, develop fine motor skills during the drawing process, take an active part in physical exercises);
“Mastered the prerequisites of UUD” (together with the teacher, plan the sequence of drawing a person, exercise self-control, mutual control, self-analysis, mutual analysis, self-esteem, mutual assessment).
Educational:
Fine: actively use previously learned methods of depicting a person.
Technical: Learn to work with visual materials (watercolor) and tools (pencil, brush).
Compositional: Encourage children to draw large, place the drawing on the entire plane of the sheet, achieve a high-quality result, doing the work carefully.
Color: learn to obtain colors of flesh tones of different lightness and saturation using color mixing.
Principles of learning: the principle of learning in the zone of proximal development, the principle of clarity, the principle of systematicity and consistency, the principle of activity.
Principles of education: the formation of a personal style of relationships with peers and the teacher, the creation of a positive emotional background and an atmosphere of emotional uplift, education through interaction.
Teaching methods:
Methods of organization cognitive activity: explanation, conversation, demonstration, illustration, repetition, practical work.
Methods by level of inclusion in productive activity: problematic presentation of what is being studied, explanatory and illustrative.
Stimulation methods: stimulation with entertaining content, creating a situation of success, encouragement.
Development methods creativity: creation of a creative field, creative task.
Methods of control and diagnostics: self-monitoring, observation, analysis of children's activities.
Educational methods: conversation, example, creating a situation of success, encouragement and reprimand;
Forms of organization: group, individual.
Didactic tools: simple pencil, paper, watercolor, brushes, jars of water, supporting drawings of stages, color model.
Connection of GCD with other educational areas: “Cognition”, “Socialization”, “Communication”, “ Physical development»
References: 1. Lykova, I.A. "Visual activities in kindergarten» [Text] - M.2013
2. From birth to school. Basic general education program for preschool education / ed. N. E. Veraksy, T. S. Komarova, M. A. Vasilyeva. - M.: mosaic-synthesis, 2010. 1. Organizational (motivational-target) stage
2. Perception;
3. Explanation of working methods;
4. Physical exercise;
5. Questions for clarification;
6. Practical work;
7. Analysis of children's works;
8. Summing up.
Progress of activities
Organizational (motivational-target) stageTask: to attract children's attention. Motivate them for upcoming activities.
Guys come to me! While I was on my way to visit you, a white owl flew over me and dropped a letter. Do you want to know what is there and who wrote it?
-Yes, we want!
-So, let's open the letter and read it carefully!
- Hello guys, this is the king from the fairy tale boy - Thumb, I want to ask you to help me draw him. I want to create an exhibition-museum of my little boy in my kingdom, but I can’t do it all alone. Will you help me?
- let's help!
Here's what the king wrote to us guys.
Perception (updating knowledge about the drawing, recording difficulties in activities)
Task:
Update knowledge about
drawing, recording difficulties in activities.
Do you remember anything from this fairy tale? Let's check:
-How many sons did the woodcutter have?
(children's answers)
Where did the children go for firewood?
(children's answers)
What happened to the children in the forest? (children's hypothetical answers)
-how did the children get home? (children’s answers) Guys, you remember the fairy tale well, well done
And here is a portrait of the boy - Thumb
-tell me, how does it differ from drawing an ordinary person?
(children's answers)
Please tell me what Thumb has got?
- torso, head, arms, legs, eyes, mouth, nose.
That's right guys!
Seating children at tables
Look how I drew the little boy, he will be the first to hang in the museum with the owl.
Problematic explanation of working methods
Task: learn to draw fairy tale hero trying to convey features appearance cultivate the need to achieve high-quality results;
-Tell me, in order to correctly draw a boy-thumb, where do we start?
-We start with the torso,
I will draw the torso in the center of the paper.
Then we will draw the legs, neck, head, arms. We will draw Thumb Boy different colors only the body is light brown, since our skin color is light brown. Eyes can be painted blue, green or brown. Pink lips. Eyebrows and eyelashes black.
Clothes can be painted in different colors.
Fizminutka
Task:
relieve muscle tension.
Before we get started, let's do some physical exercise first.
And now everything is in order
Let's stand together for exercises (hands on the belt).
Hands bent to the side,
Raised up, waved,
They hid them behind their backs.
Looked over your right shoulder,
Through the left one more.
We sat down together,
Heels touched
Got up on my tiptoes
They put their hands down.
Questions for clarification (primary consolidation in external speech)
Task:
Develop the ability to actively use previously learned methods of depiction in drawing a person.
Tell me, what should we succeed?
- "thumb-thumb"
Where do we start? Guys, here is a diagram of drawing a boy-to-be, let's look at it
(we discuss the drawing plan based on dynamic diagrams) - first we draw the shirt, then the panties, arms, neck and head. let's add ears, then add arms and legs
- then the guys will draw hairs, eyes, nose, mouth, pockets on the pants. What color will we paint it with?
- in different colors, only the body is pink.
Now let's close our eyes and imagine what kind of little boy we have?
(ask 1-2 people what kind of boy they imagined)
Practical work
(with self-test)
Tasks.
Continue to teach children to mix paints to obtain shades of the same color, and improve the technique of painting with a brush.
The teacher observes the children’s activities and encourages self-control and self-analysis.
Individual work teacher for correcting errors in drawing the proportions of the human figure, I advise children to select colors in relation to each other.
I help with advice when mixing paint to obtain shades of the same color, and remind you about the techniques of painting with a brush.
Incorporating knowledge into the repetition system
Objective: to consolidate ideas about the distinctive features of a person.
Are you guys finished yet?
What a great fellow you are. Let's put your portraits of Thumbs up on the carpet and admire them.
Guys, whose work did you like best?
-Why do you think so?
What is the difference between drawing a Thumb Thumb and an ordinary person? You guys did your best, the king will like your work
These are the kind of big boys our kids turned out to be!!!
In the education and upbringing of children aged 6–7 years, the priority task is to prepare children for school. Each lesson is aimed at forming and consolidating those skills, as well as developing personal qualities that a future first-grader needs to study in elementary school.
Classes on visual arts contribute comprehensive development preschoolers: meet the cognitive needs of children, contribute to the expansion vocabulary, instill a sense of beauty. By drawing, children learn to predict and analyze actions, gradually create a composition taking into account basic knowledge about perspective, perform various techniques with a pencil or brush, which prepares the hand for the most important process in the first grade - mastering writing.
For the preparatory group, one of the most interesting topics for a drawing lesson will undoubtedly be “Birds,” where both migratory and domestic birds will be considered.
Preparing for a drawing lesson in the preparatory group of a kindergarten.
Classes in visual arts (drawing, designing and modeling) are held for preparatory group students three times a week. For modeling and appliqué, classes alternate and are held once every two weeks, for drawing - two classes every week.

As a rule, drawing is one of the favorite activities creative activity in children. The process of creating a visual image using simple actions brings positive emotions. The children master basic techniques and techniques and show great independence in drawing. During development work program on drawing in preparatory group It is necessary to comply with the criteria for conducting classes with children aged 6–7 years:

Drawing lesson in the preparatory group
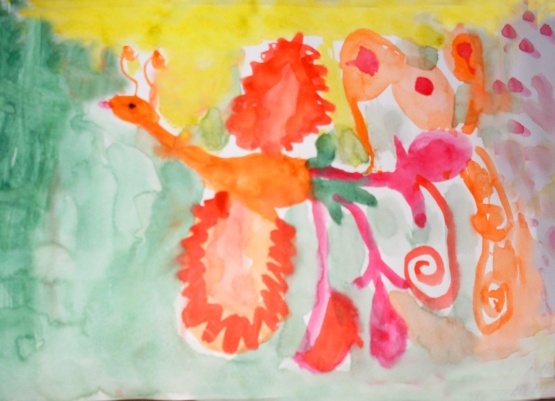
IN senior group The guys got acquainted with three types of drawing: subject, plot and decorative. In the preparatory group, great importance is given to drawing from ideas. Pupils work with visual memory images, analyze demonstrated illustrations and other visual materials. Classes on the topic “Birds” do not involve consolidating and honing the skill of drawing from life. The guys look at images of birds on pictures and posters, the teacher pays attention to the birds during a walk - the guys highlight the features various types birds (size, shape of the head/body/beak, colors and shades of plumage) and record their characteristic movements: a bird sat on a branch, flew up, pecked berries, swam, etc. Based on their presentation, the children also drew images of fairy-tale birds (Fire- bird, Finist).
Depicting these movements in simple actions is the main task of plot drawing in the preparatory group. The children transfer their feelings from the surrounding reality onto a piece of paper and depict semantic connections between objects and objects. On the topic “Birds,” students think through the plot point, try to fill the entire area of the sheet with an image, keeping in mind the perspective (near objects are drawn lower on the sheet, distant objects are drawn higher).
The theme “Birds” is also revealed in decorative drawing by older preschoolers. These are conventional images of birds as part of a complex pattern for decorating a plate, box, cutting board, tray and other items. Children can draw birds based on Gorodets, Khokhloma and Gzhel paintings, Filimonovskaya, Dymkovo and Bogorodskaya toys.
Samples of works on the topic “Birds”, made in various drawing methods.
Example of object drawing Example of plot drawing Drawing based on the characters of a fable Example of drawing based on the idea Decorative drawing based on Khokhloma painting Decorative drawing based on Gzhel painting Decorative drawing based on the Dymkovo toy Decorative drawing based on the Filimonovskaya toy
Techniques and techniques of drawing in the preparatory group.
During drawing classes, older preschoolers create works not only with paints, but also with pencils. At the age of 6–7 years, a child can perform uniform bright shading with slate and wax colored pencils. It can achieve different shades of the same color in a pencil drawing (due to the intensity of pressure during the shading process). With a simple pencil the child learns to create a preliminary sketch: indicates the contours of an object without drawing individual elements. To clearly highlight the contours and details of colored objects, colored felt-tip pens can be used.

Pencil drawing of a preparatory group student
When painting with paints, older preschoolers practice the skills of mixing and whitening paints on a palette to obtain the desired colors and shades. In the preparatory group, the children use the techniques of dabbing and brushstrokes in their work, painting both with the entire bristle of the brush and with the tip.
Watercolors are often used in art classes. By drawing with slate pencils or watercolors, children learn to see the beauty of light shades. Over the entire area of the sheet, students paint a blurry background with watercolors.
Watercolor drawing by a preparatory group student
Gouache is used in decorative drawing or in the creation of those subject and subject works in which, according to the plan, color is applied to color.

Gouache drawing by a preparatory group student
As a basis for the drawings, sets of white and colored paper, special for watercolor and gouache, and Whatman paper are used (as a rule, for creating collective works or implementing creative projects). Tinted paper is rarely used for work, mainly to create a decorative pattern based on folk painting. In subject and subject drawing classes, children learn to create a background on their own (plain or with smooth transitions).
On the topic “Birds,” classes are conducted using non-traditional drawing techniques: wax crayons with sketches using watercolor paint, cotton swabs, chalk on sandpaper, in the techniques of grattage, monotype, etc.
Examples of bird drawings made using non-traditional techniques.
Examples of works using the finger painting technique Drawing using the scratch technique Drawing using the scratch technique Example of work using the scratch technique (colored background of the base) Drawing using the printing technique Example of blotography Example of monotype in children's drawing Work in the monotype technique Work in the pointillism technique (drawing with cotton swabs)
Drawing on the topic “Birds” in the preparatory group can be combined with other visual arts techniques - appliqué and modeling. The guys complement dried watercolor and gouache drawings with details or figures according to the plan. For example, in a drawing of a tit, you can use pencils to glue grains molded from plasticine or crumpled pieces of napkin as “bread crumbs.” It is good to complement the image of the branch on which the bullfinch sat with plasticine rowan berries. The materials for creating the applique in the drawing can be varied: cotton pads, napkin balls, natural material, cut out motifs from candy wrappers and magazines. The use of plasticineography is encouraged - an unconventional drawing technique by smearing plasticine. Plasticine strokes help to beautifully and originally design the background of the picture: the sky, a clearing, tree leaves or snow on a branch.
Examples of drawings of birds in combination with other iso-techniques.
The berries are made using the technique of crumpling paper elements. The design is supplemented with plasticine elements. A combination of drawing and applique techniques. A combination of drawing and applique techniques ( teamwork) Complementing the drawing with plasticine elements Drawing with paints with plasticine elements Mixed media (drawing and applique)
Individualization of tasks on the topic “Birds” in the preparatory group.
An individual approach to learning is implemented through a personal approach to students, the development of differentiated tasks (by level of difficulty or by design) and the setting of classes not for the “average student”, but for the development of the skills of each child in the group. For drawing classes in the preparatory group, this approach is carried out through the teacher’s adherence to the following principles and methods of work:
In drawing lessons, a person-centered approach is implemented through the teacher’s careful development of a lesson program and preparation for each lesson. By consolidating previously acquired skills in the process of creating a drawing, the child feels the significance of what he did previously. At every lesson he learns something new or learns something - the child has interest and incentive to develop. He analyzes the finished work, learns to accept constructive criticism and well-deserved praise.
The topic for a drawing lesson should be general and give each student the opportunity to dream up. For example, the topic “Poultry” can provide children with scope for creative activity based on the following criteria: what kind of bird to depict (the bird lives in an apartment or in the courtyard of a village house), perform work within the framework of subject drawing or plot drawing, choose the level of background detail, etc. For each drawing, children independently choose the color scheme in which they will draw (warm or cool colors); they can use additional materials to complement the work with modeling or paper appliqué, if there is time left after completing the main task.
The topic “Birds” in long-term planning for drawing in the preparatory group.
In the "Drawing" section of the program educational field“Artistic and Aesthetic Development” in the preparatory group, the theme “Birds” is presented in many classes. It is revealed when learning to draw from an idea, drawing images folk tales and works of art, decorative drawing.
Motivating start to class
One of the tasks of learning to draw from paper is to develop motivation to work with pencils, paints, and pastels. Most effective way attracting attention to the creative process and enhancing cognitive activity - the use of motivational material on preparatory stage classes. As a motivating start to the lesson, the teacher can use a variety of techniques and use additional equipment:
Examples of using motivating materials at the beginning of a lesson on the topic “Birds”.
At the beginning of the lesson, the teacher asks the children whether they remember well the fairy tale “The Gray Neck” they previously read. Held conversation according to the content of the fairy tale: for what reasons did the duck not fly away with its flock, what happened in the fairy tale before meeting the hunter, how the fox behaved, and how the duck behaved, how she met the hare, etc.The teacher reads out excerpts from a fairy tale: with what feeling do birds prepare for a long journey to warm lands; description autumn day, when Gray Neck was left alone, and flocks were flying in the sky migratory birds; scene at the wormwood; meeting with a hare, etc.
Carrying out logic game “Find the difference”: two pictures depicting the same illustration for the fairy tale of Mamin-Sibiryak are attached to the board, but one of them has differences. The teacher stipulates how many differences the children must find. Creation surprise moment : The postman brings a letter to the group. It was written by Dunno, he tells the guys that Znayka wished him a very difficult riddle
, he can’t give the correct answer. Dunno asks the child to help him solve the riddle and send him an illustration of the answer in a return letter.:
Mystery
Red-breasted, black-winged,
Loves to peck grains.
With the first snow on the mountain ash
He will appear again.
Next, a conversation is held to study visual material (pictures of bullfinches): the children determine the structural features of the bird, plumage, and posture. Physical education minute
“Look at the branches - bullfinches in red T-shirts.” Possibly holding logic game “Find bullfinches in the same poses”: on the table there are pictures of bullfinches (in flight, pecking berries, sitting on a branch, jumping, etc.), the guys must find the same ones. Prepares background accompaniment for the lesson - audio recordings with the singing of forest birds; visual material -
illustrations conversation to fairy tales and nursery rhymes, made by the artist Vasnetsov.
At the beginning of the lesson, the teacher takes the child to an exhibition of illustrations and talks about the artist Yuri Vasnetsov. Afterwards it is carried out : what birds the guys saw in the paintings, what colors predominate in the works shown, etc.:
The teacher reads
nursery rhyme
Oh, you little owl,
Turned his head,
Fell from the tree
She rolled into the hole.
He asks what bird this nursery rhyme is about and asks to find an illustration with it at the exhibition. Discussion of the image of an owl: structural features of the bird, plumage, posture, what it sits on, what colors the artist used to draw the bird. The teacher asks if they have met an owl or an eagle owl in fairy tales, poems, songs and cartoons, and perhaps they have seen this bird outside the city or in the zoo.
Outdoor game “Owl”: in the middle of the game room there is an owl’s nest, where the first driver stands. The teacher announces that night has fallen in the forest, the driver closes his eyes, and the rest of the children depict various inhabitants of the forest - insects, birds, animals, they run and play. When the teacher says that the day has come, the children freeze, and the owl flies out of the nest and looks to see if everyone remains motionless; those who move, the owl takes to its nest. Afterwards, it is calculated how many the owl managed to catch, and a new driver is selected.
Compilation of notes on the topic “Birds”.
The purpose of drawing classes on this topic is to create images of various types of birds in characteristic poses, plot scenes, and fairy-tale images. A drawing lesson in a preparatory group lasts no more than 30 minutes and contains the required steps:
The teacher must analyze the lesson conducted and outline ways to correct methods and forms of work in subsequent educational activities.
Summary of a lesson in visual arts in the preparatory group on the topic “Poultry yard.”
At the beginning of the lesson, a short warm-up is carried out: the children follow the teacher and move to the lines of a poem about a goose.
Creating a playful moment: a doll comes to visit the children and invites them to look at her poultry yard; first, she asks the children riddles about birds.
The doll shows the children a picture of a poultry yard. The teacher conducts a conversation. What birds are shown on the poster? Why are these birds called domestic birds? Why do people keep and breed poultry?
Conducting a physical education session with a poem about poultry.
Practical part: the guys make drawings with colored pencils.
Demonstration of works. The guys highlight especially successful drawings.
The teacher thanks everyone for the work done and interest in the lesson. The order of drawings on the theme “Birds”.
Pupils of the preparatory group actively develop the ability to follow the teacher’s oral instructions. Therefore, before the children complete the practical part of the task, the teacher should discuss with them in what ways and in what sequence they will draw the figure of a bird, whether they will first create a background and how, what mixed techniques are suitable for completing the task, whether it is possible to use sculpting and appliqué techniques to design of the finished drawing. Through leading questions and hints, the teacher leads the children to the recommended course of action. You can look at examples of finished works on a given topic and invite the children to determine the techniques used to create these drawings. It is allowed to use technocards with step-by-step drawing of a bird figure for those children who have difficulty completing the task.
Schemes for step-by-step drawing of migratory and domestic birds.
Instructions for drawing with a pencil Instructions for drawing with a pencil Instructions for drawing with a pencil Instructions for drawing with colored pencils Instructions for drawing with gouache Instructions for drawing with a pencil Scheme for drawing with paints Scheme for drawing Drawing scheme Scheme for drawing Drawing scheme Scheme for drawing Drawing scheme Scheme for drawing
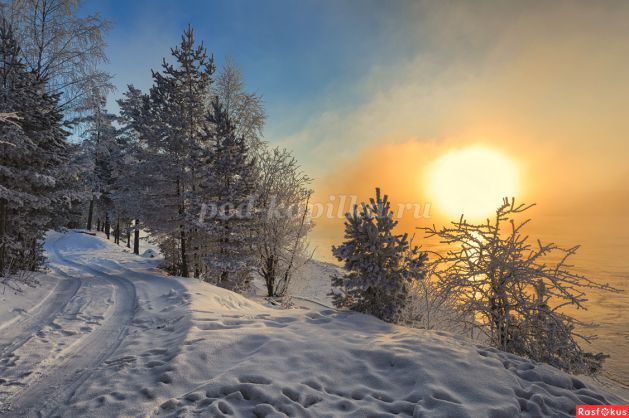
Drawing on the topic: Winter for children 5-7 years old
"Winter sun". Master class for educators
Sredina O.S. teacher of MDOU TsRR d.s. No. 1 “Bear Cub”, Yuryuzan, Chelyabinsk region.Target:
Introducing preschoolers to the possibilities of a limited palette in color reproduction.
Training in working techniques on large format (A3).
Tasks:
Teach how to work with flat and round bristle brushes in gouache
Improve work with the palette to compose shades of cold and warm colors,
Develop the ability to notice, see and describe color nuances
Cultivate love for native nature.
Develop curiosity.
Materials:
A3 format, palette, two sponges, gouache in white, blue, scarlet and yellow. Plastic spoon. Round and flat bristle brushes (No. 1-5).
Literary materials:
Poems by Russian poets
Preliminary work:
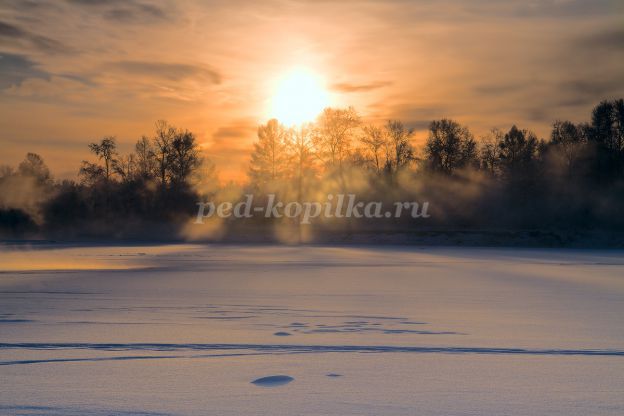
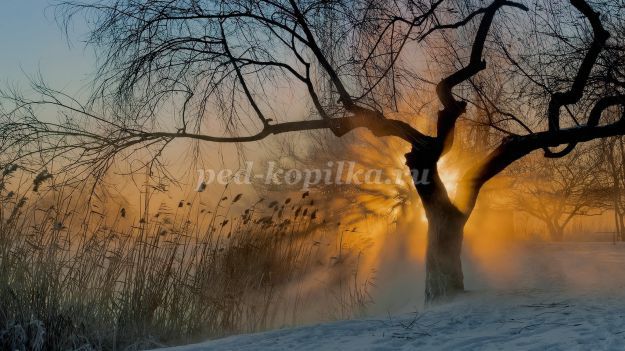
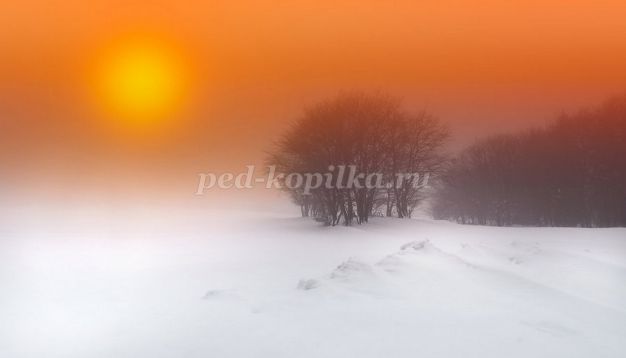
1 We look at a presentation with photographs of winter landscapes. It contains images of the sun rising or setting in winter. We admire the beauty of our native nature.


2 Listen to poems about winter.
S. Yesenin
White birch tree under my window
She covered herself with snow, like silver.
On fluffy branches with a snow border
The tassels bloomed with white fringe.
And the birch tree stands in sleepy silence,
And snowflakes burn in golden fire.
And the dawn, lazily walking around,
Sprinkles the branches with new silver.
Options:
A. S. Pushkin “Here is the north, the clouds are catching up...”; A. A. Fet "Mom! Look from the window"; A. N. Apukhtin “A white, fluffy robe”; L. A. May “Double green formation...”; S. A. Yesenin "Powder"; A. S. Pushkin " Winter road" 4 S. A. Yesenin “Winter sings - howls”; I. A. Bunin “Blizzard”; S. D. Drozhzhin “Snow flies and sparkles...”; N. A. Nekrasov “Frost the Voivode”; A . S. Pushkin “Winter!.. Peasant, triumphant...”
N. A. Nekrasov “A Little Man with a Marigold”; A. S. Pushkin “The dawn rises in the cold darkness...”; A. A. Blok "Dilapidated hut"; K. D. Balmont "Snowflake"; A. S. Pushkin “Winter Morning”; I. Z. Surikov "Winter"; F. I. Tyutchev “The Enchantress in Winter...”; A. A. Fet "Wonderful picture..."
3 We talk about the color of the sky (pink, lilac) and the solar disk. We find shades of the sun: white, yellow, light yellow, golden, orange, pink...
Thinking about the sun. Why does it only shine in winter and not warm? Why is there no winter at the equator and no snow in Africa? Do we actually see the rays from the sun that we usually draw? What is the sun like in winter - at dusk or in fog, in frost: clearly defined or looks like a blurry spot?
Practical work
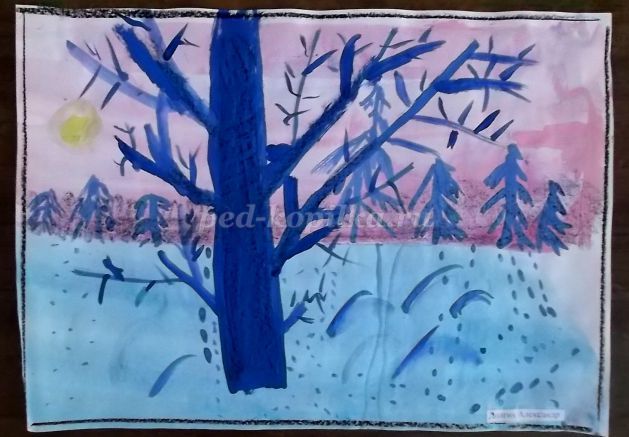
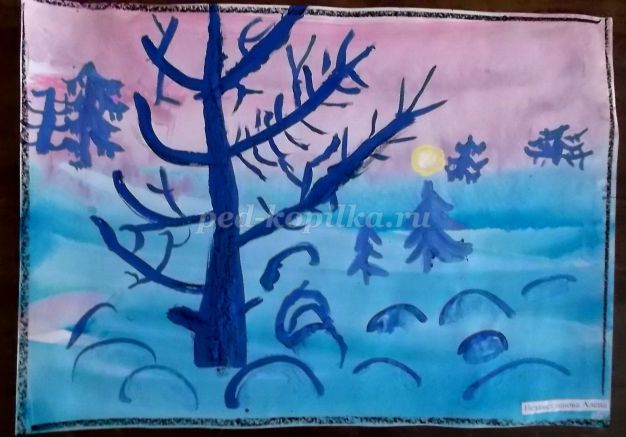
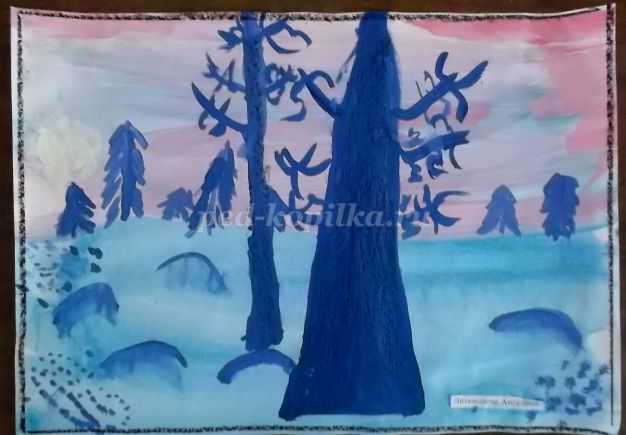
Let's draw together with the teacher. Variations are welcome. This could be the location of the horizon line, the number of trees, snowdrifts, or the location of footprints in the snow.
Description:
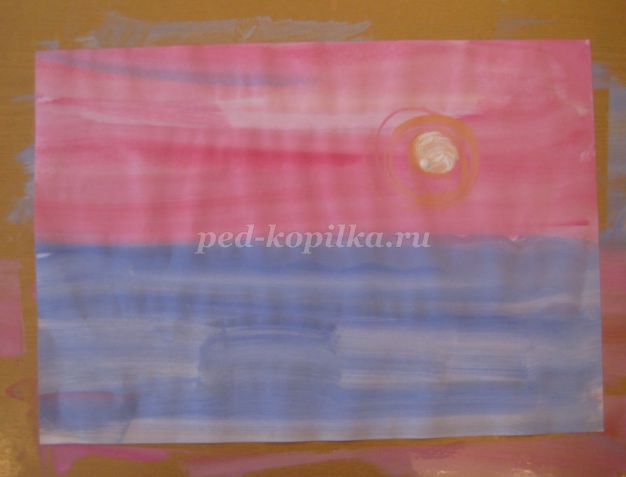
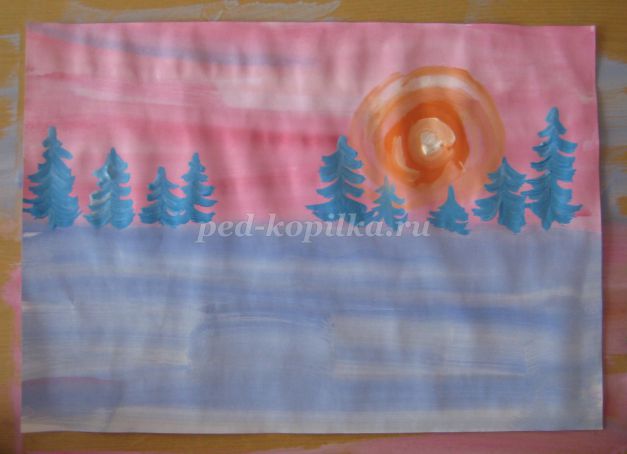
1). Take a sheet of A 3 format and prepare the background. To do this, take two sponges. We wet them with water. Alternatively, you can moisten the sheet with water. We put a little white and scarlet gouache on one sponge, white and blue on the other. Our sky will be pink. And the snow is blue.


2) We work with the palette. Lay out white and blue gouache. White - using a spoon (so that the paint remains white and not dirty in the jar). Even a cleanly washed brush, picking up white gouache, adds its own shade to it. Mix to get a blue color (several shades can be made).
Mix white gouache and yellow to obtain a pale yellow color.
Mix yellow and red to get orange.
Mix white and orange to get a pale orange color.
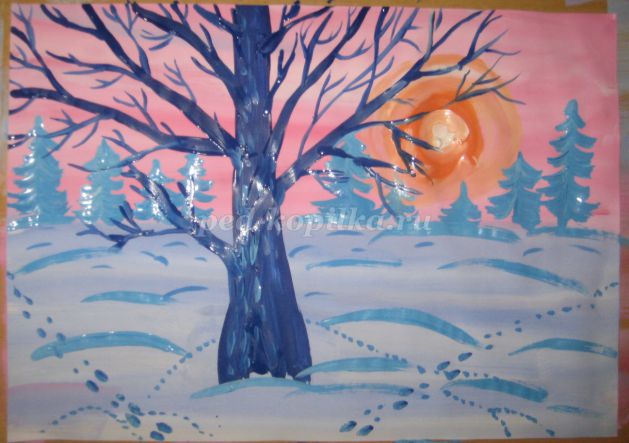
3) The sun is rising (or setting). This means that its circle will only rise slightly above the horizon line. Place the sun slightly to the right or left of the center of the sheet. Posting White color to the center of the solar circle. We outline the small solar circle with smooth movements using large yellow, orange, light orange. Using a clean, damp brush, I blur the transitions from one color to another.

4)
We draw blue spruce trees on the horizon line. We arrange them not like a fence of fir trees of the same height, but in a free order.
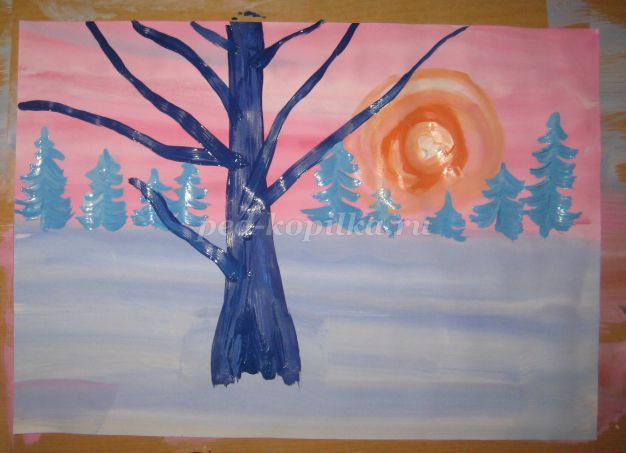
5) Let's talk about the composition of the sheet. Would it be beautiful if the large, main tree in the picture was located right in the middle of the picture? And if the tree is pressed to the edge, will it remain the main one? Where should it be drawn? Slightly to the right or left of the center of the sheet.
Using blue gouache we draw a tree trunk in the foreground. Let's imagine that this is an old oak tree. First we draw its long side branches, and then thin branches.

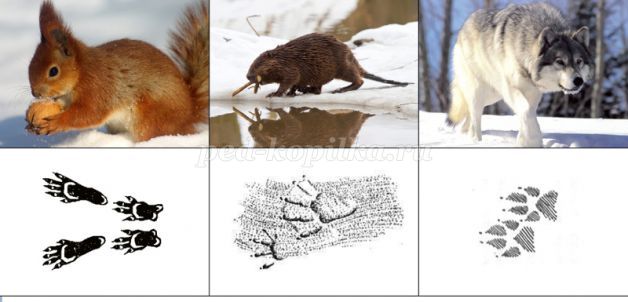
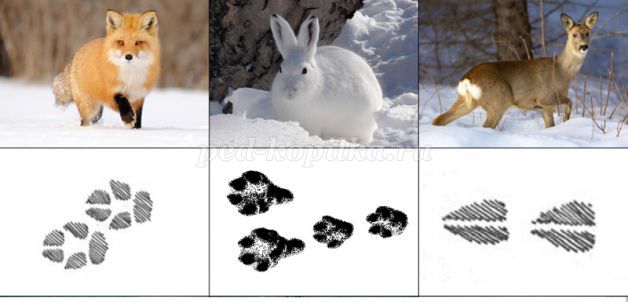
6) Drifts and footprints appear in the snow.
Who left them? You can play a game, remembering who does not sleep in the forest in winter, and what
to whom do the traces belong?
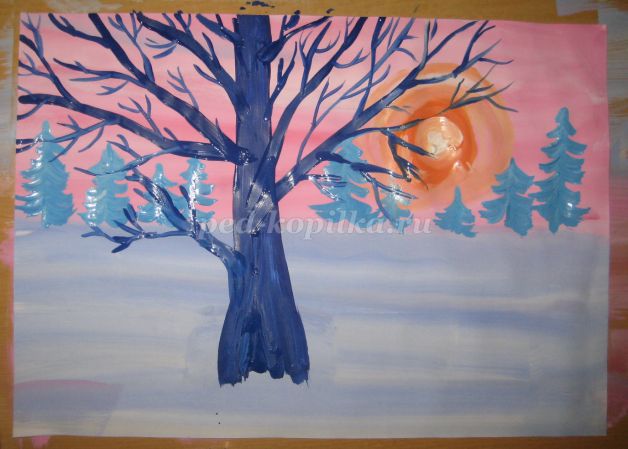
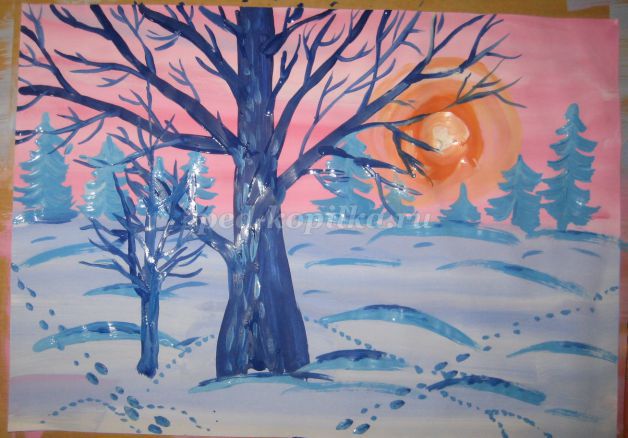
7) On the trunk - with vertical lines of a blue tint - bark. Next to the old oak tree is a young tree.
8). Take the thickest round bristle brush. Using a dry brush, pick up blue gouache and, holding it vertically, apply strokes, imitating snow-covered branches.
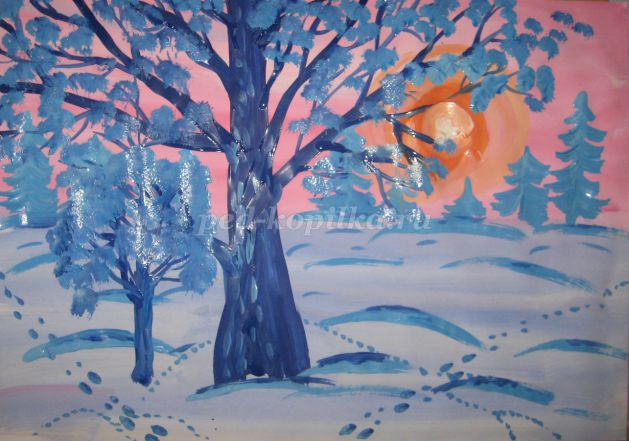
9) After the work has dried, you can (if desired) work on the trunk of the old oak tree. We take a black wax chalk and go flat across its surface. Due to uneven strokes, the bark becomes textured. The chalk leaves marks only on the protruding parts.
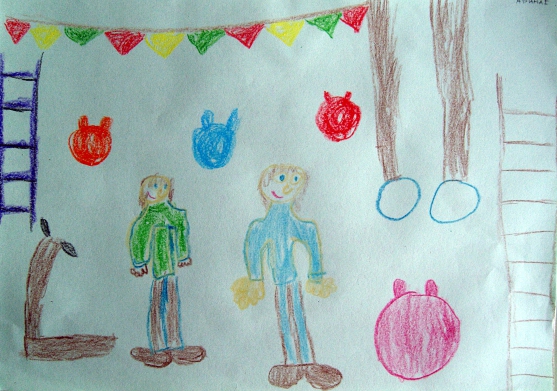
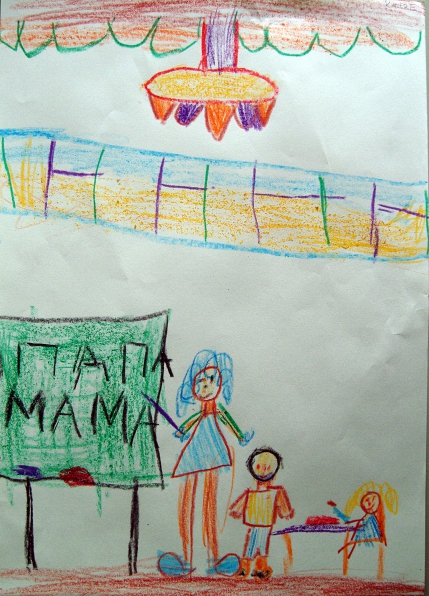
Drawings by preparatory group students:

Efremova Oksana Vyacheslavovna
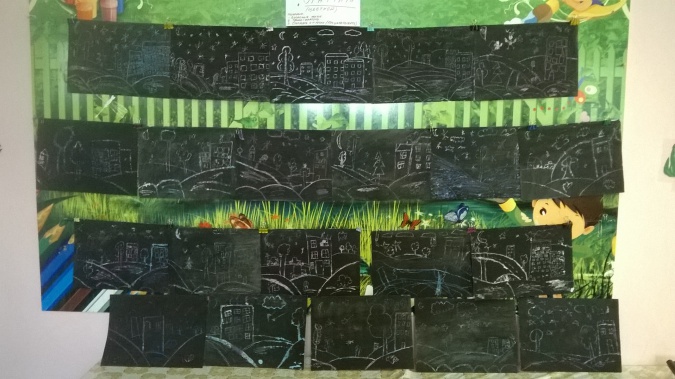
"Night city" - grattage.
IN preparatory group
When children study draw and know that there are special techniques that can be used to resolve difficulties in drawing, the joy of creativity becomes more accessible.
So I decided to show and tell about this unconventional technique" grattage"to my students.
"I'm about I'll tell you grattage,
It arouses interest.
You're like a magician with a scratch,
You paint a whole world of wonders. "
1. The children actively decorate with colored wax crayons on thick paper.
2. Rub the background with a candle
3. Cover the sheet with black gouache to which dishwashing liquid was added.
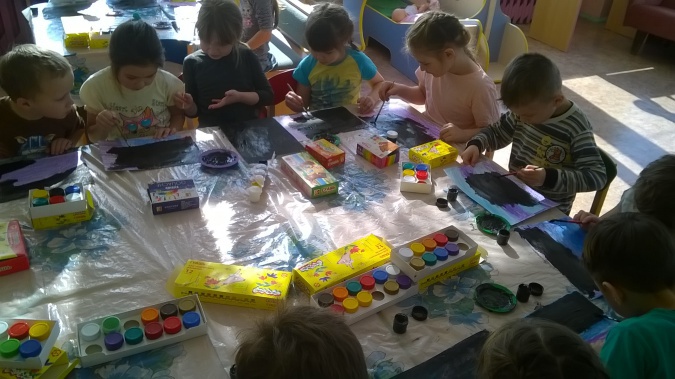
When the work has dried, children scratch it with a wooden skewer or pen rod.
In their works, children show knowledge of how they depict in the foreground and how draw in the distance.

For children this technique brought a lot of joy, watching with amazement how bright lines and strokes appeared on the graphite-black background, requiring strong pressure on the visual instrument. In the works you can see what pressure was applied when scratching.
Bottom line works:
Develops in the child a sense of consistency, attention, and perseverance.
They feel more relaxed and bolder.
Creates a cheerful, working mood in children.
Publications on the topic:
TOPIC: "DEVELOPMENT OF CHILDREN'S CREATIVE ABILITIES THROUGH MASTERING NON-TRADITIONAL DRAWING TECHNIQUES" PEDAGOGICAL DIAGNOSTICS IN FINE SCIENCE.
Summary of a lesson on artistic creativity in the senior group. Unconventional drawing technique “Herringbone” Objectives: *Teach children to convey the impression of New Year's holiday, create the image of an elegant Christmas tree using non-traditional ones.
Summary of a drawing lesson in the preparatory school group “Reflection in water.” Unconventional drawing technique Summary of a drawing lesson in a preparatory school group. Topic of the lesson: “Reflection in water” Purpose and objectives of the lesson: 1. Developmental.
Lesson notes for the senior group on the topic “ unconventional techniques drawing" (painting with glue) "Scarlet Flower" Completed by the teacher.
Today I introduced my children to unconventional technology drawing. They haven’t memorized the difficult word GRATTAGE yet, but it’s a matter of time.
Hello dear colleagues! There are many visual arts competitions held in our garden, we always try to participate and surprise.
Unconventional drawing technique - drawing with napkins Unconventional drawing allows you not to limit the manifestations of creative abilities.
Currently, the so-called non-traditional or non-classical technique is very popular among children, parents and teachers.
Alla Mokretsova
Target: create conditions for independent compilation of a plot composition, selection of artistic materials, visual and expressive means; improve drawing techniques, develop artistic taste.
Preliminary work: looking at illustrations regime moments. Memorizing poems on the topic: “Farewell, our kindergarten.”
Materials: album sheet, wax crayons, colored pencils.
GCD move.
Mystery: There is a house in the alley,
Just a tower - a tower.
There are cribs in the little house,
The children sleep on the beds.
They rise early,
They wash themselves white.
They sit quietly at the tables,
They don't look at the food, but eat it.
Children's answers (kindergarten).
This house is called a garden,
Children grow in it like flowers,
Where they are warmed by a caring gaze,
Sons and daughters are growing up.
Your preschool years have flown by quickly, and now it’s time to say goodbye to kindergarten. When you first came here, you still didn’t know how to do a lot, but now your hands have become skilled and you can make any craft, cut and paste a wonderful applique, draw a wonderful picture. Yes, you can’t list everything.
You were preschoolers.
You went to kindergarten.
You made from clay
And horses and bunnies.
And now, and now
The school door is opening!
The school accepts you
Accepts first grade!
In kindergarten you learned to love your Motherland, take care of nature, help your younger ones and each other, and most importantly, be friends. Why do you love kindergarten? (Children's answers).
Why do we love so much
Our cheerful kindergarten?
Because it's wonderful there
Very very interesting
And, of course, everyone knows
That there are no more friendly guys.
That's why we love so much
Our fun kindergarten!
You will remember your friends, happy holidays, children's games and fun for a very long time. Let's remember the wonderful moments from life in kindergarten.
1. We come to kindergarten, there are toys there
The locomotive and steamship are waiting for the guys.
2. There are flowers here, we water them.
3. We know letters and syllables, we learned them in kindergarten.
We know how important and strict numbers are in mathematics.
4. We love sports and physical education, we do gymnastics.
This is necessary for figure, flexibility and plasticity.
5. And all our children are fans of drawing.
Parents love to decorate exhibitions.
6. Why do you want to sit in the sandbox?
And build a castle, a sand castle.
7. There’s already snow all around, let’s go for a walk anyway!
8. This house has everything for us: a fairy tale, a song and a story.
Noisy dancing, quiet time - this house has everything for us!
9. We all got up early and washed ourselves all white.
10. We will eat the soup and the second one, a little bread.
The dishes will be clean, we won’t leave any crumbs behind!
11. But we dressed up the dolls and invited them to visit us!
12. Today I’m a nurse, I’ve been treating the dolls in the morning.
13. And we sing like artists, like Kirkorov and Alsou.
All wonderful artists, if a holiday is around the corner.
14. Our favorite kindergarten has become home to all the children!
Children look at a series of demonstration paintings “Our Kindergarten”. Educational – Toolkit. Author – compiler N.V. Nishcheva. artist O. R. Goffman St. Petersburg “CHILDHOOD - PRESS” 2006
Our flowers will fade, and our birds will fly away.
You will go to first grade for the first time.
Sad dolls sit on an empty terrace.
Remember our cheerful kindergarten in class.
Dynamic pause "Toys".
We woke up, stretched,
They turned from side to side.
Stretch, stretch!
Where are your favorite toys?
(Raise your arms up, stretch).
Boom Boom! Tra - ta - ta!
The drum is thundering in the morning -
Bunnies are playing
They hit with the paw.
(Imitation of playing the drum and saying boom - boom - boom).
Here are the cars running,
They rustle with their tires.
Yellow and red
Everyone is so different.
(Easy run and pronounce sh – sh – sh).
The little bear took the accordion
I decided to play a little.
One, two! Turn.
He dances and sings.
(Turns right - left, saying y - y - y).
Here are the nesting dolls - crumbs,
colorful clothes,
Bright scarves,
Rosy cheeks.
(Perform the “spring” exercise and pronounce a - ah, a - ah).
Hey, hurry up and take a look!
The dolls went dancing.
Legs are exposed
You are invited to visit!
(The legs are placed on the heel, and the words are pronounced: eh - eh, eh - eh, eh - eh).
What a funny ball.
So it jumps, and it jumps like that!
I wish I could catch him quickly
To play again.
(Light jumps on two legs, saying bam - bam - bam).
The most beautiful locomotive of all:
Two pipes and a hundred wheels.
Well, and there are toys in it -
Dolls, bunnies, parsley.
(Fractional step with pronouncing chuh - chuh - chuh).
I suggest you draw what you remember most from the life of kindergarten.
Independent work of children to the children's songs "Farewell to our kindergarten."
Result: your drawings turned out beautiful and wonderful. It is clear from them that you had fun in kindergarten and you are sad to part with it, and we are also sad because you will not return here again.