month period detailed content of work
September Topic Goal: Equipment:
1. Modeling "Big and Little Carrots"
Page 28 T.S. Komarova Teach children to sculpt objects of an elongated shape, tapering towards the end, slightly pulling and narrowing with their fingers. A toy bunny, carrot, plasticine, modeling board for each child.
2. "Cucumber, beets"
Page 30 T.S. Komarova Introduce children to the techniques of sculpting oval-shaped objects. Learn to convey the features of each object. Natural cucumber and beets, plasticine and modeling boards.
October 3. Modeling "Mushrooms"
Page 36 T.S. Komarova Strengthen children’s ability to sculpt familiar objects using learned sculpting techniques (rolling clay with straight and circular movements, flattening with palms). Toy mushrooms - dummies, a sheet of green paper, plasticine, modeling boards.
November 4. “Make what kind of toy you want as a gift for a friend (brother, sister)
Page 41 T.S. Komarova Continue to develop imaginative ideas, imagination and creativity. Toys, plasticine, boards.
5. “Make whatever vegetables or fruits you want” (for game store)
Page 48 T.S. Komarova Teach children to choose the content of their work from a range of certain subjects.
Foster independence. Plasticine, modeling boards.
6. "Fish"
Page 40 T.S. Komarova To consolidate the knowledge of making oval-shaped objects Plasticine, modeling boards, a fish toy.
7. "Different fish"
Page 46 T.S. Komarova
topic: Consider two different fish with children,
Ask how they will sculpt the fish so that one is round and the other is long. Toy fish. Boards for modeling.
December 8. Modeling "Bird"
Page 55 T.S. Komarova Teach children to sculpt a bird from plasticine, giving an oval shape, pulling and pinching small parts - beak, tail, wings. Toy bird, plasticine, modeling boards.
9. “Make whatever toy animal you want”
Page 57 T. S. Komarova Teach children to independently determine the content of their work. Strengthen the ability to sculpt using different sculpting techniques. Toy animals, plasticine, modeling boards.
January 10. "Girl in Winter Clothes"
Page 51 T.S. Komarova To arouse in children the desire to convey the image of a girl in a sculpted image. Doll, plasticine, modeling boards.
11. "We made a snowman"
Page 66 T.S. Komarova Teach children to convey the relative size of parts, develop a sense of form. Plasticine, modeling boards, a snowman toy or a picture.
February 12. “The birds have flown to the feeder and are pecking at the grains.”
Teamwork
Page 65 T.S. Komarova Teach children to convey a simple form in modeling - the pose of tilting the head and body down.
Reinforce sculpting techniques. A toy bird, or a picture of a pecking bird - on a feeder, boards, plasticine.
13. Modeling "Round dance"
Page 63 T.S. Komarova Teach children to depict a human figure, correctly conveying the ratio of parts in size. Plasticine, boards, doll
March 14. Modeling "Duck"
according to Dymkovo toy
p. 47 T.S. Komarova Introduce children to Dymkovo toys (ducks, birds, goats), learn to convey the relative size of the parts of a duck. Dymkovo toys, plasticine, (clay), boards for modeling.
15. "Lamb"
Page 73 T.S. Komarova Teach children to sculpt a four-legged animal
Oval body, head, straight legs, consolidate sculpting techniques.
Toy lamb, plasticine, modeling boards.
April 16. Modeling "Bunnies in the meadow"
Page 74 T.S. Komarova Teach children to sculpt an animal, convey the oval shape of its body, long ears, head. Reinforce the techniques of sculpting and connecting parts. Toy bunny, plasticine, modeling boards.
May 17. Modeling "Dishes for dolls"
Page 81 T.S. Komarova To strengthen children’s ability to sculpt dishes and practice sculpting techniques. Creating a game situation, doll dishes, plasticine, modeling boards.
18. Modeling “A bird pecks grains from a saucer”
Page 82 T.S. Komarova
To strengthen children's ability to sculpt familiar objects. Toy bird, plasticine, modeling boards.
19. lesson “How we played an outdoor game - the arrival of birds”
p. 86 T.S. Komarova Continue to teach children to create images of outdoor play in modeling, to develop creativity and imagination. Plasticine different colors, boards for modeling.
Literature: 1. 1. Sample general education program for preschool education Federal State Educational Standard “From birth to school.
2. Classes on visual arts V middle group kindergarten T.S. Komarova.
3. Developmental activities for children 4 – 5 years old Federal State Educational Standard L.A. Paramonova.
Maria Kupri (Lukinska)
Month Topic Tasks
September 1. "Fairytale Tree" (subject drawing; gouache) 1. Create desire draw an imaginary tree; learn draw a tree(to convey the structure of a tree, and everything fabulous and extraordinary that can grow on it).
2. Continue teaching children to use paints carefully (pour paint onto the entire pile, remove an extra drop on the edge of the jar, rinse the brush well in water).
3. Cultivate the ability to experience surprise and joy.
2. Fruit (subject drawing; wax crayons) 1. Teach children to imitate fruits (convey their shape, color).
2. Continue to teach children how to hold a wax crayon correctly. (three fingers).
4. Foster independence.
3. Vegetables (subject drawing; wax crayons) 1. Teach children to pretend to be vegetables (convey their shape, color).
2. Continue teaching children to paint over an object without gaps.
3. Cultivate interest in classes drawing.
4. "Checkered Shawl" (decorative drawing; gouache) 1. Teach children draw a pattern, consisting of vertical and horizontal lines on square shaped paper.
2. Continue to teach children to draw a line without lifting the brush from the sheet (top to bottom and left to right); develop the habit of rinsing your brush well and drying it on a napkin.
3. Develop eye, taste, fine motor skills.
4. Cultivate neatness and a sense of color harmony.
October 1. "A little hedgehog walks in the forest" (plot drawing; gouache) 1. Teach children to convey in drawing characteristic features appearance hedgehog: oval body covered with spines, sharp muzzle.
2. Improve children’s ability to paint an object in one direction according to the shape, draw needles on a hedgehog.
3. Develop fine motor skills, attention, sense of rhythm.
4. Cultivate diligence, respect and a caring attitude towards all living things on earth.
2. « Autumn tree with yellow leaves" (subject drawing; gouache)
1. Teach children to draw a tree (demonstrate its structure in the drawing - trunk, branches, leaves).
2. Learn to depict leaves using the technique "dipping".
3. Develop a sense of color, shape, fine motor skills of the fingers.
3. "Let's decorate a flower pot" (decorative drawing; gouache) 1. Teach children paint pattern on the silhouette of the pot with straight horizontal lines, decorate with dots.
2. Strengthen the ability to draw a line with a brush quickly and boldly; be able to rinse the brush well and dry it on a napkin.
3. Develop fine motor skills, senses, and colors in children.
4. Foster neatness and independence in choosing contrasting colors.
4. "Fairytale House" (subject drawing; colored pencils) 1. Teach children paint fairy house with one window using different lines (vertical, horizontal, inclined).
2. Continue to teach children to combine quadrangular and triangular shapes in a drawing, to paint over an object without gaps.
3. Develop creative imagination, the ability to fantasize.
4. Cultivate interest in fairy tales.
November 1. "Fish swim in an aquarium" (plot drawing; gouache) 1. Teach children to create a simple plot composition - depict several fish swimming in different directions.
2. Practice drawing oval shapes; paint an object according to its shape, depict details.
3. Cultivate intelligence and a caring attitude towards fish.
2. "Colorful balls" (subject drawing; gouache) 1. Teach children draw balls, different in shape and color.
2. Improve children’s ability to paint an object according to shape, pick up paint over the entire pile, and rinse the brush well in water.
3. Develop a sense of color and fine motor skills of the fingers.
3. “The bird is not big” (subject drawing; colored pencils) 1. Teach children draw a bird, betraying its features (body structure, tail, etc.).
2. Continue to teach children to paint over an object without gaps, to hold the pencil correctly, without squeezing it too hard.
3. Cultivate a friendly attitude towards our smaller brothers.
4. Drawing by Design 1. Teach children to think about the content of their drawing.
3. Foster independence.
December 1. "Snow Maiden" (subject drawing; gouache) 1. Teach children paint Snow Maiden in a certain sequence (head, shoulders, fur coat widened downwards, arms from shoulders).
2. Strengthen technical skills in drawing with all the pile, paint over the image of the object with wide lines, without going beyond the outline.
3. Develop imagination and fine motor skills of the fingers.
4. Foster independence, interest in drawing.
2. "Gloves and Kittens" (subject drawing; wax crayons) 1. Teach children to pretend to be gloves (circle your palms - right and left).
2. Continue to teach children to create an ornament on their own - by idea or by design; paint over an object without gaps.
3. Develop imagination and creative activity.
4. Cultivate intelligence.
3. "My doll"
(wax crayons) 1. Continue teaching children paint a person in long clothes - a sundress, decorate the doll's sundress with a pattern.
2. Develop fine motor skills of the hands.
3. Cultivate accuracy when painting.
4. “On the small Christmas tree, gifts for the little bunny” (subject drawing; gouache) 1. Exercise children in drawing a Christmas tree, decorated with gifts for the bunny.
2. Continue teaching children to draw rounded, pointed shapes (apple, carrot).
3. Cultivate sympathy for wintering animals and a desire to help.
January 1. "Snowman in a Hat" (subject drawing; gouache) 1. Continue teaching children draw a snowman, consisting of three circles.
2. Improve technical skills in drawing: pick up paint onto the entire pile, rinse the brush well in water, and dry it on a napkin.
3. Cultivate confidence and accuracy.
2. “Like pink apples on bullfinch branches” (subject drawing; colored pencils) 1. Teach children paint bullfinches on snow-covered branches, showing the peculiarities of their appearance - structure, coloring.
2. Strengthen the ability to hold a pencil correctly - with three fingers, without squeezing it too much.
3. Foster a caring attitude towards birds.
3. "Dymkovo patterns" (decorative drawing; gouache) 1. Continue to introduce children to the Dymkovo toy (teach draw a pattern, consisting of horizontal and vertical lines, rings.
2. Strengthen children’s ability to carefully use paints.
3. Instill in children a desire to learn draw Dymkovo patterns.
February 1. Introduction to architecture. 1. Introduce children to the view fine arts– architecture.
2. To form the idea that the architecture of each building depends on its purpose.
3. Teach children to depict one-story and multi-story houses.
4. Develop a sense of form and composition.
2. "Kolobok" (subject drawing; wax crayons) 1. Arouse children’s interest in the image of a kolobok.
2. Strengthen the ability to hold a wax crayon correctly and paint over an object without gaps.
3. Cultivate interest in Russian folk tales.
3. "Tank" (subject drawing; wax crayons) 1. Teach children draw a tank(convey shape, color).
2. Improve children’s ability to hold a wax crayon correctly (with three fingers, without squeezing it too hard, to paint over an object without gaps.
3. Develop fine motor skills of the fingers.
4. Foster a patriotic attitude towards the Motherland.
4. Drawing by Design 1. Continue to teach children to think about the content of their drawing.
2. Develop imagination and creative activity.
3. Cultivate intelligence.
March 1. "Funny nesting dolls" (decorative drawing; gouache) 1. Continue to introduce children to the matryoshka doll as a type of folk toy.
2. Teach children to make a pattern using the silhouette of a matryoshka doll, holding the brush perpendicular to the sheet.
3. Develop attention.
4. Cultivate interest in decorative drawing.
2. "Little Bear" (subject drawing; colored pencils) 1. Continue teaching children draw a bear cub(to convey its characteristic features - color, shape).
2. Improve children’s ability to paint over an object without gaps.
3. Develop imagination.
4. Cultivate perseverance and accuracy when painting.
3.“Rook on the mountain - spring is in the yard” (subject drawing; wax crayons) 1. Teach children draw a bird(rook, using a round shape to convey the shape of the body and head.
2. Develop attention and creativity.
3. Cultivate interest in the world around us.
4. "Owl - big head" (subject drawing; wax crayons) 1. Teach children draw an owl, conveying its characteristic signs: (large head, eyes like headlights, oval-shaped body, wings, etc.)
2. Develop a sense of form and composition.
3. Cultivate interest in depicting birds.
April 1. "Spring has come - it's red" (plot drawing; gouache) 1. Teach children to portray spring landscape (grass, flowers, birds, etc.) 2. Strengthen children’s ability to paint objects according to shape, pick up paint over the entire pile, rinse the brush well in water, and dry it on a napkin.
3. Develop a sense of beauty.
2. “I’ll fly on a rocket to the distant stars”
(subject drawing; gouache) 1. Teach children to pretend to be a rocket (convey shape, color).
2. Develop compositional skills.
3. Cultivate interest in visual arts.
3. Easter Egg» (decorative drawing; gouache) 1. Continue teaching children to make a pattern on the silhouette of an egg.
2. Develop a sense of color.
3. Cultivate interest in Orthodox holidays.
4. "Rainbow - Arc" (subject drawing; wax crayons) 1. Continue to teach children to independently and creatively reflect their ideas about beautiful natural phenomena.
2. Develop a sense of color, sequence, attention.
3. Cultivate aesthetic taste.
May 1. "Ducklings are swimming on the lake" (plot drawing; gouache) 1. Learn to create a simple plot composition by placing objects on the entire sheet (ducklings swim on the lake).
2. Teach draw ducklings, based on an oval.
3. Develop creativity.
2. "Two Girlfriends" (plot drawing; wax crayons) 1. Teach children to depict a human figure in a drawing (two girlfriends).
2. Continue to strengthen children's skills paint human figure in sequence (head, shoulders, sundress, then arms from shoulders, legs).
3. Cultivate a friendly attitude towards your friends.
3. "Filimonovsky motives" (decorative drawing; gouache) 1. Introduce children to the Filimonovskaya toy; learn paint elements of painting on the silhouette of a pig in a certain sequence (stripes - red, yellow, green).
2. Develop a sense of color and fine motor skills.
4. Game "Pick up patterns" 1. Teach children to select cards with patterns for a specific painting (Dymkovskaya and Filimonovskaya).
2. Develop attention and aesthetic taste.
3. Cultivate interest in decorative and applied arts.
Then the child begins to speak earlier, pronounce words clearly, and understand tricky logical problems. The best tool for developing fingers is sculpting! In the middle group, such classes are more educational and professional in nature than in the younger groups.
Features of the age of preschoolers 5 years old
Five-year-olds are characterized by curiosity, an inquisitive mind, attentiveness, activity and patience. Children listen to the conditions set by the teacher, and only then begin to complete the task. It is easier for them to work with the material, tear off and knead pieces, since their muscles have become stronger.
At this age, classes have 4 stages:
Of course, five-year-old children are not yet so good with their fingers; it is difficult for them to connect parts together without flattening the plasticine and sculpt small elements, but their crafts already look similar to real objects with the appropriate proportions. In addition, with each lesson their skills improve. Modeling in the middle group is closely related to the study of the surrounding world, drawing, and appliqué.
During any lesson or walk, the teacher focuses on the shape of the object and its details. For example, they consider a titmouse: round head, oval body, flattened elongated tail and wings, pointed beak, eyes, etc. That is, it is necessary to develop children’s thinking and teach them to notice small details that will need to be reflected in their crafts.
Modeling technique in the middle group
Modeling includes not only specific activities with plasticine or clay, but also the constant work of the teacher with children. That is, the teacher draws the attention of preschoolers to shapes, small details, when they walk on the street, when they read books, when they spend For example, during reading they analyze the shape of vegetables, fruits, animals, dishes, etc. 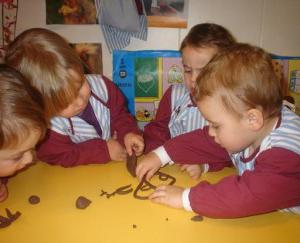
Modeling in the middle group involves the sequence of classes:
- At the beginning of the school year, the material is repeated. Fruits and vegetables are molded round shape. Children learn to work with stacks and use their fingers to pull out oblong “sausages.”
- In winter, preschoolers learn to create complex figures from various parts of round, oval and oblong shapes. With the help of stacks, they learn to draw small facial features, fur of animals, feathers of birds, etc.
- By spring, five-year-olds learn to create objects from a whole piece, drawing out the mass, rather than tearing it into pieces.
- In summer, classes are often aimed at consolidating educational material.
Each preschool educational institution has its own program, so the number of modeling classes, the material approved by the management and its content will differ. On average, modeling takes place at least once a week for free, but there are also paid classes called “Creative Workshop”.
The invaluable role of modeling in the development of preschool children
American scientists have already proven that daily modeling activities activate the brain, in particular the departments responsible for speech. Children begin to pronounce words expressively, pronounce sounds more clearly, and more easily master the letter composition of words.
In our country, N.K. Krupskaya noted that modeling in the middle group contributes to the development of creative and artistic imagination, visual-figurative and abstract thinking, memory, broadens horizons and emotional sphere, forms observation and personal qualities (patience, independence, ingenuity, initiative, discipline). 
The child’s mental development occurs during modeling classes due to the well-structured and varied texture of the material. Previously, kindergartens used plasticine, clay, salt dough, sand and snow. Nowadays you can buy various types of plasticine:
- plasticine for babies of a soft consistency changes colors when mixed, does not “sour” at room temperature;
- smooth “wet” consistency (similar to the touch of silk) hardens two days after making the craft;
- fine- and coarse-grained plasticine made from balls on an adhesive base.
The child not only feels the different texture of the material, sees its different properties, but also performs various actions with it (sculpts crafts, creates a mosaic picture, or And the purposeful activity of the teacher helps children focus on small details. Therefore, modeling in a preschool educational institution (middle group) promotes mental and creative development children.
Features of the plastic form created by children of the middle group
Children of the fifth year of life differ in their development from children of the previous age. Their muscular system has sufficiently strengthened, expanded vocabulary, in connection with this, the regulatory role of speech has increased.
Children begin to identify some functional features of objects, which facilitates the image process. They became more attentive during the teacher’s explanations and during the lesson, but the results of the work are still little different from what they did in the second younger group: when depicting objects, proportions are violated, there is no clarity in conveying the form, parts are not firmly held together. This happens because children do not adequately master the methods of representation; they do not have a clear idea of objects, their shape and structure.
Learning Objectives
The teacher continues to cultivate a stable interest in modeling, develop the activity of thinking and imagination, and coordination of hand movements. Teaches how to sculpt with the whole hand and fingers. Clarifies ideas about the shape of objects, their structure, proportions and details, teaches how to convey these ideas in modeling. For example, that a person’s head is round, that his face has a nose, mouth, and eyes. A hat may be worn on the head. The doll's body can be oval or cone-shaped, and the arms and legs are depicted as cylinders; the head is small compared to the body.
To a greater extent than in the previous group, the aesthetic perception of form, a sense of rhythm, symmetry, and proportions develop. Higher demands are placed on children regarding the independent use of certain modeling methods and the choice of a topic in classes according to their own ideas.
The requirements for modeling techniques are increasing: children must be able to sculpt a shape with the ends of their fingers, tightly fasten parts by covering the fastening points, make small parts with a stick or by pinching.
Completion of the program
I quarter
At the first lessons, children are asked to roll out a lump of clay using straight and circular movements, and flatten the resulting shape between their palms. Repeated tasks are carried out to consolidate modeling methods and more accurately fulfill the teacher’s requirements. To do this, children are taught not only to sculpt with palm movements, but also to transfer with their fingers. characteristic details forms. In addition, children use their fingers to refine the oval shape of the carrot. This process is difficult. It requires understanding the shape of an object, the ability to clearly imagine an image, and visual control over the actions of the fingers. Thus, at the beginning of the year until approximately December, children depict familiar objects, clarify their shape, and improve sculpting methods.
II quarter
In the second quarter, children are asked to sculpt objects from a whole piece (vegetables, fruits), as well as figures consisting of several parts. They make a doll, a girl in a long fur coat, a rabbit, a cat, a teddy bear and a hare. All these objects consist of parts, the creation of which children have mastered, but the transfer of proportions, the structure of objects, and methods of connecting parts are difficult.
Children will understand the structure of the human figure faster if they start by sculpting a snowman. In the second younger group, children made a snowman out of two balls. In the middle one they will sculpt it from three parts, and this will be the initial mastery of the basic proportions of the human figure: at the bottom there is a large ball, in the middle there is a smaller one, and the top ball is the smallest. Children can depict hands and other details: hat, eyes, mouth, nose. After this, you can sculpt a doll with a dress or a girl in a long fur coat. Both figures are created from separate tightly connected parts.
Gradually the tasks become more complicated: children move on to depicting animals. For example, the image of a cat begins with sculpting an oval body, then the head and tail; the front legs are pulled away from the total mass (the hind legs can be omitted, since they are almost never visible in a sitting cat).
Continuing to improve the methods of sculpting, the teacher teaches children to sharpen and round the end of the column with their fingers, and pinch the edges of the disk-cake to create a fuller and more beautiful shape. Children, using these methods, can fashion carrots, pies, cheesecakes, cookies, and saucers.
III quarter
This quarter, new tasks are being solved: teaching children to pull clay when sculpting small parts, pressing it with their fingers to obtain hollow objects, bending the edges of a flattened shape while sculpting dishes, firmly holding parts together by covering the fastening points.
Children learn to pull clay away from the total mass when depicting a chicken, bird, and fish; at the same time, they learn to correctly convey the shape of these objects, and compare parts to each other in shape and size. For example, when sculpting a fish from a whole piece, first create the base of an oval-shaped body, and then, slightly stretching and rounding one of the sides, sculpt the head, and more strongly stretch the opposite side to sculpt the tail, making it flat compared to the head. The fins are depicted by pinching the clay, then, if desired, the children depict the scales, making them with a stick (stack) or by sticking them on (placing smaller details on the surface of the product).
We need to teach children to divide the clay into the required number of parts. For example: to sculpt a bird, a lump of clay the size of a child’s fist needs to be divided in half. The body is made from one half, and the head and stand are made from the other.
In the third quarter, children learn to sculpt dishes. To do this, they are shown two ways: pressing round and cylindrical shapes with their fingers to obtain a glass, mug, and bending the edges of a flattened shape to depict a plate, dish and tray. Children can make a handle for a cup using their skills in pinching and pulling clay away from general form, as well as in a new way - by applying a clay roller to a sculpted vessel.
Dishes, clothes for dolls, a post on which a bird sits can be decorated with high or deep relief. This helps create a more vivid image and a positive emotional mood for children to develop a sense of rhythm, symmetry, and the desire to make their work beautiful and complete.
IV quarter
IN summer period Opportunities are created to consolidate the skills acquired by children. As a rule, children sculpt all the objects that they learned to make during the school year, in addition, the teacher offers other objects, the image of which corresponds to the children’s skills, for example, a mouse, a hedgehog, a pig, a dish with berries, a basket of mushrooms, and dishes.
In each quarter, all classes are subject-based. Some of them are carried out on the instructions of the teacher, and some according to the children’s own plans. During the lessons, according to plan, the children most often repeat what they have learned. The main goal of these classes is to teach children to come up with a theme for modeling, bring the work to completion, and show independence in creating a clear form of an object, supplementing it with details, and using familiar modeling methods.
Teaching methods and techniques
To successfully complete and consolidate the program throughout the year, the teacher selects appropriate teaching techniques. Techniques are used that activate children’s attention during modeling, as well as techniques that expand children’s understanding of the environment. In the group and during walks, examination of objects and observation of phenomena of the surrounding life is organized, which can be offered to the children for depiction. The teacher draws the children's attention to how a sparrow pecks at food, how fish swim in an aquarium, how a prickly hedgehog drinks milk or curls up into a ball. When examining, the teacher directs the children’s attention only to the basic form, to elementary proportions and structure, and only to those actions that they can understand and then depict. For example, when examining a bird, children’s attention is drawn to its oval body, round head, flat tail, and the fact that the head is on top of the body, closer to the edge, and the tail is on the other side. It is especially noted that the beak is very small compared to the head.
The teacher associates the position in space with what the animal is doing: if a bird pecks grains, it tilts its head, and if it drinks, then first it tilts its head to draw water into its beak, and then throws it back to swallow the water. The hedgehog curled up into a ball - he was scared. Such explanations from the teacher contribute to the formation in children of a connection between the image of the animal and the position it takes depending on the action performed.
In order to get to know each other more thoroughly, an examination is carried out, which includes hand movements. First, the adult himself covers the torso, head with his hand and in words determines the shape of the parts, then turns the children’s gaze to smaller parts, runs his fingers over them and suggests repeating these actions. As a result of such an examination, children should have an idea of the object (animal) as a whole, the shape of its parts and the proportional relationships between them. These preliminary examinations should help during modeling and guide children to a conscious image of the form. But you cannot limit yourself to just a preliminary examination and analysis of objects in the middle group; at the beginning of the lesson you need to turn again to analysis, but this time to the visual. The teacher traces the main parts of the object with his hand, emphasizing and naming their shape, size and relative proportions. At the first stages of learning, so that children understand the method of modeling, when analyzing the shape of parts, you can resort to comparisons with those objects whose shape children know well. For example, when sculpting a doll, you can say that its arms are like columns, and its body resembles a thick carrot, which means that the arms need to be sculpted in the same way as columns, and the body like a carrot.
The skills of 4-year-old children are still limited; they still cannot do much. They don't always do well at first. oval shape, children are not good at connecting parts together by smearing. In this regard, the teacher resorts to an explanation with full or partial demonstration. Basically, children are shown only unfamiliar modeling methods or those that have not been sufficiently mastered. For example, when depicting a hedgehog or a pig, you may need to show the sculpting of an oval body. The teacher says: “Children, today we will pretend to be a hedgehog. The shape of its body resembles a testicle. Look at how it needs to be sculpted: “I put a piece of clay on the palm of my right hand, cover it with the palm of my left hand, like this, first I move my hands in a circle, like this, I check whether it’s rolled into an even ball. Now I move my hands back and forth, like this, checking what happened - the ball has stretched out a little. Using the fingers of my right hand, I extend one of the sides a little, making it thinner, and leaving the other side thicker. This is the body of a hedgehog.”
It happens that not all children immediately learn the demonstration and explanation. In such cases, to activate attention and memory, the teacher can invite those who have mastered this method to show it to all children.
In the middle group, children need to be taught to use some expressive means: to depict not only the basic shape of objects, but also characteristic details. For this purpose, when examining objects, children should pay attention to such features as the indentation of an apple, the elongated stalk of a zucchini, etc. To increase children’s interest in the result of modeling, you can prepare cuttings from cardboard for carrots, and leaves for an apple. However, it is recommended to resort to such a technique only at the very beginning, until children have accumulated the appropriate skills to convey these features using Lenka methods. Gradually, during the learning process, the children themselves will begin to sculpt cuttings, and then leaves from clay.
To lead the children to create a more vivid image, in addition to observing living objects, you can arrange for the children to look at toys, small sculptures or figurines made by the teacher. Two similar figures are selected for examination, but in different positions. For example, children can sculpt on the theme “Birds are pecking at food.” One of the birds is depicted at rest - its body is horizontal to the plane of the table, and the second is in an inclined position - it is pecking - its body is located at an angle. When performing another theme - “Rabbits gnaw carrots” - one rabbit is sculpted with its paws tucked under itself, and there is a carrot near it, and the other sits on its hind legs and holds a carrot in its front legs.
This presentation of the topic is interesting to children and encourages them to think about the possible diversity in the image. However, it should be remembered that it is difficult for children to sculpt two figures in one lesson, so you can offer one object for the image in the position that the child is most attracted to.
Another equally effective teaching technique can be playing out the topic and result of the work. So, children place all the sculpted birds on one stand, calling it a feeder. It is best to make this feeder out of clay in advance, so that the children can see how the teacher makes it (you can also use a board or thick cardboard for this purpose). The theme “Cake Modeling” is associated with preparing treats for dolls: at the beginning of the lesson, children are asked to fashion treats for dolls, and at the end, the molded products are placed on the table around which the dolls are sitting. If the children portrayed animals, they could place the bunnies near cardboard trees or a hare that the teacher made, and the piglets near a pig or a feed trough.
To teach children to correctly convey proportions, you need to show the technique of comparison. For example, when depicting the hands of a doll, the teacher takes a pre-fashioned column, divides it in half and, comparing the resulting parts, determines their length. You can teach children to compare the lengths of parts in the process of sculpting a basket from rings. Children are asked to sculpt a disk bottom and 4 columns of the same length. The basket itself is made from three columns, and the fourth is used for the handle. The length of the parts is clarified by comparing the columns: children put one of the columns to the bottom, and if it turns out to be longer than its circumference, then it is shortened; each subsequent column is applied to the previous one, aligned in length and pressed tightly against it.
During the explanation before modeling, as well as during any lesson, the teacher asks the children questions about the nature of the form, details, proportions, methods of modeling, stimulating their mental activity. For example, he asks how you can sculpt a pig’s snout or how to depict and strengthen the collar on a girl’s fur coat.
To arouse in children interest and a positive attitude towards the lesson, as well as vivid figurative representations, you can read the day before modeling or at the beginning of the lesson short tales, poems and riddles. It is important that the content of these works helps to reveal the theme of the upcoming sculpting (shape, structure, size). For example, before sculpting a pig, you can ask a riddle: “The tail is a hook, the nose is a snout. Who is this?"
To create more expressive images, you can offer a stack stick. Children need to be shown how to cut clay into pieces, remove excess clay, and also apply small details and patterns to some objects. For example, to depict the eyes of a rabbit, the figurine is placed on a stand, held with the left hand, and the eyes are outlined with the right hand, which holds the stack.
Particular attention is required to classes according to the plan, which are prepared by all previous work. At the beginning of the lesson, the teacher teaches the children how to choose a topic and asks them to remember what they saw on a walk, who they read about, etc. After the children have determined the topic and started working, the adult directs their attention to expressiveness with questions and advice. created images: features of the ears of a hare, pig, cat, bear, their location, character actions. “What is your bunny doing? - the teacher asks the child. “Make it clear to everyone that he is sitting.” Or, noticing that the position of the bird sculpted by the child is not clearly expressed, he says: “The bird turned out good, but it’s not clear what it does. Think about how to place the bird on a stand so that everyone will immediately realize that it is drinking water.” Such questions activate mental activity during modeling and teach children to work on the image.
Expanding children's understanding of the shape, proportions of an object and methods of sculpting, it is important to have small conversations about what happened when analyzing the result. Basically, the teacher himself has to talk about the quality of the work performed, paying attention to how the form was obtained, whether the proportions and structure are depicted correctly, how firmly the parts are connected, but the children should always be activated by asking them questions that will encourage them to think about the what happened to them.
"Methods of teaching visual arts and design", ed. N.P. Sakulina, T.S. Komarova; M., 1979


