For some reason, I wanted to start this article with the lines of the well-known song “Nature has no bad weather, every weather is a blessing! ..." Outside golden autumn, probably the brightest time of the year. The trees are dressed in colorful outfits, the bright blue sky, the golden rays of the sun... How I want to preserve the memory of warm, bright autumn days, because there is a dull time ahead. Autumn is the time to collect natural materials, time for creativity, time for crafts and seeds.
Probably each of you collected bouquets, including autumn ones. Is it possible to make it so that autumn bouquet made us happy not for a day or two, but for a week, a month, a year? Of course you can!
This summer, while visiting my parents, I accidentally came across a craft that I made about 15 years ago!!! My surprised gaze froze, I carefully studied it, turned it over, twisted it... it was preserved without losing its beauty!!! Of course, the color of the leaves is no longer so bright, but it didn’t make her any worse. Given bouquet of dry leaves and twigs - this is a miniature, height about 7-8 cm, width 5 cm, depth 1.5-2 cm. It was so nice to see my work in a prominent place, even my husband and daughter paid attention to it! It was not for nothing that my mother kept my work so many years.
Getting ready Some girls tried to make a similar craft. For your consideration, I present to you the work of Vicki Sh. “Bouquet”, made of dried flowers and leaves, in a coffee can.

This work is not difficult to do and will not take much time. You will need a clean jar, plasticine and natural material. Apply plasticine with a thickness of at least 5 mm to the lid of the jar (if there is no lid, you can use a piece of cardboard). Then, taking into account the size of the selected jar, make a composition from various natural material, fixing it on plasticine. It is welcome if you complement the work with various beads, beads, pebbles, bright wire, sparkles, etc., the main thing is not to overdo it. Afterwards, carefully put the jar on and close it. If you did it on cardboard, then you need to disguise the junction of the cardboard and the can (for example, for me it’s a piece of padding polyester).
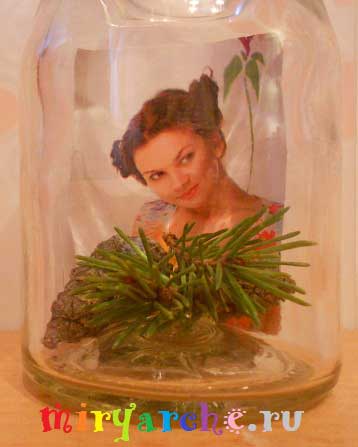
To create a more effective, meaningful composition, you can add photo. Let's start in order. This composition is even easier to perform. You will need a beautiful, elegant jar, photo (or picture), oil, natural material. Insert a photo into the jar, put a small twig or pine cone (you can leave it like that, it looks original). Then fill the composition with oil (olive, sunflower, etc.). This work can be given as a souvenir.

If you collect various not only beautiful, but also medicinal herbs in a jar, pour them olive oil(or use peach, almond oil, grape seed oil, since these oils are light and easily absorbed into the skin), you will get both a beautiful and healthy composition. This nourishing infusion can be used for massage or aromatherapy baths. The scents of summer are so wonderful, especially in winter.

And it’s not at all necessary to hide autumn bouquets in a jar; you can stroll around autumn forest, park and collect various, already dry, blades of grass, spikelets, twigs, flowers and collect them in a bouquet, put them in a vase and enjoy the beauty of the passing autumn.

Here is a small overview of autumn bouquets that retain the warmth and splendor of autumn. Bouquets made from natural materials will please the eyes of your family and guests, can be provided at contest autumn crafts to kindergartens and schools or give as a souvenir, because gifts made with your own hands, in which a piece of a person’s soul is invested, are even more pleasant to give and receive.

How to make a bouquet of roses from autumn leaves video master class You can see it in the article “” or simply by clicking on the picture.
Good luck to everyone and see you soon!
Bouquet of leaves- This is a wonderful decorative decoration for your home. In autumn, nature is full of colors, and to fill your home with a special mood, you can do it yourself original crafts with children, create flower arrangements using a wide variety of natural materials. Such bouquets can be presented to the class teacher for Teacher's Day, make it for grandma on her birthday.
Both children and parents will be happy to engage in such creativity. Children really like working with this material, because it is very pliable, it can be bent, cut, glued, and there is no need to work with complex tools, which means that parents’ help may not be needed at all.
Bouquet of maple leaves
Autumn bouquet from leaves- this is both an element of decor for your home and a nice gift for your friends, so be sure to start mastering a new technique for working with natural materials. Children are happy to make appliqués from dry leaves, but mothers and older sisters can engage in decorative creativity.
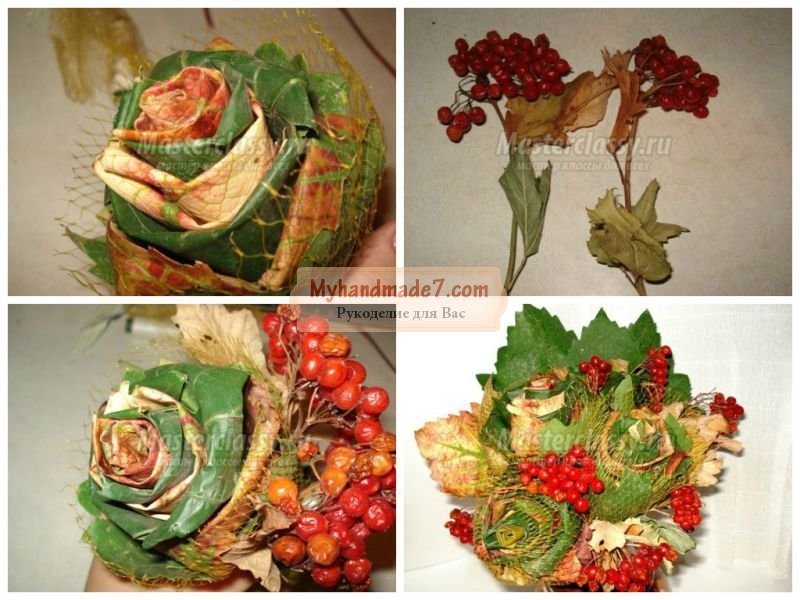
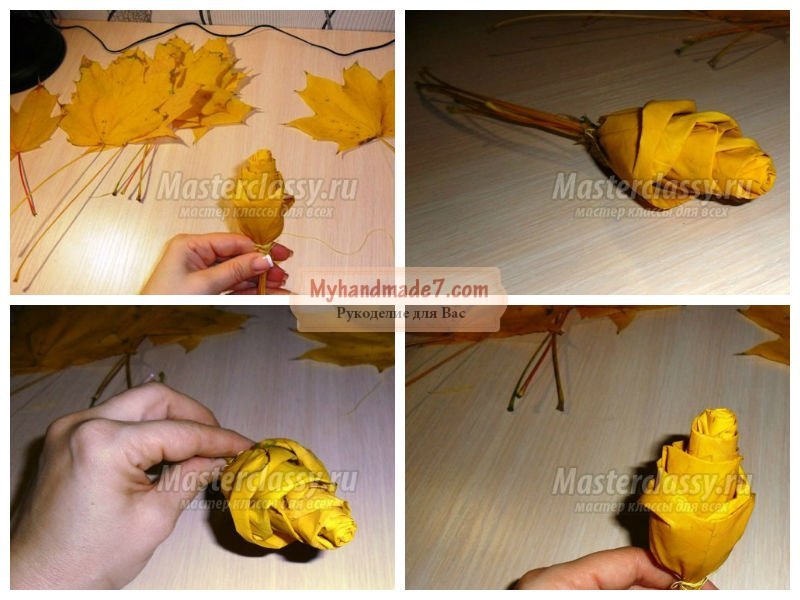
For this craft we will use not only maple leaves, but also grape leaves. They must be large, without damage, they must also be plucked “live” leaves so that they are soft, but it is better to leave the dry ones for creation. flower arrangements, herbariums and other autumn crafts. Pay attention to their color too, so that bouquet of maple leaves It turned out bright, juicy, full of autumn colors. You can collect maple leaves in green, yellow, orange and even red; it is advisable to choose one color of material for one flower, but here it all depends on your imagination.
![]()
The first leaf should be folded in half, right side out, and the central vein should run across. Now this folded element must be tightly rolled into a roll to get the core for our future flower - it will be a rose.
It is necessary to further lay the petals around this core. We bend the leaf in half outward, and the edge of this bend should be located slightly above the core, about 1 cm. Next, the fold must be smoothed, then the protruding edge of the leaf must be bent, but it is no longer necessary to smooth it in order for the petal to turn out beautiful. The side halves of the petal should be wrapped around the central roll. The lower edges must be pinched at the base of the bud.
For the next petal you will need a new leaf; you should repeat all the same steps with it, but it must be placed on the opposite side so that its center overlaps the side flaps of the previous one.
You need to repeat the steps with all the following leaves until your bud reaches the right size. When the bud is ready, you need to tie it with threads at the base, this way you will secure the flower and it will not bloom.
Actually, how many flowers will be included in your DIY bouquet of autumn leaves, it’s up to you to decide, and when all the blanks are ready, you can start decorating. To decorate ours, we will need “greenery” made from variegated leaves. For this, we need the material to be dried, and if there is no time to dry the foliage for a long time, it can be ironed by placing it between two sheets of ordinary newspaper. After such a simple procedure, the leaves will become dry, but at the same time fragile, so you need to work with them very carefully and thriftily.
The prepared leaves should be distributed in a circle under the buds, and then wrapped with threads to secure our finished bouquet. To close the threads, you can wrap the base with yellow tape at the end of the design, and after that the bouquet will definitely take on a finished look.
If you're interested, how to make a bouquet of leaves durable, then you can take advice from experienced craftswomen, who, through trial and error, came to solve one important problem: how to keep our crafts looking fresh. To prevent the flowers from drying out, but to retain their softness and rich color, it is recommended to lubricate them with sunflower oil. The oil should be applied with a brush to the finished bud, and the oil will be completely absorbed after a couple of days.
Some people also coat the finished buds with varnish to make them easier to care for and to wipe off accumulated dust without spoiling the composition.

Autumn bouquet of leaves
DIY leaf bouquets can be supplemented with other natural materials, for example, in the forest you can collect not only maple leaves, but also collect twigs with rose hips, barberry, hawthorn, they will perfectly complement the composition.
They look very original, and they can also serve as decorative decoration for your home, and such a wreath can be hung on the door, and only after a few months it will be replaced by a Christmas wreath.
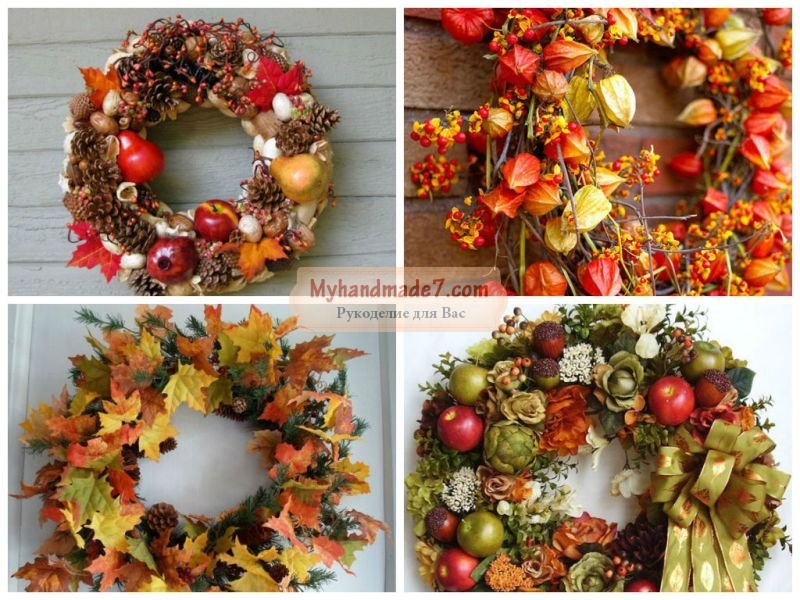
In schools and kindergartens in October they organize autumn ball, and for a girl such a wreath will be a wonderful decoration, and you can also arrange a themed family photo session to preserve bright, warm memories of this wonderful time of year.
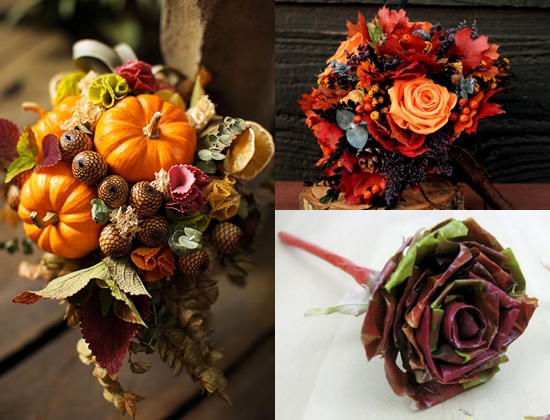
And when choosing a vase for such a bouquet, pay attention to natural materials - for example, an empty dried pumpkin or a basket made of vines will work well. Water is even harmful for a bouquet made only of leaves, but if your bouquet also contains fresh flowers or if you just prefer a regular vase, you can decorate it with leaves or other natural materials - by gluing acorn caps mixed with coffee beans, painting them with a pattern of leaves or using leaves act as stamps for paint to be applied to the vase.
Bouquet of only leaves
This bouquet should not be placed in water - the leaves will quickly rot in it. But it would be appropriate to dry it, and no special actions are required for this - after a month in a dry room, the leaves will dry out on their own. You will need a lot of maple leaves (always with cuttings, so that they can be attached to each other later). Most of them need to be rolled into roses, and the rest will become a background addition to the bouquet (these should be the most elegant leaves without damage). Roses from maple leaves can be rolled in two ways.
- fold the sheet in half (crosswise), smooth side out;
- roll it tightly, starting from the edge;
- do the same with the next sheet, but fold it together with the first, as if wrapping the second around;
- Roll each subsequent leaf less tightly to imitate not a bud, but ordinary petals;
- tie together the cuttings of all the leaves of the “rose”;
- combine with background leaves and place in a vase.
Second way:
- roll each leaf into an “envelope”, first folding it in half, as in the first option, and then bending it inside the edges;
- make more of these petals and then connect them;
- add leaves for the background and place in a vase.
Autumn bouquet-tree of leaves
Such a “tree” - a bouquet of stems on a long stem - usually has a rounded crown and a thin trunk.
You will need:
- thick wire;
- long sticks;
- flowers (of your choice);
- leaves with cuttings or even pieces of branches;
- fern, rowan berries on long thin branches, reeds and any other decoration material;
- natural tourniquet;
- colored adhesive fabric tape (green, brown or orange, to match the color of the bouquet);
Take rowan on the branches as a base. Add sticks to the branches and carefully secure the structure with wire, wrapping it around it. Attach the flowers and add wires again to keep the bouquet from falling apart. Form the “crown” to your liking by arranging flowers, ferns, reeds and leaves in a harmonious manner.
Wrap very tightly with fabric tape the entire “trunk” of branches, sticks and wire, from the bottom to the very top. The leaves, of course, will not fall into the trunk itself and will not be attached to it in any way (except, perhaps, by a long fern), but if the bouquet is dense enough, they will still hold on well. Decorate the trunk with a natural rope.
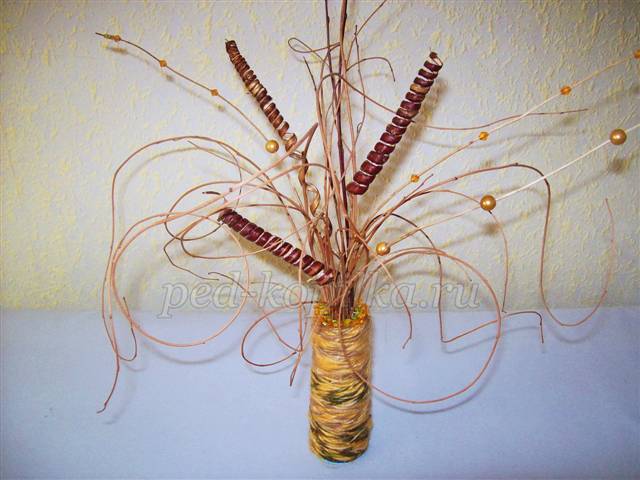
Craft made from natural material “Bouquet of Fantasy”
Purpose: interior design
Description of the master class:
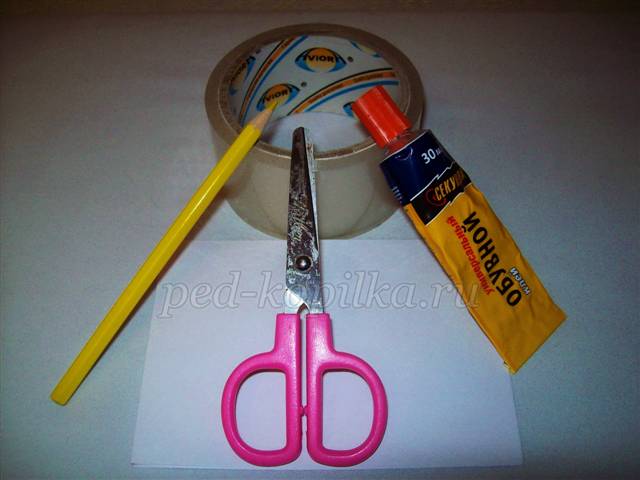
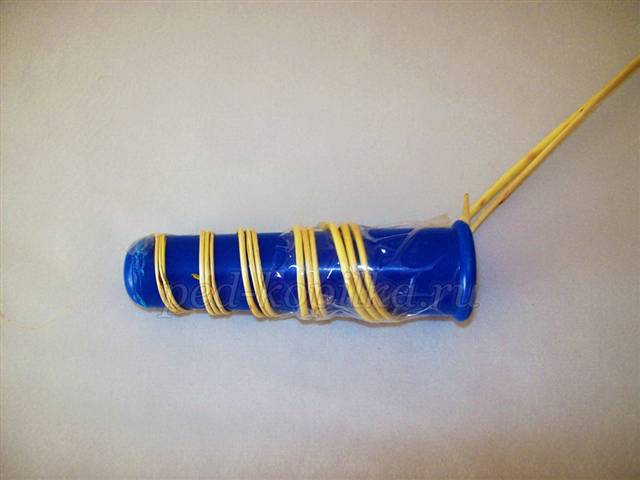
To make this craft, you need the following materials and tools: willow twigs (thin, medium and large thickness, several 3-5 pieces each), beads with large holes, an empty large spool of thread, pencil, scissors, tape, glue (any transparent and instantly drying), cardboard.
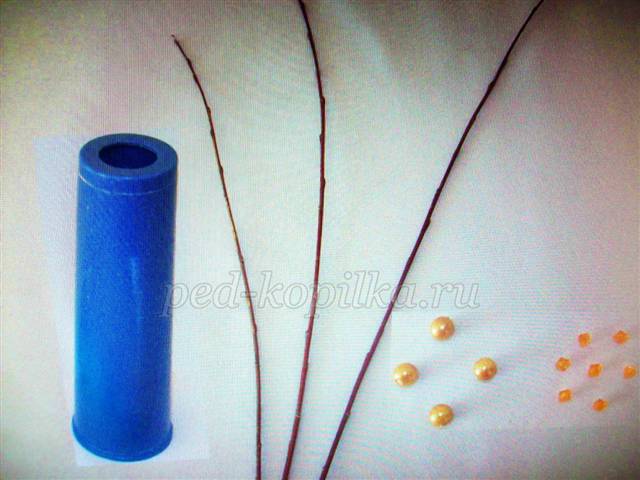
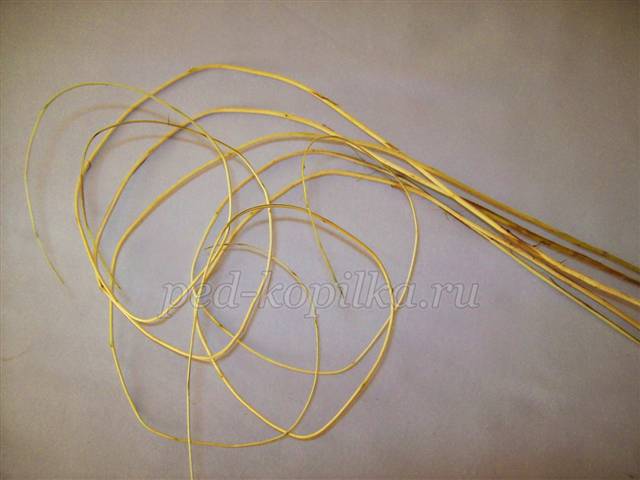
First, we prepare the components of the bouquet itself. To do this, you need to peel thin branches from the bark (the quantity is at your discretion), they will be needed for the bouquet. There is no need to remove the bark from the middle branches. To give the shape, we wrap the thin branches together on a large cylindrical shape, securing them with tape at the beginning and at the end.
We twist other thin branches into a ring and secure them with tape.

We wrap each of the middle branches (from which the bark was not removed) separately onto a pencil, securing them at the beginning and at the end with tape.
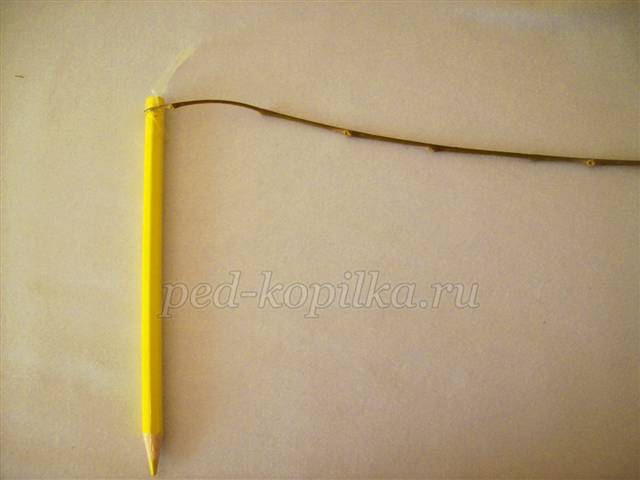
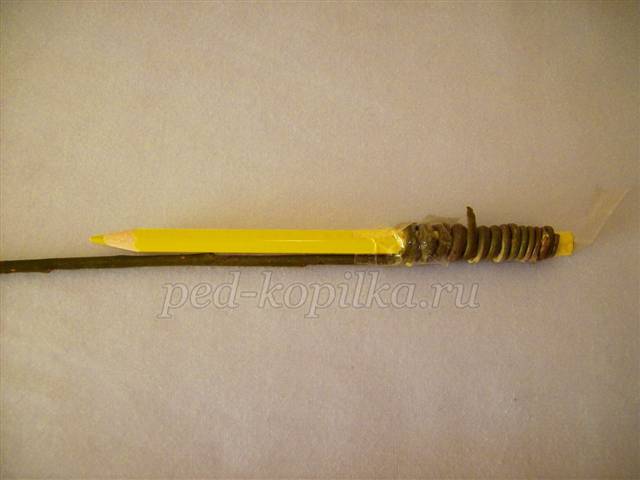
In this position, let the thin branches dry for 2-3 days, and the middle ones up to a week, until they dry out. Then, carefully removing the tape, we release the dried branches from the molds.
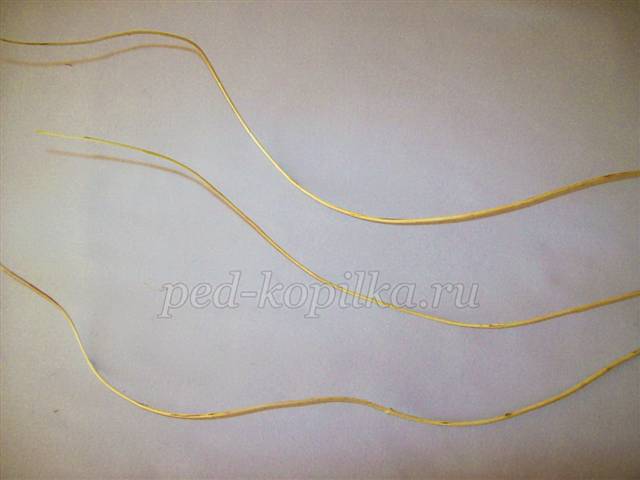

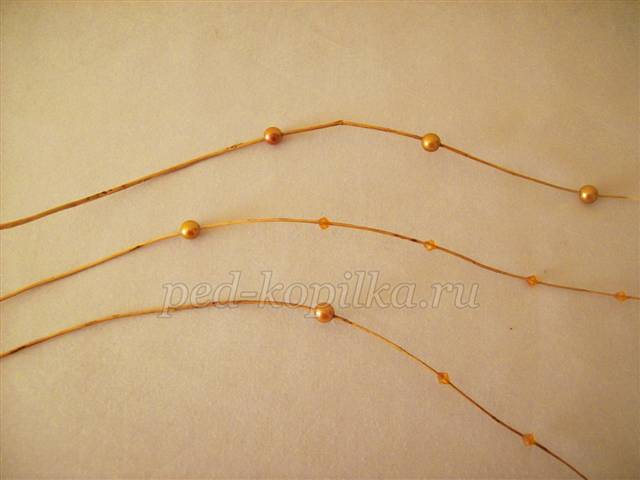
We string beads onto the branches, which were removed from a large cylindrical shape, securing them with colorless glue.
Now we prepare the vase for the bouquet. To do this, it is necessary to remove the bark from thick branches in long strips. By securing the bark strips to the top base of the thread spool with glue
![]()
We wind them onto a reel. Then glue the bottom of the vase
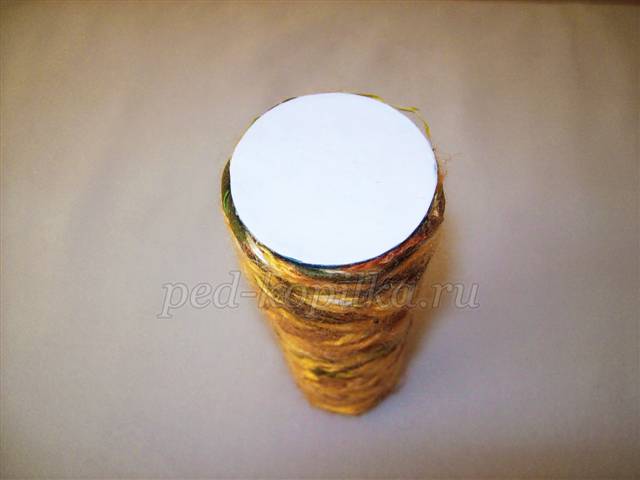
We decorate the neck with beads.

We compose a bouquet from previously prepared elements.