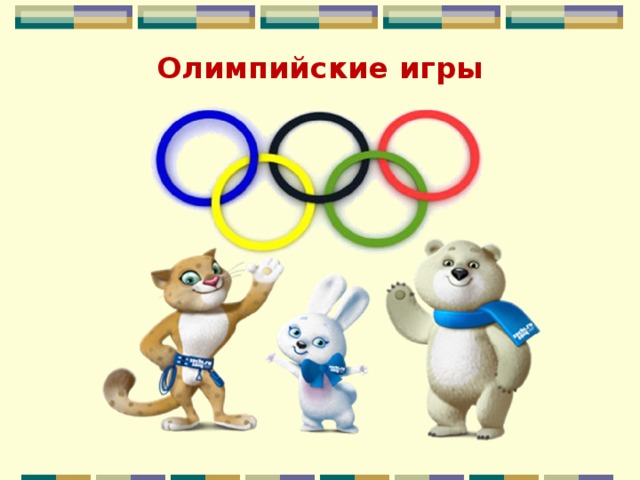
TECHNOLOGY
2nd grade
Primary school teacher
MKOU "October Lyceum"
Supkareva Elizaveta Petrovna
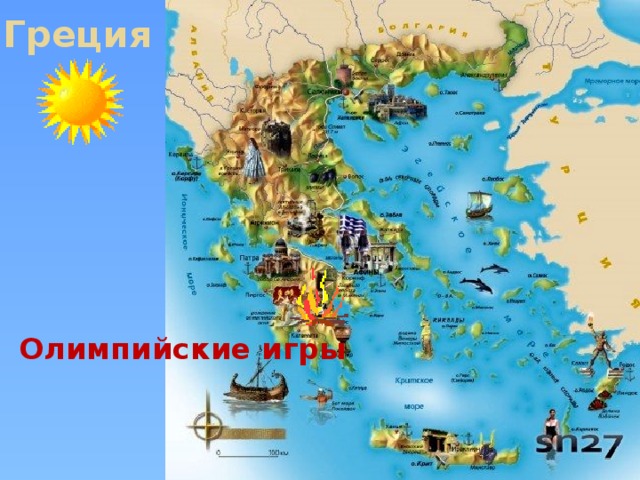
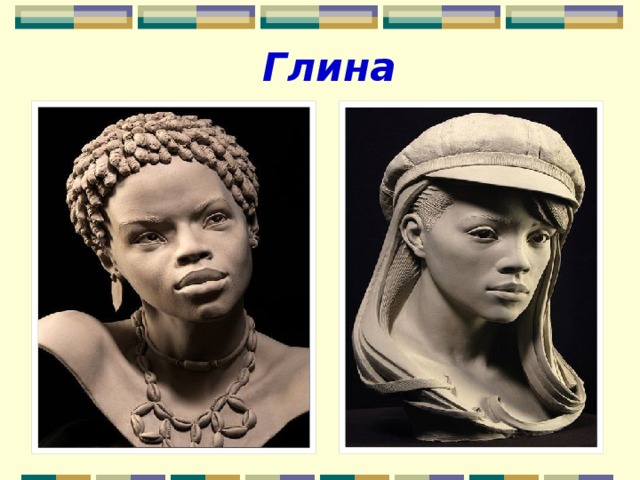
Greece
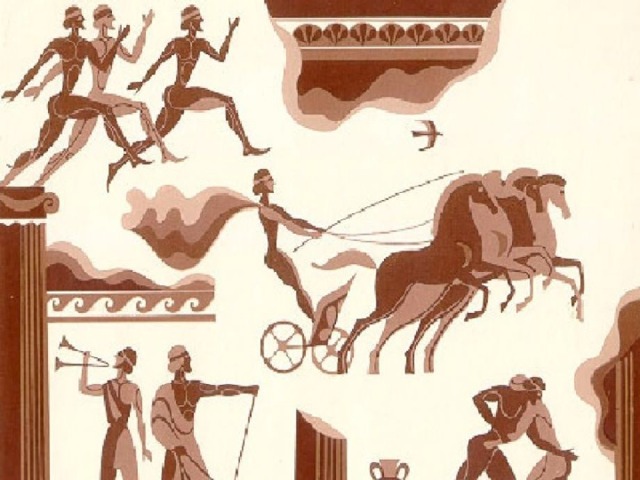
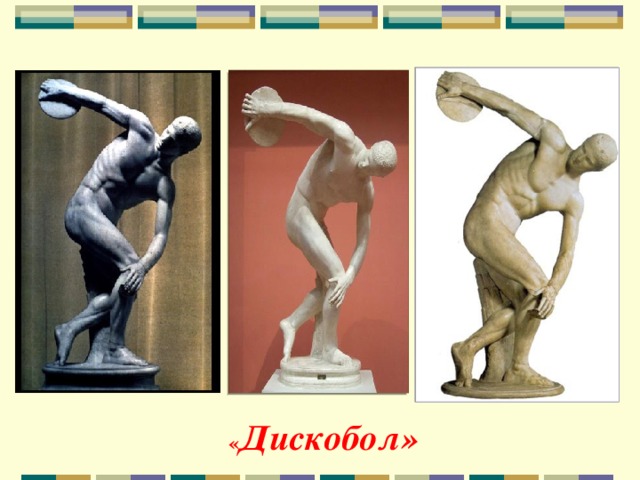
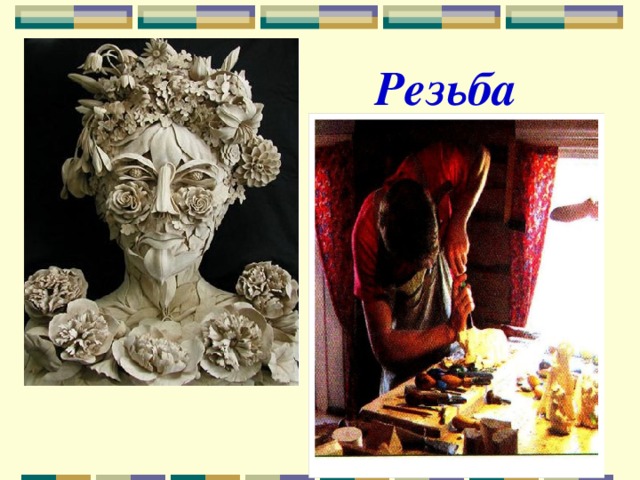
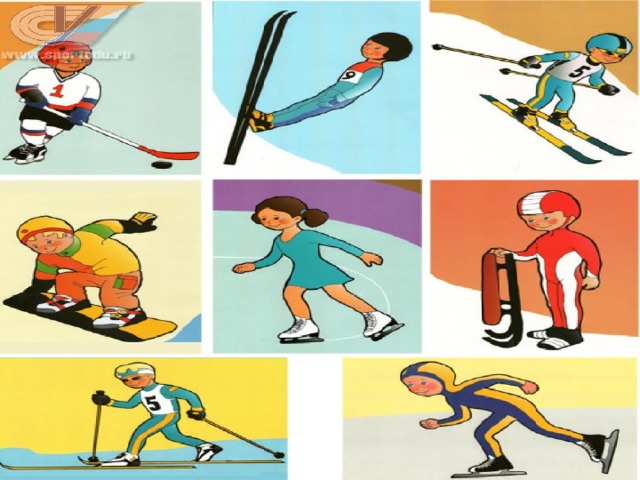
« Discus thrower"
Shapes are the main decoration of many cakes. For me, the most important thing is that the characters come to life and appeal to the audience. With several simple tips can be implemented! My model was so nice and was represented, for example, by photographs.
Before starting modeling, you should carefully study the template. Is there a gesture that is always done? In addition to clothing and appearance, this is what makes a person special. The basis for any type of movement is the difference between bones and joints. Only in the places where the joints are located can the body move!
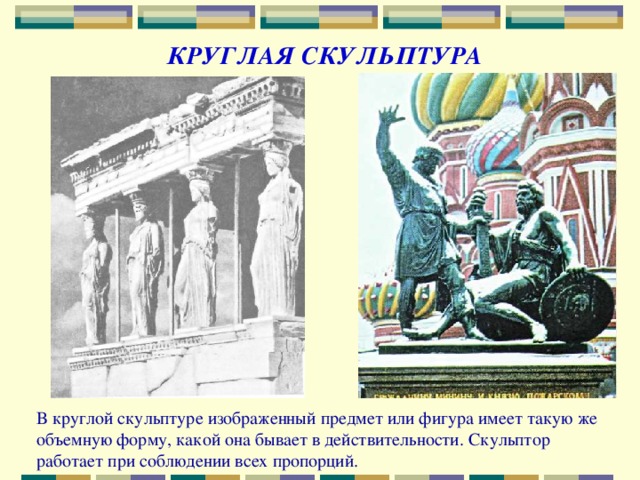
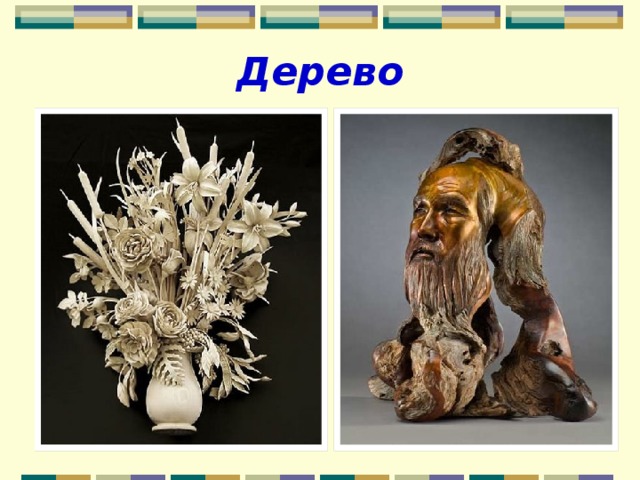
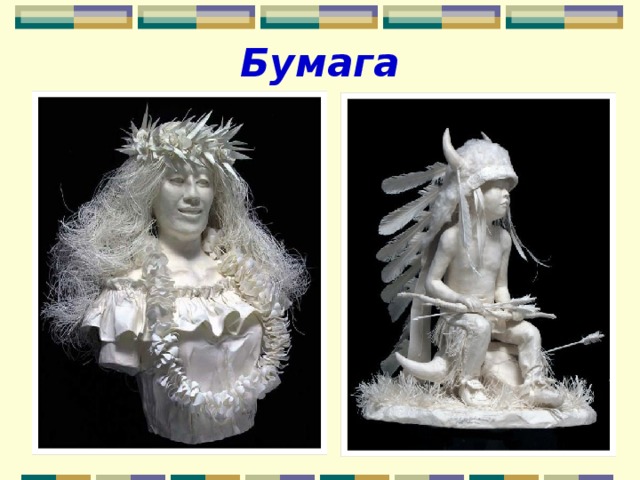
ROUND SCULPTURE
In a round sculpture, the depicted object or figure has the same three-dimensional shape as it appears in reality. The sculptor works while maintaining all proportions.

RELIEF
When the body moves where solid bone actually is, the figure looks strange. Almost as if the body was made of rubber, or the body was broken. But if you bring the figure into motion, where the joints are, it all works naturally again.
To give the correct movement to modeling, it is wise to do it with your body first. A simple movement that we do automatically every day becomes more complex when we want to implement it as a figure. Make the movement intentional and remember how the joints move and whether the imagined position is possible. It is important to find the center of the body as a base, since this is where supports need to be supported during modeling. This is especially true for standing figures. If the support in the body is in the right place, the figure can no longer topple over.
(FLAT)
In relief, the image is created by a three-dimensional form that partially protrudes above the plane. In relief you can depict a large group of people and even a landscape.


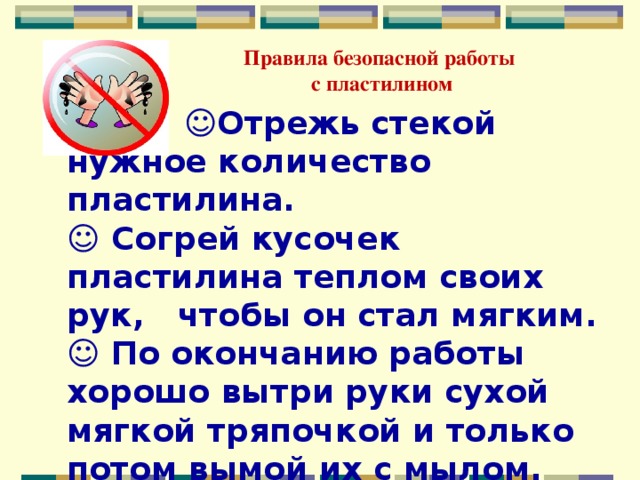
Safe work rules
It is also better to try the place you want to feature here. You can see very quickly if you can still stand with your leg in the air. When modeling, the support comes to a leg that is stable! Always exaggerate the movement for the viewer! If movement is only interpreted, it is not perceived. Development of elbows, knees, etc. also helps a lot.
The easiest way is to imagine that you yourself are making the movement, which should still be perceived at a distance. Modeling cannot speak - so arms and legs become the expressive force. Even if the facial expression remains the same, the hands or posture can make the figures "speak." Here, too, you need to exaggerate the movement so that it is perceived.
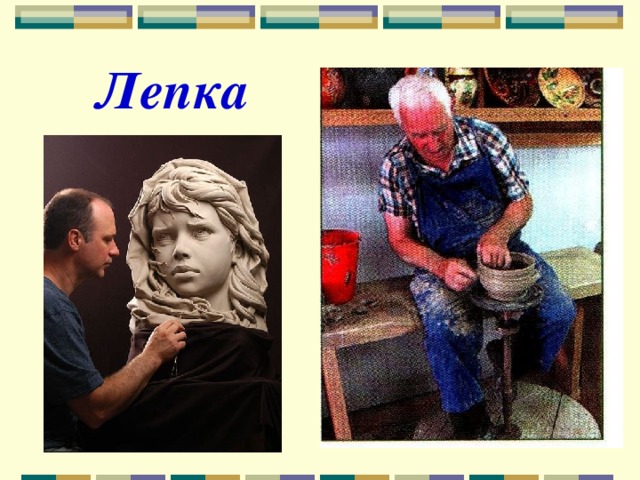
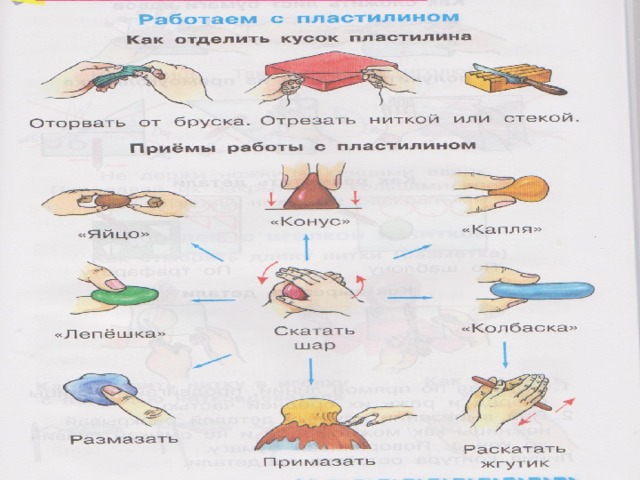
with plasticine
☺ Cut the required amount of plasticine in a stack.
☺ Warm a piece of plasticine with the warmth of your hands so that it becomes soft.
☺ At the end of the work, dry your hands well with a dry soft cloth and only then wash them with soap.
It is forbidden take plasticine into your mouth, touch your face, eyes, clothes with dirty hands.
Examples of formulation of tasks and skills to be practiced
Likewise, weapons usually function as aids in maintaining balance in the body. This way the arms are always moving when the body should be moving. Especially in the case of figures that represent wide movements, the weapon must in any case be adapted to the movement.
Every move almost always has a counter move! When you walk, it's not just your legs that move. The arms, body and perhaps the head must also adapt to the movement. 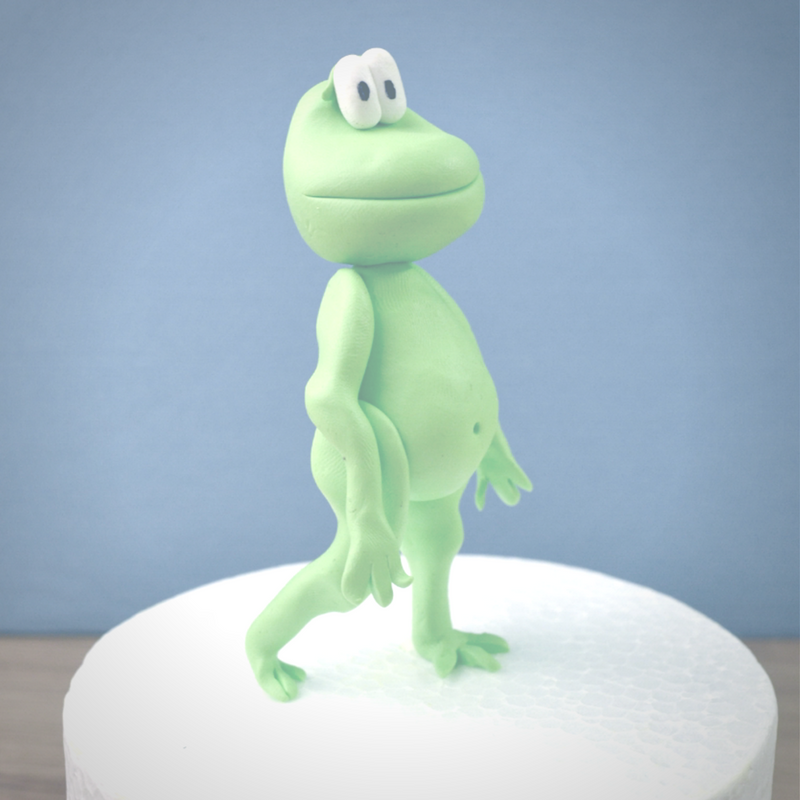

If the figure is wearing clothing, always ensure that it matches the movement. It's just that more clothes throw wrinkles and have a certain momentum that comes with movement.
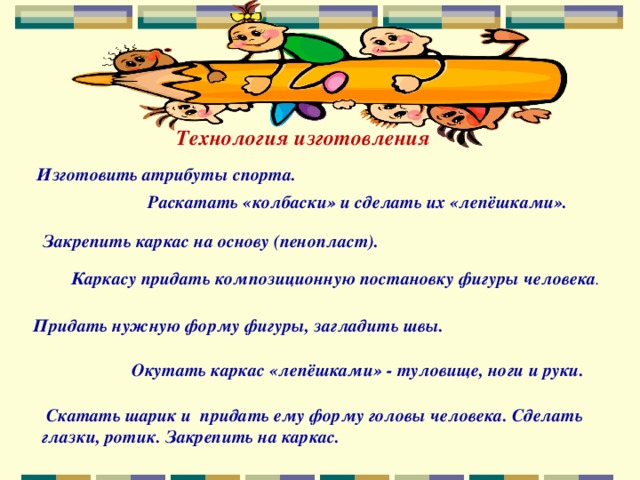
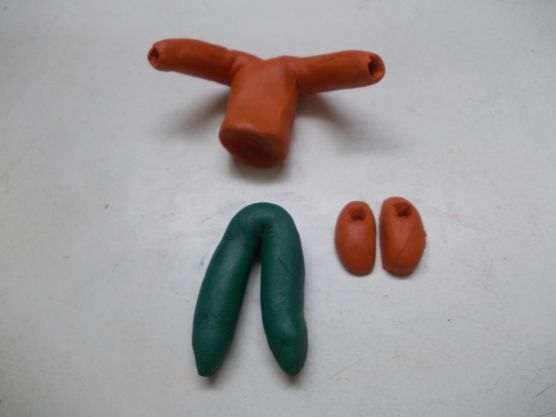
Manufacturing technology
Make sports attributes.
Roll out the “sausages” and make them into “flatbreads”.
Attach the frame to the base (foam plastic).

![]()
Plus, these pieces of clothing can give the movement even more momentum. The person has such a wonderful eye for movement that he often recognizes someone he knows from a distance in his course. Accordingly, the challenge is to calculate realistic and convincing movements of animals and people using computers, whether for movies - think of the running dinosaur characters in Jurassic Park - or for video games. Animating an artificial person is especially challenging because even subtle subtleties add a sense of personality and mood.
Give the frame a compositional setting of the human figure .
Give the desired shape to the figure, smooth out the seams.
Wrap the frame with “cakes” - the torso, legs and arms.
Roll a ball and shape it into the shape of a human head. Do

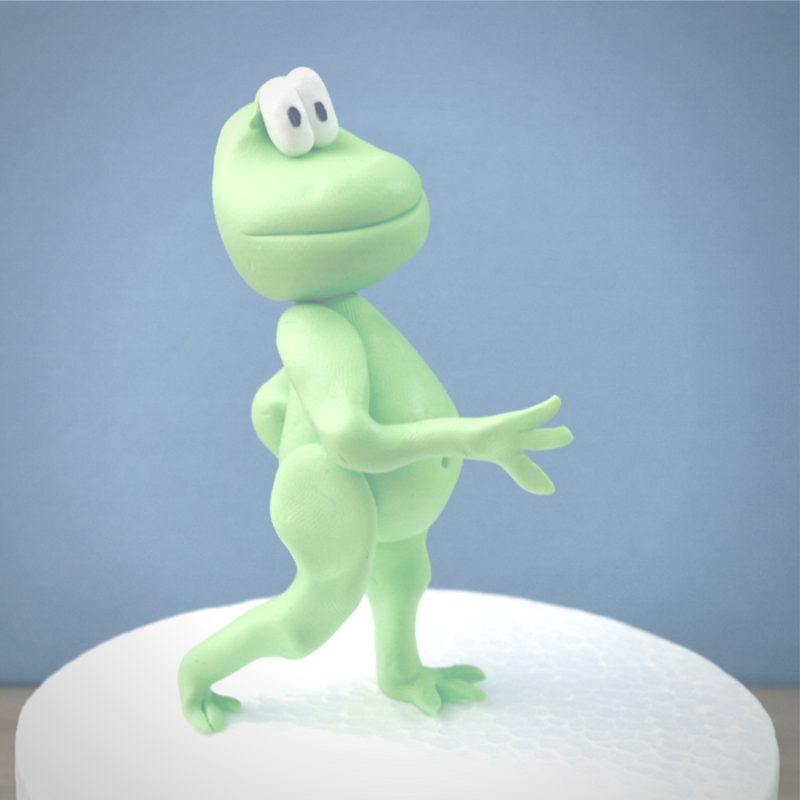
Manufacturing technology
There are basically three methods: keyframe, motion capture and simulation. In the first case, the animator can control the subtleties, but must ensure that the result is natural. Capture and motion simulation generate motion sequences in most cases automatically, on the other hand, there is little scope for fine tuning.
Methods and techniques for modeling in the preparatory group
Keyframes are individual images; the technique comes from time, since stunt films were still hand-drawn. Using these selected "snapshots", the positions of all faces and objects were determined, and intermediate images of the film were created as gradual transitions between keyframes. This interpolation is done by computer today. The case of a stone can be determined, for example, only from the initial position and the final position, provided that no obstacles prevent free fall.
1. Give the frame a compositional setting of the human figure .
2. Attach the frame to the base (foam plastic).
3. Roll out the “sausages” and make them into “flatbreads”.
4. Wrap the frame with “cakes” - the torso, legs and arms.
5. Roll the ball and give it the shape of a human head. Do
eyes, mouth. Attach to the frame.
Keyframe specification can be partially automated. If, for example, a figure's arm needs to be in a certain position, the computer can calculate appropriate elbow and shoulder angles. Of course, the animator must know the motion behavior of the objects to be rendered and select and arrange key frames accordingly; there are many possibilities for controlling the subtleties of movement.
Particularly natural animations can be achieved by recording real movements using magnetic or optical sensors; the first measure changes the position of the sensor relative to the reference transmitter, the latter measures the external light source. The computer can produce an impression of the motion sequences measured in this way on the virtual figure; famous athletes have already been pioneers for virtual athletes in various video games. Even everyday movements can be recorded relatively easily.
6. Give the desired shape to the figure, smooth out the seams.
7. Make sports attributes.
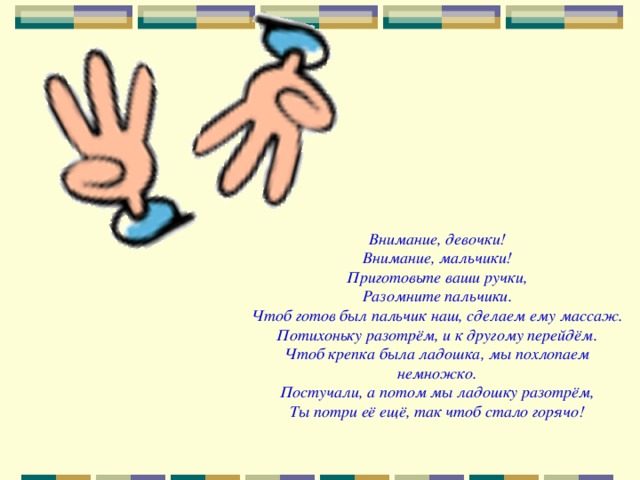
Attention, girls!
Attention, boys!
Get your hands ready
Stretch your fingers.
So that our finger is ready, we will give it a massage.
However, accurate measurement of motion sequences, particularly of the human body, is difficult because markers attached to the subject's skin and clothing may slip and thus may provide incorrect data. Different shapes or sizes of the original and computer models can also cause errors: the test person includes, for example, a real table; the animated figure is smaller, their hands may disappear into the table.
Moreover, some movements are difficult to record. Thus, electromagnetic sensors usually require a cable connection between the subject and the computer, which limits their freedom of movement. Additionally, such systems produce noisy data when there are metal objects or devices nearby, such as a treadmill. In optical systems, one part of the body may interfere with the representation of another. Despite these shortcomings, most motion sequences in commercial animation are now generated from recorded data and then adapted for virtual performance.
Let's grind it down little by little and move on to something else.
To make your palm strong, we will clap a little.
We knocked, and then we will rub our palms,
Rub it some more until it gets hot!

Main criteria for evaluating work
☼ the task was completed efficiently, without violating the appropriate technology;
Unlike these methods, simulation calculates motion sequences based on physical laws. A virtual person is usually modeled as a combination of rigid body parts. For example, the lower half of the body consists of a torso with upper and lower limbs and feet connected by joints to the hips, knees and ankles. Our working group used biomechanical data from various studies, including cadaveric measurements, to accurately replicate our models. The forearm of our virtual adult male weighs, for example, 1.1 kilograms, is 24 centimeters in length and has an average circumference of about 25 centimeters.
☼ performed labor techniques correctly, independently;
☼ creative originality.


Modeling in the preparatory age group is in the nature of practicing previously mastered skills, so the content side of the lesson becomes more complicated. If earlier children sculpted animals, toys, food, then at 6–7 years old there will be a human figure in the center of the composition (for example, a girl playing with a ball, a soldier and a skier). Let's consider the stages of preparing a lesson dedicated to sculpting a person in motion.
Preliminary work with the group
Although the models are physically plausible, they also remain an approximation of the human body. So they ignore the traffic muscle mass relative to the bone. The shoulder is also typically designed as a single joint with three degrees of freedom of rotation, although the clavicle and scapula in humans also allow for more complex movements such as the armpits. The more subtleties are taken into account, the more realistic the simulation will be.
Inanimate objects can be animated by equations of motion. If a ball rolls down a mountain, it is calculated by taking into account gravity and friction. Living things, however, have internal sources of energy; Therefore, virtual humans must be provided with controls that transmit motor signals to the muscles and determine the required rotation for each joint of the simulated body.
Children have grown up, and new techniques for working with plasticine are available to them. From sculpting on a plane, which involves creating a kind of painting, plasticine bas-reliefs on a sheet of cardboard or paper, and from simple forms (balls, lumps, figures without complex details), the children move on to three-dimensional standing and walking figures that require taking into account proportions and the laws of balance.
My working group has developed appropriate software for various types sports such as running, jumping, cycling and horseback gymnastics. Although it's very different movements, our systems operate on the same principle and are based on a common basis of individual events.
Primary school teacher
We use a state machine, which is an algorithm implemented in software that first determines what function each connection should perform at any time, and infers and coordinates the details of the movement. For example, work is a cyclical activity that alternates between a standing phase and a flying phase. During the standing phase, the ankle, knee and hip joint of the leg must provide support with grounding and balance. However, if that leg is in the air, the hip joint has a completely different function: in preparation for the next contact on the ground, the leg must swing forward.
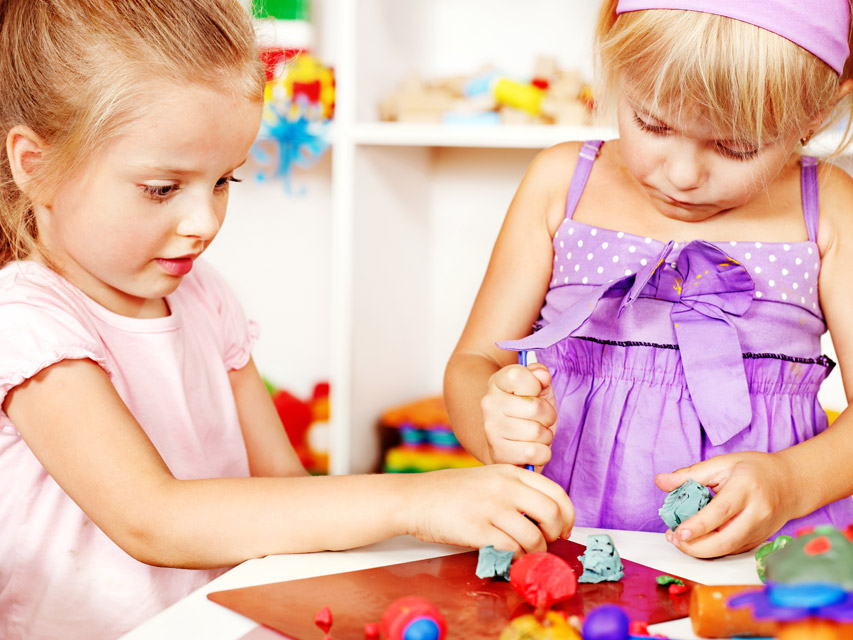
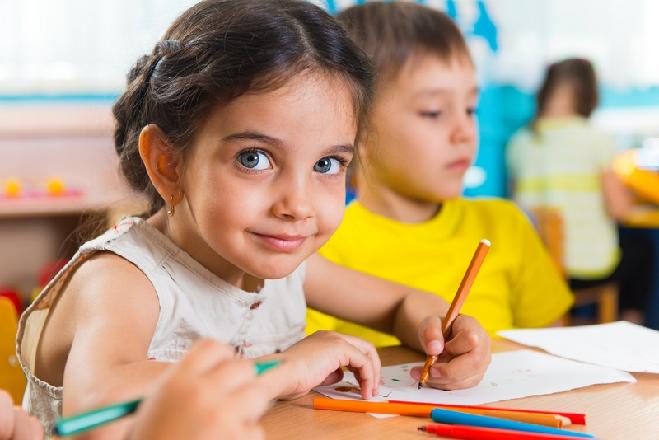
Playing with plasticine is an important part of preparing for school
What methods of modeling from plasticine can be used
Children aged 6–7 years are already familiar with constructive (the composition is created from individual parts, like a construction set), sculptural (all parts of the figure are made from one piece) and combined methods (combination of constructive and combined). To sculpt a figure in motion, it is more convenient to use a constructive method - this way it is easier to convey small details, such as, for example, palms, facial relief, etc.
The state apparatus constantly selects the correct functions from the possible functions of the hip joint. At each movement phase, control laws apply, with the help of which the corresponding angles are calculated for all 30 joints of our simulated actor. These are equations that describe how each part of the body must move to perform its intended function. These equations are now formulated as if the muscles were springs whose support corresponds to the desired angle.
To make our lives easier, we take advantage of the fact that multiple parts of the body often interact closely during movement. For example, in the simulated jointing of the foot and knee together, the task is to push the body off the ground during the standing phase. The knee works like a spring, which is initially compressed and thus stores energy, then stretches again and releases energy. We make the assumption that such passive movements are often used to reduce the energy expenditure of movement.
Modeling techniques
In this group, children consolidate previously mastered modeling methods, including:
Almost all of these methods are useful when working with the human figure.
Composition options on the theme “Man in Motion”
Modeling of a non-static figure can be presented in the following variants of themes for composition, which can be dedicated to a specific educational block:
As can be seen from these examples, most of the options for such modeling in calendar and thematic planning correlate with the winter theme. This is explained simply: by the 2nd semester, the children repeat and consolidate all the basic techniques and methods of sculpting, which allows them to create complex designs, which include the human figure.
Preliminary work with the group
Although the technique of sculpting a human figure is relatively simple, the teacher, during classes on speech development and physical education warm-ups, first examines with children the features of human posture, drawing their attention to such nuances as:
In addition, even before starting to work with plastic material, the adult individualizes the process as much as possible. That is

It is advisable that the choice of color scheme for the little man’s costume remains with the child.
Motivation
Already at the stage of individualization (that is, preparation for the lesson), the motivation of the little ones begins. However, the first part of the lesson should be planned so that the kids become interested in both the result of the work and, what is very important, the sculpting process itself. To do this, the teacher can use a number of techniques.
This is interesting. The famous Italian teacher, philosopher and humanist of the late 19th - early 20th centuries Maria Montessori said: “Don’t limit yourself to just one methodological manual, for example, cards. Cover one topic in different ways: in games, posters, books, cartoons.”
One of the motivation options could be a preliminary drawing of a sample of a man in motion
Conversation and visibility
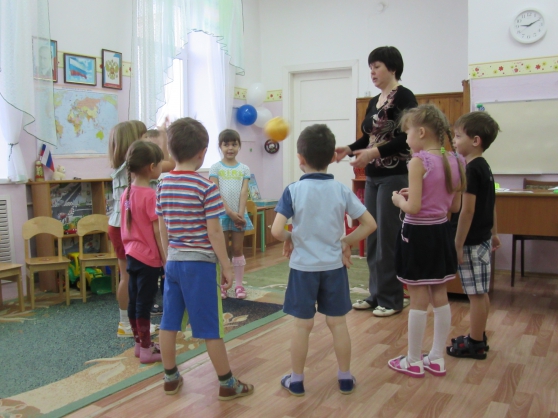
If we rank the most effective ways to get the children to work, then, of course, the conversation will take first place. The main thing is to build it correctly. Usually these are questions from an adult, which the kids answer one at a time or in chorus. For example, before creating a figure of dancing children, questions might be:
However, these questions cannot be speculative. Children perceive the world figuratively, so they cannot do without clarity. These could be pictures of athletes, frames from famous cartoons (for example, “Well, just wait!”), or photographs of the children themselves. If the kids are sculpting the composition “Girl Plays with a Ball,” then for motivation you can invite all the children to repeat 2-3 exercises with the ball, and then discuss which movements were the same, which were different, and also what poses the body took.
Game
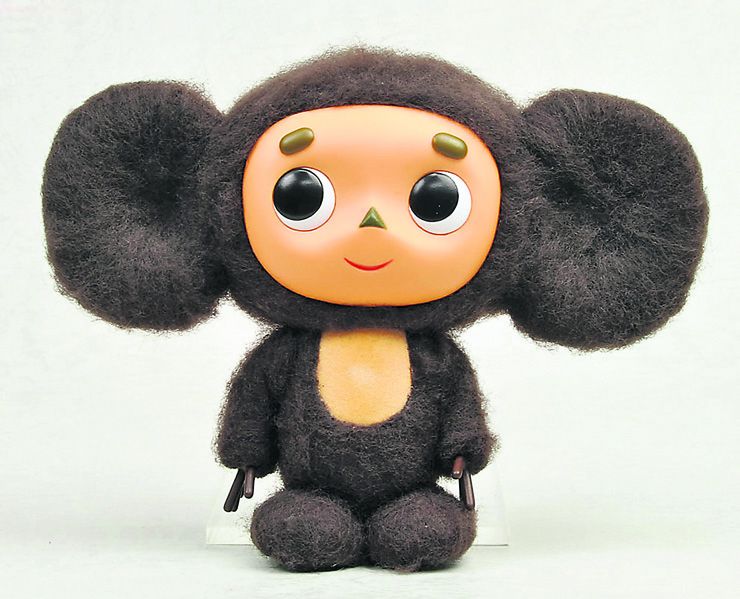
Gives the lesson a special, interested working atmosphere story game. If we talk about working on plasticine figures, then such a character, including children in work-play, can be a cartoon or book hero. For example, during a lesson on the topic of a skier’s figure, the symbol of the Sochi Olympics, Cheburashka, may come and invite the kids to create their own ski team.
Children work in class with special pleasure if their favorite character “comes to visit” them
Poems
The rhythm and dynamics of rhymed lines also organizes the children well and puts them in a working mood.
Methodology for compiling notes
Work on drawing up a lesson plan begins with formulating goals and objectives. The main goal-setting factors in sculpting a moving person can be called:
The objectives of the lesson are more specific:
After the goals and objectives are formulated, the teacher needs to plan the stages of the lesson so that every minute is used, and the children, accordingly, do not have time to be distracted.
The lesson notes must include time for physical education.
Example of a lesson summary (abbreviated) - table
| Kargina Natalya " Winter fun, sculpting a human figure in motion" | The teacher shows the children cards with a schematic image of a man in motion. Next, he demonstrates the pose of a person in motion using a visual aid - a human figure. Draws children's attention to how the skier's arms and legs are positioned. After familiarizing yourself with characteristic features a person in motion, the teacher asks the children a question: “Guys, how should a skier be dressed?” Children's answers: “He should have a warm jacket, pants, mittens, scarf, boots.” Educator: That's right. Now let's each of you blind your own skier and choose your own color of clothes for him. |
Sequential execution:
Educator: Well, our skier is ready. What a great fellow you are. What good skiers we have! |
|
| The teacher sums up the lesson: The guys put their skiers on the snowy plain of a layout prepared in advance, called “Winter Walk”. (The teacher prepares a foam pad in advance and corrugated paper). They look at who got what. Educator: Guys, now you can imagine yourself in the role of your sculpted skiers and play with them at the model... |
Step-by-step work on the compositions “Girl Plays Ball”, “Skier”, “Soldier”
Flexible figures that can take a variety of poses good material to express the child’s creative imagination. And the requirement for realistic products, set by the topic, leads to the need to think logically and comprehend known facts.
Modeling in the preparatory group “Girl plays ball”
This composition consists of two parts: sculpting a girl and creating a ball. If time permits, both tasks can be completed in one lesson. Otherwise, it is better to divide the work stages into 2 sessions. The latter option is more rational, since the proposed composition involves sculpting a girl with facial features and distortions in the fabric of the dress during movement, that is, the craft is quite complex.
Step-by-step instructions (man):

The girl’s arms need to be well smeared to the base so that they can be bent and unbent.
Step-by-step instructions (ball):

Children use squashing and stretching techniques to create stripes on the ball.

Place the finished ball in the girl’s hands
The ball can be placed in both hands of the girl or placed on one.
Figure "Skier"
To prevent the figurine's legs and arms from falling off, they are formed from parts of the body.
Step-by-step instructions (skier):
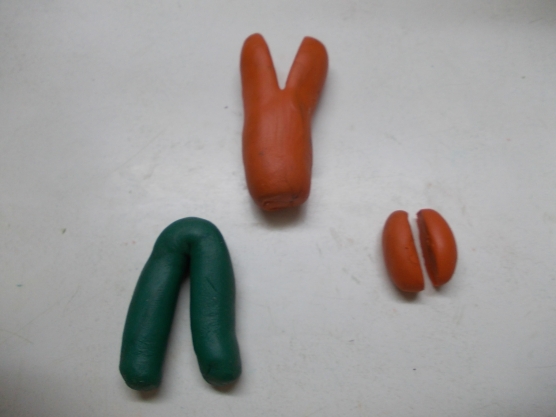
Splitting a plasticine part
This is how arms and legs are made for a skier

You can use toothpicks for ski poles, but matches are easier for children to work with.
Figure "Soldier"
Instructions:

This is how the torso and arms are made


