Children always love to do origami; they are ready to sit all day long and make some origami crafts and show them to their relatives. Any child would like to learn new origami crafts, for example, making the simplest paper boats with their own hands. Below in our master class we will teach you how to make this easy and also complicated paper sailboat with your own hands.
1. The most common version of a DIY paper boat
For the lightest boat, of course, we only need 1 sheet of A4 format. The following ten steps show you how to make origami.
You can also try to make another origami, a paper boat using a slightly more complicated pattern. As always, we will need a regular piece of A4 paper.
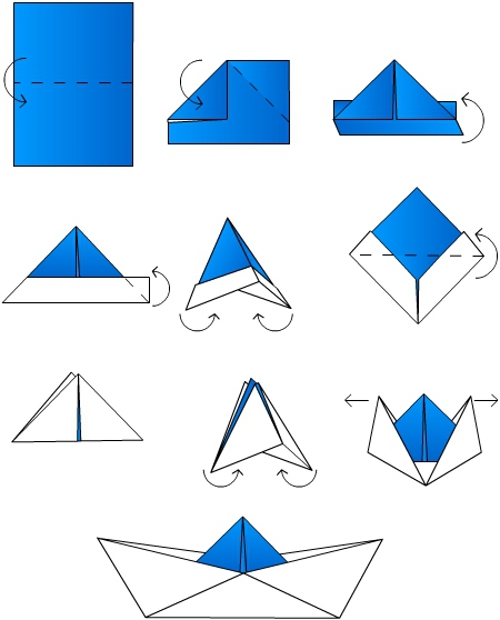
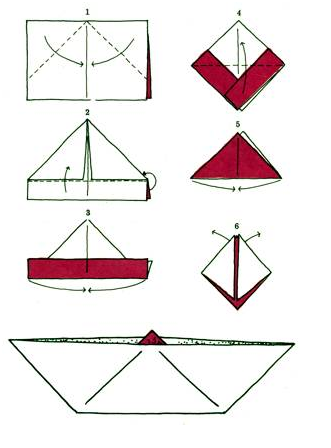
2. Scheme of a sailing boat.
First, we take our workpiece and bend it in half like a “book” (picture.1). Then both sides, fold them in half too (Fig. 2). Mentally divide the folded sheet into 4 parts (you can use a gray pencil), then fold the top and bottom half towards the middle (picture.3). Then we turn back the previous step (Fig.5), The result was a blank with three fold lines. Then the second half needs to be unscrewed and folded along the fold lines as on the template (Fig.5). And then fold the bottom half of the paper up (Fig.7). Do the same with the top half of the craft. (image.8). Then unfold the first folded part up (digit.9), should
look like the picture (Fig. 10). Then turn the product over to the reverse side, in front of you is a large square and four small triangles (Fig. 11). Then fold the square with opposite corners from top to bottom (under number 11). So we assembled a beautiful sailboat (Fig. 12).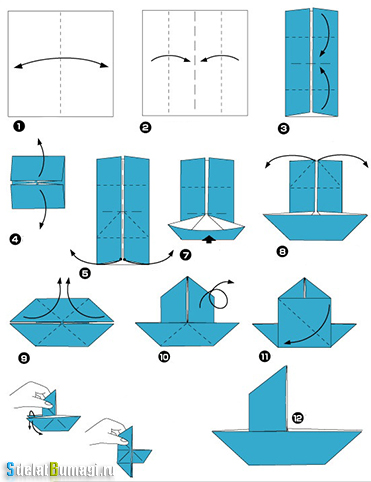
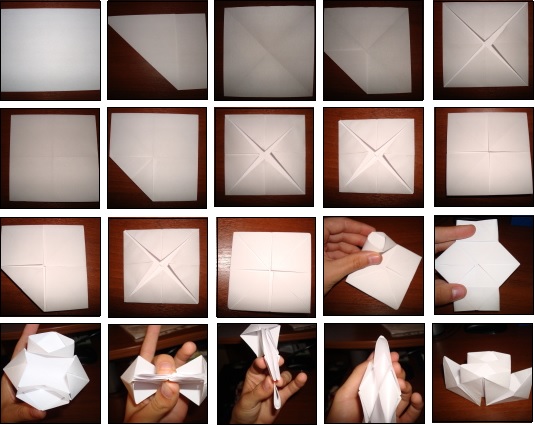
3. Step by step instructions origami sailboat

4. Scheme for making a paper steamship
A simple way to make a boat, an easy option in 10 minutes. 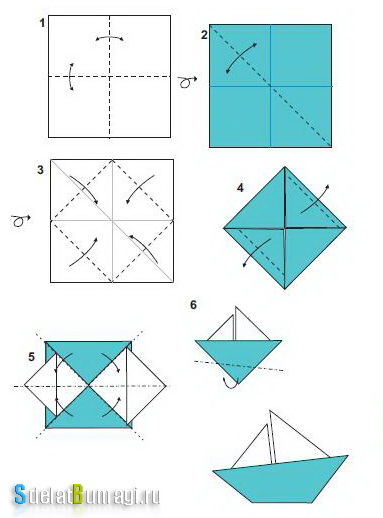
How to make a boat out of paper detailed instructions photo
To make a boat we will need a thin sheet of A4 paper.
1. Find the middle of the workpiece. We bend it in half.
2. On the resulting rectangle, bend one corner to the middle.
4. We turn the remaining parts of the craft upward, first the front part.
5. Then, similarly to step 4, fold the other part of the paper.
6. We tuck the corners over the folded workpiece.
7. We also accurately turn the remaining corners over.
8.
Next, we take the lower corners of the triangle and connect them together. We have a big diamond .
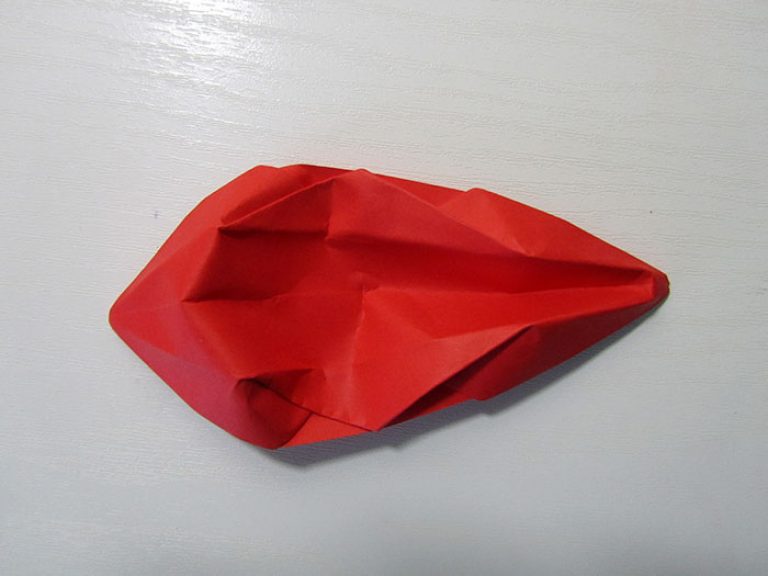
9.
You should see a large diamond unfold .
10. Z Then we bend the lower corner of the front side of the diamond to the upper corner, and similarly with the back side.
11.
You should get three triangles.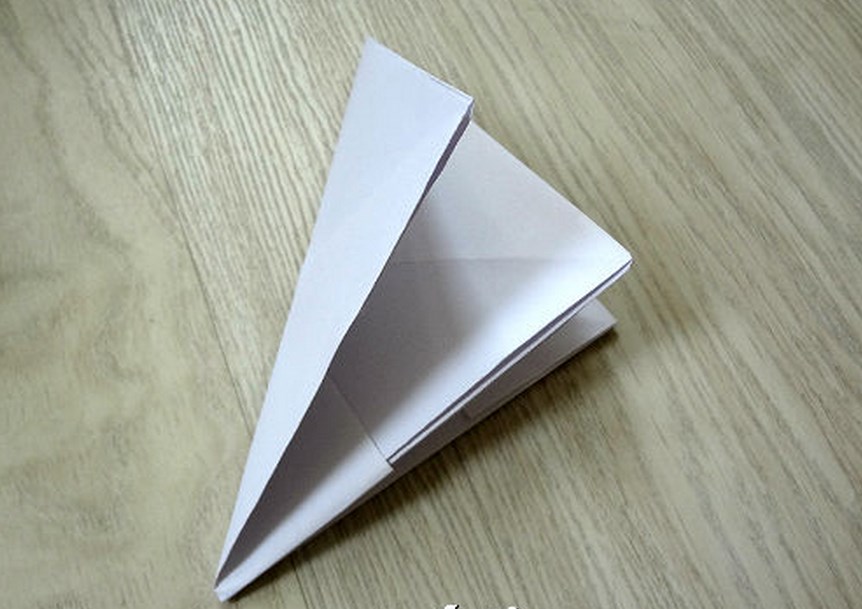
12.
Then we connect the lower side corners to each other (the origami is folded into a small rhombus with equal sides).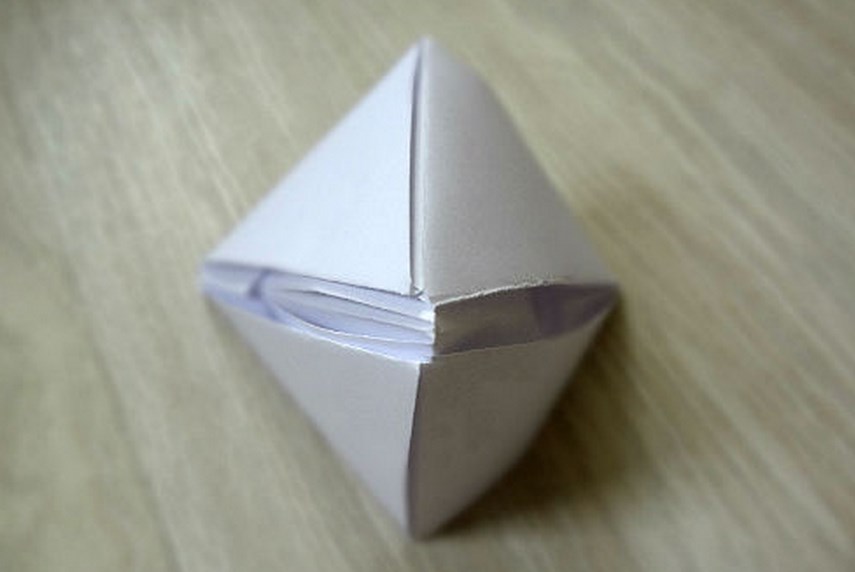
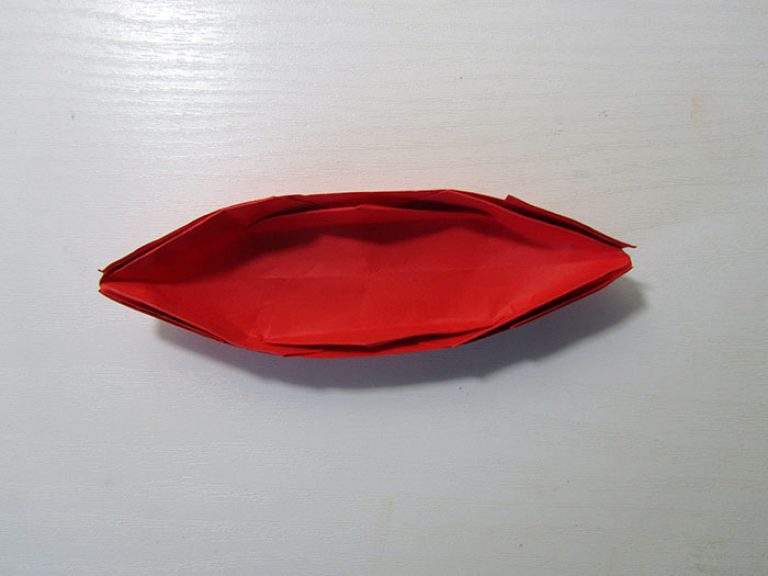
13.
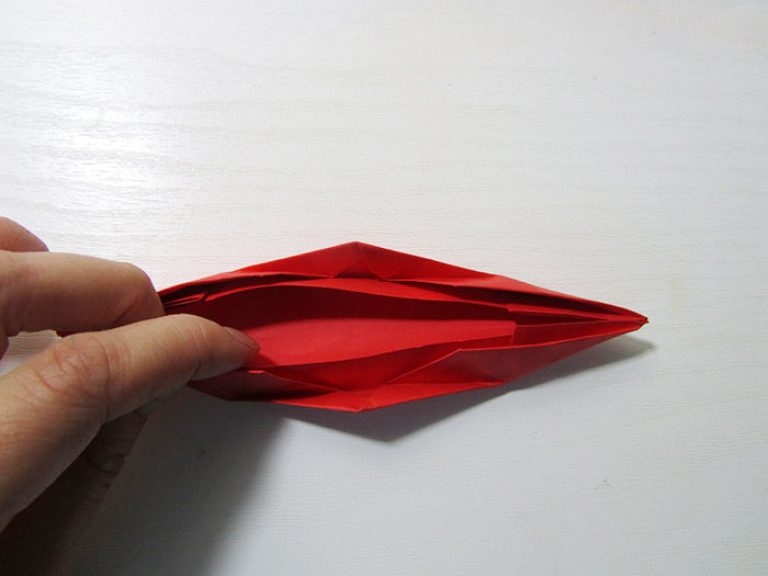
Let's take on different sides(behind the upper corners of the triangle) and begin to move them apart.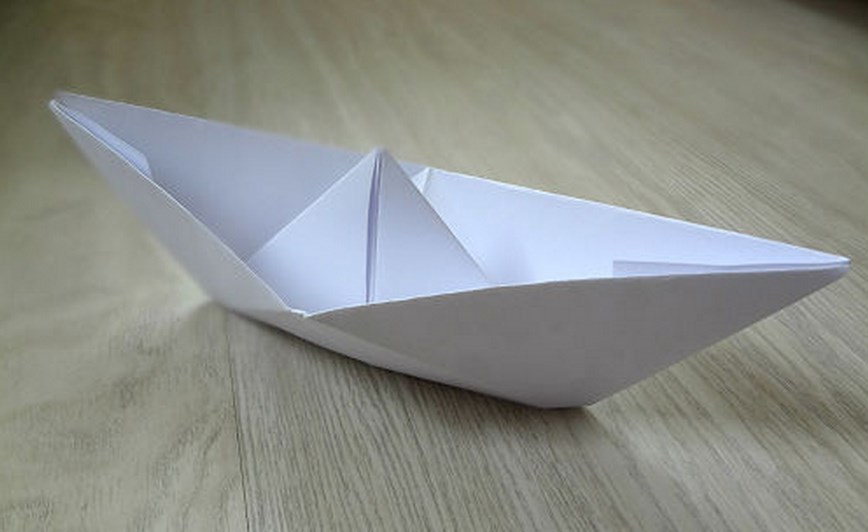
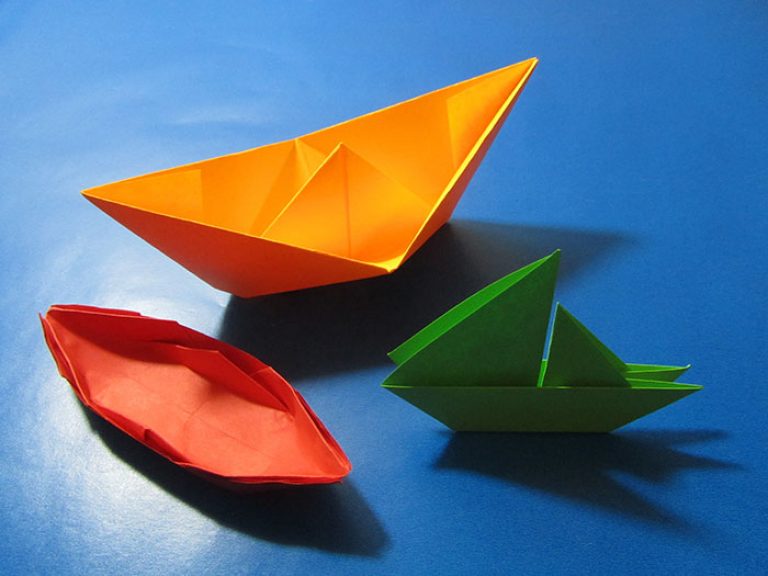
And now you have a beautiful boat with a large deck. Collect a collection of different ships on your table, made according to various designs. 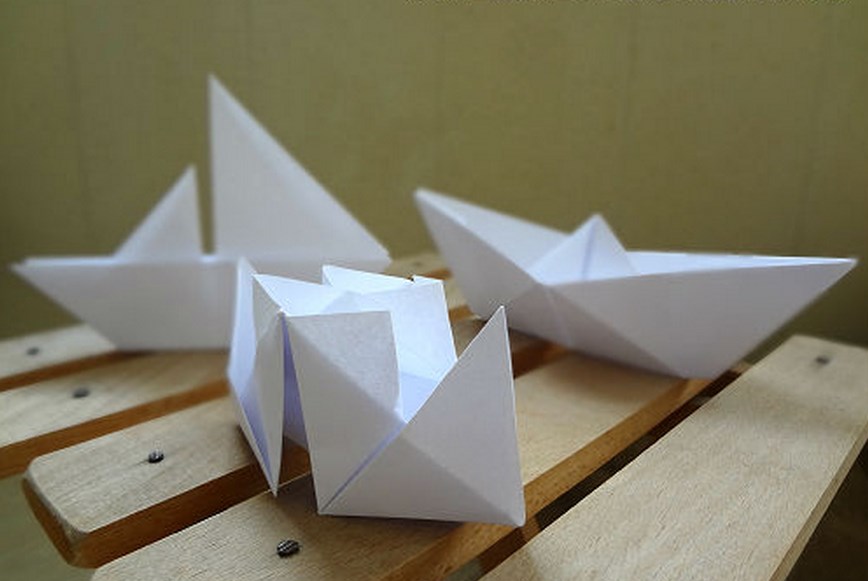
In this article I tell you how to make a paper boat with step-by-step photos. As a result, you will get a beautiful three-dimensional toy for a child. The article contains 3 master classes with detailed photos, which will help you quickly and easily learn the intricacies of origami techniques. Thanks to these master classes, you can easily build a whole fleet of all kinds of boats of different sizes and colors.
In this master class I will tell you how to make a simple, simple boat using the origami technique.
If you don’t know how to make these yet, I recommend that you definitely learn and then show them to your children. Such boats are known for their good buoyancy and ease of manufacture. Usually, when we talk about paper crafts, the idea to make just such a product immediately appears in our minds.
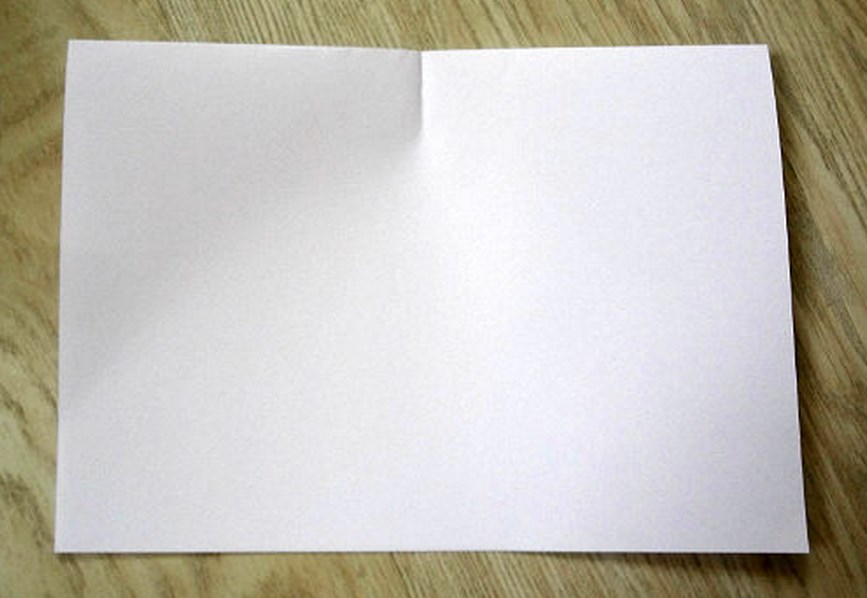
Step 1. Take a sheet of A4 paper. In general, any paper can be used, but if you plan to launch a boat on the water, it is better to take a sheet with a glossy surface. This way the craft will last you longer.
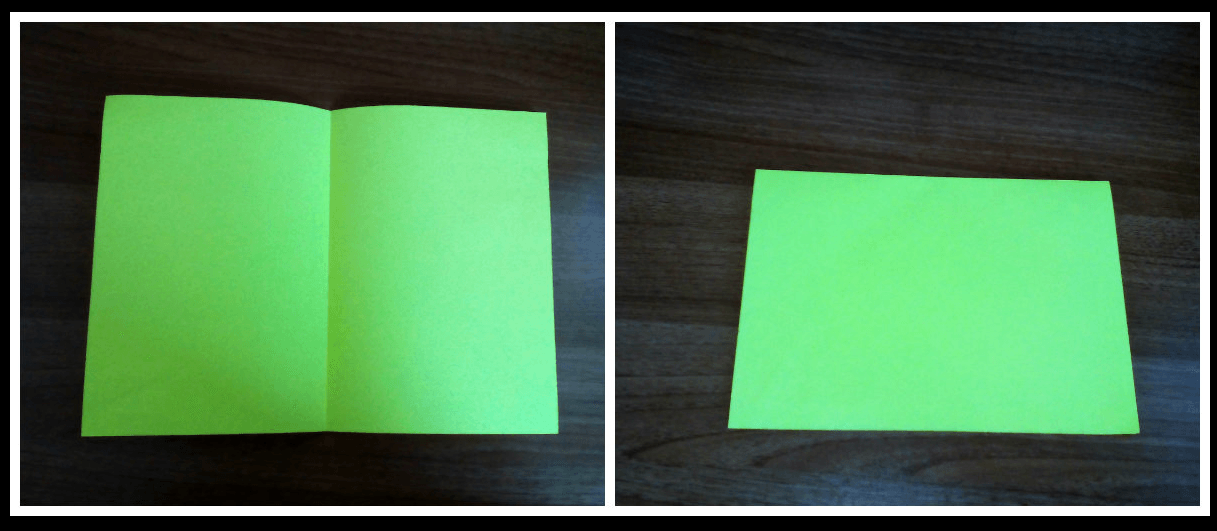
Step 2: Now fold the piece of paper in half.
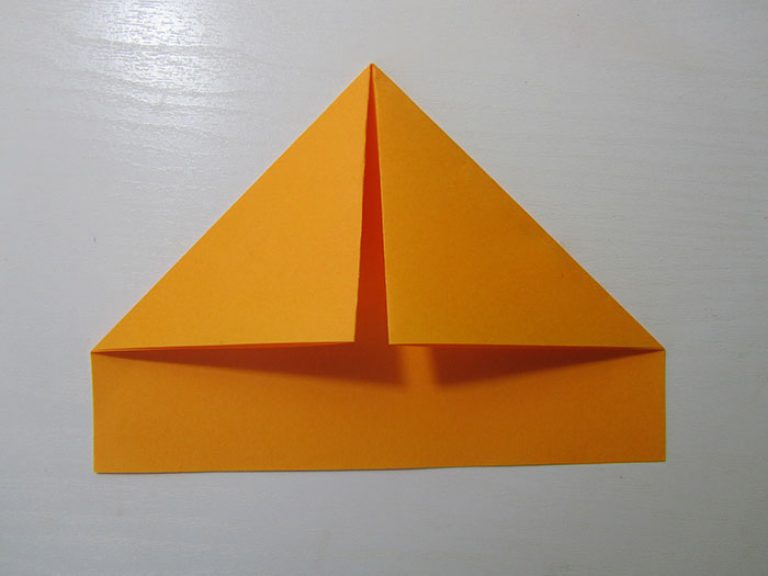
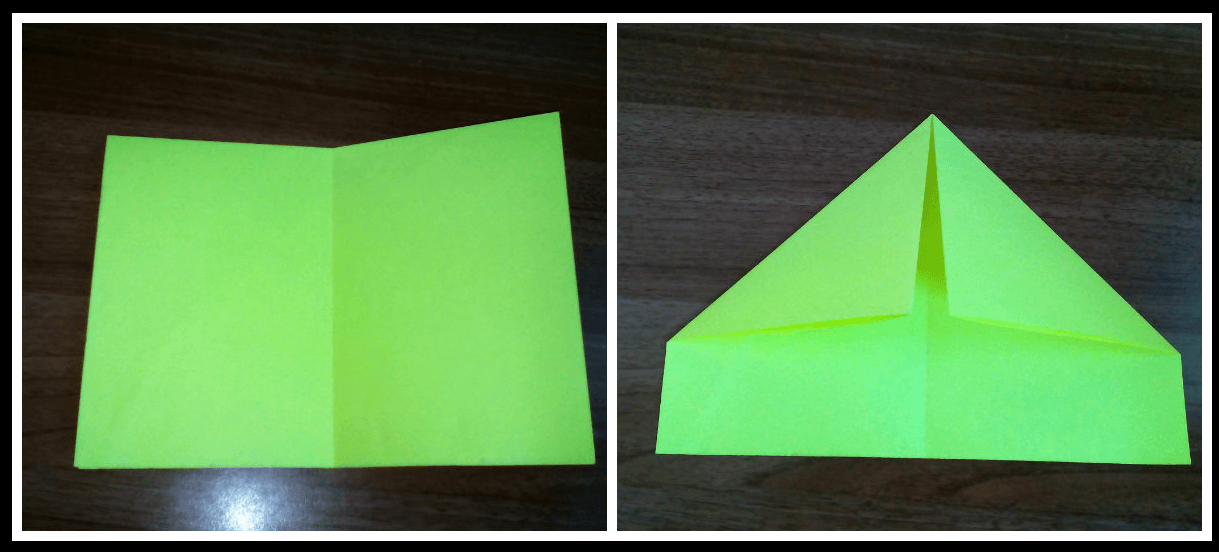
Step 3. Fold the two upper corners towards the middle.
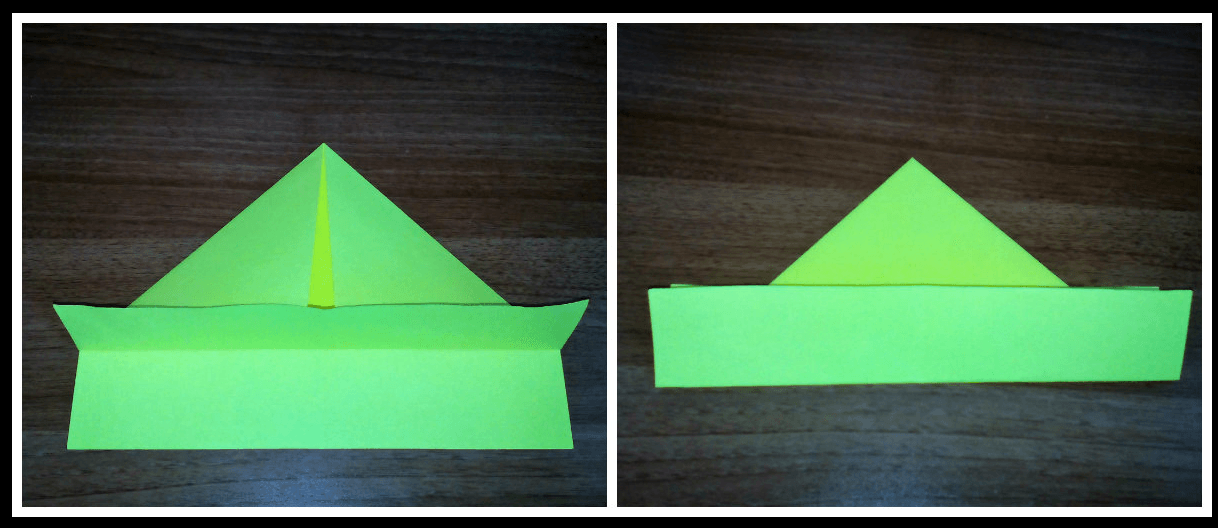
Step 4. Fold the bottom layer of paper upward.
Step 5. Do the same with the opposite layer of paper.
Step 6. Fold the corner into the middle, as in the photo.
Step 7. Fold the second corner as well.
Step 8. Do the same with the corners on the left side of the craft.
Step 9. Now grab the two corners with your hands and bend the craft into the middle.
Step 10. This is how it turns out in the end.
Step 11. Fold the bottom corner up.
Step 12. Do the same with the opposite corner.
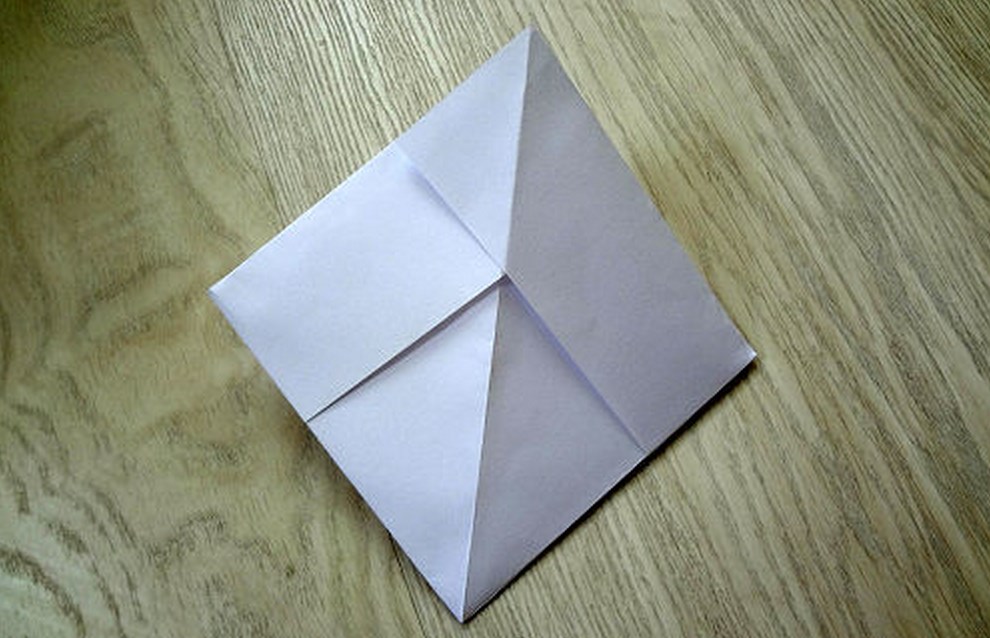
Step 13. Now take two opposite corners and bend them into the middle as shown in the photo.
Step 14. The result is an envelope like this.
Step 15: Grasp the bottom two layers of paper with your hands and bend them outward.
Step 16. This is the final boat we get. As you can see, it is not at all difficult to make. Now you can go and launch a boat along a spring stream or summer river. And if it’s winter in the yard, then just pour water into the bathtub or basin and let your boats sail along with small passenger toys.
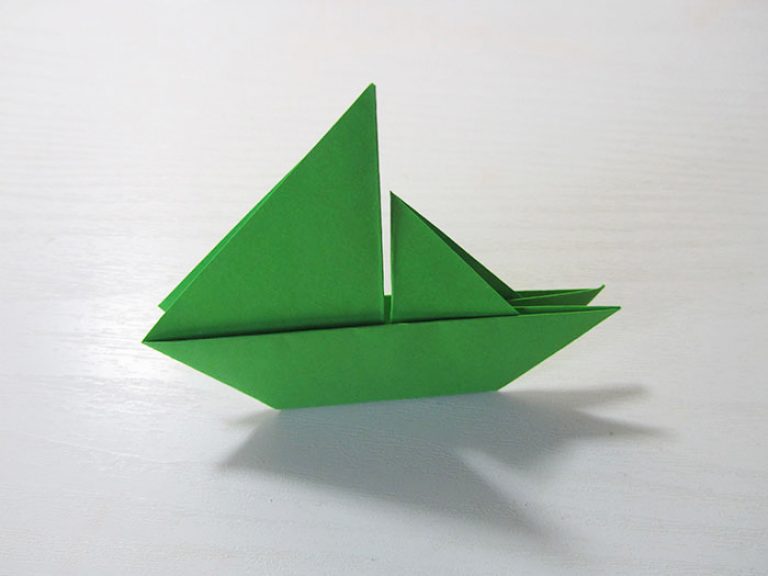
Master class “Sailboat using origami technique”
In this tutorial I will show you how to make a simple but cute sailboat from a regular square piece of paper.
Making it will take you no more than 5 minutes. The interesting thing is that not every child, and not every adult either, knows how to make such a craft. But it's not scary - there is always time to learn.
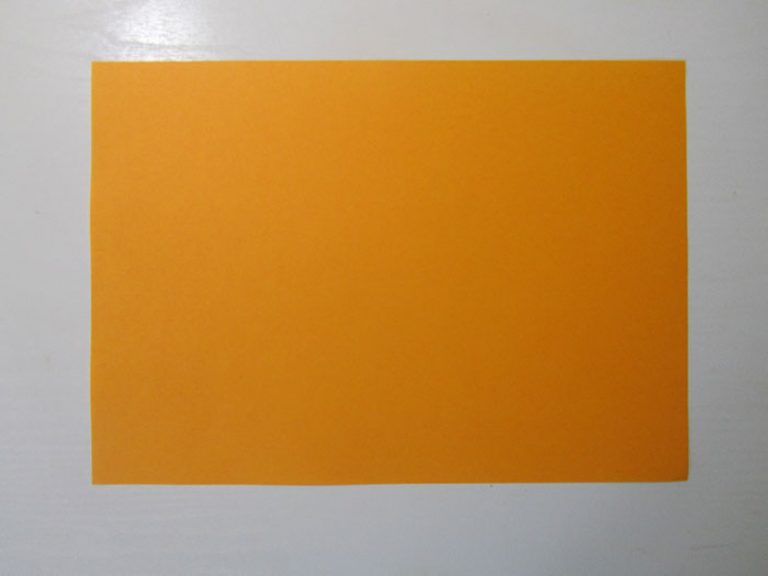
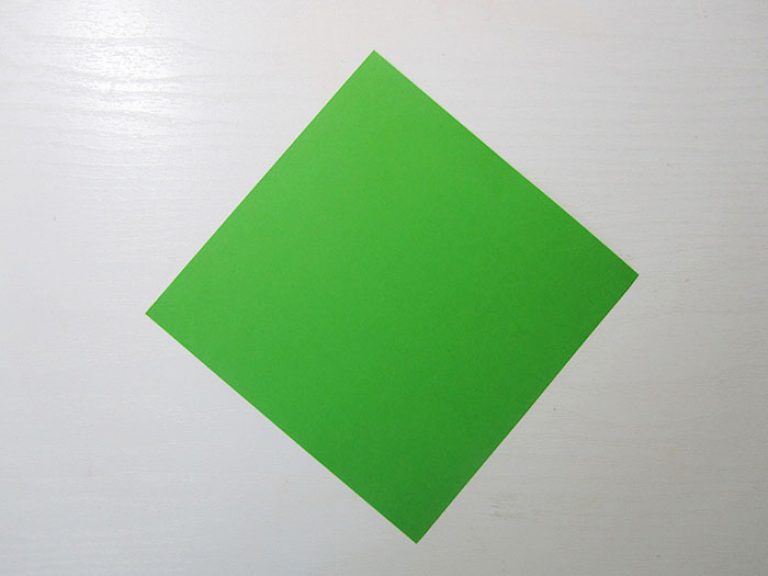
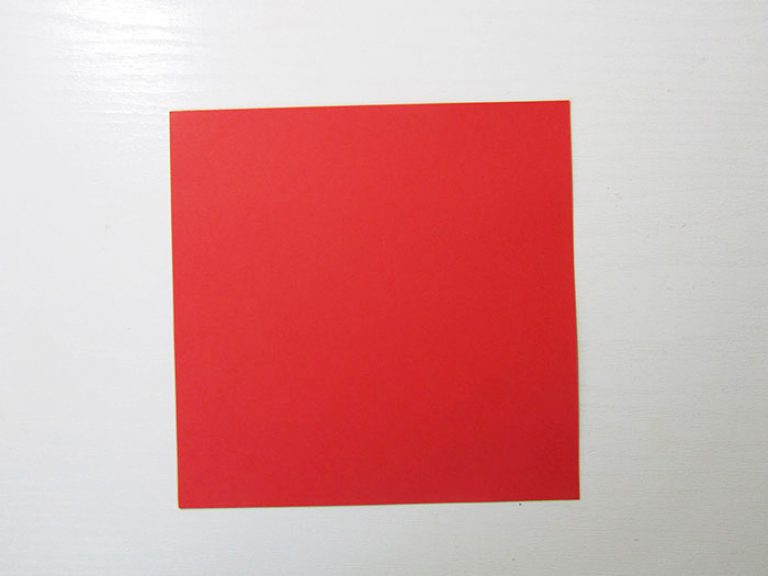
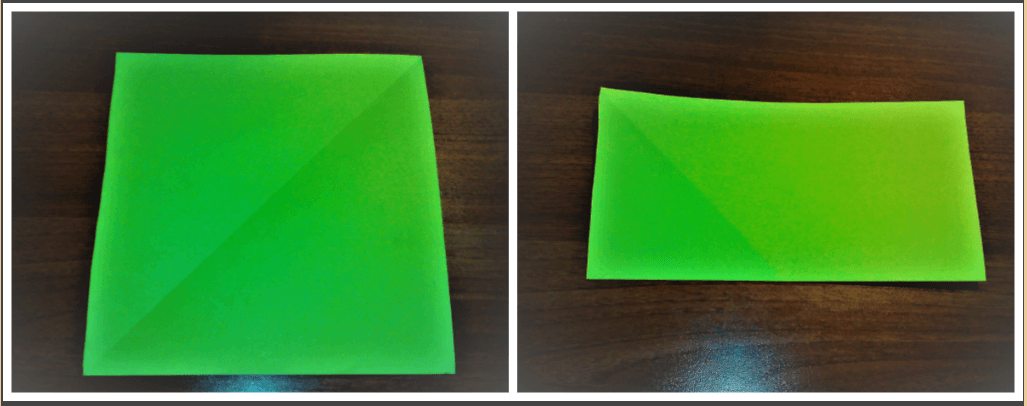
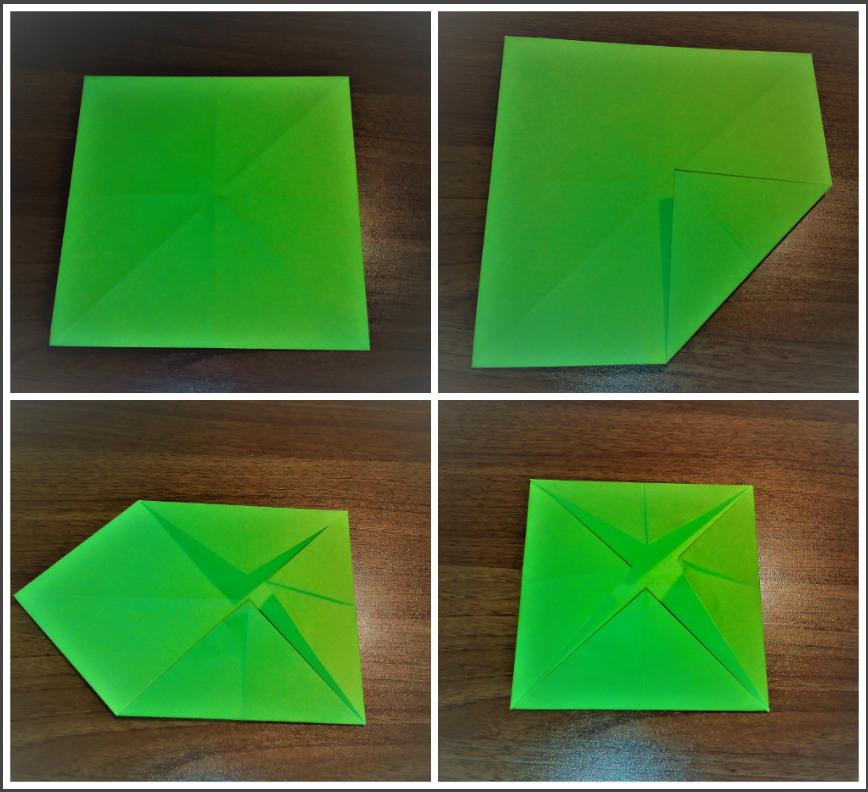
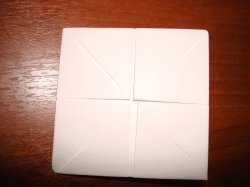
Step 1. So take a square piece of paper. I recommend using ready-made paper for crafts, but of course you can simply cut a square from regular A4 office paper.
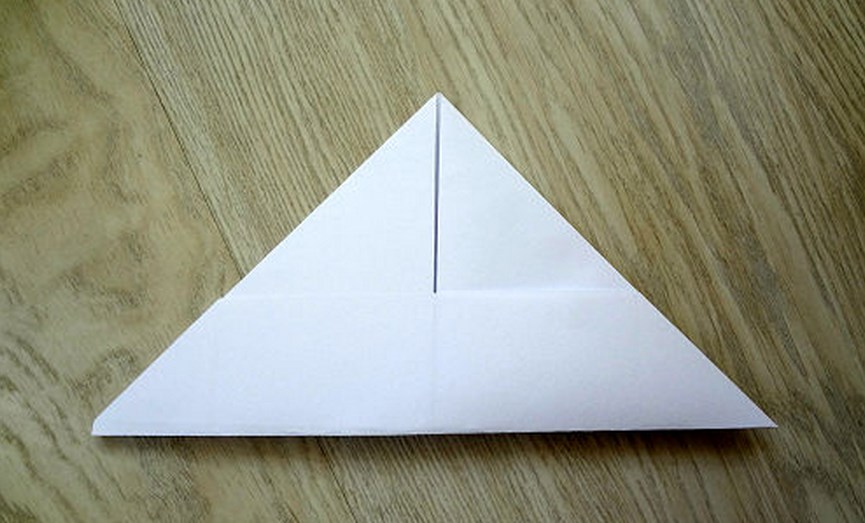
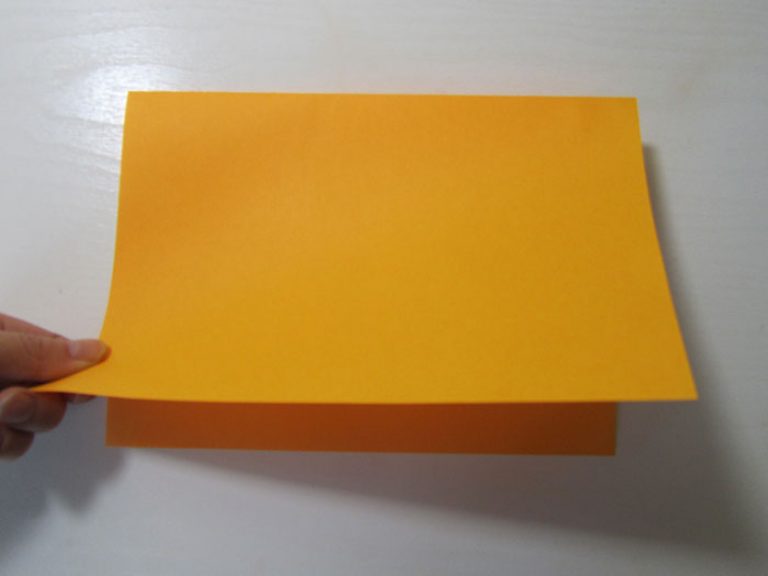
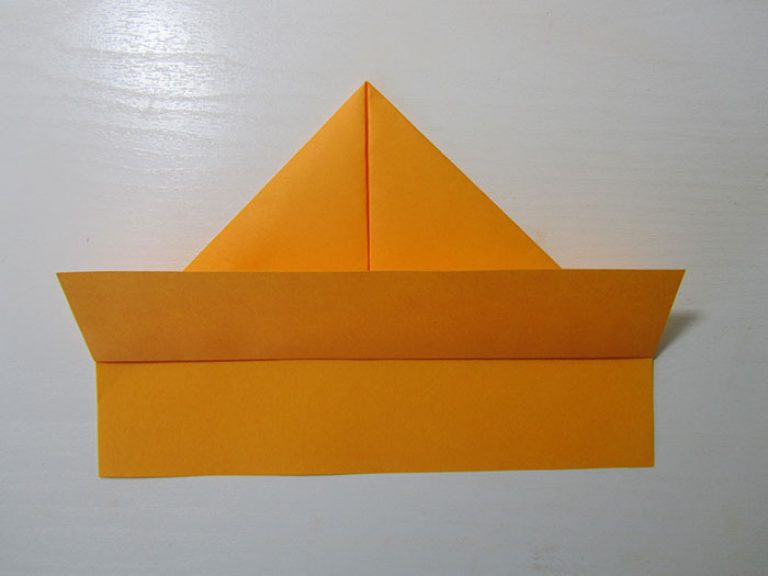
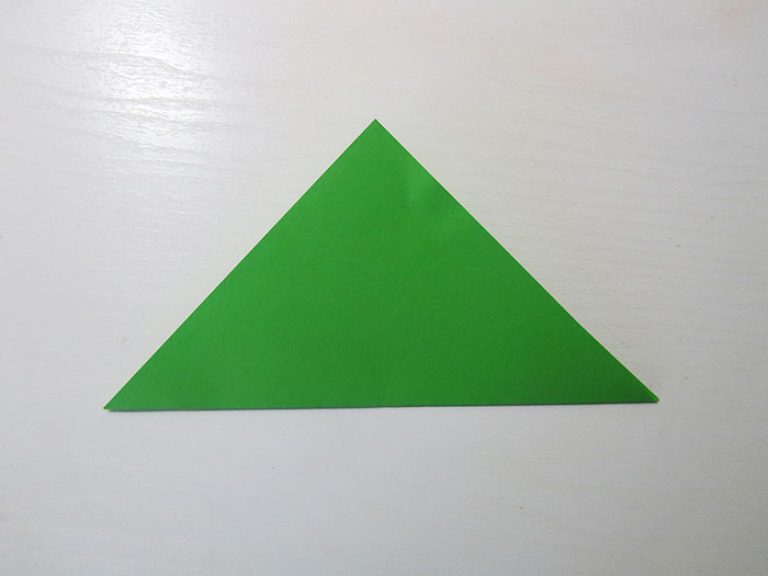
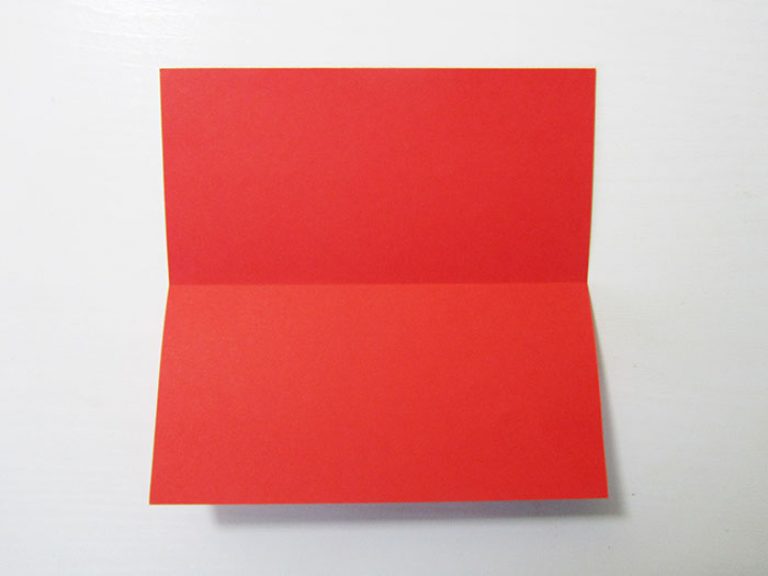
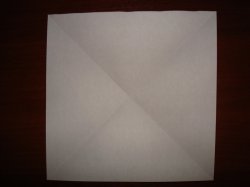
Step 2. Fold it in half diagonally.
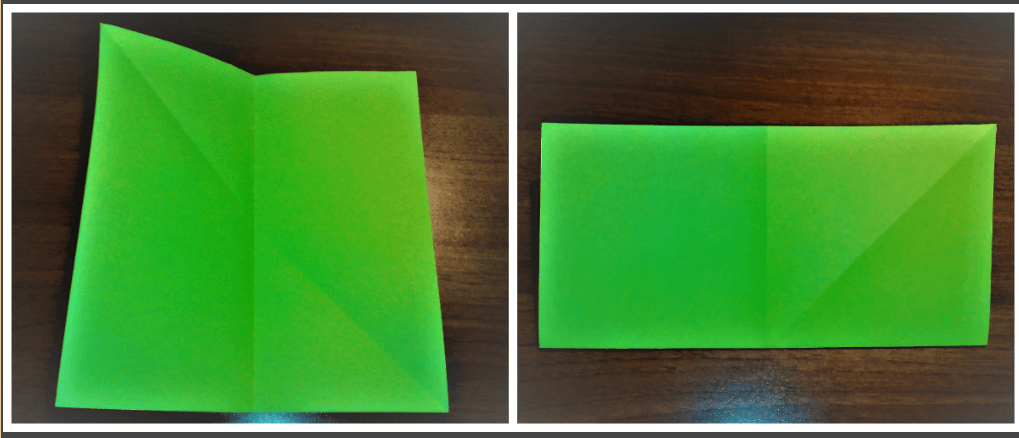
Step 3. Unfold and fold in half.
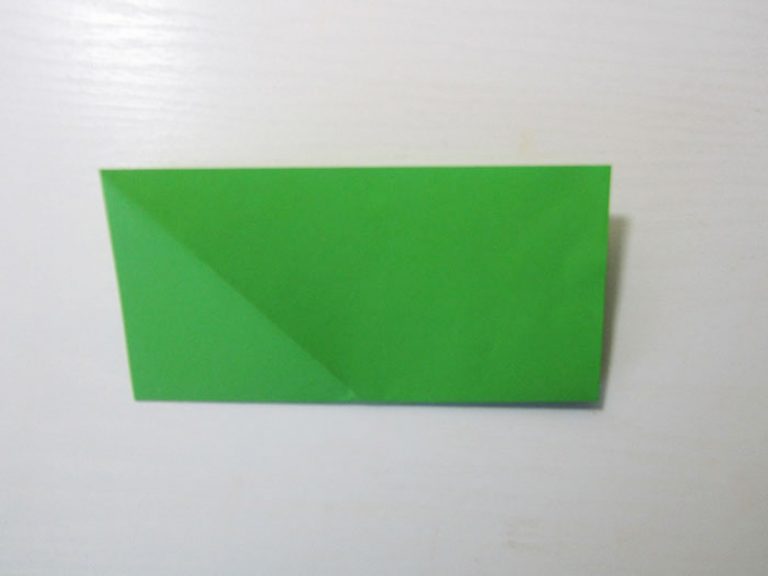
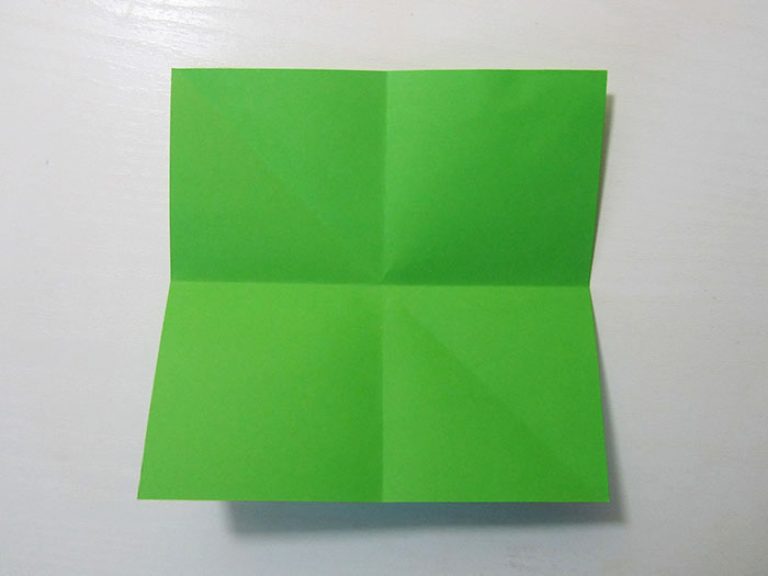
Step 4. Unbend again.
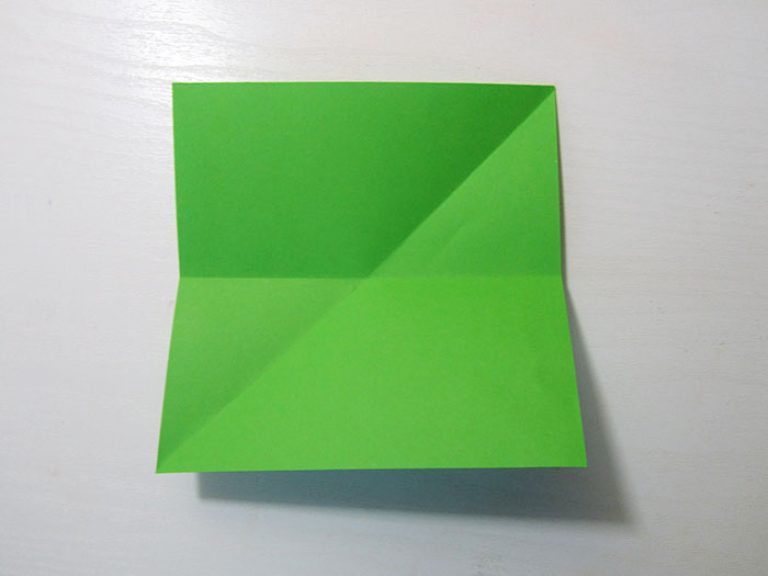
Step 5. Fold in half the other way.
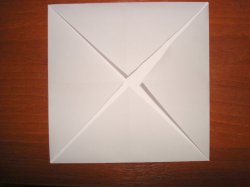
Step 6. Unbend. The result is these additional lines.
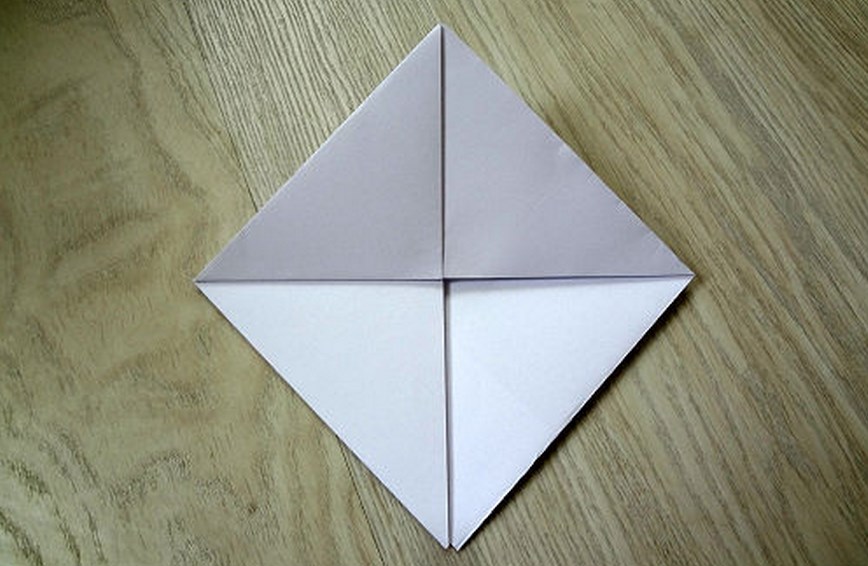
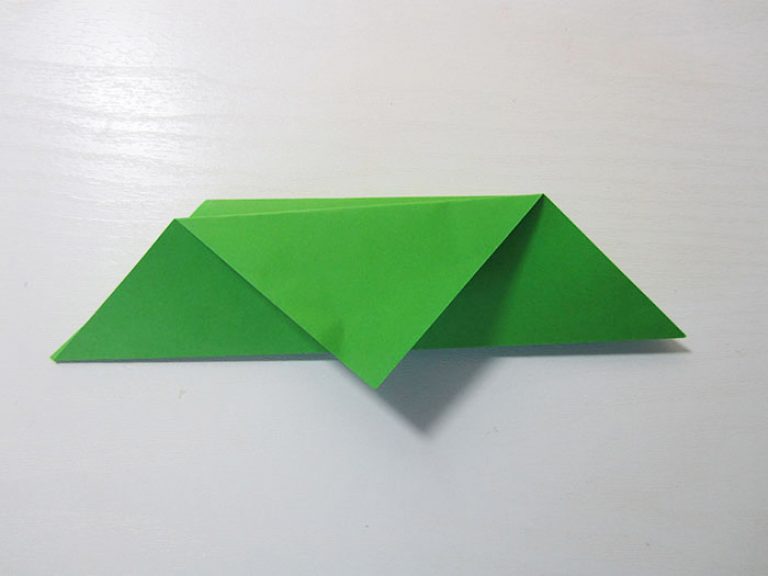
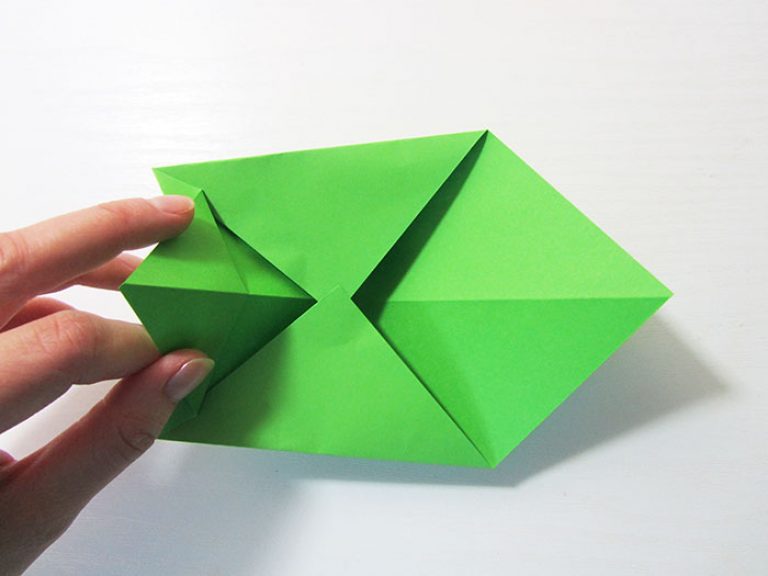
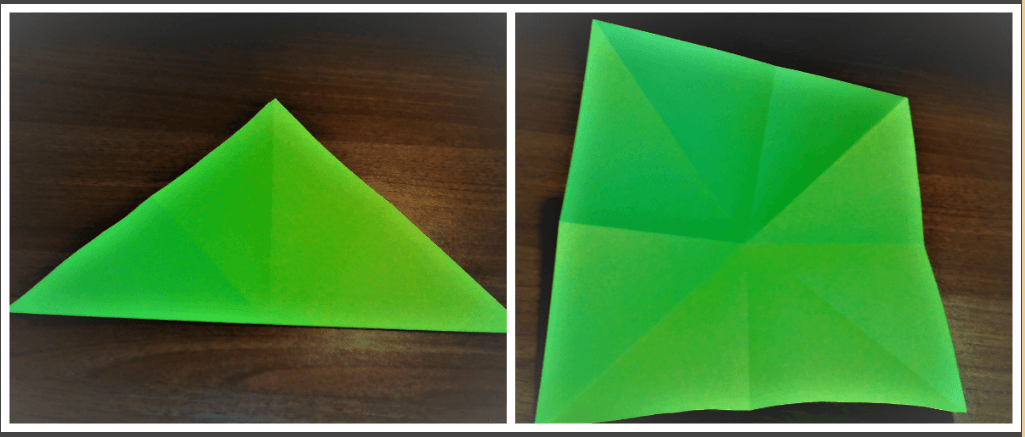
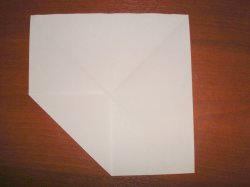
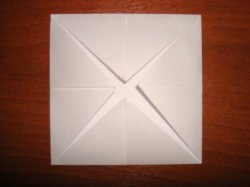
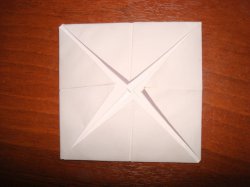
Step 7. Now fold the corners towards the center on those squares that do not have a fold line.
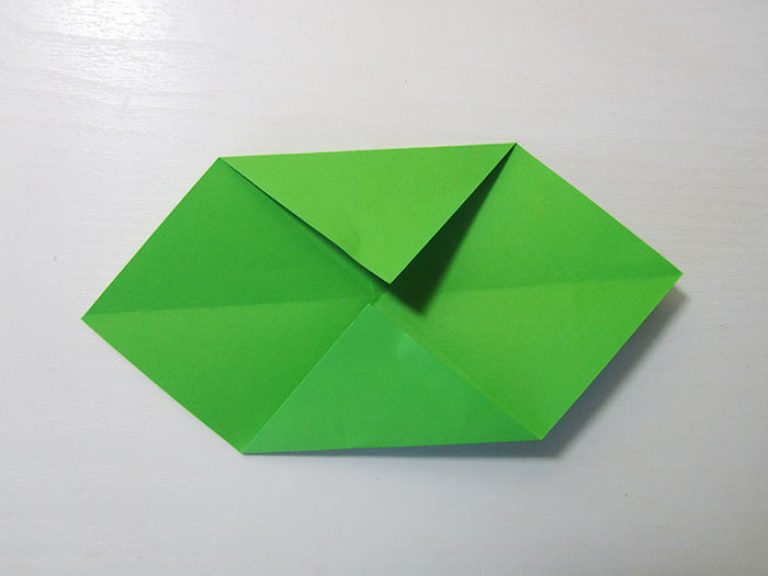
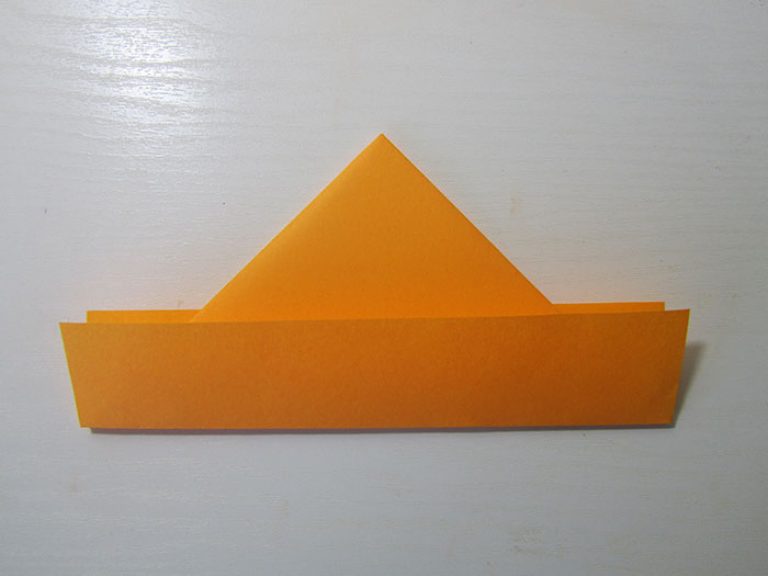
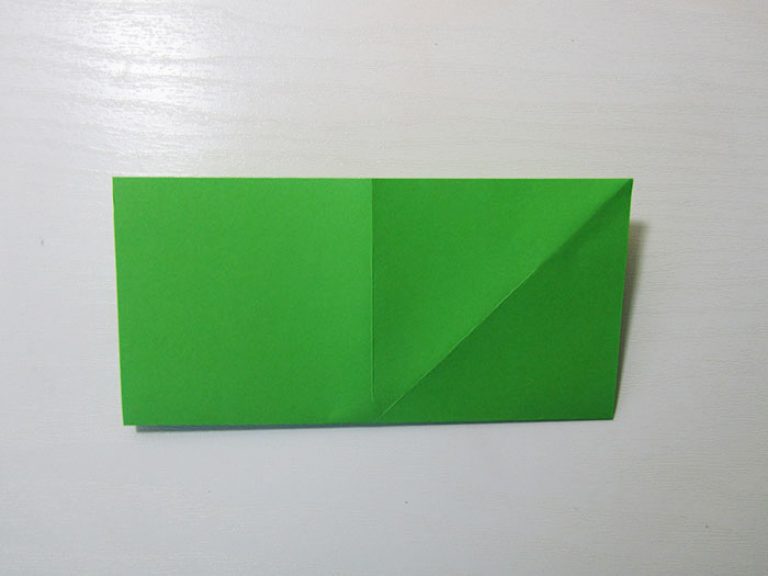
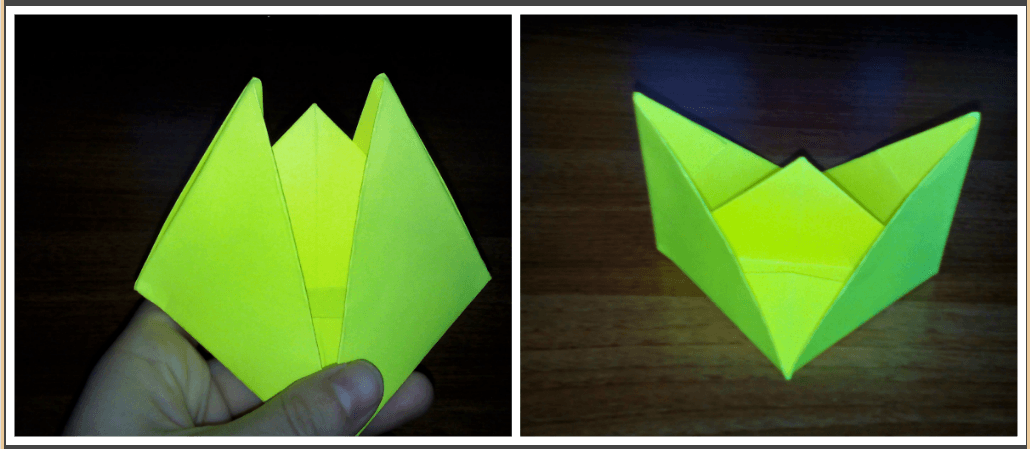
Step 8. Fold the shape in half.
Step 9. Accelerate the workpiece.
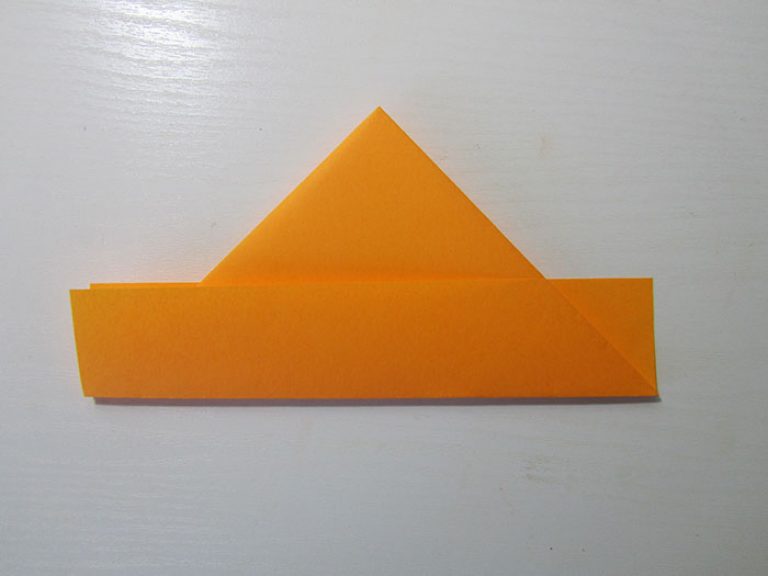
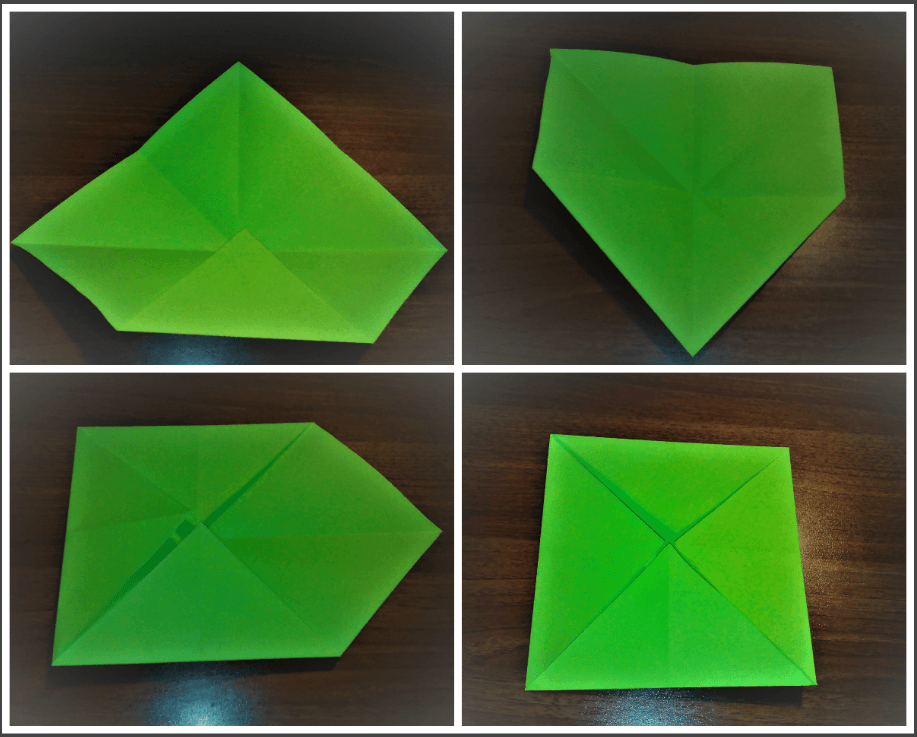
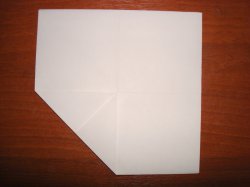
Step 10. Fold the left corner towards the center.
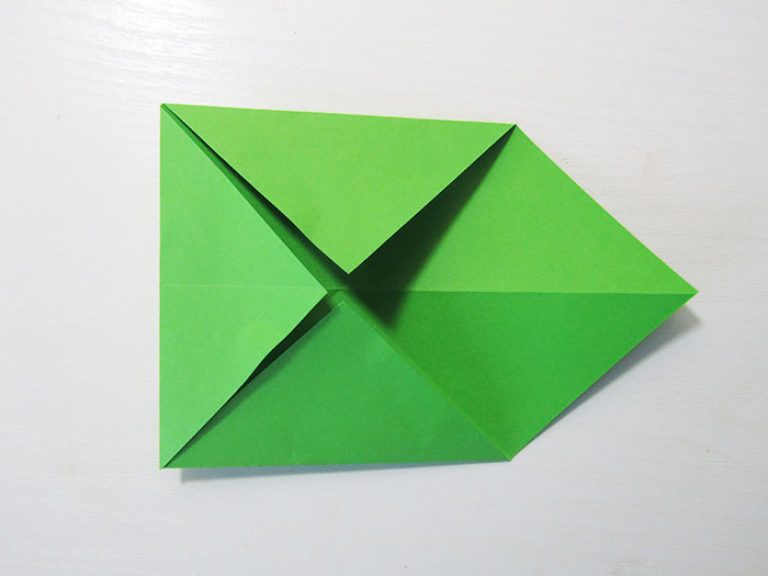
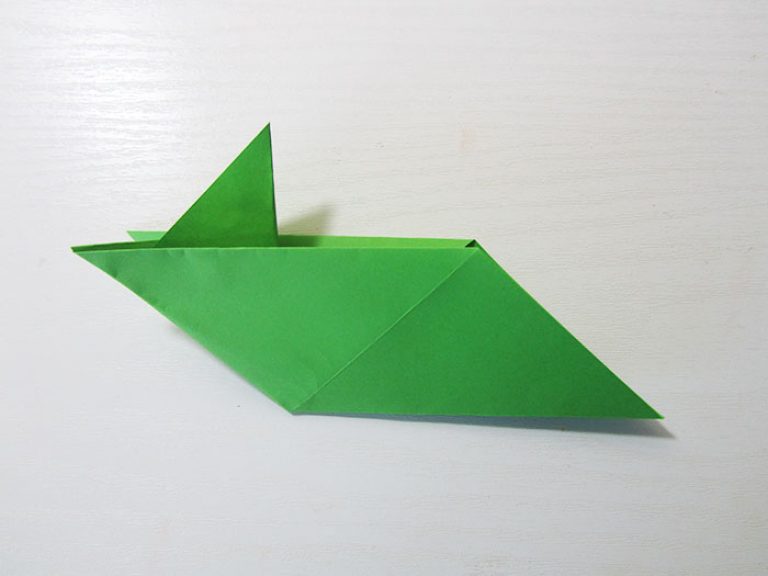
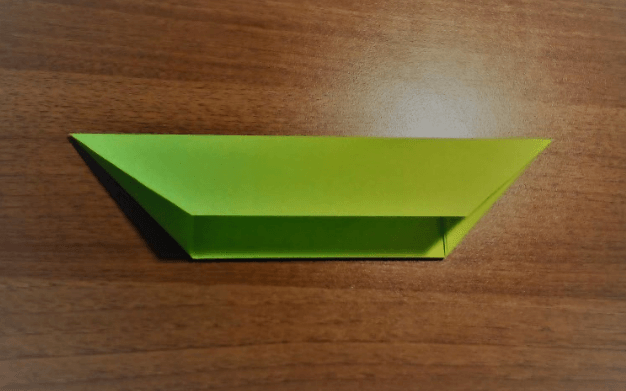
Step 11. Bend the left edge slightly to the side.
Step 12. Now fold the left corner inward.
Step 13. It should look like in the photo.
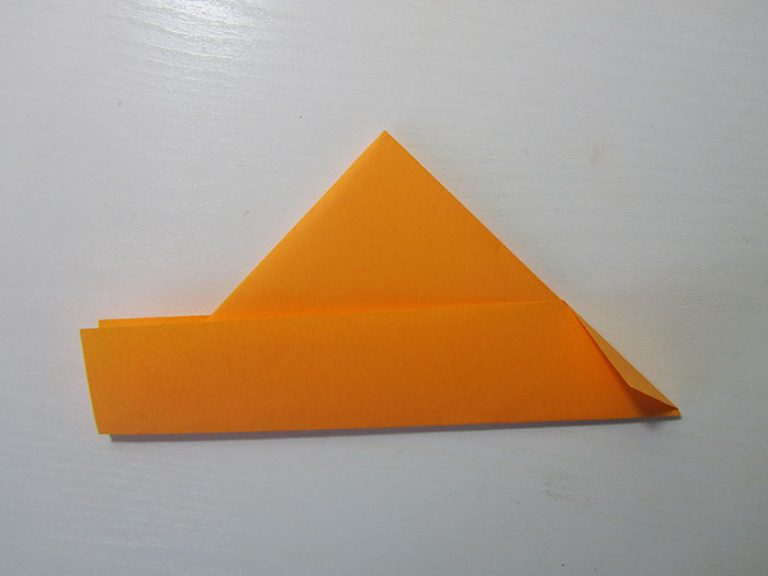
Step 14. Now fold the right corner towards the top.
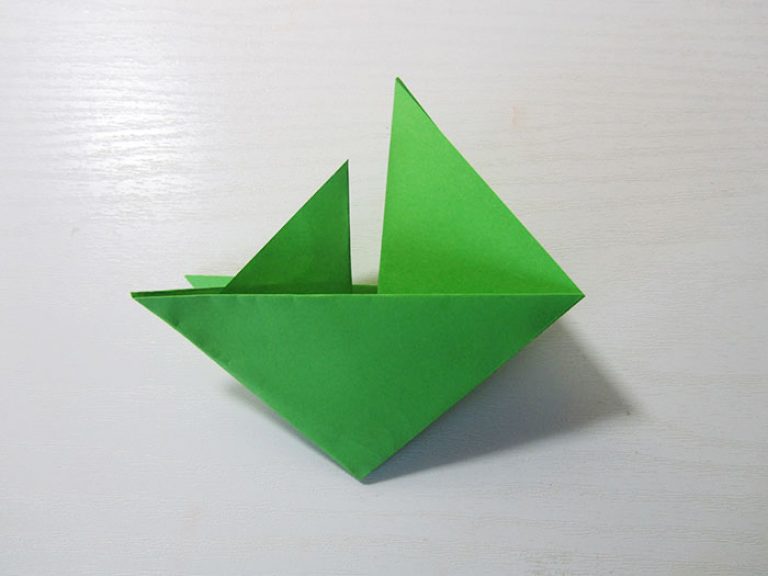
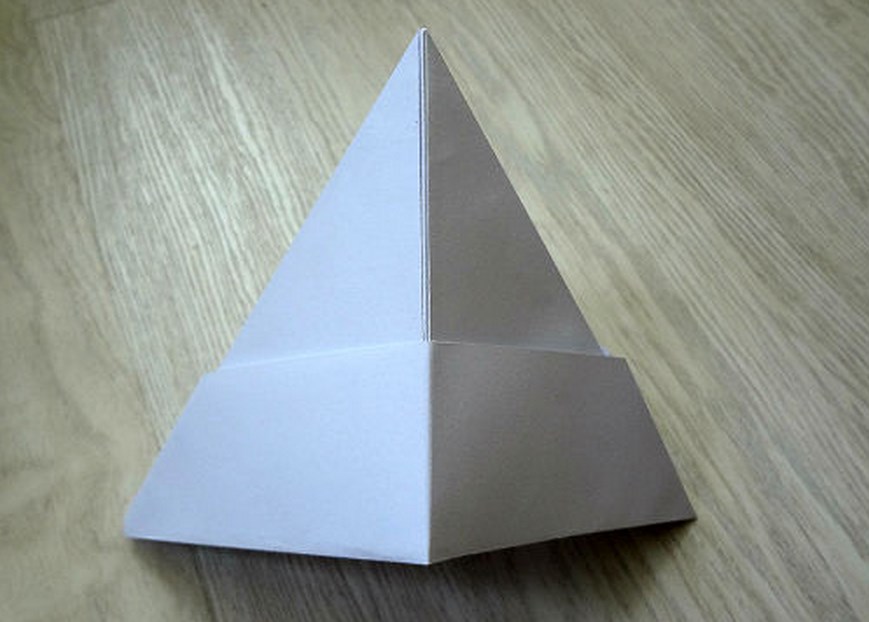
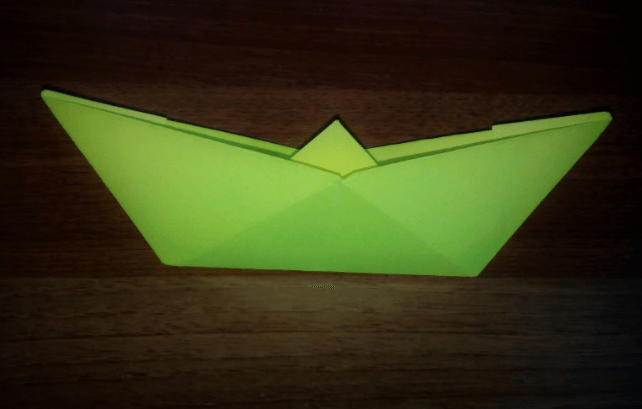
Step 15. Fold the bottom center corner up.
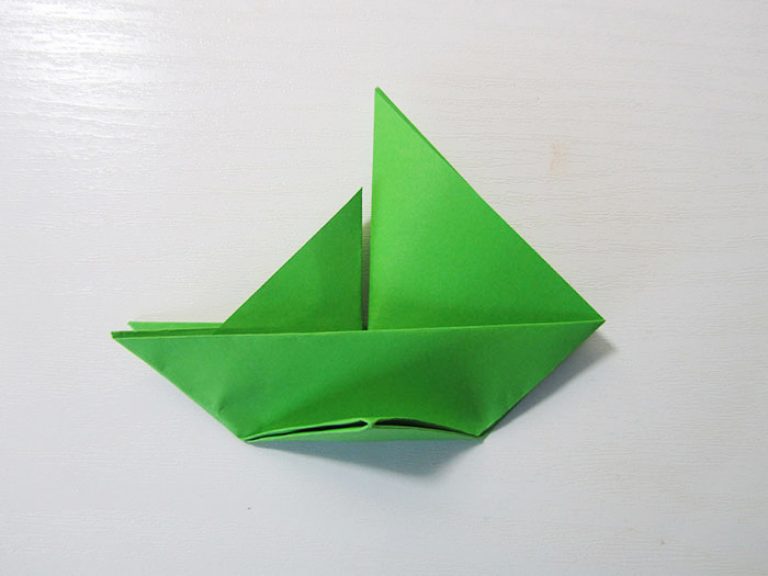
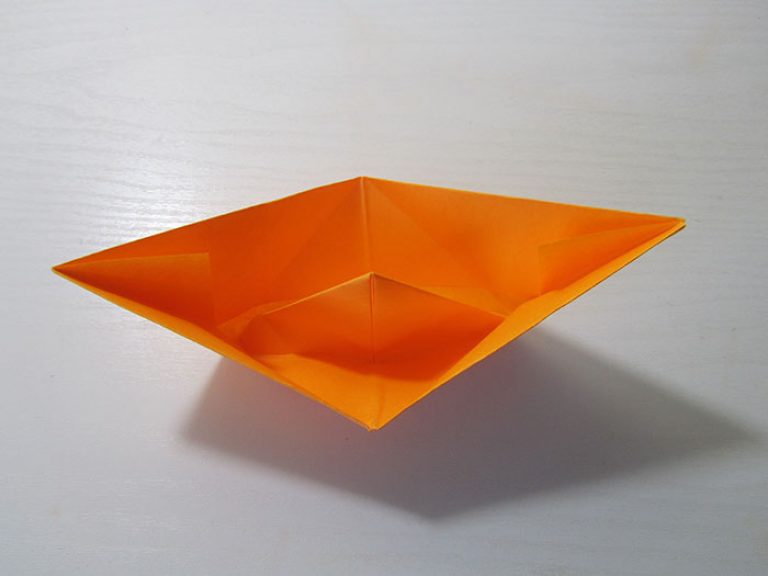
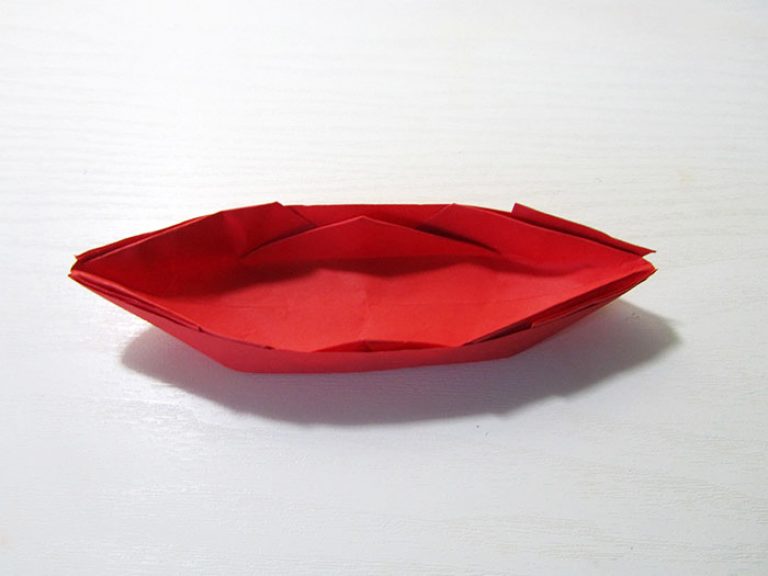
Step 16. This is how you get a sailboat. It turns out that it can be done quite simply. This boat can’t swim, but in any case it looks good on a table or bedside table.
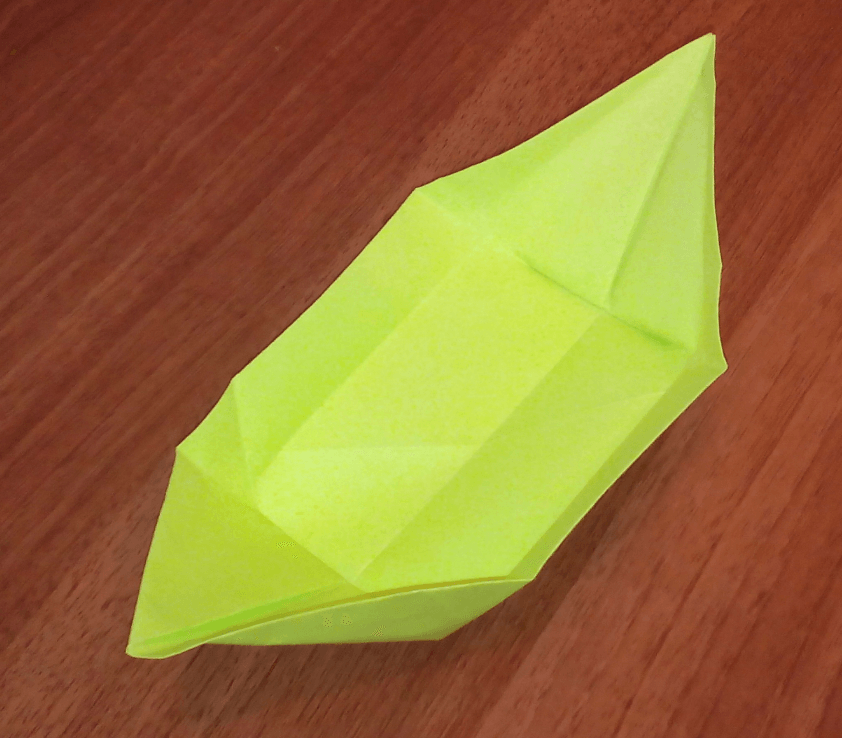
Master class “Boat using origami technique”
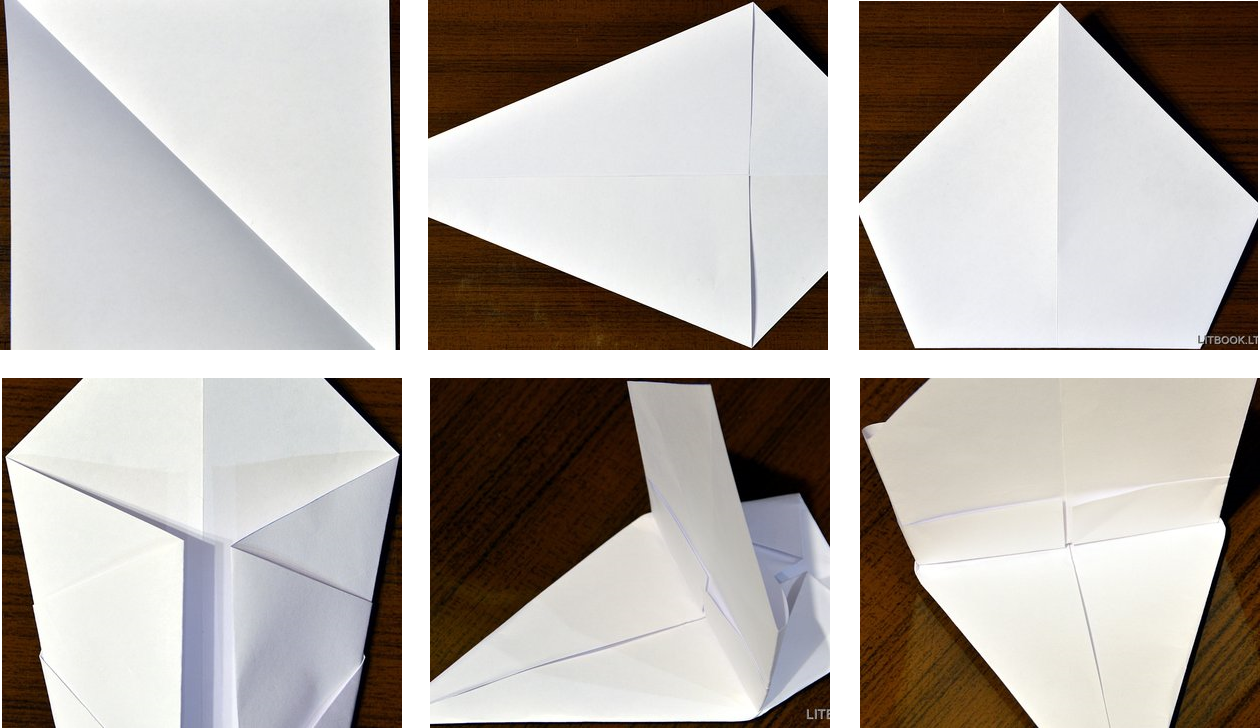
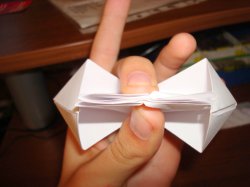
In this master class I will show you how to make an interesting boat using the origami technique.
This is a rather unconventional method that will require some sleight of hand. But as a result, you will get a wonderful boat that also floats great. And by the way, it holds up on the water much better than the first version of the boat.
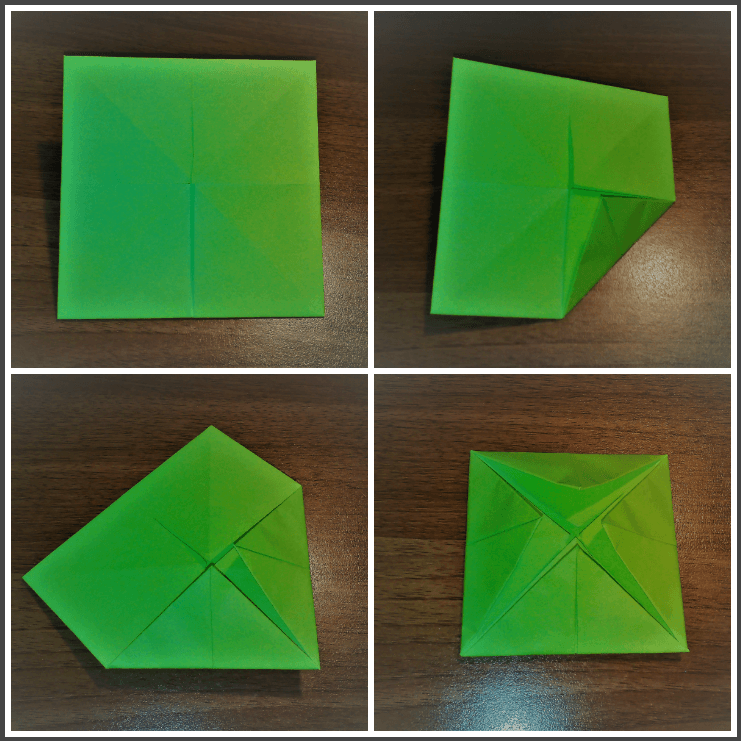
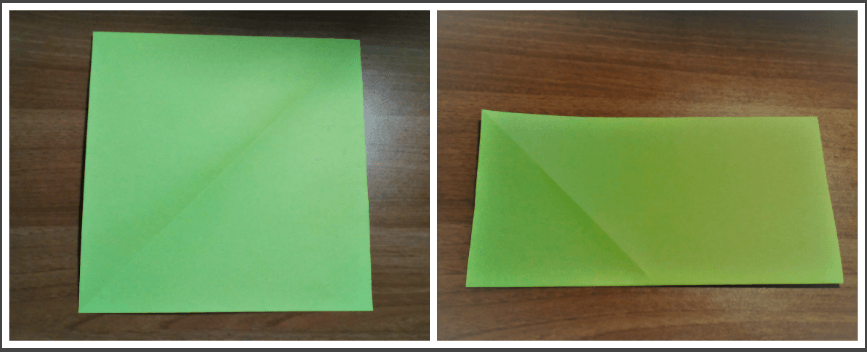
Step 1: Take a square piece of paper.
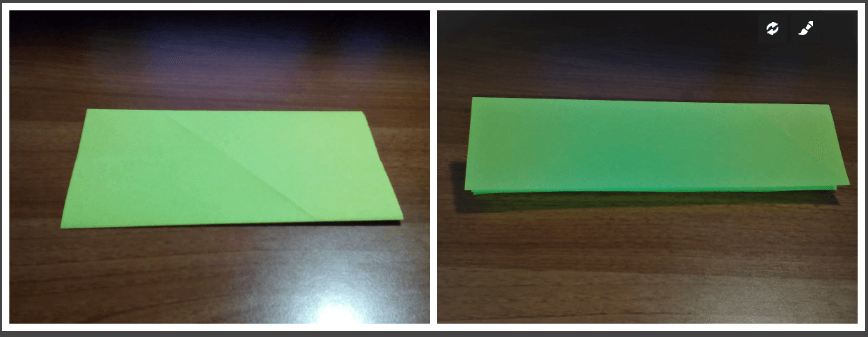
Step 2: Fold it in half.
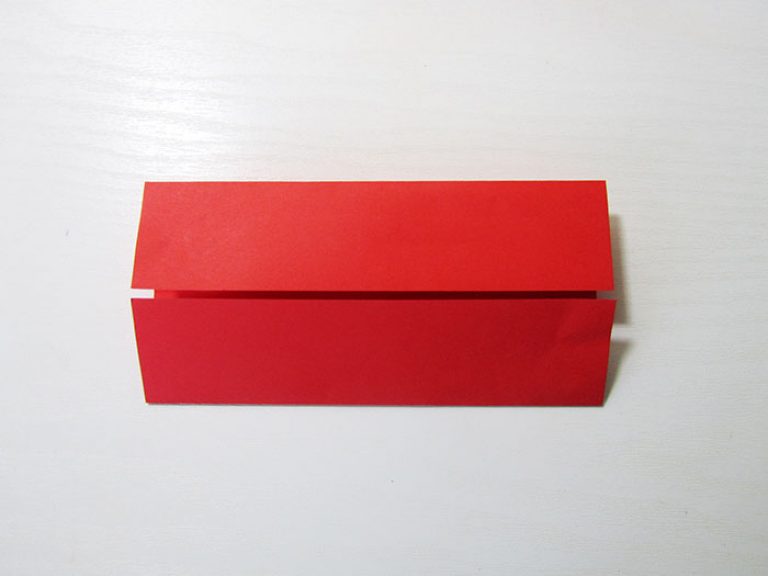
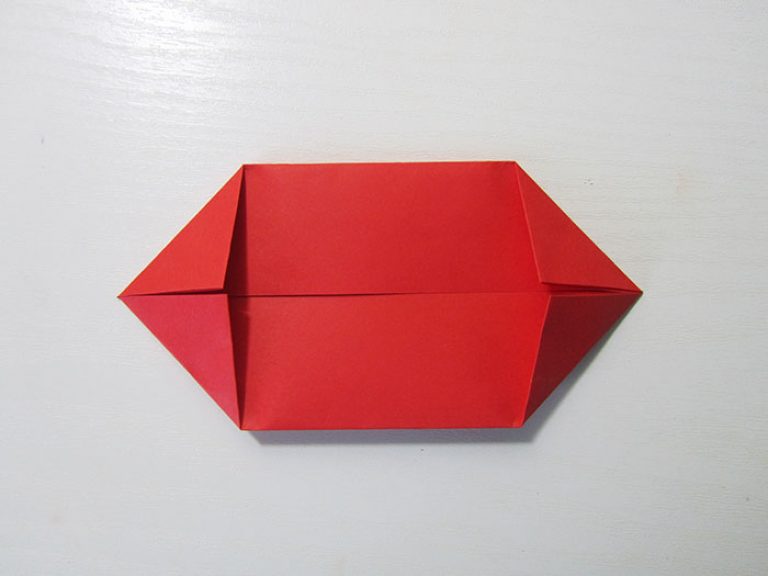
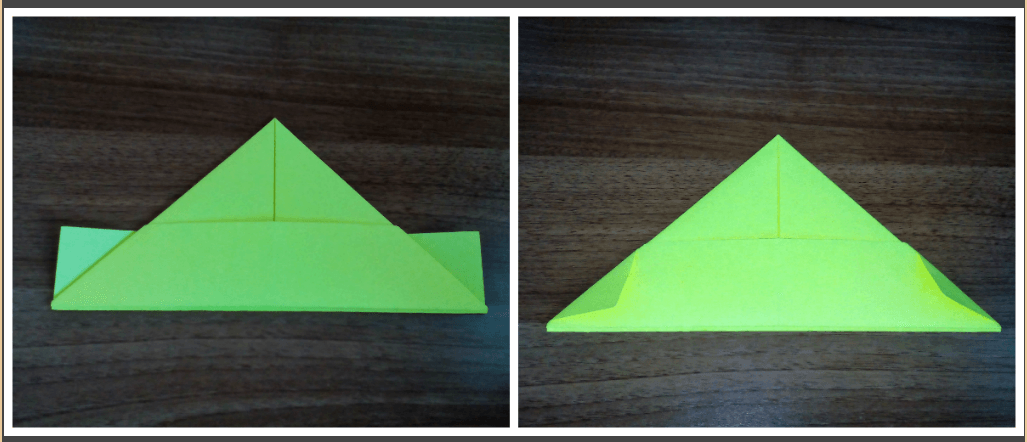
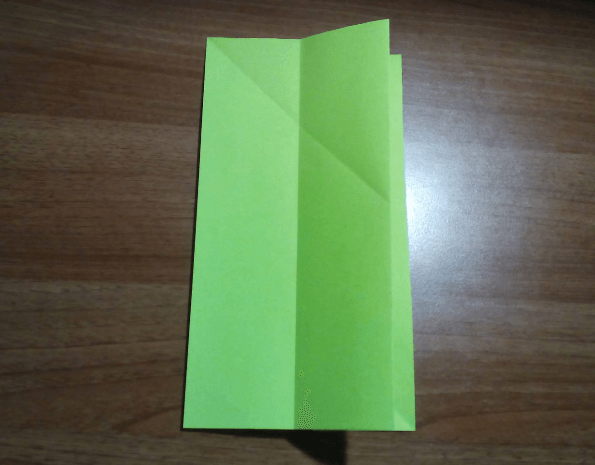
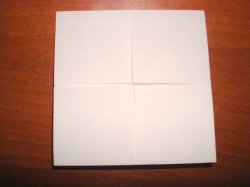
Step 3. Bend each side towards the middle.
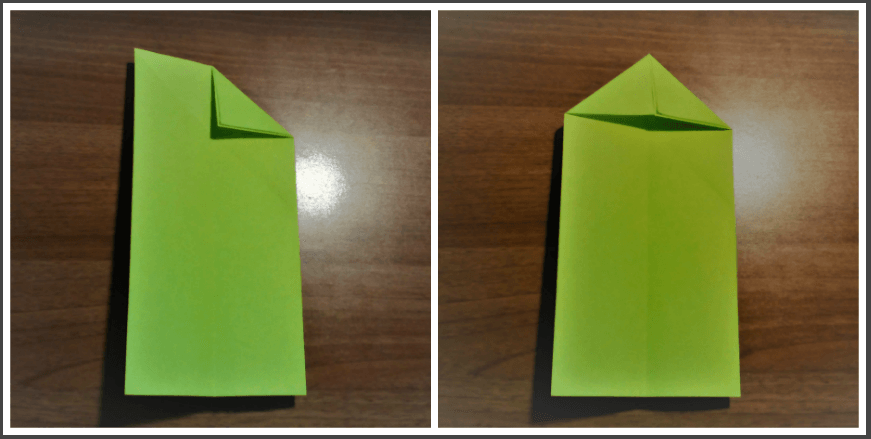
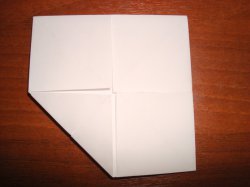
Step 4. Fold the two corners on the right towards the center.
![]()
Step 5. Also bend the two corners on the left towards the center.
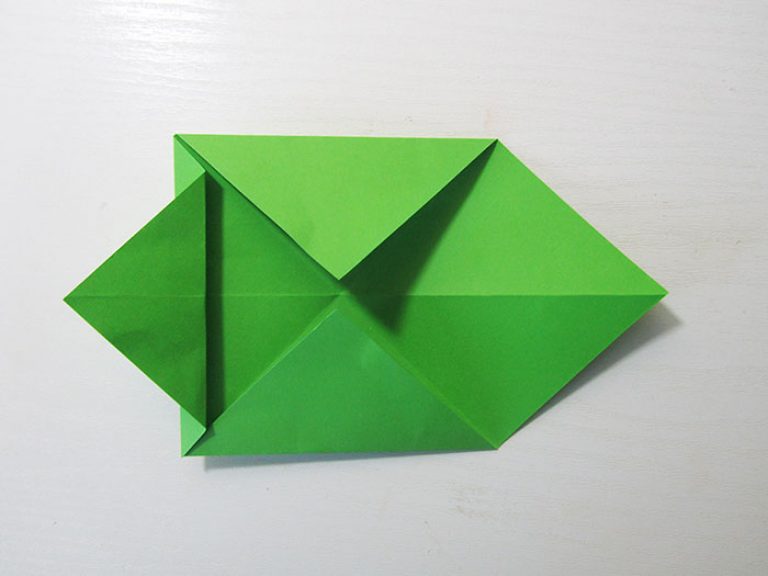
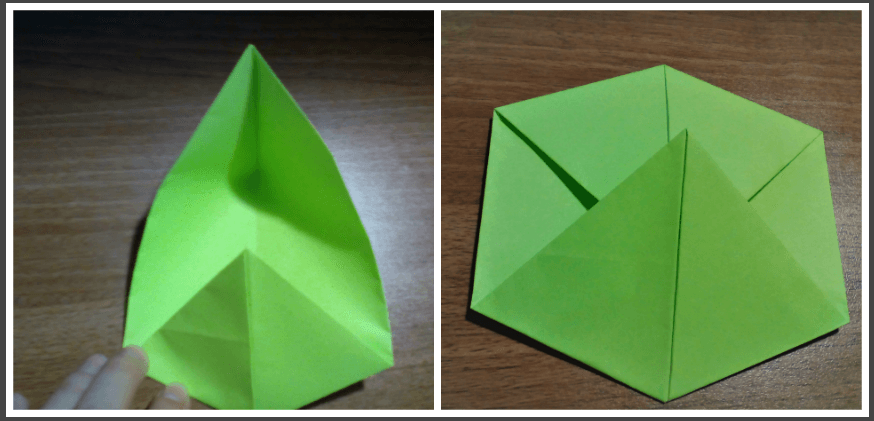
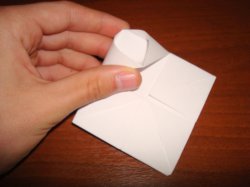
Step 6. Now fold the bottom left corner towards the center.
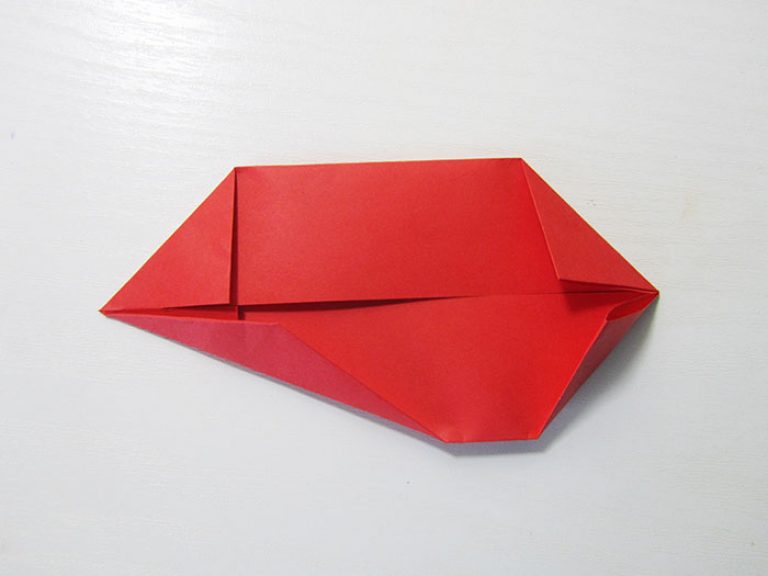
Step 7. Fold the other three corners in the same way.
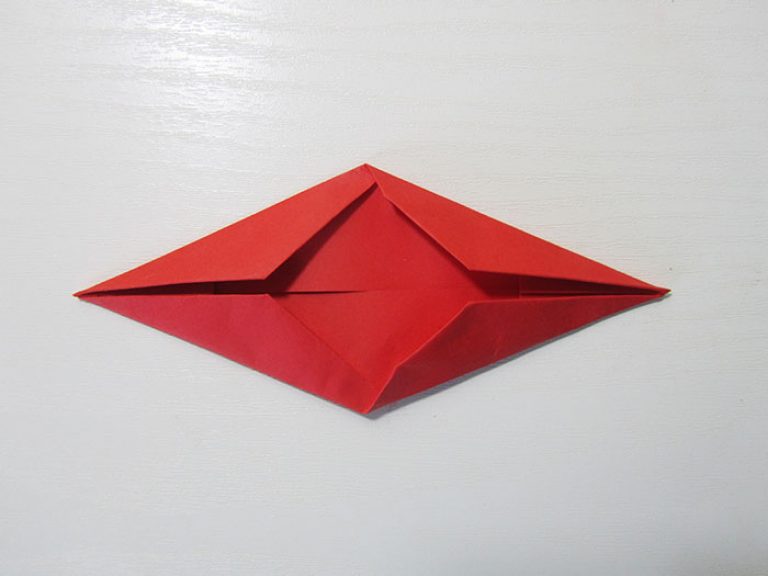
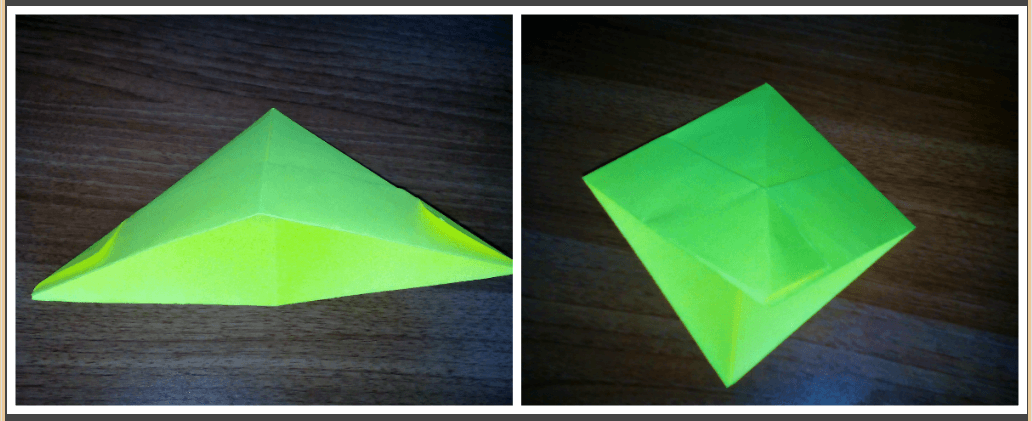
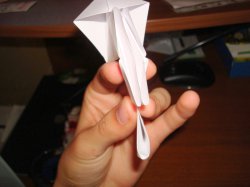
Step 8. Now fold the bottom corner of the paper blank towards the center.

Step 9. Do the same with the top corner.
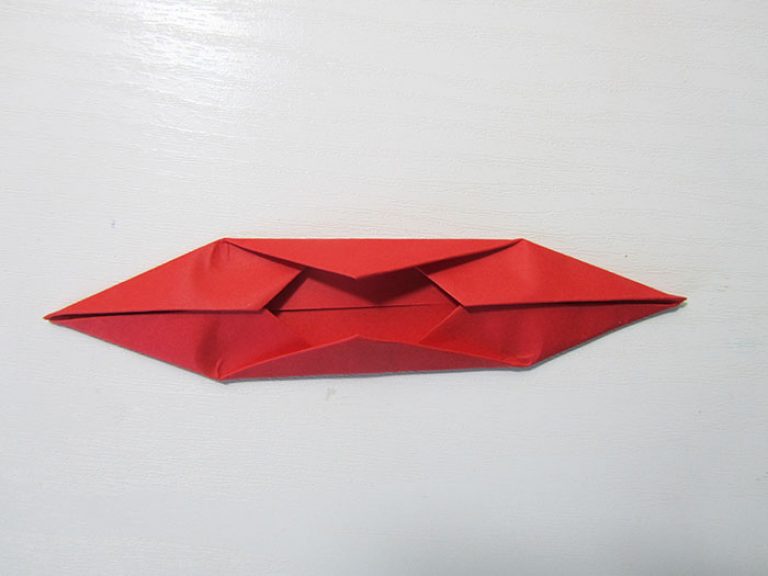
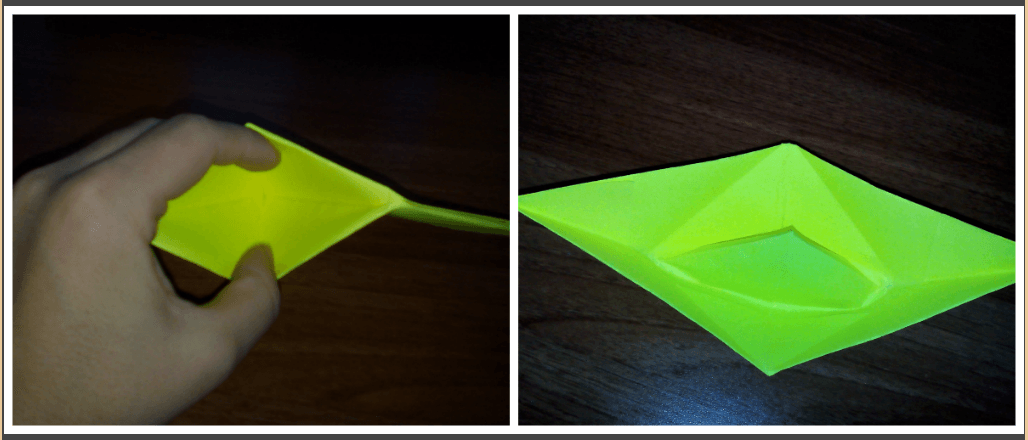
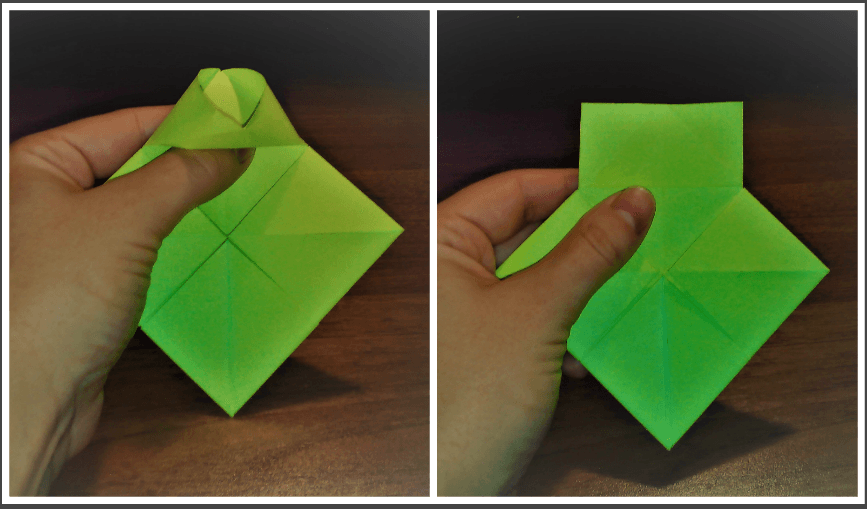
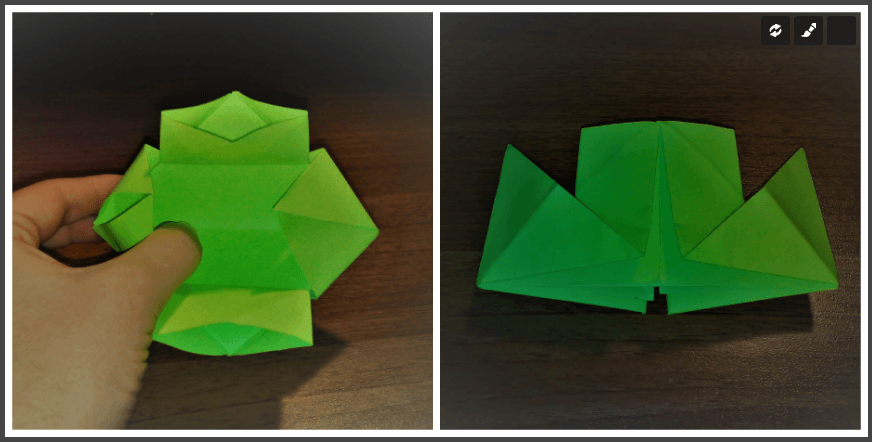
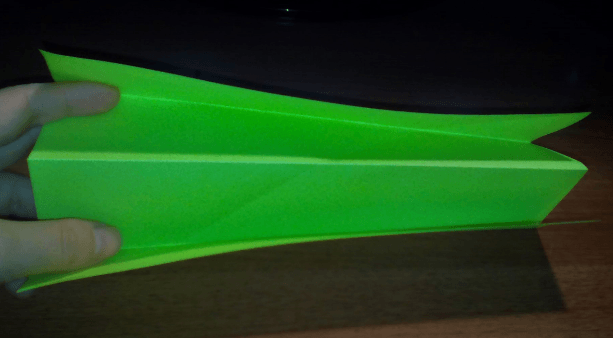
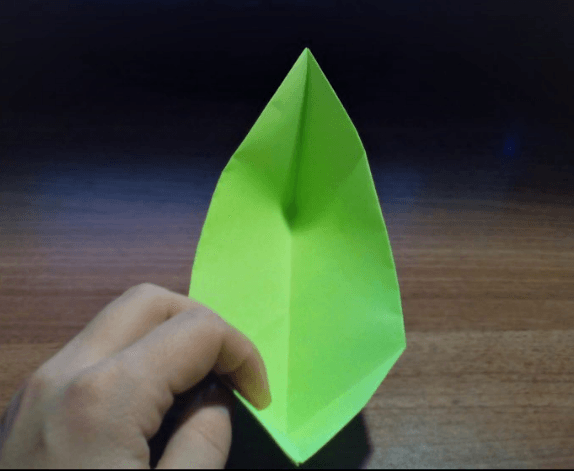
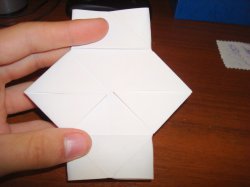
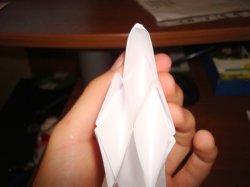
Step 10. Now the most difficult moment in this craft. Begin to unbend the workpiece from the center outward.
Step 11. This is what it looks like in the process with reverse side. It may be difficult to do this carefully at first, but it will definitely work out the second time!
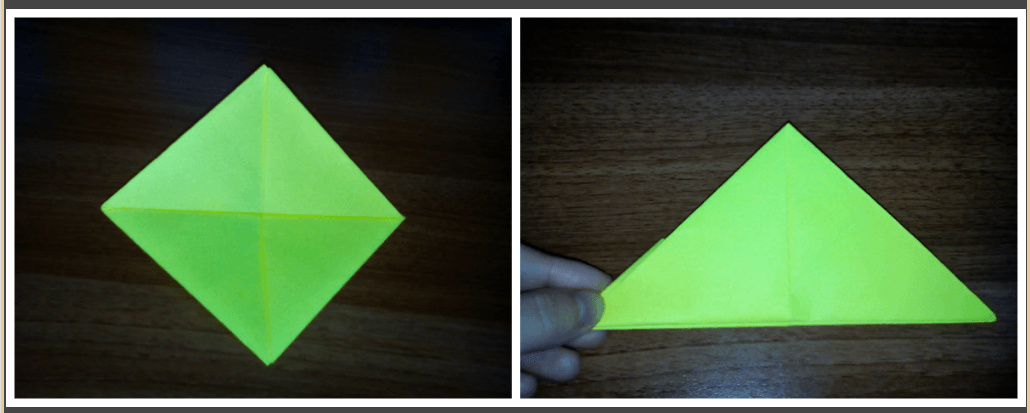
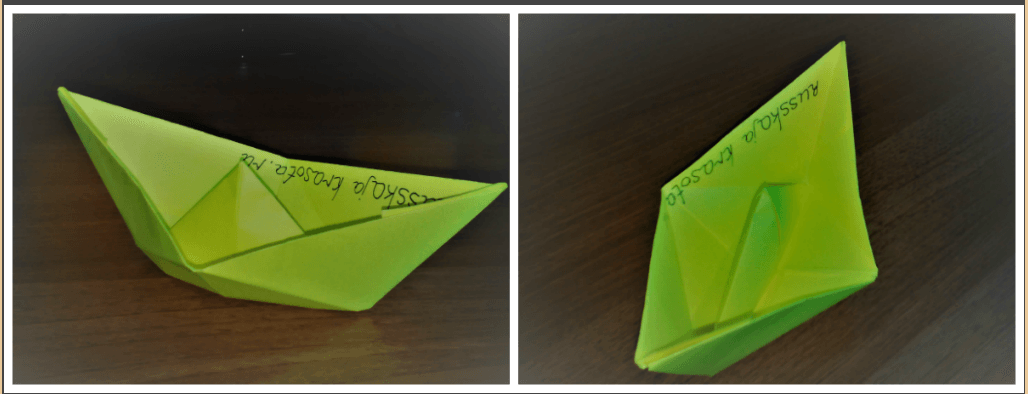
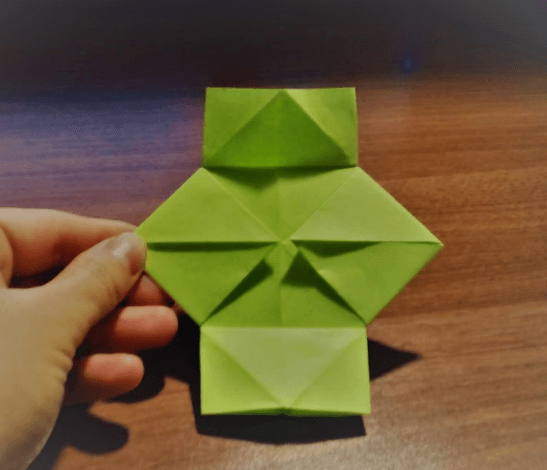
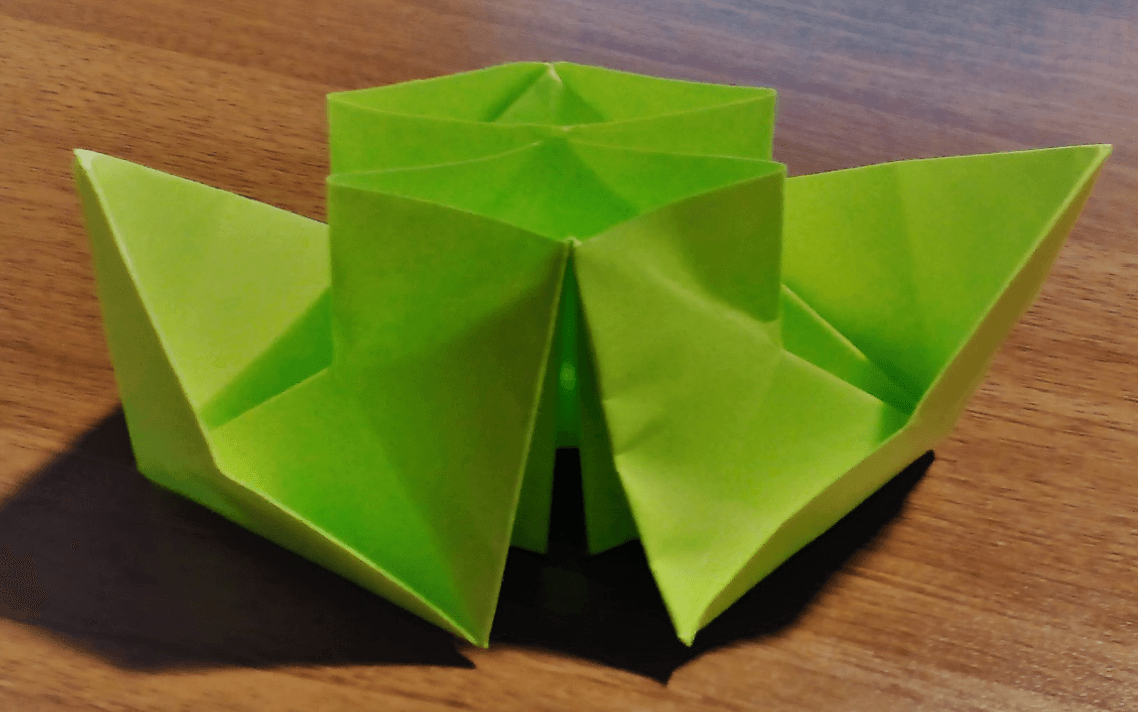
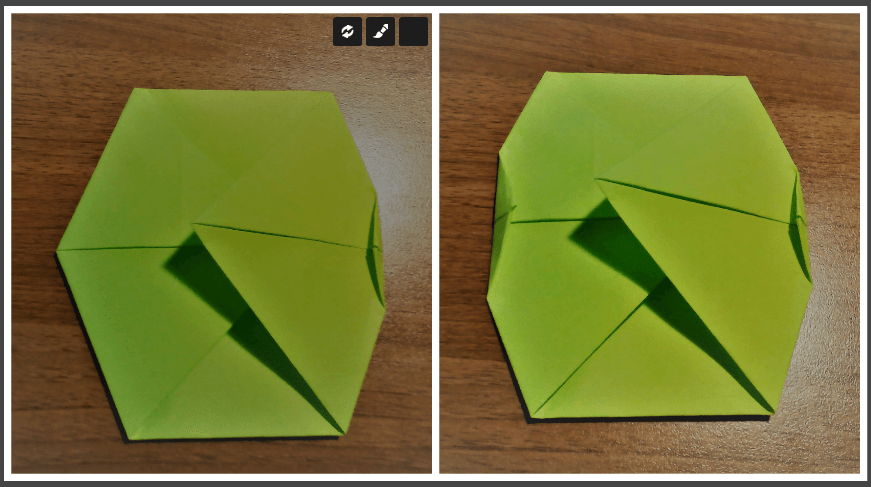
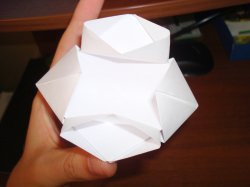
Step 12. Now touch up all the kinks.
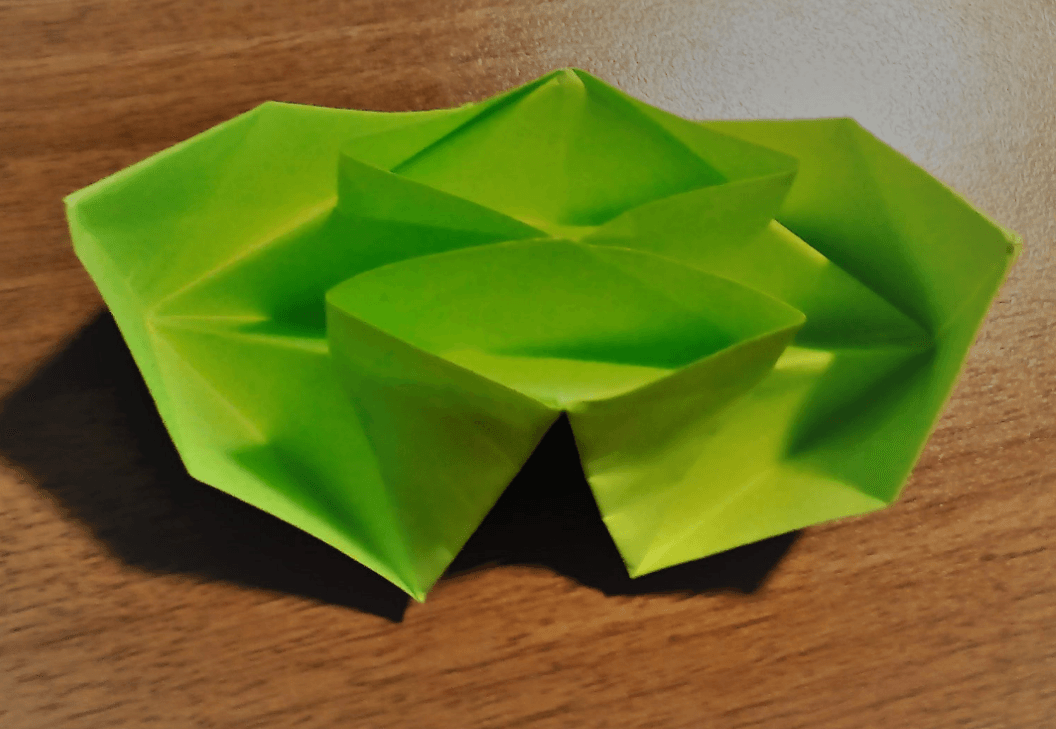
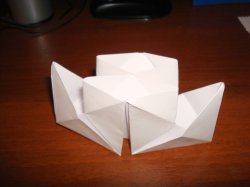
Step 13. This is the boat you end up with.
And here is our entire navy.
Now you know how to make a paper boat, and step by step photos will definitely help you in the process of making it. Happy crafting!
Many children love to make various objects out of paper. In this article I will write and show how to make a boat out of paper. You can make different ships. I made three different options: a steamship with two funnels, a boat and a sailing ship.
A paper boat that floats well.
- To make such a boat, you will need an A4 sheet.
2. The sheet must be folded in half as shown in the photo. Further actions are already performed with a sheet folded in half.
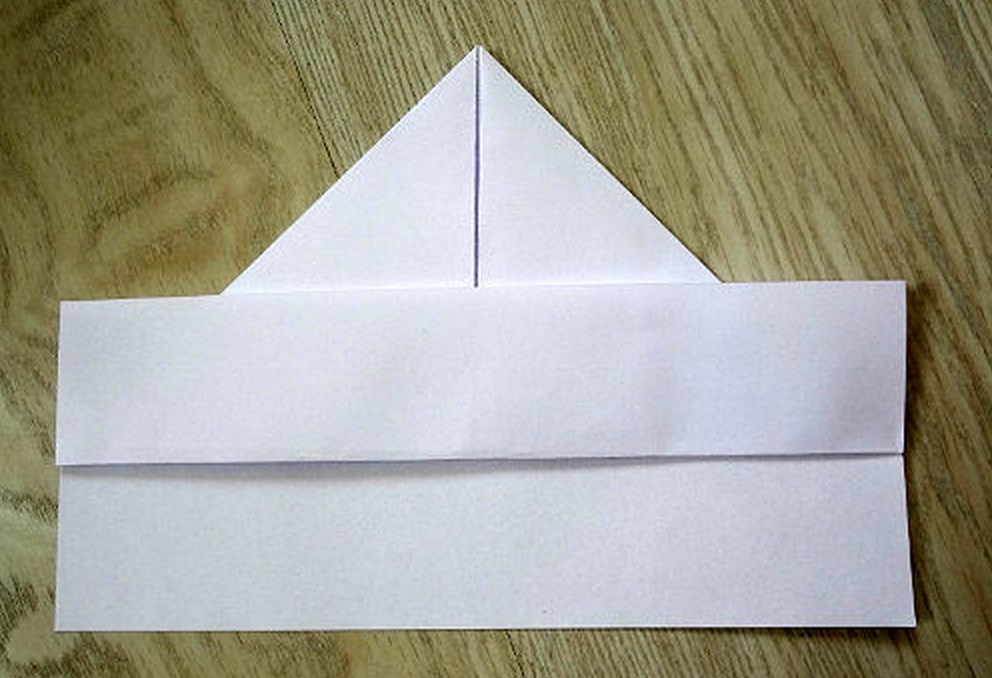
3. Once again bend the sheet in half so that it is clear where the middle is. Bend the two upper corners towards the middle.
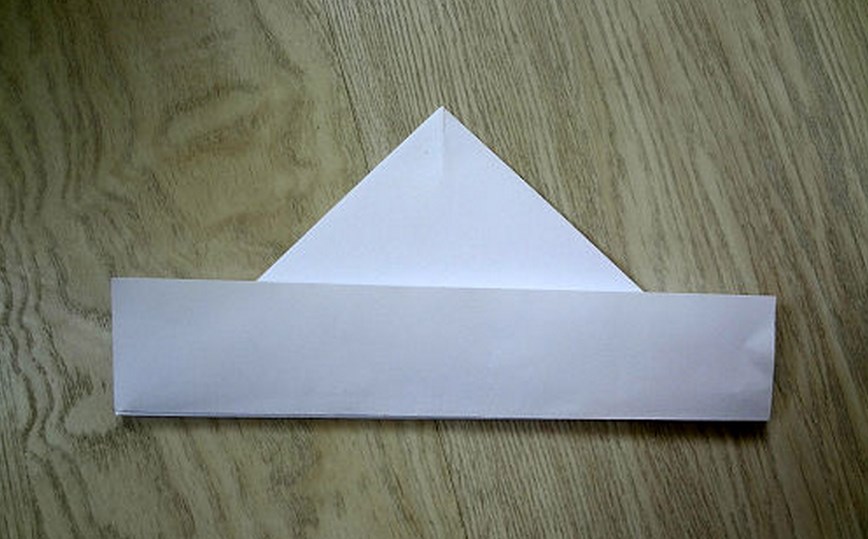
4. In the lower part, bend the resulting rectangles upward along the folded corners. First, one, then we turn the workpiece over and bend the other one up.
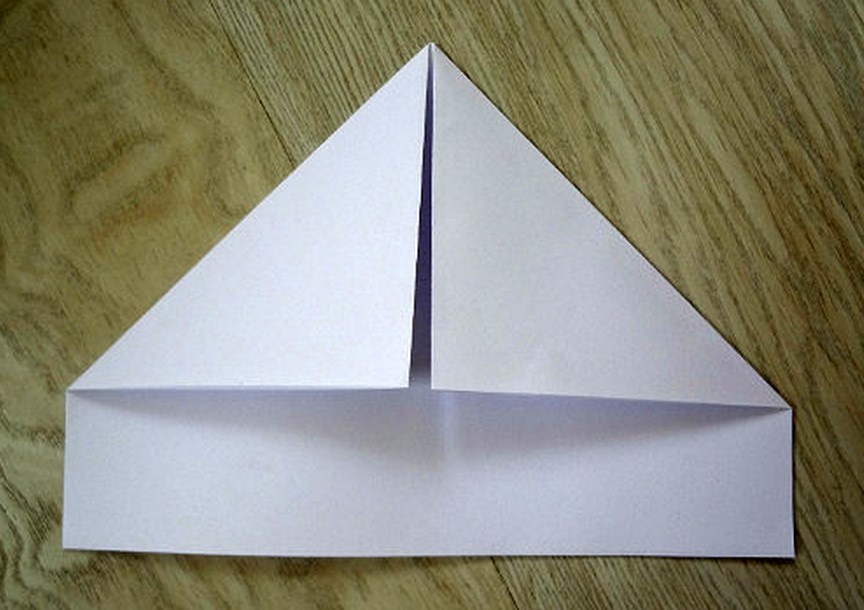
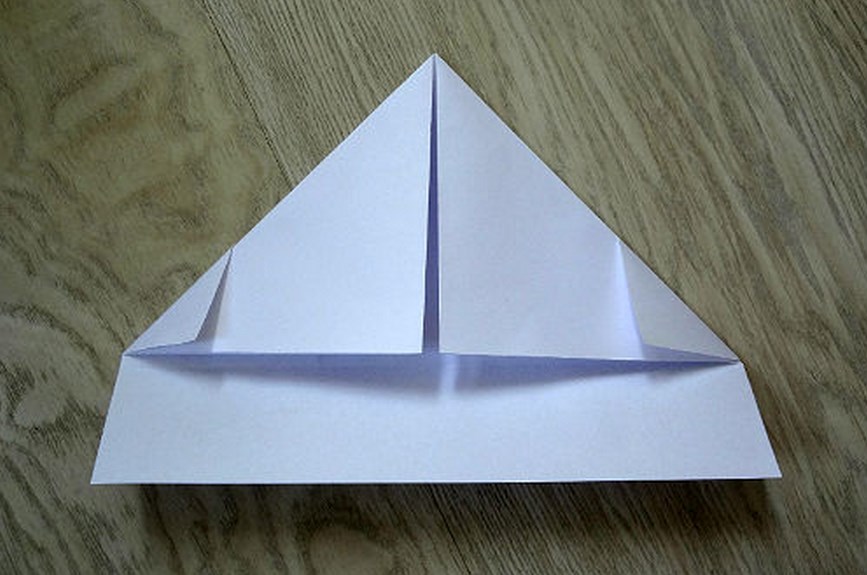
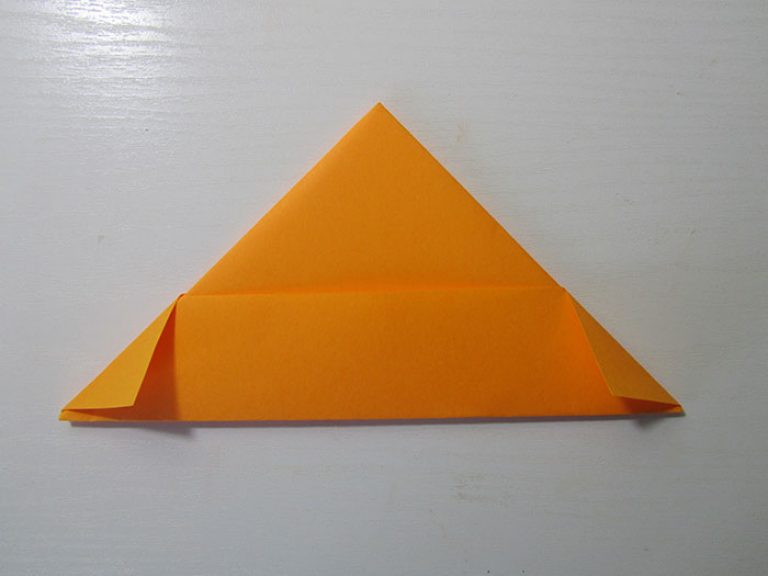
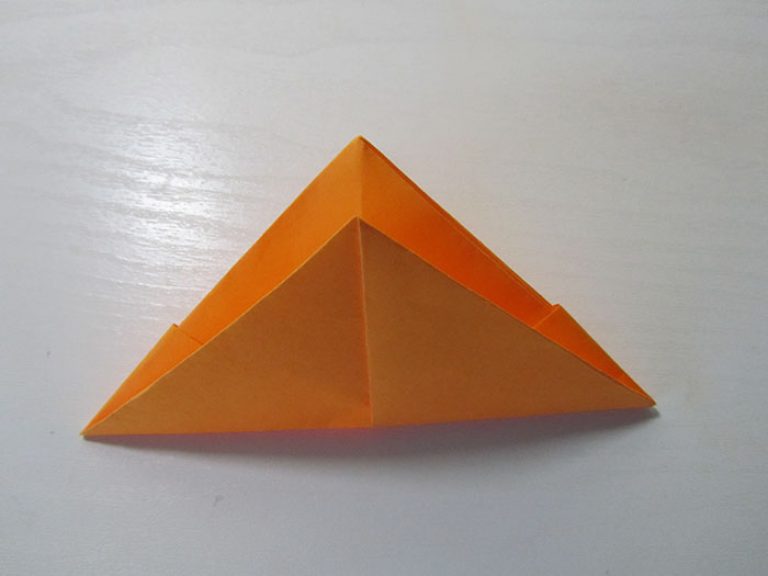
5. Place the workpiece as in the photo. Fold the triangular corners first from the top rectangle, then from the bottom. You will get a large triangle.
6. Open our triangle from below and bend it so that it turns out to be a square.
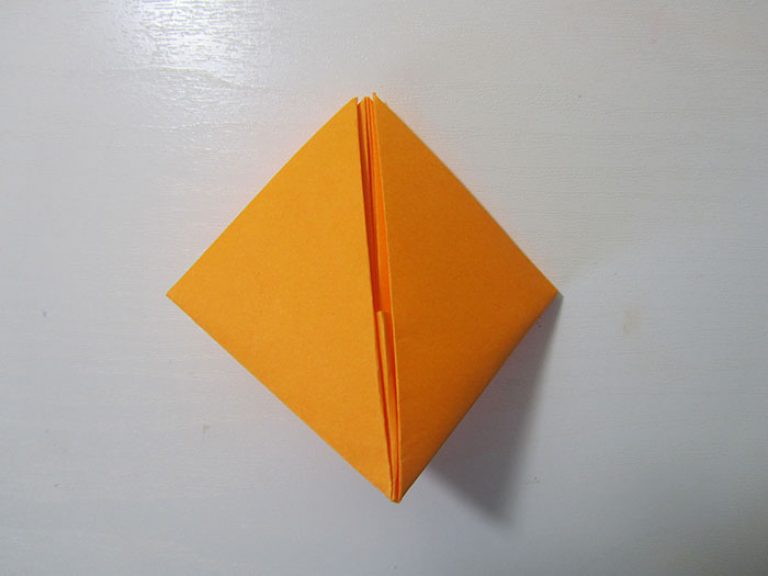
7. Where the square opens, take one corner and bend it upward. Turn over and bend the second square in half. It turns out to be a triangle.
8. The result is something like this.
9. We do the same as in point 6. Open the triangle from the bottom and bend it so that it turns out to be a square again.

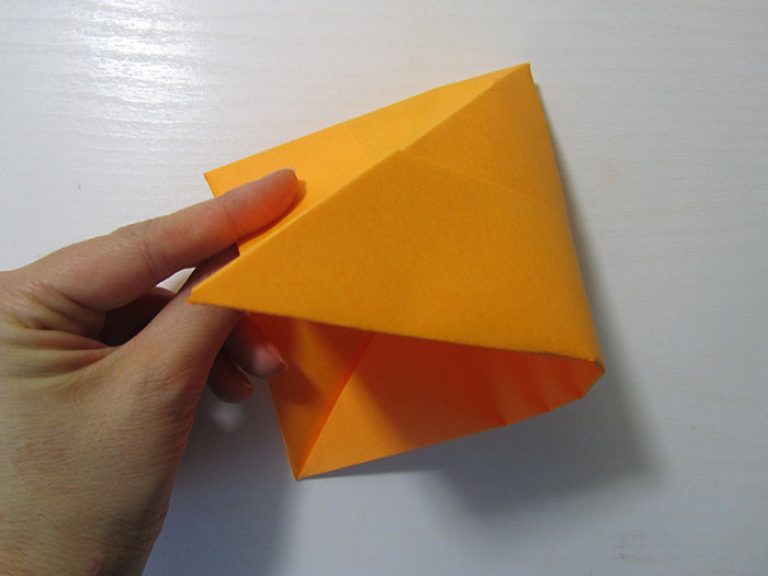
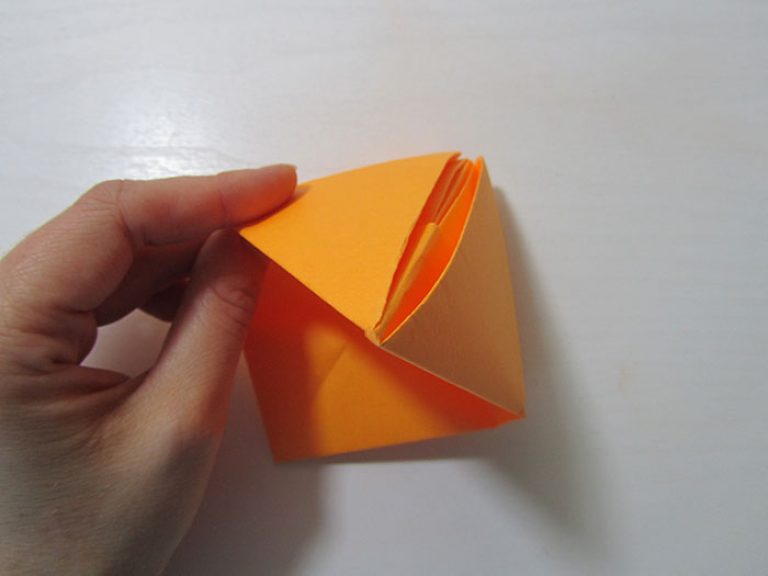
10. Now we pull the upper corners and open our boat.
11. This is how it turns out. Almost everything is ready.
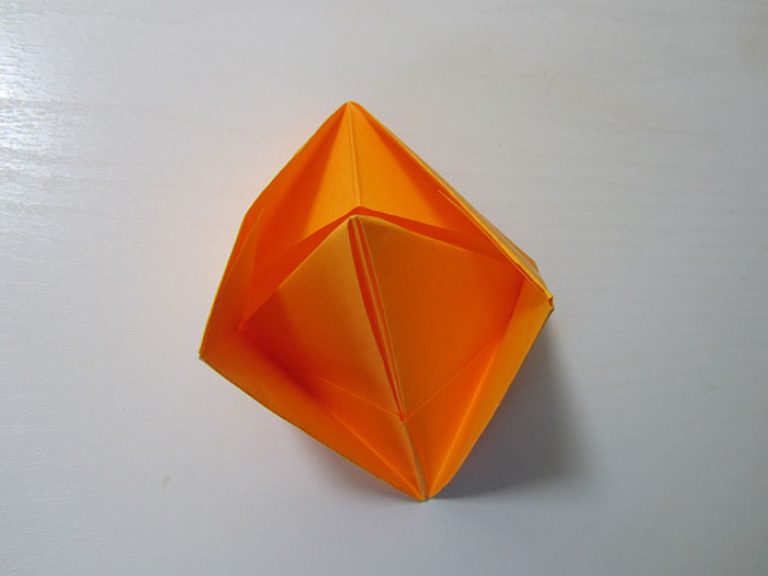
12. To make the paper boat stand better, open the base a little from the bottom.
13. You can set the ship sailing!
DIY paper steamship: step-by-step guide.
1. Making a steamboat with two pipes is very simple and quick. My 5 year old daughter quickly learned how to make such a boat. I’ve already made a lot of colorful steamers and launch them in a bathtub with Smurfs on board :)
For the steamer you will need a square sheet of paper. I made a square from a regular A4 sheet.
2. Now we bend our square in half lengthwise.
3. Once again we bend the square in half, but this time reproach it.
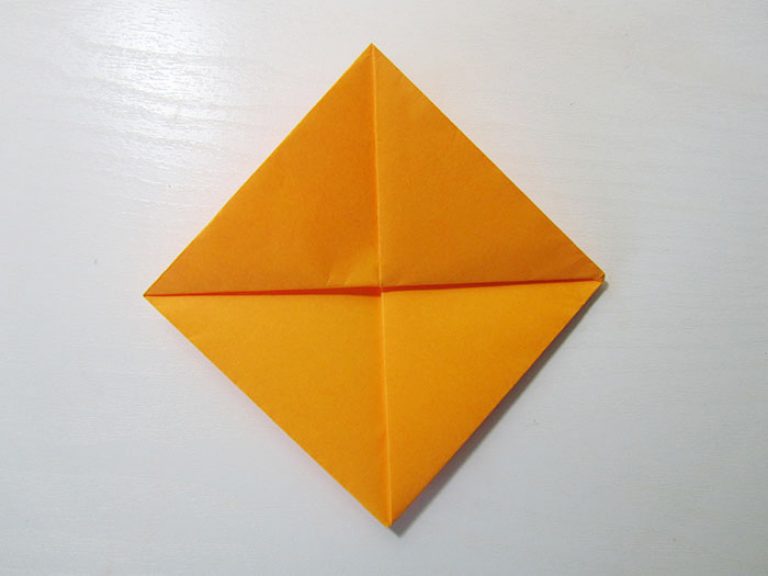
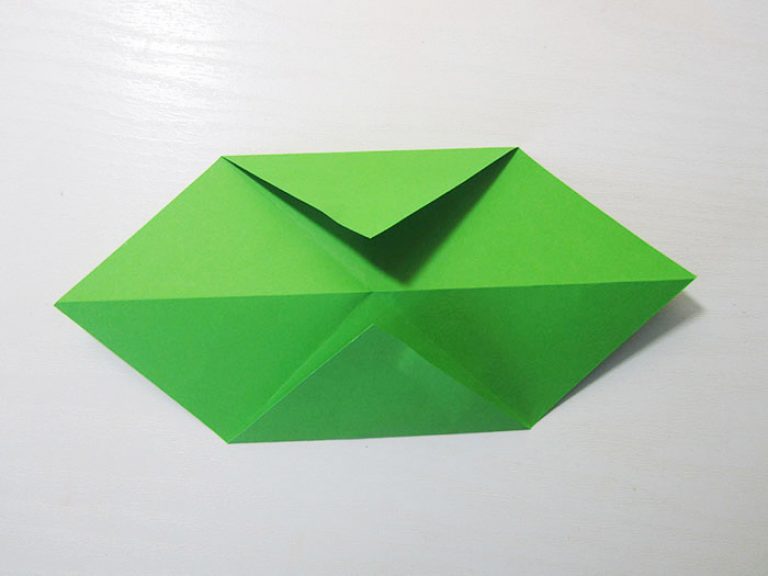
4. Bend the square diagonally in both directions. It turns out to be a square with four folds.
5. We bend each corner to the center one by one.
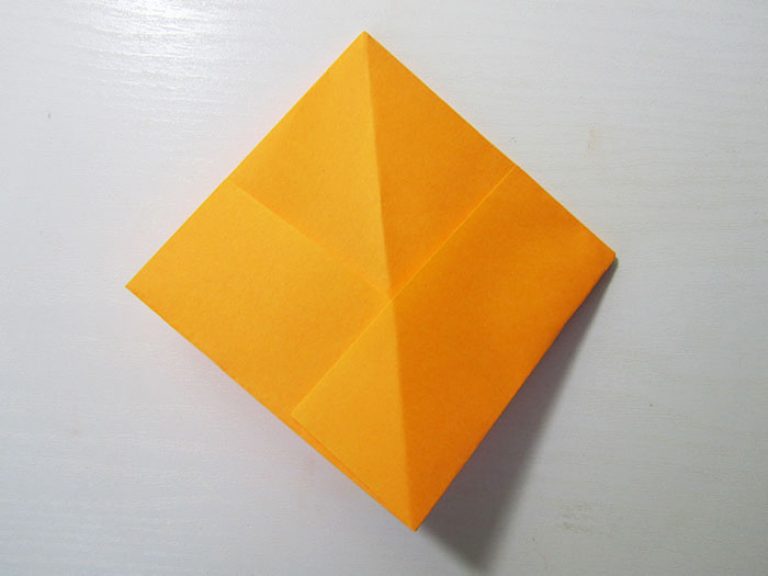
6. Turn the square over and again bend all four corners towards the center.
7. And again we carry out a similar procedure. Turn the square over and bend all four corners towards the middle.
8. Turn the square over.

9. Now we make pipes for the steamboat. Open one of the small squares and smooth the sides. This will be the first trumpet.
10. We carry out similar actions with the square opposite.
11. Now take two squares next to the pipes and pull them, opening the steamer.
12. That's it, the ship is ready to accept passengers!
A boat made of paper step by step.
- The boat has a wide flat bottom and floats well on the water. You need to make a boat from a square sheet. First, fold the square in half lengthwise.
2. Open the folded square, you will see a fold line in the middle. You need to bend two sides of the square to this line.
![]()
3. Turn the resulting workpiece over and bend it in half.
4. You will get a figure like this.
5. Place the figure vertically and turn away one long rectangle.
6. Fold the corners towards the center.
7. Turn over and also bend the corners on the other side.
![]()
8. We bend our future boat in half.
9. Open the boat from the wide side.
10. Bend the corners towards the middle.
11. Now we bend the corners quite a bit.
12. Open the large folded corners. They will stick well on small bent corners.

13. All that remains is to make and bend the sides of the boat.
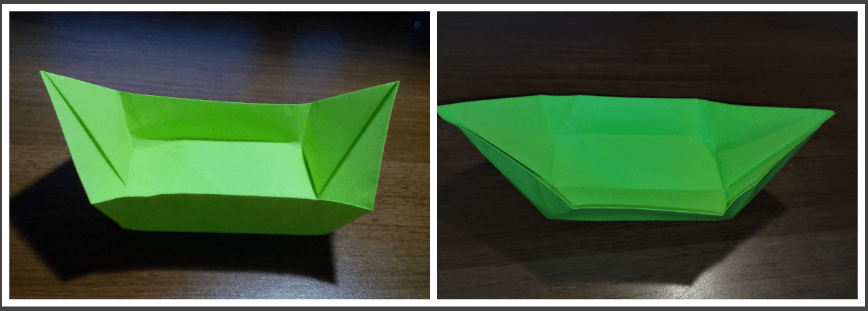
14. The little boat is ready for sailing!
These are the kind of boats you get. I think it will be easy for you to do any of them. Make boats out of white, colored, or thick paper (so it floats longer) and organize competitions.
Fair wind!
All children love to float boats on the water. If you don't know how to make a paper boat for a child or want to make paper boat along with it, our article will help you with this.
We will look at the most interesting and simple options, which can only be made with paper using the origami method, using diagrams and step-by-step instructions.
In order to make a simple paper boat with your own hands, you will need the minimum amount of available materials. Or rather, just paper. It could be like colored paper, and an ordinary piece of paper from a school notebook.
Simple paper boat
Prepare a sheet of paper. It’s very good if it’s a sheet of A4 size - then the boat will turn out to be large, dense, and, of course, stable. This means that it will stay afloat for a long time and still defeat its opponent.
The steps for creating a paper boat are as follows::
Fold a sheet of paper prepared in advance in half. Place the folded side up and fold it in half again.
- Bend the upper corners at right angles towards the center.
- Fold all free edges of the sheet up on both sides.
- Carefully tuck all free corners inward. You will get a triangle.
- Bring the corners at the base of the shape together. This should create a square.
- Fold the bottom corners of the square on both sides so that you again form a triangle.
- Bring the corners at its base together - you get a square. Take it by the upper corners and gently pull it to the sides until the figure is completely revealed and the boat is formed.
- Smooth out the sides of the boat to give it maximum stability.
It’s better to figure out how to make this boat, a visual diagram will help you:
Congratulations, your simple paper boat is ready! If you wish, you can paint it with pencils, felt-tip pens and paints and even make additional applications on the walls. And small handmade masts, sails and flags, carefully placed on board, will certainly delight children and make the boat even better. Playing with such a paper friend is a pleasure!
For greater clarity, we invite you to watch a short video that shows in detail the process of creating a paper boat with your own hands
The process of creating a two-pipe boat is not as complicated as it might seem. You will again need a familiar sheet of paper and an additional tool - scissors.
So, in order to make a two-pipe boat, you will need:
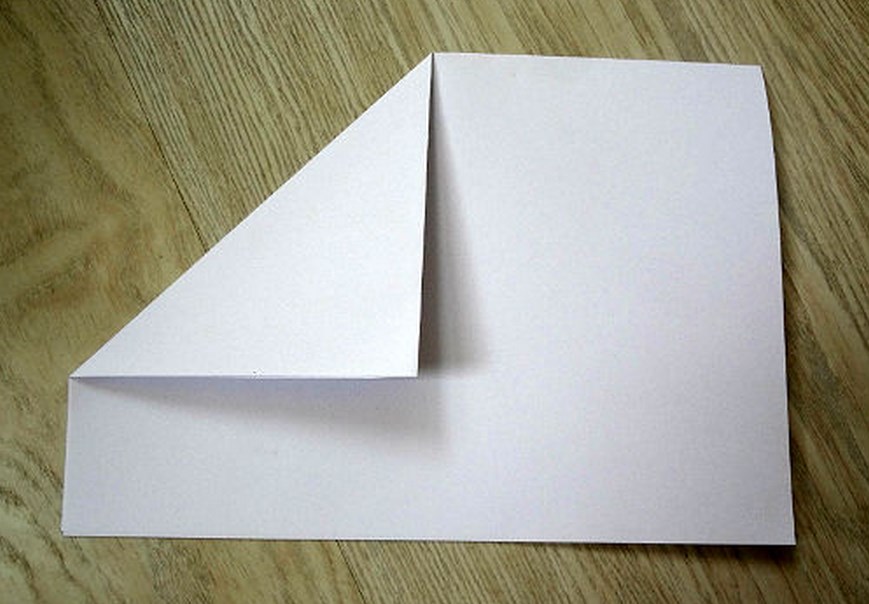
- Fold the bottom left corner of the sheet of paper so that its top side lies completely on the right side. Cut off the resulting excess part. Having completely unfolded the sheet, you will see a square in front of you.
- Since there is already one fold line on it, it is necessary to make a second one intersecting with it. To do this, the square should be bent diagonally.
- Fold all four corners towards the center to form a small square.
- Turn the resulting figure over with the bent corners facing down. Next, repeat the third point - bend all corners towards the center.
- A square sheet of paper (it can be easily made from a rectangular one by folding one of the corners and cutting off the excess) needs to be folded along the central axis and diagonals in such a way as to obtain 16 small squares.
- Bend all four corners of the square towards the center, and then align the two edges of the workpiece with each other and with the center.
- Do a similar procedure with all corners. Turn the workpiece over and bend it in half diagonally.
- Connect the small triangles on the right side of the figure to each other. They will appear in the form of a sail.
Second way
This method is traditional for the Japanese. To implement it you will need:
- Take a square sheet of paper and bend it diagonally.
- Also carefully bend two corners along the center line.
- Next, you need to bend the bottom corner and align it with the top, thus forming a horizontal line.
- Also bend the two sides along the axial vertical line.
- Carefully bend the side with an obtuse angle and bend it at an angle of 90 degrees to the horizontal sheet.
- For greater persuasiveness, bend the vertical sheet slightly on the sides.
Japanese ship - the sailboat is ready!
Usually it is recommended to make a sailboat from colored paper, because it is much brighter and more beautiful this way. Don't forget to paint and decorate it as you wish, and also make several more similar products. After all, the more of them, the more interesting.
The process of creating a paper boat - a sailboat - is shown in the following video
Paper boat
The boat creation scheme is also simple and will only take a few minutes. All you need is patience, accuracy and attentiveness.
In order to create a paper boat, you need very little time and effort. Fold the A4 sheet in half, first lengthwise and then crosswise. Please pay close attention that the closed edges should be on top.
The next step involves working with the corners - the top ones need to be folded towards the center line, and the top and bottom edges, which are currently open, need to be folded up.
Then you need to bend the triangle. Once you do this, you will have a square in front of you, the bottom corners of which are open. Now fold the front and back corners up.
From the resulting triangle, make a square again. Now slowly pull the ends of the upper corners of the square in different directions, and a real paper boat will appear in front of you.
The traditional way to create a boat can be seen in the video:
So we figured out how paper boats are made. Making various boats is not at all difficult, but on the contrary, it is fun and enjoyable. Therefore, feel free to arm yourself with paper, paints and pencils, involve your children in this exciting process, have fun and remember your carefree childhood, spring, streams and those sweet moments of launching your paper army. Have a nice time!
All children are very interested in playing with paper boats, which, if carefully crafted, are no worse than store-bought toy ships. In addition, you can show your child how to make a boat out of paper. It's very simple and he'll probably like it. And working together will unite you even more, help you have fun and usefully spend time - learn how to make boats. You can also involve your son or daughter’s friends in this process. And then we all set sail together. By the way, already finished ships (and they can be different in shape) can be painted with colored paints (preferably waterproof, otherwise all the art will flow into puddles). Or, without wasting time, go and launch ordinary (paper or newspaper) boats into the water - this is a lot of positive emotions.
How to make a two-tube paper boat
 Need to take blank slate A4 paper.
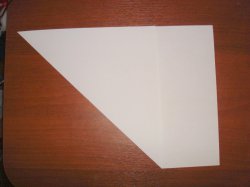 The lower left corner of the sheet must be folded as in the photo. The resulting rectangle needs to be cut off.
 Then the square is folded so that the two intersecting diagonals are not visible.
 Any corner of the sheet must be aligned with the intersection of the diagonals.
 The same must be done with the other three corners.
 The resulting square should be turned over with the bent corners down.
 By analogy, bend the corner towards the center.
 And bend three more corners in the same way.
 This is the result obtained. And again it needs to be turned over.
 This is the reverse side of the sheet.
 Again you need to bend the corner towards the center.
Using the same pattern, bend the three corners again. And turn the square over one last time.
 This is the result of a revolution.
 Then you need to carefully unbend any pocket.
 The pocket parallel to this should also be bent.
 Carefully lift the remaining corners.
 And combine the pipes together.
 Then you should click on the karma of the boat.
 Perform the same operation on the other side.
 So, in fact, we have a boat ready to set sail.
How to make a paper boat
1. A rectangular sheet of paper needs to be folded in half, making a vertical bend.
2. Fold the rectangle in half again.
3. Fold the upper corners towards the midline.
4. Bend the remaining flaps at the bottom each in its own direction.
5. Then, as it were, turn the boat inside out so that it turns out to be a square.
6. Fold the bottom edges of the paper upward, forming a triangle.
7. Turn it into a square again by stretching the triangle from below.
8. Expand the resulting square so that the edges of the paper folded inside are located at the top and open the origami again.
9. The boat or just a paper boat is ready to sail.


