Hello, dear readers! Many mothers begin modeling with their children after 1-1.5 years. At this age, toddlers still know practically nothing... Here I will tell you how to make such activities not only useful, but also exciting. I will introduce you to the principles of the very first crafts. I’ll tell you what’s best to sculpt from, how to interest your child in a new type of creativity... And I’ll show you photos of our first works.
When to start sculpting with kids?
Getting to know home salt dough You can start at least 6 months. It is harmless, you can “taste” it, any little one will show interest in such material. However, I personally don't see much point in this. And I think that modeling lessons should start no earlier than 1 year. Until this age, it is enough to use ordinary toys. But it all depends on you and your baby's needs. The main thing is that the classes evoke positive emotions in everyone!
Modeling with children 1-2 years old has its own characteristics. We engage solely for the sake of the process itself. There is no need to think about any result yet. We are getting acquainted with new material. Let's get acquainted with the capabilities of our fingers. Not all one-year-old children will give you the opportunity to complete the craft, and not everyone will be ready to accept your rules of the game. Therefore, in the first lessons it is very important to let the child just study the dough thoroughly. And don’t try to make crafts before the little one is ready.
What is better to sculpt from?
We are all accustomed to plasticine. In our childhood there was only him... But today in children's stores there is a wide variety of modeling materials! How to choose the best?
More and more children are buying kinetic sand. This is exactly him in this photo.
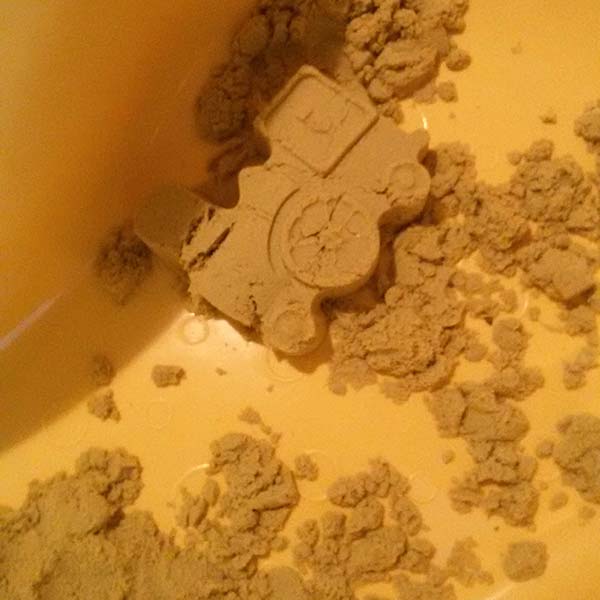
Kinetic sand is a good alternative to a regular children's sandbox. Especially in winter. It doesn’t stick to your hands, doesn’t get dirty, and you can easily make any “cakes” out of it. It's a pleasure to tinker with. I wouldn’t call such games modeling, but if you want to diversify your baby’s everyday life, why not? But remember: after such games you will have to do a little cleaning. Vacuum and wash the floors. It’s good if you have a shallow basin that can serve as a home sandbox... But it won’t save your floor from cleaning. However, it is convenient to pour sand from the basin back into the jar for storage.
My daughter enthusiastically played with this sand for 30-40 minutes. And at 1.5 years, and at 2.5. Kinetic sand is not cheap, but it lasts a very long time. It doesn’t dry out, doesn’t spoil... They rummaged through it and put it back. Of course, every time it becomes less and less... But that's okay.
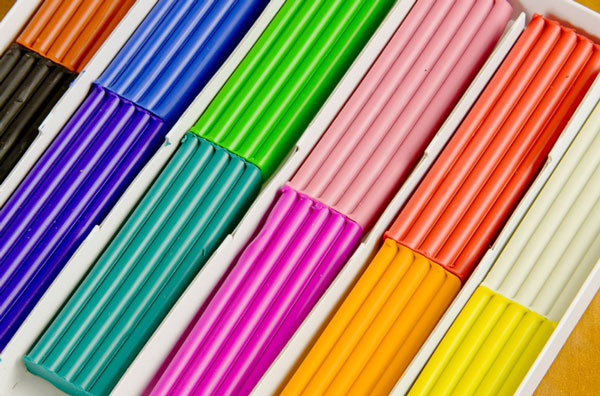
Plasticine. In my opinion, this is the worst material for teaching children. Even for children 2-3 years old. And for a one-year-old... Plasticine stains your hands and everything around, it stays under your nails, it is not easy to wash it off the floor, it is quite hard... And one more thing: it is better not to put plasticine in your mouth. Therefore, I brush this material aside when thinking through games with children. Plasticine is useful for a school-age child, but in the development of children younger age It's better to use dough.
Salty dough. It is much easier to sculpt from it than from plasticine. It doesn't get stuck under your nails. Easy to clean. Harmless. It's almost perfect... Of course, you can't make crafts with an abundance of small details from salt dough. It is not so elastic. But that doesn’t matter to us yet, does it?
You can make this dough yourself. Or you can buy it in a store. This could be Play Doh or some similar modeling compound. You can buy interesting kits along with the test. There are devices that help you cut out circles, squares, and triangles from layers of dough. My daughter really liked the dough scissors. For a child 1-2 years old, such sets are not yet relevant. We assessed them only after two years.
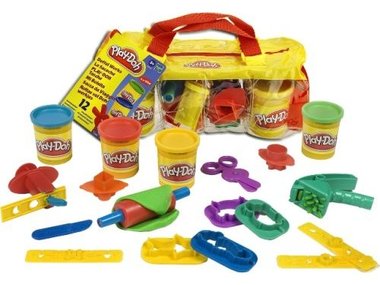
The advantage of purchased dough: it is more elastic, brighter, and very pleasant to hold in your hands. Cons: it dries out quite quickly, forcing mom to go to the children's store again. It is better to buy it in large sets - 10 jars, for example. If the dough is a little dry, do not rush to throw it away. Add some water to it. This way you will save a lot of money. Of course, after water the material slowly loses its elasticity, but one jar is enough for us for 1-4 weeks (depending on how often my daughter forgets to put it in the jar).
The homemade dough recipe is very simple: 150g flour, 150g salt and 100ml water. This is a one-time dough that can then be well colored. There is also a recipe for reusable homemade salt dough: 1 tbsp flour, 0.5 tbsp salt, 0.5 tsp. dry citric acid, 200 ml water, 1 tsp. vegetable oil. When preparing such masses for modeling, you can add gouache to them. This way the dough will be colored.
How to introduce a child to modeling?
I am of the opinion that it is impossible to teach reading at 2 years old and applications at 1.5 years old. If you have a different position, the “Creativity from the Diaper” program is suitable for you. I try to teach children more relaxed and give them more freedom. Therefore, the main principles of the first lessons are as follows:
- Let the child knead and study the dough as much as he needs. Perhaps it will take 1 day, or perhaps a month. If your child is ready to enthusiastically tinker with the material for hours without your intervention, then that’s enough for him for now. This is especially true for children under 1.5 years old;
— show your child the possibilities of modeling by example. Make animals and people yourself, act out fairy tales. It is important that your little one learns to see a dog, cat, etc. in a plain piece of dough;
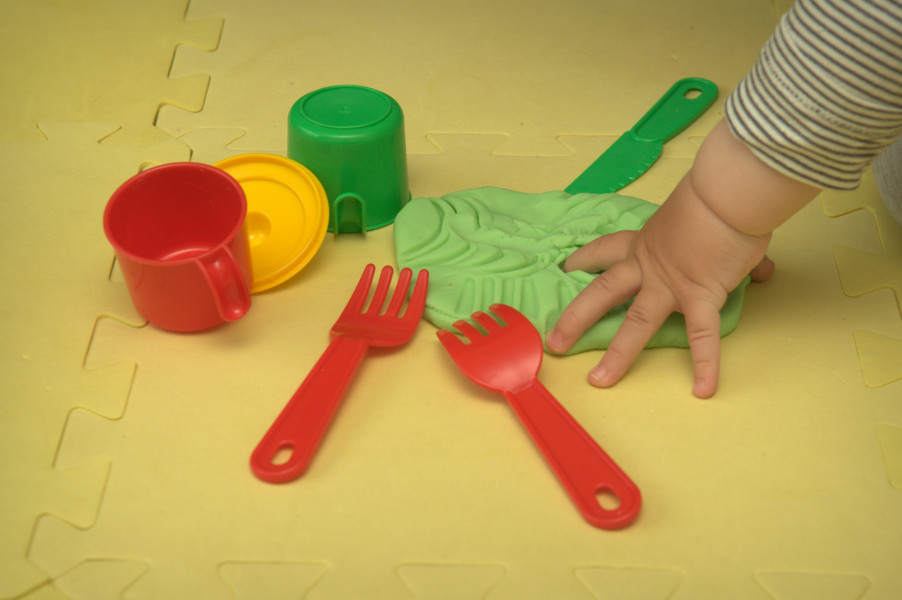
— show how you can leave impressions on the test. Apply forks, keys, coins to the layer, make spectacular dents on it;
— try smearing “store-bought” modeling compound on cardboard or thick paper while coloring pictures;
- if your child can’t make “balls” and “sausages”, relax and don’t torture your baby. In six months or a year he will master this skill without problems. There is no point in “running ahead of the locomotive,” even if at 2 years old all the children in the yard cope with such tasks “excellently.”
First crafts
Closer to 2 years, you can try to do interesting crafts. At this age, it is difficult for children to do anything voluminous. And I would recommend focusing on “flat modeling”, which results in convex paintings. But the very first classes are not even crafts, but simply pinching off pieces from a layer of dough. Here are some game ideas:
1. Pieces of dough will be cookies (or pies). Make small “cookies” with your baby, put them in the “oven”, and then on a toy plate. Of course, next will be dinner for all your animals. With slightly older children, you can work a little on the quality of the cookies, making them even and semicircular.
2. Pieces of dough will be coins. And you play store. There is a lot of room for imagination here.
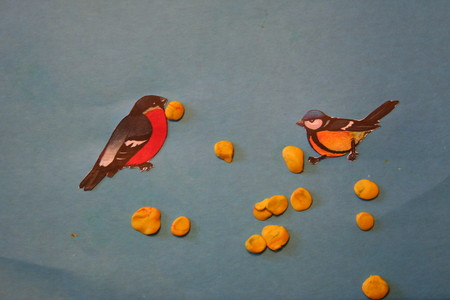
3. Pieces of dough will be mushrooms/berries. First you plant them, and then the bunny collects them in a basket.
Often mothers begin their acquaintance with modeling with the following tasks:
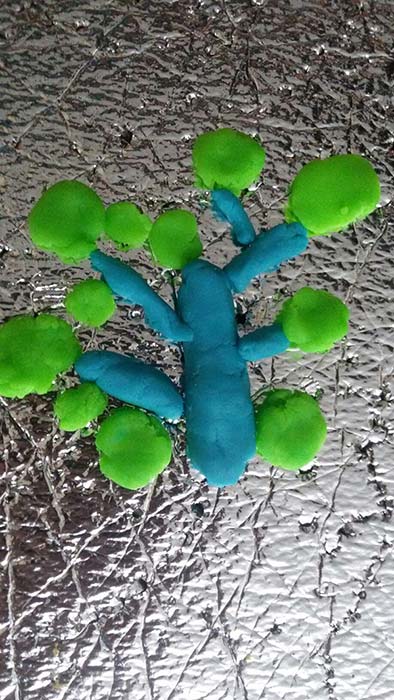
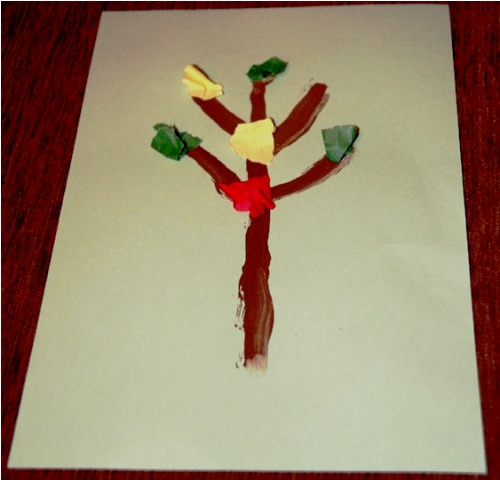
The next stage of modeling is more complex elements, paintings. We are gradually learning to roll “balls” and “sausages”. Let’s sculpt a tree: you create a trunk and branches (if “sausages” are not yet available), and the little one sticks leaves. It turns out like this:
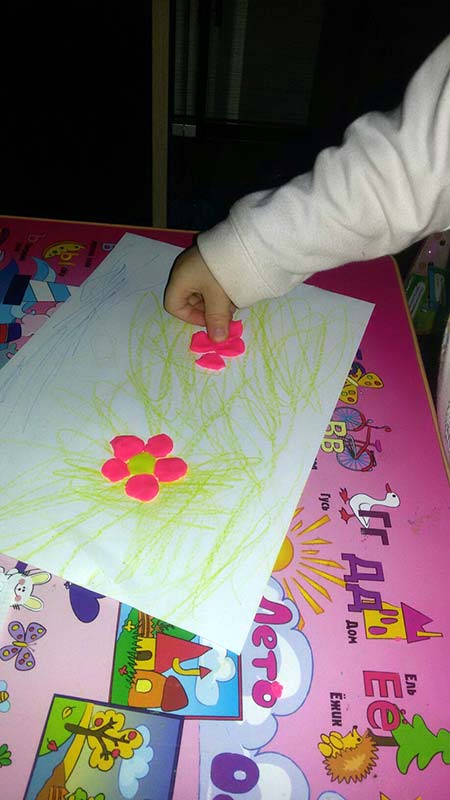
When you can make a little friends with the “balls”, it’s time to sculpt flowers. First, draw a green meadow with the toddler, and then take the mixture for modeling... It’s very good when you can combine different types creativity!
Another interesting craft idea is a water world. It would be nice to first study some book or photograph with sea creatures with your baby. Then draw the sea using a variety of colors (preferably with paints). When the paint is dry, it's time to sculpt the fish. Fish can be the most various shapes, depending on your capabilities. You can simply stick pieces of dough. You can attach a small ponytail to a round head. You can even draw out the fins with a plastic knife.
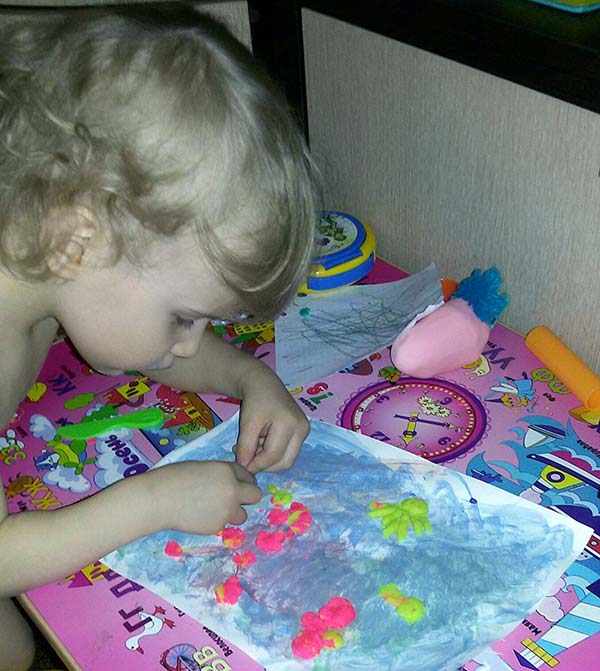
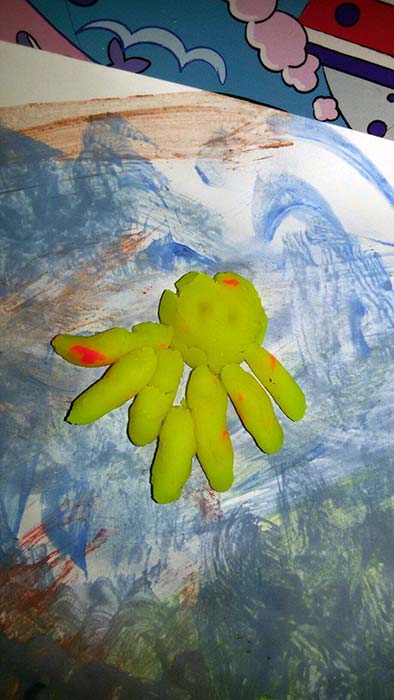
We even made an octopus. It is very easy to make: combine one ball and many sausages.
When your baby understands the principle of balls and sausages, you can make anything with him. A butterfly, a man, a dog, a car... Choose the most understandable scenes that the baby knows well. And of course, be sure to make a cake like this:
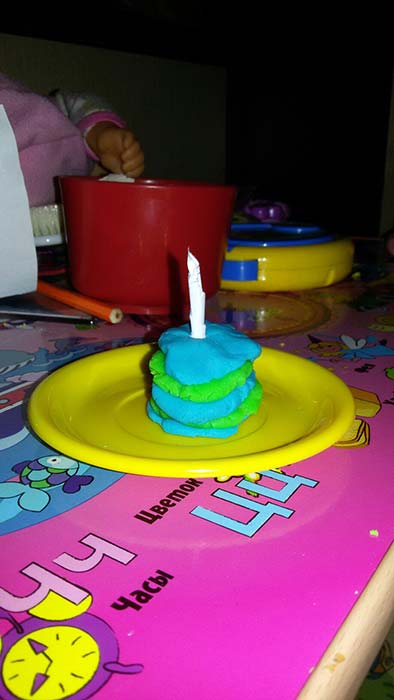
For this craft you need to be good at rolling and flattening balls. It's not as easy as it seems. But how many games can you come up with with such a cake!
That's all. I think you understand main principle modeling with children under 2 years old. Don't be alarmed if our craft ideas seem very complicated to you. Still, many children at this age are only able to make “cookies” with “coins”. This article is not a test of your baby’s abilities, but a small collection of ideas. And there is nothing wrong with the fact that a child is ready for such modeling only at 2-2.5 years.
What do your children like to sculpt at this age?
What crafts can you do with a one-year-old? As practice has shown, there are a lot of different things.
We started with applications. At first it was just multi-colored flowers, which the daughter sculpted in random order on a sheet of white paper. When my daughter got comfortable with glue sticks, they began adding centres, leaves, etc. to them.
The cut-out appliqué has always been a great success for us. After all, tearing a napkin together is so much fun! :)
Here are some of our works, so to speak, “from the early days” :)
1. These are our very first experiments with applique. We have created a countless number of such “clearings”. We started creating at about 1 year 2 months. This work is already, one might say, advanced. There are plasticine hearts and leaves...
The girl very quickly figured out how to glue everything together. All I had time to do was cut...
A little later we figured out the centers of the flowers - now we sculpt them quite confidently in the right places.
And then I got tired of the endless flowers... and away we go!
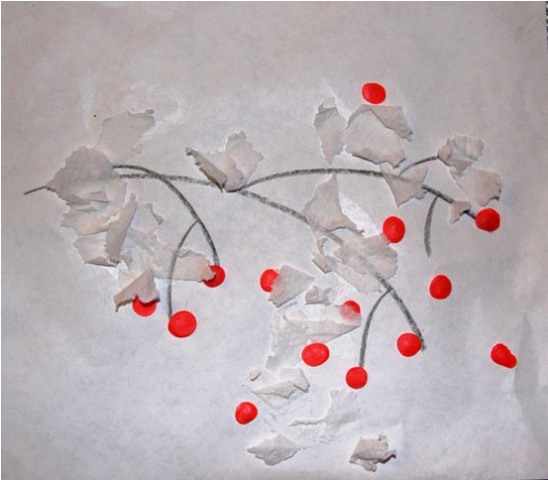
2 "Rowan". We did it with a baby at 1 year 3 months.
I drew a twig. She gave the child balls (rowanberries) - she sculpted them wherever she wanted. Then they tore the paper towel together. The child applied glue where she could (my mother helped in some places). And sprinkled with torn pieces. Beauty!
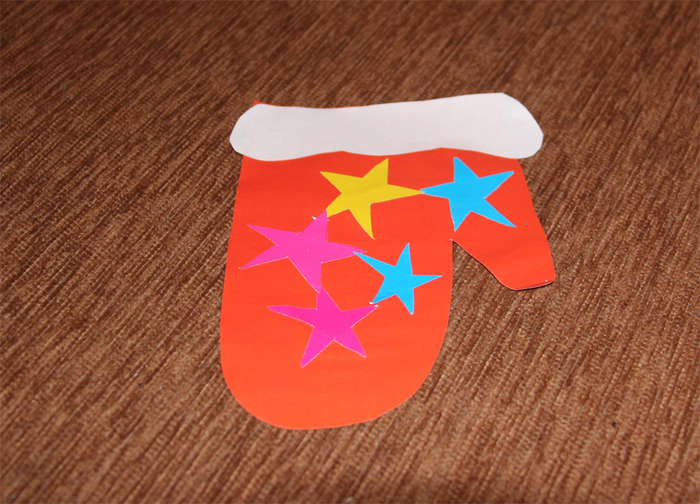
3. Rukovichka." Made during a lesson at the children's center, at 1.5 years old.
4. And this is already a “development”, one might say.
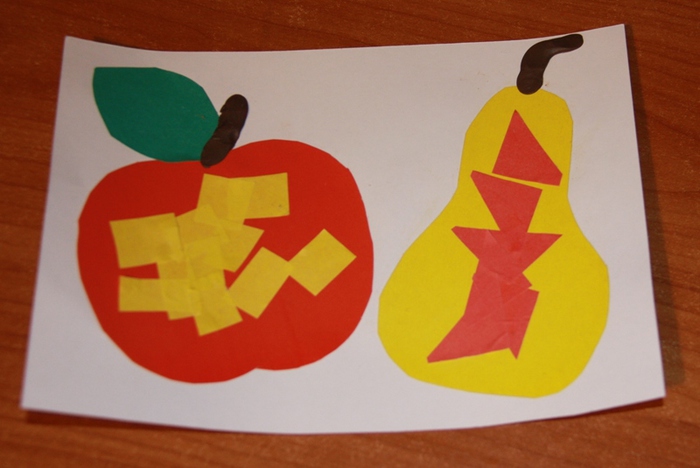
Assignment: glue red triangles onto a pear, yellow squares onto an apple. It was necessary not to mix it up and preferably not to miss the fruits :) They did it in 1 year 7 months.
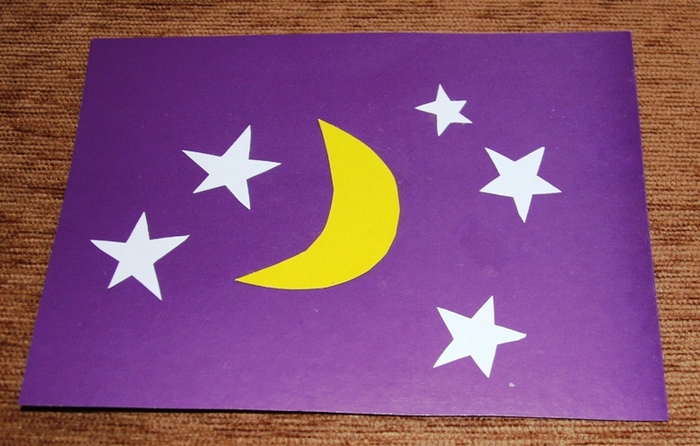
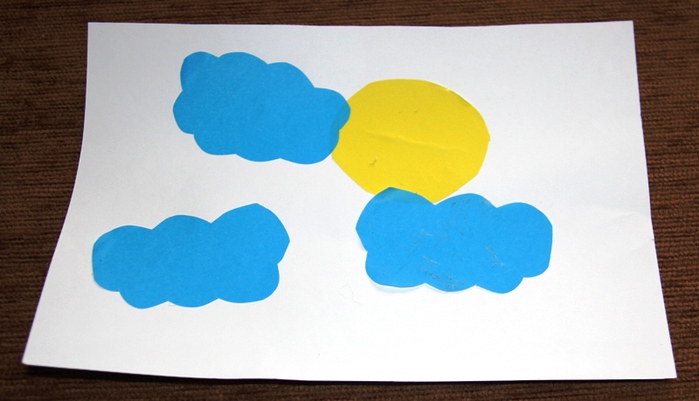
5. "Day and Night." Find and stick what happens day and night. They did it in 1.9 years.
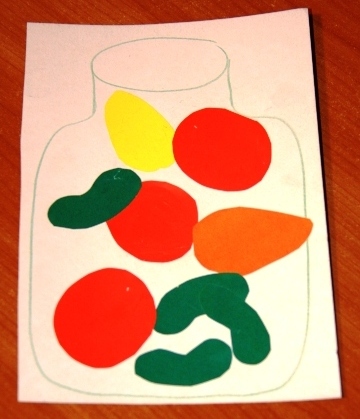
6. “Pickles.” In the jar we have cucumbers, tomatoes and peppers.
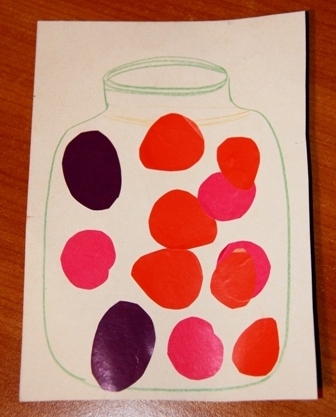
7. "Kompotik". We developed the theme of “pickling”. Here we have strawberry, cherry and plum.
8. Did this with my daughter at 1 year 7 months.
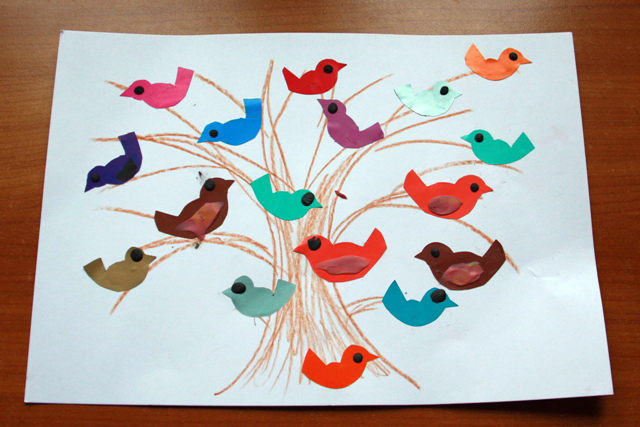
I cut out the birds from double-sided paper. And she glued it on the side that looked best to her. Then, because The child wanted to continue creating, so they made eyes. One eye became a wing... I gave the baby more plasticine - that’s how some birds got wings.
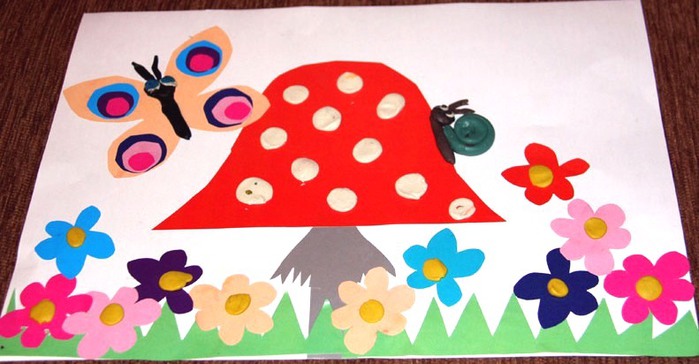
9. Done at 1.5 years old. The daughter glued the parts cut out of paper: her mother suggested the mushroom and butterfly, and the flowers at her own discretion. She rolled balls and sausages. A snail came out of the sausage. And the balls became the centers of flowers, the eyes of a snail and the dots of a mushroom - she sculpted herself.
10. We did it together at the children's center, at 1 year 3 months.
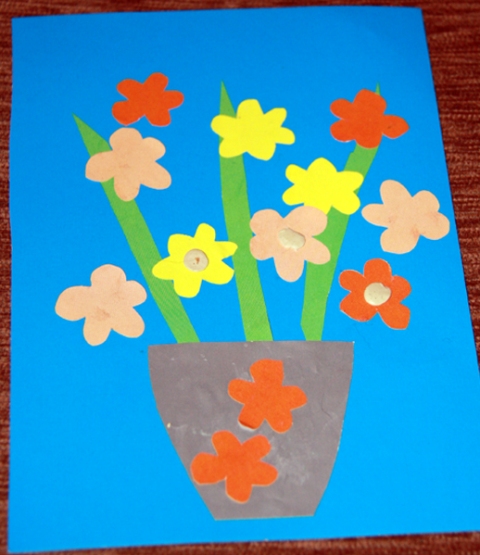
11. Flowers are our favorite theme. My daughter (1.5 years old) chose where to glue the flowers.
She decided that it wouldn’t hurt to decorate the vase with flowers. I also glued the vase and stems myself, but I suggested where.
On the eve of the magical New Year holiday, all adults and children are puzzled by what to give to their loved ones and friends. As is known, best gift- this is one that is made with your own hands, so kids enthusiastically try to create their own masterpieces to please mom, dad, grandparents and other relatives.
In addition, using available materials, you can also make various New Year’s crafts, decorations and home accessories with your own hands, which will support a great mood and give warmth and comfort. In this article we will tell you what New Year's crafts you can make with children 3-4 years old, so that the child himself can take part in creating a lovely little thing.
How to make New Year's crafts in the form of a Christmas tree with a 3-4 year old child?
One of the most popular symbols of the New Year is the Christmas tree, decorated with all kinds of balls and garlands. Children 3-4 years old can easily make New Year's crafts in the form of Christmas trees made of cardboard, paper or plasticine. It is at this age that boys and girls, as a rule, really love to draw and make all kinds of applications.
On the eve of the New Year, a favorite topic for studying at home or in kindergarten is the creation of holiday cards depicting the green beauty. Three-year-old children enjoy making Christmas trees from colored paper, cotton wool, napkins, buttons, beads, various fabrics and other materials found in every home.
Today, it is also popular to create appliques using the scrapbooking technique. Small cylinders of different sizes are made from special paper designed for working in this technique, which are subsequently applied to the base, forming a Christmas tree, and fixed with glue. Of course, it may still be difficult for the baby to cope with such difficult material, but with the help of his beloved parents he will definitely succeed.
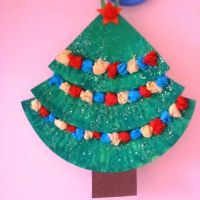
Also original crafts in the form of Christmas trees for the New Year with children from 3 to 4 years old can be made from disposable plates of different diameters, pre-painted with green paint. To do this, cut small fragments from them, use glue to fasten their edges, giving them the shape of a cone, and then secure the resulting elements to each other. Decorate the Christmas tree with tinsel, serpentine, beads and other small items.
Wonderful souvenir Christmas trees can also be made from cones. To make them, you only need paint, green tinsel, glue and a few bright beads for decoration.
What other crafts can a 3-4 year old child make for the New Year?
New Year's crafts for children 3-4 years old can be of a different nature, but since kids do not yet have a sufficient number of skills, the technique for their execution should be the simplest. Thus, all kinds of applications, drawing and modeling from plasticine or special dough are most often used here.
In particular, using the method of volumetric or flat applique, you can decorate any home accessory, decorate a gift box, greeting card and much more. By gluing fragments of cardboard, colored paper, cotton wool and other materials onto each other, you can get figures of the Snow Maiden, various symbols of the coming year, and so on.
In addition, kids will definitely enjoy creating with their own hands. Christmas decorations, for example, balls or stars. You can also invite your child to color a ready-made plain New Year's ball and decorate it with glue, beads, cotton wool, or even cereals and pasta.
In general, children at the age of 3-4 already have a fairly developed imagination and are able to come up with original crafts on a certain topic. And you can help your child by using interesting ideas from our gallery:
 |
 |
On the eve of the holiday, I wanted to post a few more master classes on crafts and cards. Moreover, I chose such fakes for the holidays that children aged 3-4 years can make with their own hands. Of course, with the help of adults.
So, today I will tell you how to make an original one and flowers as a gift. The child made the card with my help, so our flowers didn’t turn out perfect. But this is their “zest” :)
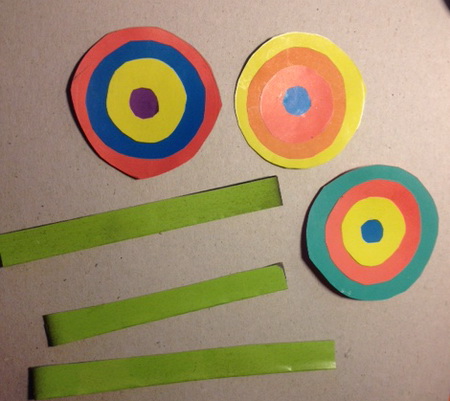
For the postcard you will need - colored paper, cardboard, scissors, maybe a compass or stencil, glue.
Cut out circles different colors and diameter. Our card has three flowers with four circles.
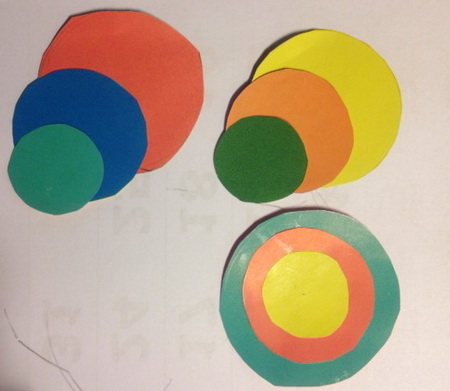
Glue the circles on top of each other - you get it unusual flowers. Cut out the stems.
For the postcard, you can use colored cardboard or cover regular cardboard with colored paper. We glue our flowers and pocket onto the card. 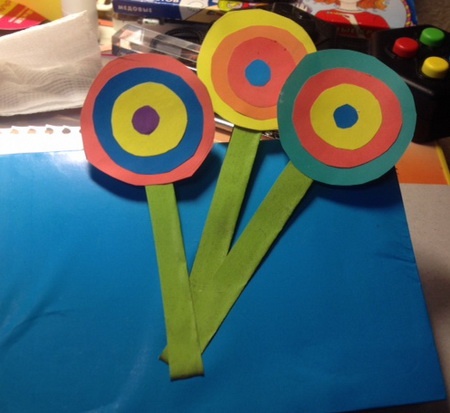
That's all! The result is a DIY postcard that a 3-4 year old child can master. 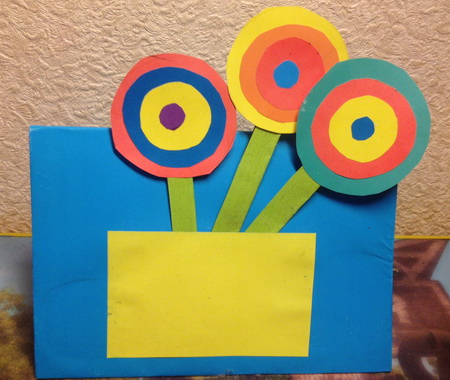
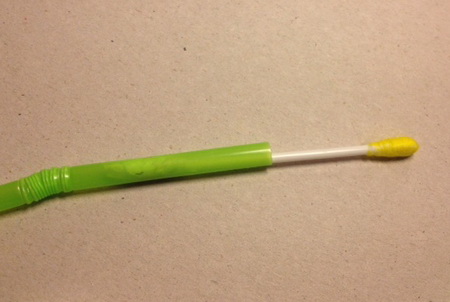
Now let's make flowers! The flowers amazed me with their simplicity. You need: cotton swabs, cotton pads, PVA glue, green plastic tubes, yellow felt-tip pen. 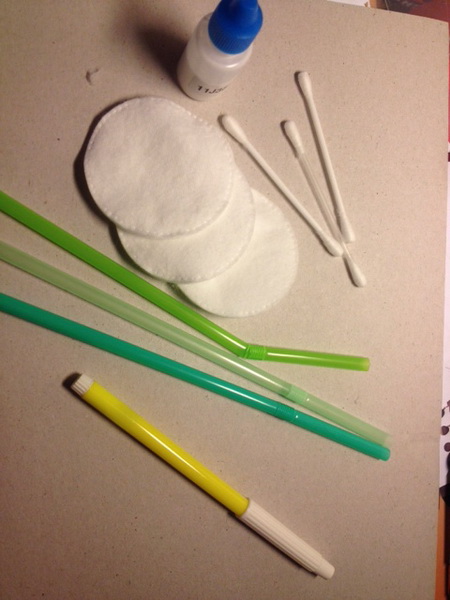
Paint one tip of the cotton swab yellow. 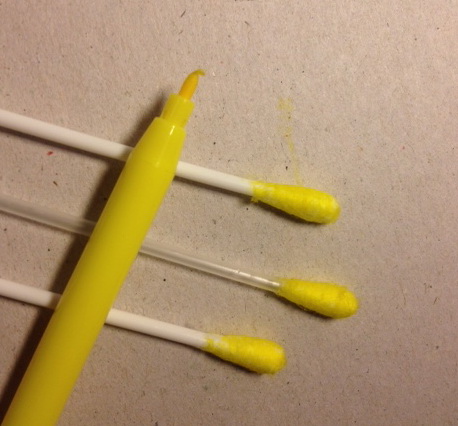
We insert cotton swab into a tube. To prevent the stick from falling through, I wrapped some paper around it.