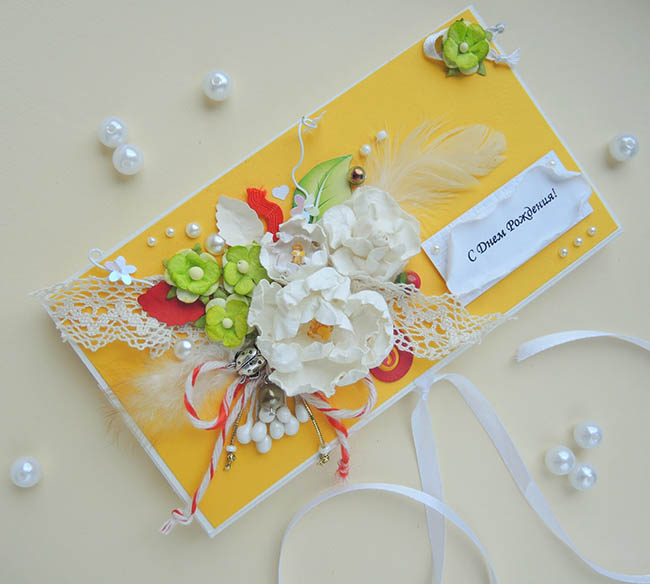
Friends, hello everyone! Today I will write about how to easily pack a gift and why you should not always take a hard box for decoration.
Gift ideas are, of course, wonderful, but the gift must also be presented correctly, beautifully, elegantly. Well, other adjectives. And without beautiful packaging it’s difficult to do this.
So today I will show you some original packaging methods that won’t take much time.
How to wrap a gift in gift paper: step-by-step instructions
It’s not difficult to make packaging with your own hands, even without a box, which has already become a traditional symbol of almost any holiday.
There are several options here:
1 Just wrap the gift in wrapping paper. The master class below describes this process in some detail. I use it myself often, it turns out great)
For this method, you will need to cut a piece of paper that is wide and tall enough to wrap the gift. Usually, to do this, it is enough to multiply the width and height of the surprise by 2, add the side parts if the gift is not flat, and leave a small margin for hems. Then you need to wrap the gift according to the instructions below.
It would be best for you to pack this way:
- book,
- neatly folded T-shirt,
- towel,
- picture,
- telephone.
Due to the fact that you set the shape yourself using wrapping paper, you can decorate even a soft rag surprise in this way.
2 Origami. It turns out to be very original and you can even do without a box. All you need is a piece of wrapper and a little patience (and a ruler and scissors will also come in handy).
It’s good to make such a lightweight paper box from so-called kraft paper, which has the interesting property of adding something stylish to any creation. Try using it too. You can’t put a big gift in such a box, but a small souvenir will look very cool here.

3 There is also an object that is quite difficult to approach - a round or oval shape. In fact, everything here is easy to do yourself - take a square of wrapper, place the box in the center and... collect the excess into a bun.
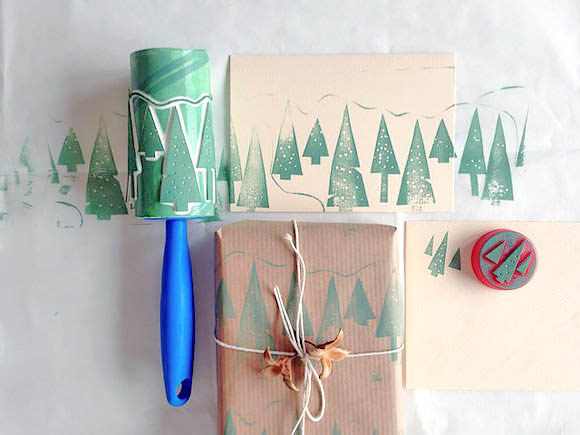
We use corrugated paper
What is the advantage of corrugated paper? It is precisely in its corrugation. Such a wrapper can be expanded where necessary and given the desired shape. And for some of the methods described above, such paper is also suitable.
It would be ideal to wrap it in:
- bottle,
- watch,
- plate,
- pen,
- mug.
Thanks to the structure of the paper, wrapping the bottle will be very easy. You will need an upper and lower piece, which you need to wrap first around the top of the bottle and then the bottom. To make it all look harmonious, tie a thin ribbon around the bottle and disguise the joint with decorative ornaments.

For round gifts, everything is quite simple - you just need to cut off a piece of paper that covers the side of the surprise along the perimeter. The lower and upper parts will need to be assembled and the junction area decorated.

Another simple method that can be used for almost any small or medium-sized gift is candy wrapping. You can actually handle this task yourself in a few minutes.

Presenting a gift in a box
Boxes come in different shapes. Rectangular, oval, triangular - this is just the tip of the packaging iceberg; the variety of shapes is much greater.
Let's start with the traditional shape, which is not at all difficult to create from thick cardboard.
If you are preparing for an important holiday, then the gift box should be decorated. This can be done, for example, as described below. A great way to congratulate a man is to wrap, say, a shirt in such a box.
To make your gift memorable for a long time, I suggest using the previously mentioned discs. But this time you don’t need a wrapper from them, but they themselves. Trace the disc as shown in the photo, then cut and fold the edges.
For a larger box, you can use plates, pans and much more.
And here is the packaging of the gifts in video format:
That's it! We have come to the end of the article on how to wrap a gift. I think you have found something suitable for yourself. Or maybe I didn’t tell you something? Then write about it in the comments.
See you!
P.S. Be sure to subscribe and wait for news from the nyaskory blog. And also tell your friends through social networks and surprise them with magical gifts.
Sincerely, Anastasia Skoracheva
Many people love to give and receive gifts. But it’s doubly nice when the gift is beautifully wrapped. You can make holiday packaging with your own hands, for example, you can take the idea from the master classes offered here with step-by-step photos, as well as videos from YouTube. Prepare gift paper, ribbon and follow the selected instructions on how to properly wrap a gift.
Classic packaging
In this way, you can wrap an ordinary box in beautiful paper, and then add a spectacular decorative element from the same packaging material. Now we have a New Year's gift, so the design is appropriate, but this decor option is suitable for any holiday.
- wrapping paper;
- scissors;
- transparent tape;
- golden ribbon;
- glue.

This method is convenient for packing a gift that initially has a box with smooth edges. Therefore, at the first stage we pack as usual. To do this, cut off the required piece of wrapping paper.

We keep transparent tape on hand, we will need it at this stage. First, we wrap our gift on one side with wrapping paper and secure it in two places with transparent tape.

After this, we will close the end sides of our gift. To do this, first carefully bend one side down, following the contours of the box, as shown in the photo:

From the remaining part of the wrapping paper we form a triangle, folding the corners on the sides.

Now we bend the top of this triangle, after which we bend it to the end of the package. We take transparent tape and fix it well with it.

We repeat these steps from the other end of our box.

The decorative element of our packaging will be a fan made of the same paper. Therefore, we prepare a piece of wrapping paper to create it. It all depends on how we position this fan. We decided to position it along the width of the box. Therefore, we cut out the paper of the appropriate size.

Now we fold it like an accordion.

We bend this “accordion” in half.

We glue it in the middle, and make the edges of the resulting “accordion” semicircular using scissors. At the same time, we make sure that the overall size of the fan matches the width of our box.

The decorative element is ready, let's proceed to the final stage of packaging. Take a golden ribbon and tie it around the box.

We form a bow.

Now immediately behind the bow we fix the fan with glue.

Our gift wrapping is ready.

Video on how to pack a box:
How to beautifully tie ribbon bows? Watch the video:
How to tie a simple bow on your fingers:
How to make a lush bow from ribbon:
Packaging with folds
In this master class we will demonstrate one of the gift wrapping options. At first glance, it does not differ from the usual one, but at the same time it has one twist.

To create such packaging we prepared:
- wrapping paper;
- scissors;
- transparent tape;
- thin double-sided tape;
- golden ribbon.

First, prepare a sheet of paper of the required size. In this case, you should focus on regular packaging, but make an increase of approximately 50% in the direction in which the folds will form. We lay the sheet pattern down and make the first small fold.
 Then we will make blanks for future folds. To do this, fold the paper 2.5 cm.

And we repeat this 4 more times. In total, in this case we will have blanks for five folds. If desired, they can be made larger or smaller. You can also vary the width of the folds.

Unfold the packing slip face up. We see 5 fold lines.

Focusing on them, we will form folds. Carefully grab the first fold at the edge and in its place form a shallow (about 1 cm) fold.


Now they need to be secured. To do this, turn the sheet over to the wrong side, where we secure the folds in several places with transparent tape.


Then we carefully begin to fold the end sides of the package.

Using transparent tape, secure one corner.

Then we bend the second corner with folds.

Using the same principle, we secure the other end of the package.

Now all that remains is to tie the gift with a ribbon.
We fasten it diagonally and tie the ends with a bow. Our gift is ready to be presented.

However, the paper for packaging can be the most ordinary, plain, but by wrapping your gift box in it, you can decorate it to your taste. See examples in this video on how to decorate a gift in style:
Be sure to watch this useful video about the 5 most common mistakes when packing boxes:
and how to properly tie a box with ribbon:
How to make a packaging bag out of paper
In this master class we will show a packaging option when the gift does not have a clear shape. For example, you need to pack something small beautifully, then check out this option for creating a bag using the origami technique.

To make such a packaging bag we took:
- square sheet of paper;
- scissors;
- hole punch;
- golden braid.

In our case, we use a small square of paper 21 x 21 cm, but such a bag can be made from wrapping paper of any size. First, fold the prepared square sheet in half.

Then you need to perform diagonal addition.

After this, fold the square along the other diagonal.

The resulting folds on our workpiece allow it to be folded in the form of a double triangle.

Now we will begin to form our packaging bag itself. To do this, place the triangle with the base up, take the right corner of the top layer and bend it to the left as follows.

Then we bend it back, aligning the right side.

We do the same with the left corner of the top layer; it needs to be bent to the right.

Then we bend it in the opposite direction, not forgetting to align the left edge.

We bend the upper corners inward.

We turn the packaging over and do the same with the right and left corners.

We tuck the upper protruding corners inward.

Now let's form the bottom of our packaging bag. To do this, bend the bottom corner up.

After this, carefully form the bottom, which should be square.

We should have such a blank for packaging.


We thread golden braid through these holes.

Don’t forget to remove the gift first and then tie the ribbon with a bow.

Our paper packaging bag is ready.

Description of the work and photographs prepared.
Video on how to make a packaging bag with your own hands:
Original packaging
How to pack a gift in an original way? There can be many options.
For example, you can pack a gift like candy. The wrapper for this candy is made of colored paper. For a detailed step-by-step master class with photographs, see.

Many small gifts can be placed in boxes in the form of cake portions, a detailed master class with diagrams.


Another non-standard option is to hide gifts in a balloon and wrap it like candy - a surprise is guaranteed! See.

And since we're talking about sweets, we can't help but remember the main childhood temptation - chocolate eggs. It is in the form of a kinder surprise, only in a large size, that you can arrange gift wrapping.

For a small gift, you can glue one that is already a gift in itself:

Well, if you don’t want to hide your gift, then you can make such transparent packaging:
Simple paper packaging
Children's paper packaging options are very simple; this requires thick colored paper, double-sided or single-sided.

How can you increase your feelings of joy from a gift? Pack it beautifully with your own hands! Agree, these pleasant seconds of waiting before unpacking the gift are simply priceless. But how to pack a gift in gift paper so that its appearance enhances the intrigue and causes delight? It’s quite simple if you know a few step-by-step instructions for packaging - large and small, square and round gifts, gifts in a box and without it. And if you use original craft paper and unusual decor, you can make a truly unique present! Next, we offer you several simple master classes with photos and videos on wrapping various gifts, which are easy to repeat at home, even for beginners.
How to properly pack a square gift in gift paper with your own hands - step-by-step master class with photos
Probably the most common form of a gift, or rather a box, is square. Therefore, it is not surprising that the most questions are about how to properly wrap a square gift in gift wrapping with your own hands. You will find one of the fastest and easiest ways to do this in the step-by-step master class with photos below.

Necessary materials to properly wrap a square gift in paper with your own hands
- gift paper
- scissors
- double sided tape
- ribbon and decor
Step-by-step instructions on how to wrap a square gift in gift paper with your own hands

How to pack a round gift in gift paper - step-by-step instructions with photos
If with a square box, due to its shape, the logarithm of packaging is more or less clear, then round gifts cause difficulties. And the key question is how to properly pack a round gift in gift paper so that it looks presentable. You will find the answer to this in the following step-by-step master class with photos.

Necessary materials to wrap a round gift in gift paper with your own hands
- gift paper
- scissors
- double sided tape
- ribbon for decoration
Step-by-step instructions on how to beautifully wrap a round gift in gift paper at home

How to beautifully wrap a gift in craft paper with your own hands - step-by-step instructions with photos
If you want to wrap a gift with your own hands in an original and beautiful way, but don’t have gift paper, you can use craft paper. The craft sheet is a thick glossy brown paper, which, if desired, can be further decorated with improvised means. At the same time, the principle of packaging a gift is no different from ordinary gift paper. Read more about how to beautifully wrap a gift in craft paper with your own hands below.

Necessary materials to beautifully wrap a gift in craft paper
- kraft paper
- scotch
- scissors
- acrylic paints
- tassel
- ribbon
Step-by-step instructions on how to beautifully wrap a gift in craft paper with your own hands

How to pack a gift in gift paper without a box - step-by-step master class with photos
When packing a gift in paper, you first of all focus on the shape of its box. How to pack a gift in gift paper without a box? In this case, the following master class on making a universal gift bag for a present of any shape will help. Read more about how you can pack a gift without a box in gift paper below.

Necessary materials to wrap a gift in paper without a box
- sheet of kraft paper
- double sided tape
- scissors
- ribbon
- hole punch
Step-by-step instructions on how to wrap any gift with your own hands in gift paper without a box
How to pack a small gift in gift paper - step-by-step lesson with photos
The following step-by-step tutorial shows you how to gift wrap a small gift. For this master class you need to use very thick paper or thin cardboard. You can also use recycled paper, such as a paper towel roll. Learn more about how to wrap a small gift in gift paper in the next master class with photos.
After analyzing several MK packages, I found an option that suits me quite well for now. This way you can make a box of any size and color for a box, plate, etc. There is nothing new in the box design itself. The main thing that I “invented” for myself was making my own “designer” paper. It's hard to find nice paper in a small town, so here's what I suggest you do.
1. Materials:
- Whatman paper or cardboard,
- napkin or corrugated paper
- sheet of tracing paper
- PVA glue
- scissors
- ruler
- pencil
2. Determine the size of the box so that you can then draw a diagram.
Size of the bottom of the lower part: add 1 cm to the size of the product itself.
The size of the side parts is equal to the height of the product or slightly higher.
The size of the folds for the bottom part: 1 cm less than the size of the side part.
Cover size: 0.5 or 1 cm larger than the bottom.
I make the size of the side parts of the lid 3 cm.
The size of the folds for the lid is 2.5 cm (for a simple box you can do without them)
For example: the size of the box is 5X5X4. Box dimensions: bottom 6x6 cm; sidewalls 5cm; bend 4 cm. Lid 7x7 cm, sides 3 cm, bend 2.5 cm.
Now we determine the dimensions of the square, which will be the basis of our diagram. Add 4+5+6+5+4=24cm. This is the length of the square, which we will draw on whatman paper.
In fact, making all the calculations is not as difficult as it seems))) If you do it once and understand the principle, you will easily make them in your head without any papers or notes.
3. Draw a square on whatman paper, in our case with long sides = 24 cm. Cut it out.
4. Now we mark the square on each side according to the scheme: 4cm - 5cm - 6cm - 5cm - 4cm. We connect all the points and get the following diagram.
Here are the shaded parts that we then cut off.
5. Now, actually, let's start making paper. To do this, you can use a regular napkin of a suitable design and size. Or corrugated paper, then the box will be plain. The square we cut out of whatman paper. grease with PVA. Here it is important to coat the entire surface well, especially the edges, but there should not be too much glue so that the napkin does not get wet.
While the glue dries slightly, iron the napkin with a hot iron so that there are no wrinkles. Corrugated paper does not need to be ironed. Then we place the napkin on whatman paper, cover it with a sheet of tracing paper and carefully iron it with an iron. I didn’t get it right the first time, it requires some skill))) This is what happens.
6. Now we cut off the excess parts of our square. We get such a figure.
7. Make cuts along the red lines.
8. Carefully bend everything using a ruler
9. We wrap the flaps and folds inward and get a nice box. More precisely, its lower part.
10. For the lid of the box, we repeat all the operations, only the dimensions of the square will be different. In our example, 2.5 cm + 3 cm + 7 cm + 3 cm + 2.5 cm = 13 cm
As a result of all the described manipulations, such a box appears
Everything is done quite quickly, in about an hour I did 6 of these things
And this is what the finished product might look like in beautiful packaging.
Hello, dear readers! Today we will talk about how to design a gift box. “Spending several hours to decorate a surprise is nonsense,” you will answer, because now almost everywhere you can buy ready-made packaging for a gift of any shape and size.
However, those who like to give and receive truly original and unusual gifts will immediately understand us. A gift that is made with skill, of high quality, and even designed in an original way - it will surprise everyone! So, let's figure out how to design a gift in a unique and original way?
How to decorate a gift box: 12 simple and cool ways
You can decorate a surprise box in a variety of ways.
Thick paper will help you
You can use anything for this bag: thick polished paper, newspapers, magazines. You must take into account one thing: the packaging must ultimately be designed for the weight of the gift.
Study the picture below carefully and get started! Be sure to use glue at all joints.
This packaging is often decorated with various tags or bows, or ribbons and pendants are used. If you are giving a gift for the New Year, you can glue a Christmas tree toy, a ball, a cut out snowflake or a branch from a Christmas tree to the bag.
Boxes of various shapes
In fact, making original and creative packaging for your gift is easier than it might seem at first glance. To do this, you need to buy a stationery knife, as well as sheets of cardboard. Prepare additional decor with tools like a stapler.
The work couldn’t be easier: draw and cut out a certain template from a sheet of paper (it is often used in the future), transfer the completed stencil to thick paper and carefully cut out the resulting workpiece. After this, make cuts on the folds and make a box.

Chocolate girls
An unusual gift in the form of a chocolate bowl. This is a package the size of a standard chocolate bar. It contains some sweetness, as well as a sincere, original wish. A monetary addition is also often placed in the chocolate bowl. Money can be placed under a bookmark in the package.
The chocolate maker can be decorated for absolutely any occasion. For example, on New Year's Eve they often wrap a chocolate bar in white paper, draw a figure of a snowman, and glue a hat on the top. There is a huge variety of ways to decorate any gift you give.

Thematic wrapper
Here you can start from the interests of the person to whom you are giving the item. For travelers, you can wrap your gift in a standard map of geography, for a music lover - in images of notes, for athletes - in images of medals and cups.

Natural materials
Also, do not forget about natural materials, since natural and natural decorations on gifts have always been valued both before and now. This type of decoration is often called eco-style. Craft paper is often used for the base of this packaging, and pine cones, fir branches, flowers, berries, nuts, wooden figurines and bright bird feathers are used as decorations - small children especially like this.

Pyramids
The pyramid is a very unusual and original packaging. You can put some nice little surprise in it and give it for any occasion. To create it yourself, double-sided paper is used so that the inner surface of the box is also beautifully designed. You can make this packaging very quickly (about 15 minutes) and simply.
For this you will need:
- beautiful paper;
- regular scissors;
- good glue;
- thin tape that matches the paper;
- varied decor.

Use of various materials: matchboxes, cans
In order for your gift to be different from the rest, to be remembered for a long time by a person and to surprise at first sight, you need to use something unusual.
For example, if you have a small gift, you can put it in an ordinary matchbox or in a nut shell. And also:
- use regular newspapers instead of decorative paper,
- sew together the boxes from the remaining postcards,
- place gifts in egg trays,
- decorated glass jars.
There are a great many options, the most important thing here is your imagination!

We focus on details
Many people forget that it is the details that give a gift its uniqueness and originality. If your packaging is already very bright and unusual, then you can do without various additions, since otherwise the gift will look tacky. However, if your gift packaging is of a standard, classic look, then the details are simply irreplaceable.

Japanese "furoshiki"
The art form “furoshiki” (literally translated as “bath mat”) is a method of elegantly decorating a piece of ordinary fabric. A kind of relative of origami, but only the work is done with textiles. This technique has been used for a very long time and was used in ancient Japan.
Below is a detailed diagram of how to assemble the box - it turns out very beautifully)
You can also watch the video:
Tags for wonderful gifts
Such leaves with small additions in the form of original inscriptions delight many people, because they are essentially the finishing touch of the product.
You can easily make tags yourself, using various decorative methods of “aging” the paper (it is soaked in weak coffee or weakly brewed tea, followed by the process of rubbing it with sandpaper, not rough, you can slightly tear the paper along the edges and much, much more).

Applications of Kraft Paper
Glittery gift paper is an important component for any gift wrapping. However, it looks quite standard and many have already become tired of it. To replace this paper, you can use eco-friendly kraft paper, which looks great and can be purchased at all office supply stores.
Important Note
In order for the packaging not to be boring, it needs to be decorated somehow. You can use drawing different figures and patterns with a felt-tip pen or paints, or by gluing a photo directly onto the wrapper - the main thing here is your imagination.
Using unusual decorations
While studying unique gift wrapping methods, it is necessary to talk about perhaps the most unusual method of decorating surprises - decorating with something edible. For example, lollipops, beautifully decorated sweets or delicious cookies in bright packaging will make the gift not only unique and inimitable, but also appetizing. You can use anything, the main thing is not to overdo it, know a person’s tastes, use your imagination and arrange everything correctly with taste.

And don’t forget that the most important thing in the process of gift wrapping is getting pleasure and pleasure from decorating the gift. Believe me, even glossy paper and gift ribbons can absorb your emotions and warmth, and the person to whom you give this beautifully designed gift will definitely feel it!
Don't forget to share this article with your friends and acquaintances on social networks. See you again and all the best!
Sincerely, Anastasia Skoracheva


