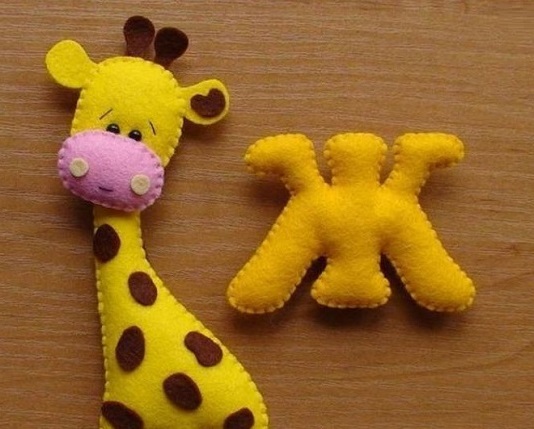
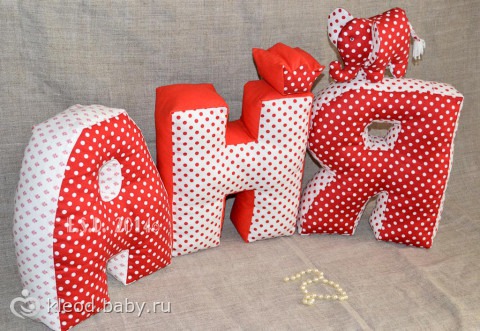
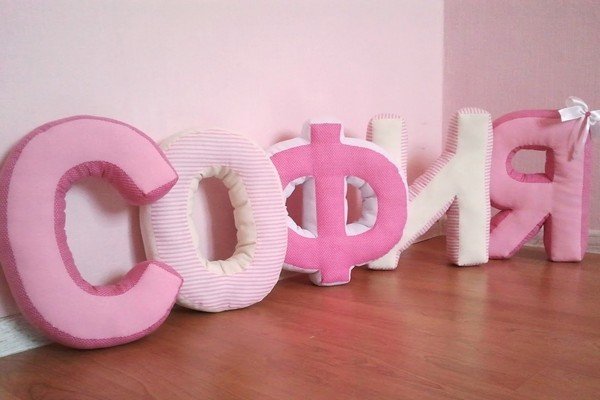
Interesting idea Decorating the interior of a children's bedroom or a couple's room with your own hands involves creating pillows in the form of letters and pillows with names. Such products will appeal not only to children, but also to adults. It all depends on the fabric, how colorful it will be and how it matches the style of the room’s interior.
Useful functions of letter pads:
- firstly, they look beautiful and stylish;
- secondly, they can be safely presented as a gift for a birthday or other holiday to a child, friends and relatives;
- thirdly, when playing with letters, the baby will remember the letters faster, and will also begin to understand syllables and form words;
- fourthly, you can sleep on this pillow and have wonderful dreams;
- fifthly, the letter pillow will become a wonderful toy.
A handmade letter pillow gift will become a bright, beautiful and creative detail in your home. You can sew the whole name or the letters that create your baby's name. The most interesting thing is that every woman can do this activity, even those who have never dealt with sewing. We invite you to watch a step-by-step master class
How to sew a letter pillow step by step?
The personalized pillow is sewn by hand or on a sewing machine. To create creative gift You need to prepare materials from fabric and filler. And also make a template or stencil of the letters you will work on creating.
What materials are needed for a personalized pillow?
- letter pillow fabric;
- choose the color of the thread;
- centimeter;
- soap, chalk or pencil for drawing;
- pins;
- cardboard for patterns;
- sewing machine;
- pillow filling (you can use holofiber, padding polyester, cotton wool).
How to prepare to create personalized letter pillows?
Important preparation points:
- product dimensions;
- thread quality;
- type of fabric;
- color of sewing material.
When choosing fabric by color, it is worth knowing who the letter pillow is intended for. For a child, we choose bright fabrics with floral prints, polka dots, stripes, with cartoon characters or just an abstraction of figures, the main thing is that the fabric is of medium density, high quality, natural. Chintz, flannel, calico, and fleece are often used for sewing pillows, but you can also take other types of fabrics; there are no restrictions in this regard, except that other materials are more difficult to work with during sewing.
We use nylon threads, which can withstand strong tension and also have a long service life.
Sewing methods, technology for creating pillow letters step by step:
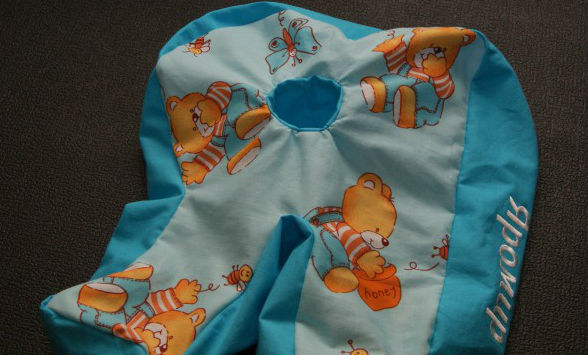
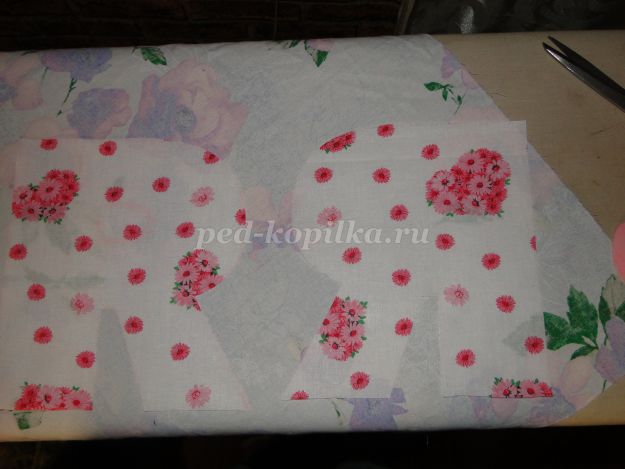
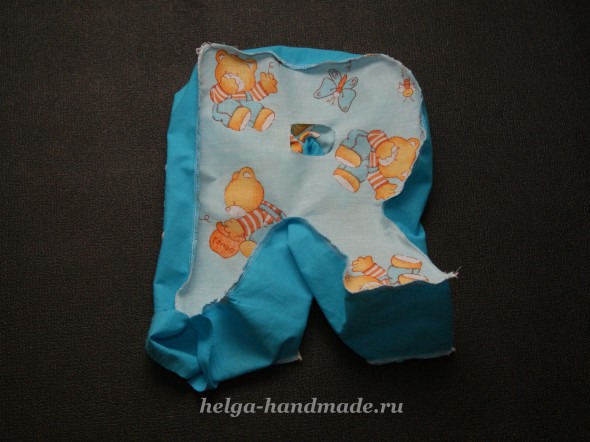
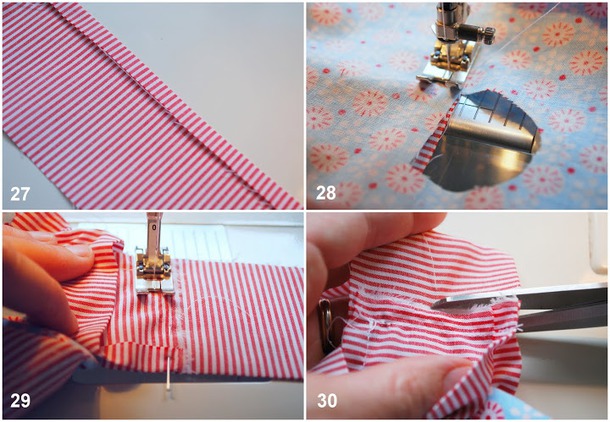
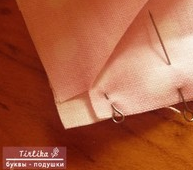
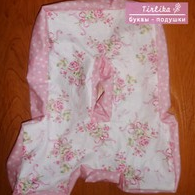
Step 1: A simple way to sew a product in the shape of a letter. First you need to make a pattern in the original form of the product. Draw a sketch on cardboard or paper, then cut out a template for the product. Fold the fabric in half with the right side inward and transfer the finished template onto it.
![]()
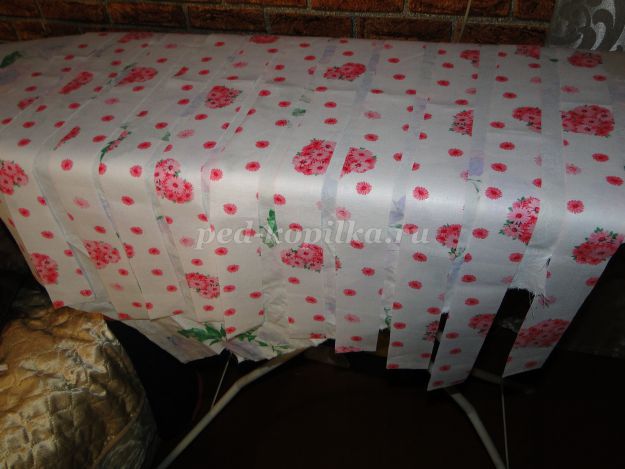
Step 2: We cut the workpiece strictly along the contour, do not rush, do it carefully, because the product will be sewn by hand along the front side. 
Step 3: You need to sew the resulting parts together using an over-the-edge seam. You need to level the product so that the letters are not pulled together by the thread, only after that tie the knots. Don't forget to leave a small hole in each letter through which we will fill the pillow. 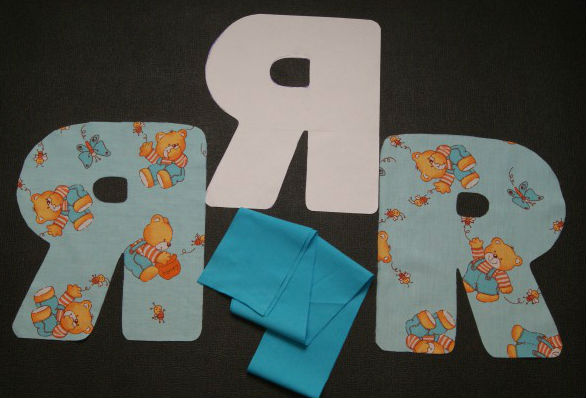
Step 4: Having filled, carefully sew the hole, then cut the thread. The letter pillow for creating a name is ready! 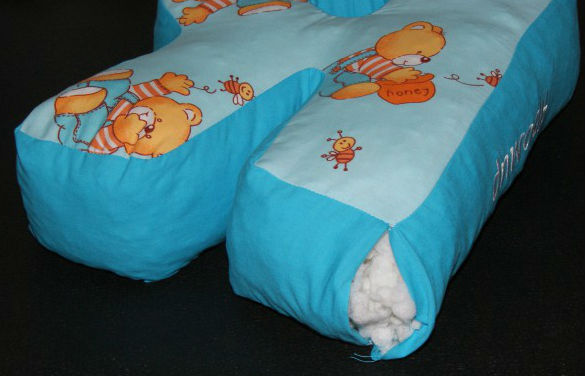

Step 5: If you want the pillow to clearly hold its lines, that is, its shape, you need to glue interlining or dublerin to the fabric on the wrong side. This is done before filling the pillow. 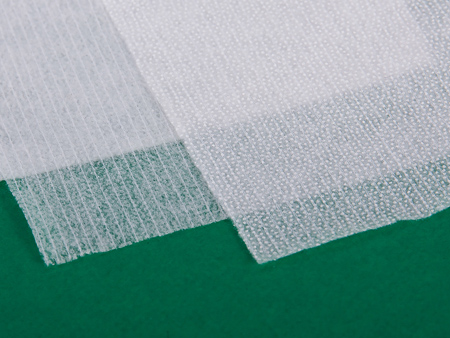
Decor of letter pillows
You can decorate such pillows to make them more colorful and presentable with lace, buttons, beads, bows; in general, each person can act as they wish.
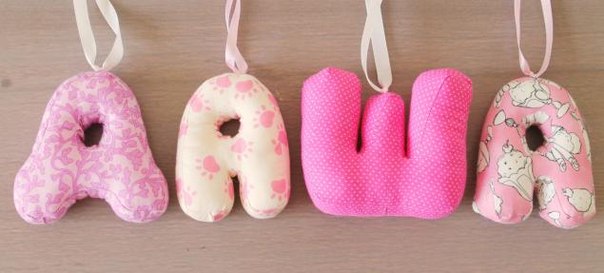
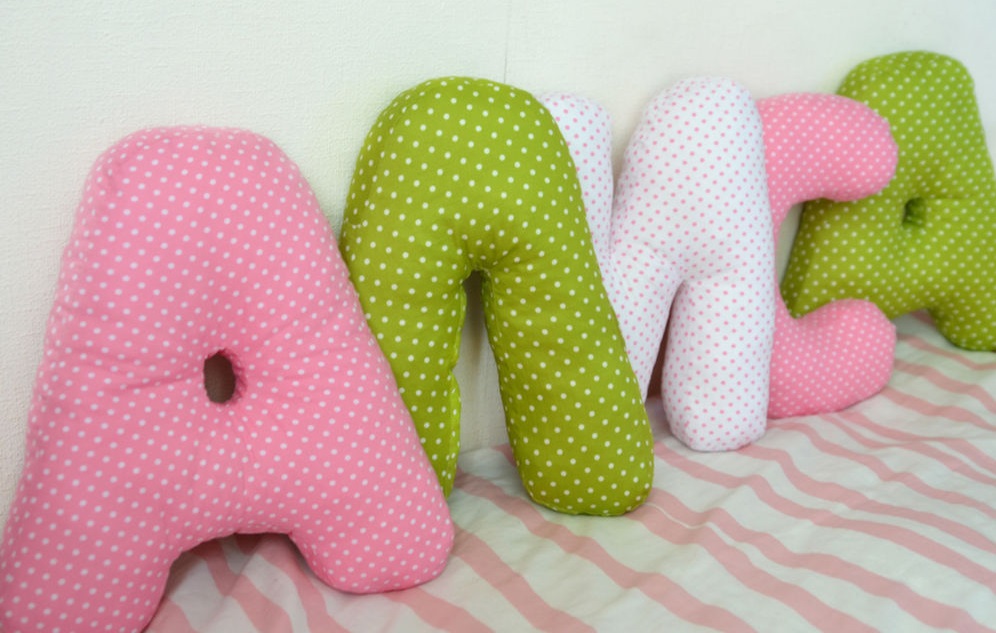
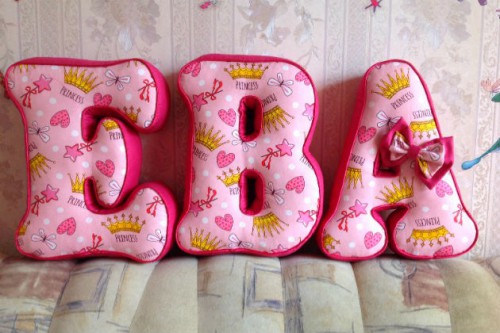
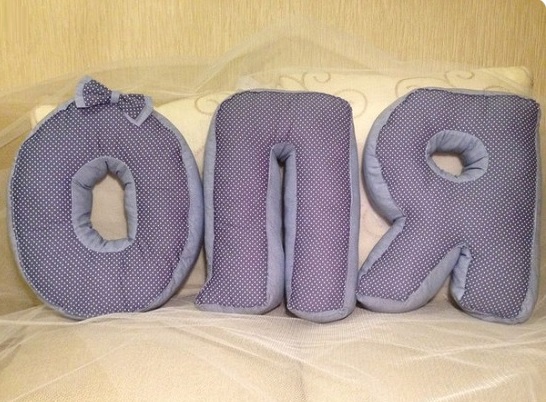
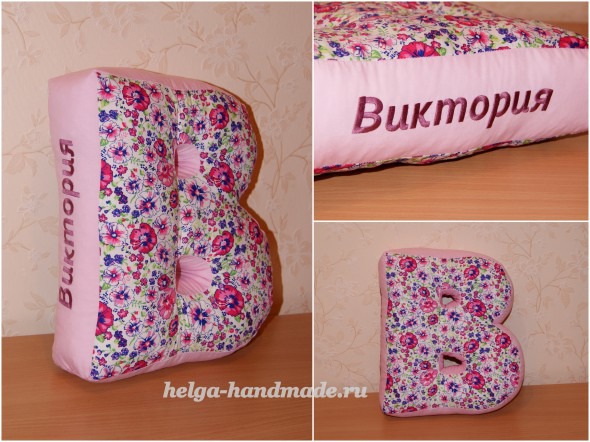
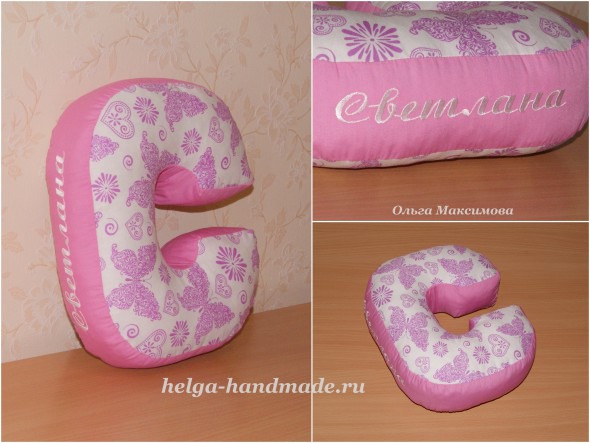
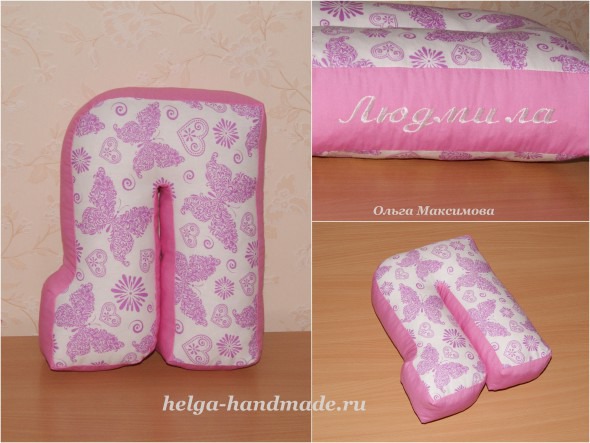
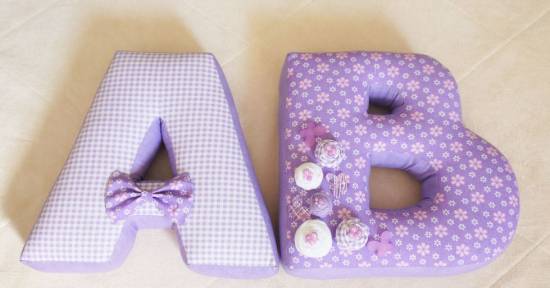
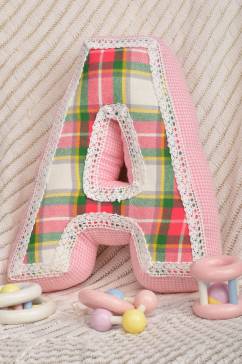
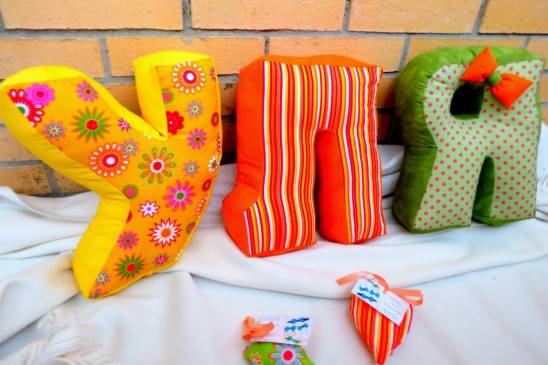
Photos of personalized letter pillows with your own hands
Master class "Textile volumetric letters-pillows"
This type of activity is suitable for secondary school students who are interested in arts and crafts.
Appointment of the master class: show all the necessary operations for creating voluminous decorative pillows complex shape.
Target: create voluminous decorative pillows of complex shapes (letters).
Tasks:
1. develop the ability to sew voluminous products
2. form aesthetic taste.
3. create an atmosphere of comfort in the home.
Recently, television has often shown programs and films in which the interiors are beautifully decorated with decorative pillows in the shape of the letters of the names of the characters.
Today, I want to show how such voluminous decorative textile pillows are made.
We will need:
1. letter patterns
2. fabric
3. decorative cords
4. satin ribbons of different colors
5. threads in the color of the fabric
6. glue gun
7. pillow filling
8. scissors
9. sewing machine
10. hands
11. needle
12. patience
13. neatness
The process of creating decorative volumetric pillows
1. Using a computer, a text editor and a printer, select a font for the text of future pillows and right size. (I advise you to use simple fonts, sans serif and fairly bold, thin letters will not be stable and beautiful). This way our pattern will be ready.
2. Take our fabric, in my case it was a simple calico, the denser the material, the wider the range of possible pillow fillings (even cereals and fabric scraps). We bend the edge of the material along the grain thread to the height of the cut, it is better if all the letters fit in 1 row. So, they will look more harmonious when combined.
3. Using chalk, we outline the outline of our letters; if possible, you can pin the fabric with needles so that when cutting out the letters, the layers of fabric do not separate and the letters are perfectly even. For each letter we need 2 back sides, which will be mirror each other, so that on both sides of the pillow the fabric is on the front side.
4. Now we need to prepare the side lines that will create volume for our pillows. We make them 5 cm wide. The length of these lines depends on the size of the pillow and the number of bends in it (i.e., on the complexity of the letter).
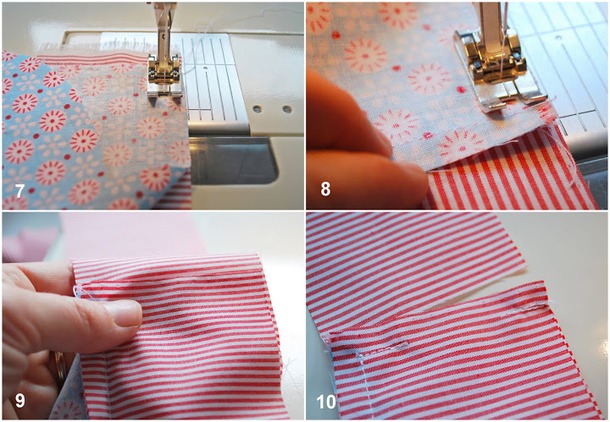
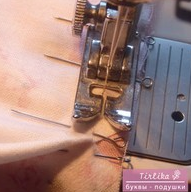
5. We begin to baste our patterns. Place the front side of the letter and the side tape right sides together (it’s better to start from the bottom so that the seam connecting the ends of the tape is not visible until the pillow is turned over). First we baste these 2 parts on all the pillows, trim the corners so that nothing is pulled and sew them on a machine with 3 mm stitches, turn them inside out, check that all the seams are sewn (if you don’t have a machine, you can do it with your hands, using the seam forward with a needle).
6. If in your word that you are sewing there are letters that are difficult to sew (a, b, c, d, o, r, f, b, y, b, yu, i), containing internal elements, then you need to baste in the second turn the internal element, using the same side stripe for it. After basting, we sew this layer on the machine. Here you need to be as careful as possible to place the element on the letter with the right side. If there are no such elements, go to point 7.
next otherwise the letter will have to be completely new.
8. After our letter is sewn, it needs to be turned out and filled with filler (sintepon, paralon, synthetic fluff, scraps, cereal, etc. depending on the thickness of the fabric, the filler can be different, the main thing is that it does not show through the fabric and did not spoil the appearance of the letters).
9. Now we return to complex letters again, we need to remember that if a letter is complex, then it has an internal element through which our letter must turn inside out. This internal element is sewn to the back of the letter by hand and this is done as a last resort, after the letter has been turned onto its face and stuffed with filler.
10. We sew up all our seams left for turning and stuffing, using a hand needle and thread.
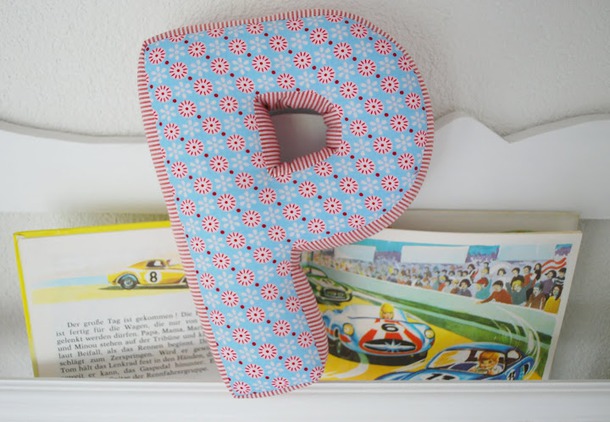
How to sew a volumetric letter pillow with your own hands
So, to make a letter pillow we will need: a little fabric for the base on the top and bottom layer of the letter (25-40 cm, depending on the size of the pillow you need), a strip of fabric 8-10 cm wide for the side of the pillow, pillow filling .
First, on paper, draw a pattern for a pillow of the size we need and transfer 2 parts in a mirror image to the main fabric.

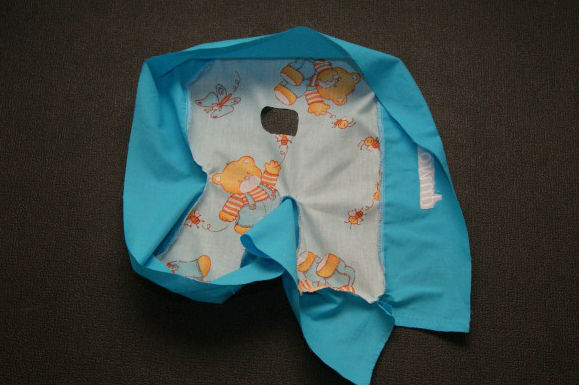
Then, from the wrong side, we sew the side strip, first to one main part, and then to the other, leaving a small part unstitched (to turn the pillowcase right side out and fill the pillow with filler)
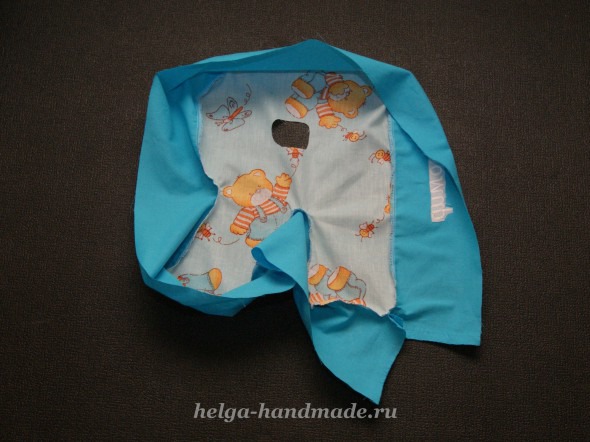
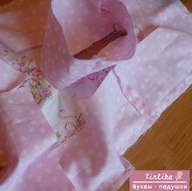
Turn it right side out.
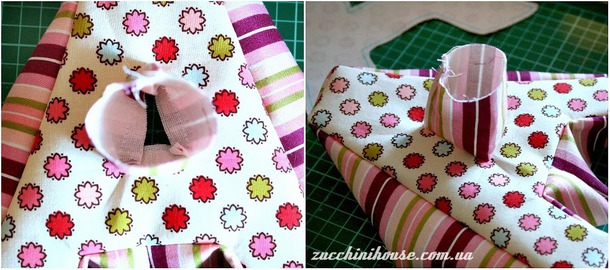
I sew the holes for some letters (A, O, Z, B and others) like this: I sew the side fabric into a circle and sew it on one side to the base. The most difficult thing to sew to the second side (from the inside out, pulling it out a little into the unstitched hole through which the pillow is then stuffed with filling) is to sew it by hand.
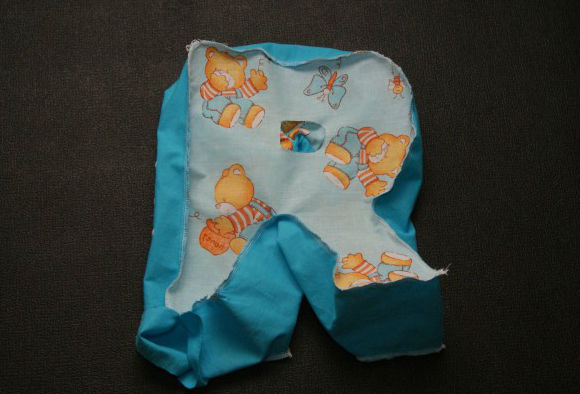
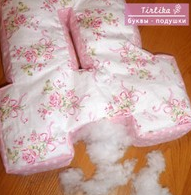
Fill the pillow with filler.
Sew this hole by hand.![]()
***
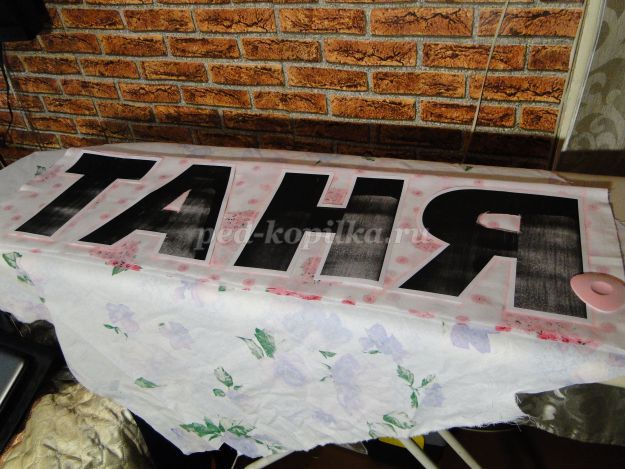
How to sew fabric letters, tutorial

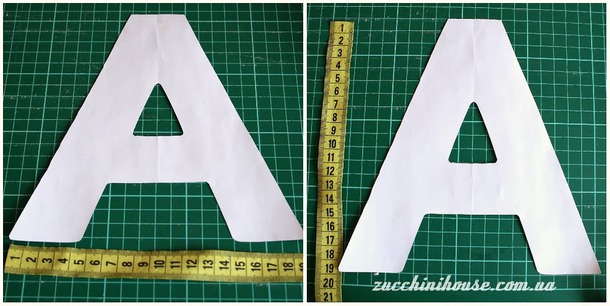
First, we print on a printer a letter (or the entire alphabet) of a size and shape that is convenient for us. My letter turned out to be 19*19cm.
* I am often asked in letters what font of letters I use... I printed out the first alphabet I liked, although later I made adjustments to " appearance"letters in my own hand.
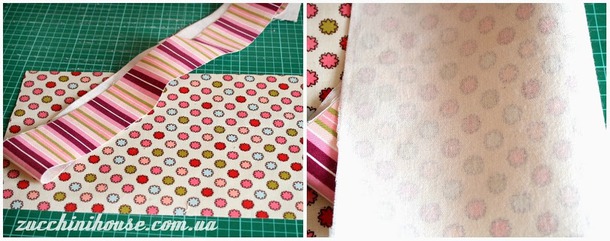
Since we plan to have a voluminous letter, we will need two types of fabric, for the “face” and the sides. Or you can just make it plain. I pre-sealed the fabric with doublerin, although before that I used adhesive interlining. I didn't have it at hand today.
* If you plan to make the letters more loose and grippy to the touch, and it doesn’t matter to you whether the letter will hold its shape well, then you can do without interlining.
1. We transfer the letter pattern to the wrong side of the fabric; I took the width of the side panel to be 6 cm, so that our letter would stand firmly on its “legs” and have a pleasant plumpness. Seam allowances 0.5-0.7cm

2. We fold one “face” and the side panel with the front part facing each other, sew in a circle, not forgetting to make notches in all concave/convex places. I started stitching from the lower middle of the “crossbar” of the letter A, so that later when sewing this seam would be less noticeable.
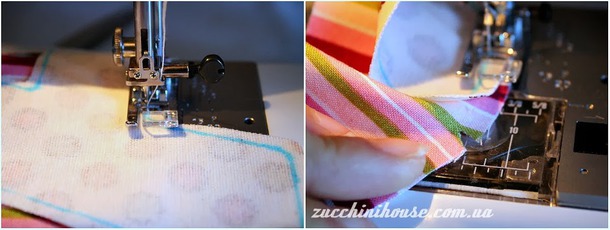
*
Please note that we do not sew the ends of the side panels; through this hole we will then turn out and stuff our letter.
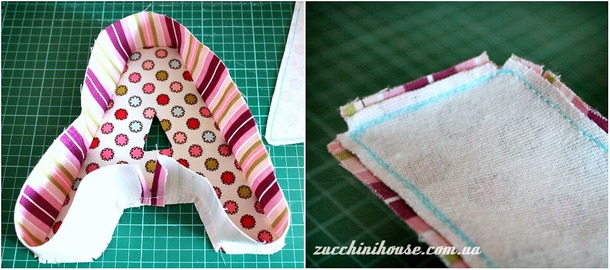
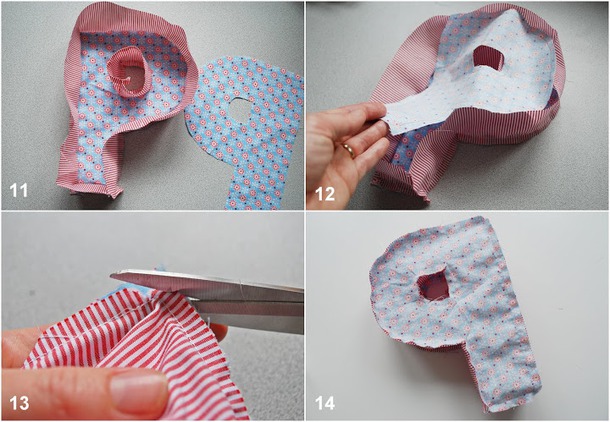
3. Now the most unpleasant part is sewing in the “donut” (the inner part of the letter). To do this, use a thread or cord to measure the size of the inner hole, and cut it off from the remaining side panel with an allowance of 1-1.5 cm. You can sew this section and sew in the resulting pipe by hand - I just sewed it in a circle on a machine. The result is a cuttlefish like this.
4. Next, it’s easier - all that’s left is to stitch the second half of the letter in a circle.
And turn it out through the inner hole (“donut”) or through the unsewn ends of the side panels (see photo below).


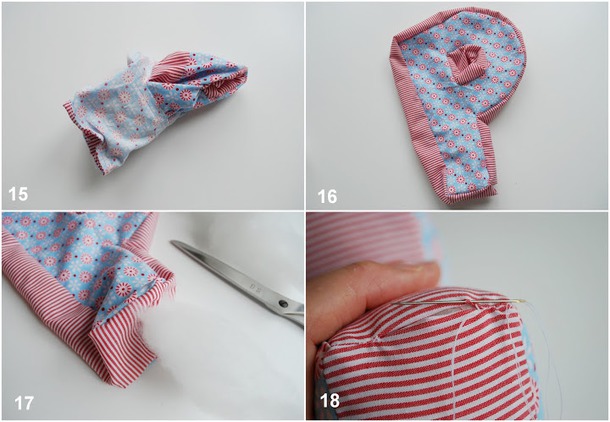
5. Now the usual stuffing - you can stuff it through the middle hole and through the “crossbar” of the letter A (unsewn ends of the sides). As practice has shown, in order for the letter to have a pleasant heaviness and hold its shape well, it is better to use medium-thick padding as padding; it is more tenacious and becomes quite rigid upon subsequent steaming.

6. Next, sew up the bottom with a hidden seam, and secure the inner donut with pins.

7. Finally, we go through the iron thoroughly with steam... a lot of steam, a lot - I didn’t photograph this process, because everything is clear with it. We just steam each side of the letter N number of times, and in the end we get something like this.
http://www.zucchinihouse.com.ua/2012/03/blog-post.html
********

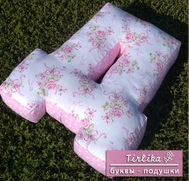
![]()

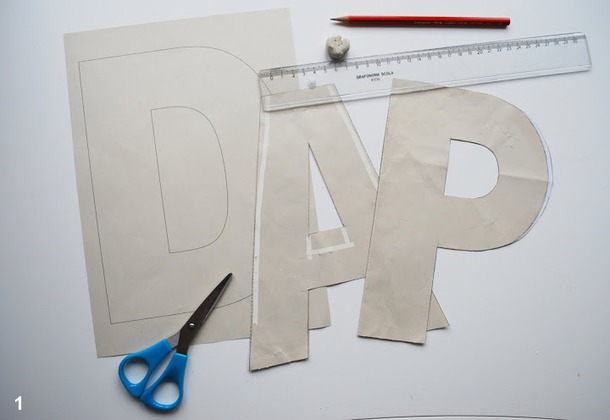
1. In order to sew pillow letters, you must first draw the font itself, manually or on a computer, then cut it out onto thick cardboard.
2. The letters have a stripe width of approximately 5 cm and the letters themselves are 24 cm high and 18 cm wide, but the size can be any.
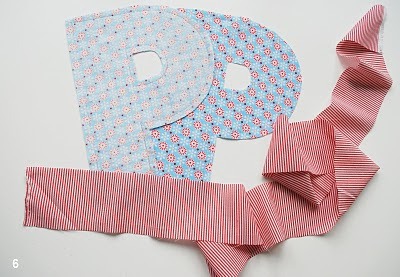
3. Cut out 2 pieces of letter halves and side stripes across the entire width of the fabric.
4. First we sew the side strip into the “holes” of the letters only and then around the entire perimeter. You will have to work hard with the center of the letters; before sewing, make a hand basting seam.
5. After we connect the two halves of the pillows, do not forget to leave a hole for the filler.
6. Cut the corners and let them sit on the seam so that they don’t pull when stuffing.
from the forum http://www.tilda-mania.ru/forum/24-216-1
source:
***


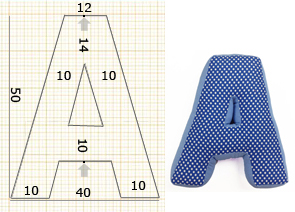
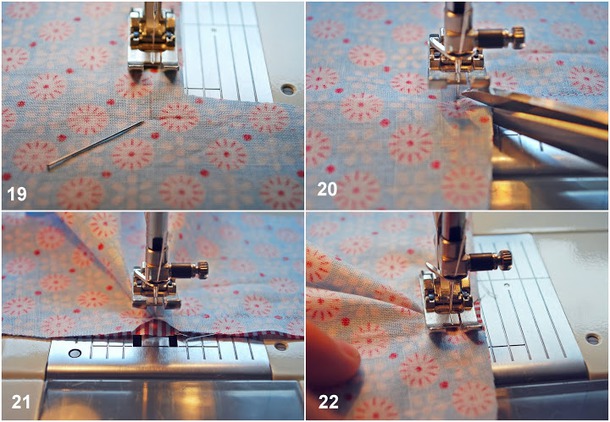
Perhaps the most difficult part of sewing such a pillow is figuring out the sequence of its assembly. If pillows in the shape of the letter T, M, C and even E need only be assembled and turned out, then the letter A will have to be sewn in two steps. First, sew the seams indicated by the white line, that is, the outer contour. Only section (C) should be left unsewn, on one side, preferably on the reverse. In the diagram, the front and back sides of the fabric are specially highlighted in color. Naturally, the parts need to be folded with the right sides facing inward before sewing. The inner part of the letter (A) can also be “assembled”, but only halfway. That is, sew a strip 10 cm wide on one (either) side. On the other hand, you need to sew on this strip only after you turn out the pillow cover.
As a result, you will have two unsewn sections: (C) and one inner side(D). Now you need to get through the section (C) to the inner unstitched part (D), pin it with pins or sweep it and stitch it on sewing machine. After this, you will only have area (C). But you will need it to put padding polyester or other insulation into the pillow. And only after this will you need to sew up this area using one of the methods convenient for you, for example, with a hand-blind stitch. If you have enough experience, you can install a zipper or sew on Velcro. It will come in handy when you decide to wash your pillow cover. You can even make a button closure, which will be an additional decorative element of the textile letter pillow.
Pay attention! Please note the following points.
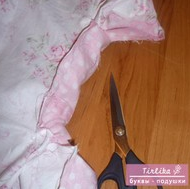
1. In order for the fabric to lay out well, it needs to be cut out in sharp corners, and notched in blunt corners. The diagram shows scissors for this, just don’t forget about it when you turn the pillow inside out. True, this is not always required, especially if the fabric is soft, knitted or the seam allowances are small. But if you sew a pillow cover from hard, rough fabric with an allowance of 2 cm, then you cannot do without it. See: We sew and cut our own patchwork quilt.
2. The side part (strip) must be marked in places where it “turns”, that is, corners (in in this example). When you sew one side of the strip completely along the back of the pillow, place a parallel mark for this connection (corner). When you sew the strip to the other side, these marks will help you prevent the fabric from shrinking or stretching too much. This is especially important when the front and back sides of the letter are cut from different materials.
3. Marking must be done for other letters, especially such as (O). Only in this case, instead of corners, notches will serve as marks. Fold both parts of the letter and cut with the tips of the scissors along the contour of the letter in several places.
http://www.sewing-master.ru/bukvy-podushki.html
******
for example:

***
| Categories: | |
Cited
Liked: 2 users
An interesting interior solution is pillow letters, patterns for making which will be presented in this article. Such pillows will appeal to both adults and children, as they decorate the room and create an atmosphere of comfort.
Step-by-step instructions for sewing a pillow
Letter-shaped baby pillows can serve multiple functions. First of all, they fit perfectly into the interior of a children's room, creating an atmosphere of comfort for the child. Also, with their help, a child can easily master the alphabet. In addition, such pillows can undoubtedly become a good gift for the holiday.
In order to sew a letter pillow, you will need fabric and threads that must match in color, and you also need filler to make the pillow voluminous. In addition, you will need some tools: a sewing machine, needles and pins, a tape measure, scissors and a knife. How to sew letter pillows with your own hands: patterns and descriptions will help you figure it out.
The first step is to draw a letter of the shape you want to sew on a piece of paper. It can be straight, curved - it all depends on your idea.
The second step is to choose the fabric to work with. You can sew it from any fabric, but pillows made from dense fabrics, such as plush, will look better. The choice of fabric color depends on personal preference, but it is worth remembering that when purchasing fabric of a certain color, you should choose threads to match.
Third step - at this stage it is important to cut out the letters correctly. To do this, we fold two pieces of fabric with their right sides facing each other, put a pre-drawn letter on top, for convenience, secure it with pins and cut it out, leaving allowances. In order for you to succeed three-dimensional letters, you need to cut out not only the front and front parts, but also the side ones. The side parts are strips that are cut out of fabric; their length is calculated using the formula: the width of the letter plus two allowances.
Fourth step. You should start assembling all the parts by sewing the side part to the front part of the future letter, you can secure the parts with pins or by basting a line. It is necessary to make cuts in the corners: if the corner is external, the cut is made on the fabric of the side part, if the internal corner is made on the fabric of the front part. Then you need to secure the back of the letter. When all the parts are secured, they need to be ground. After the seams are processed, the letter must be turned inside out.
Fifth step. In order for the finished pillows to be soft, they must be evenly filled with filler. After this, you need to complete the processing of all seams.
Sixth step. At the final stage, it is advisable to clean the pillow from excess threads, iron out all the folds and steam.

A master class on sewing letter pillows will help needlewomen understand all the nuances at all stages of work.
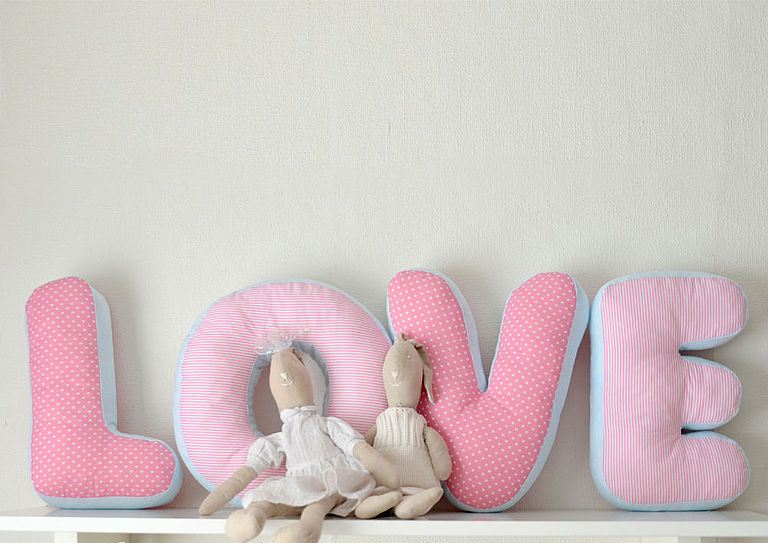
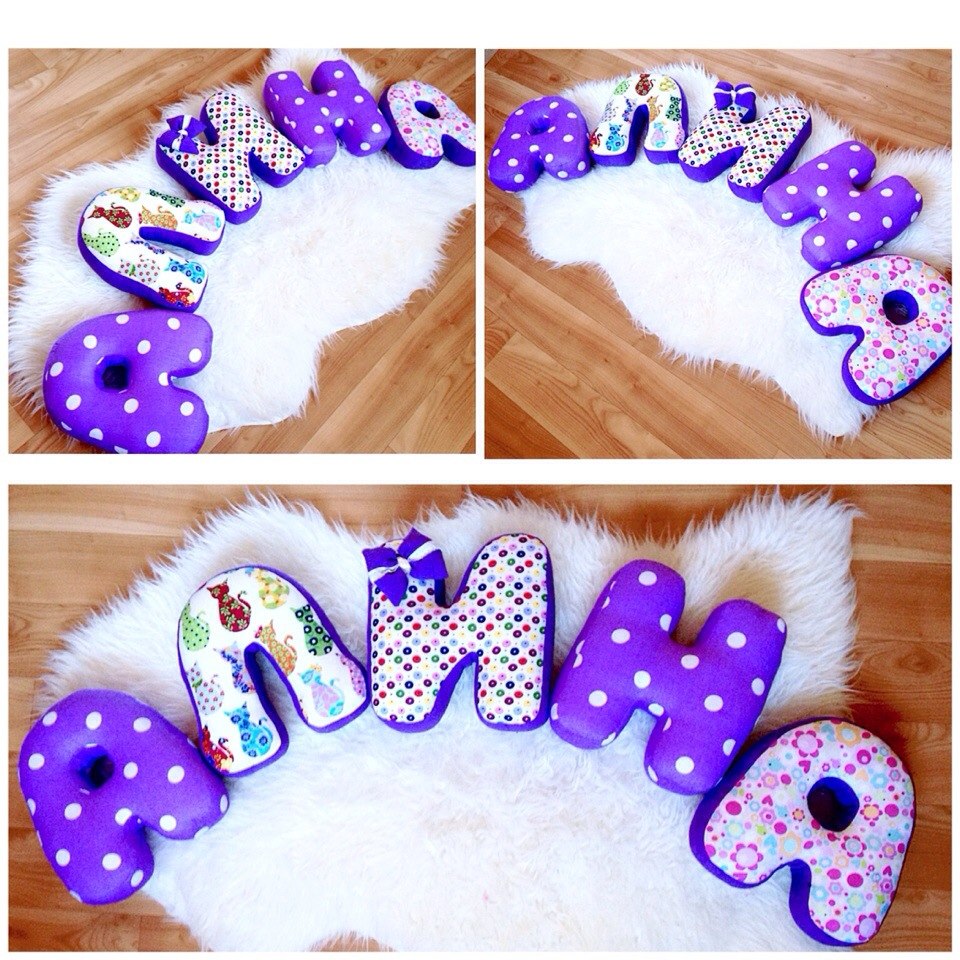
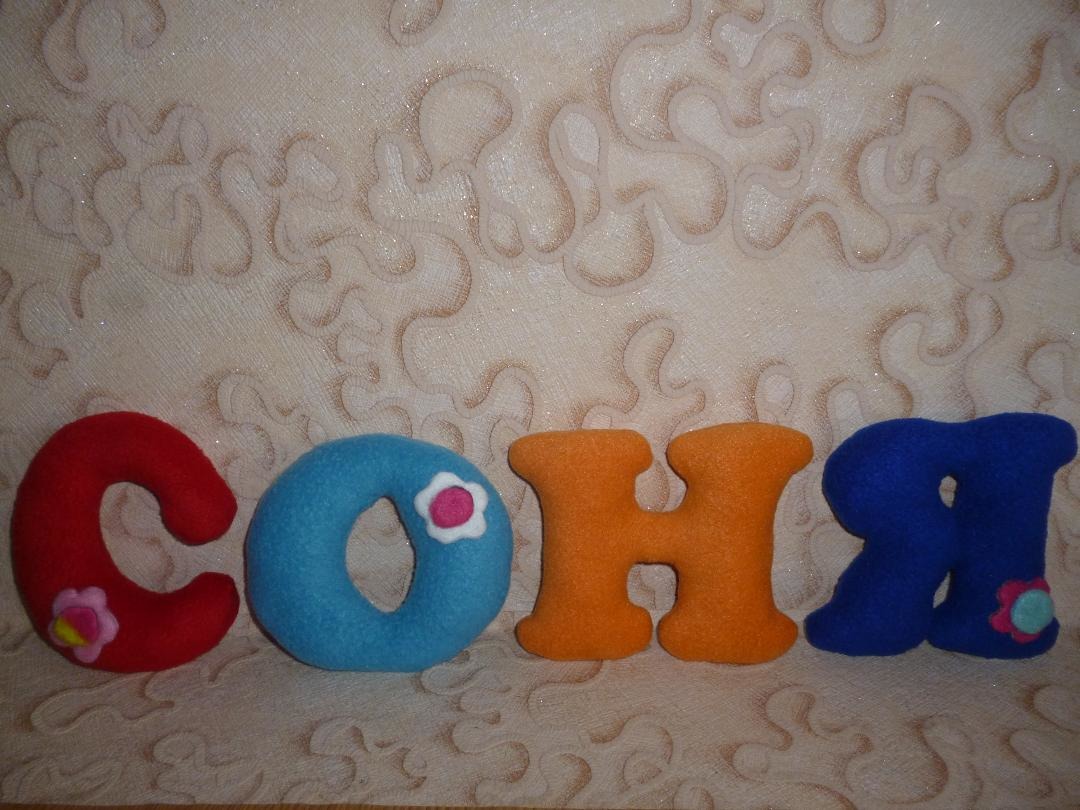
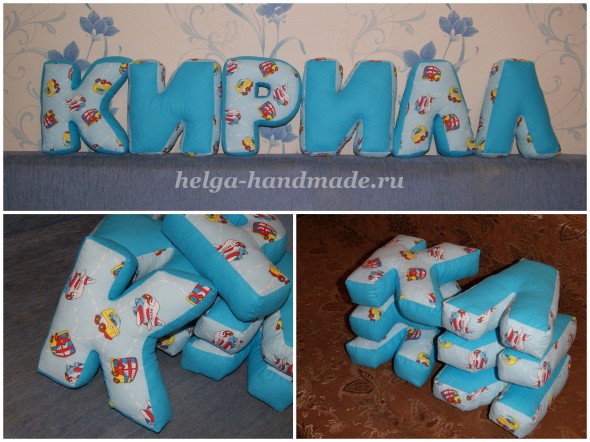
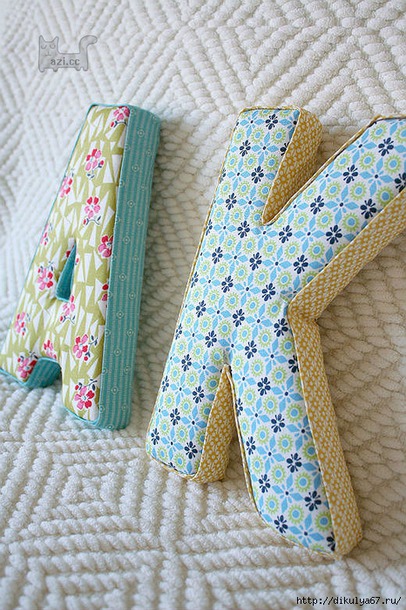
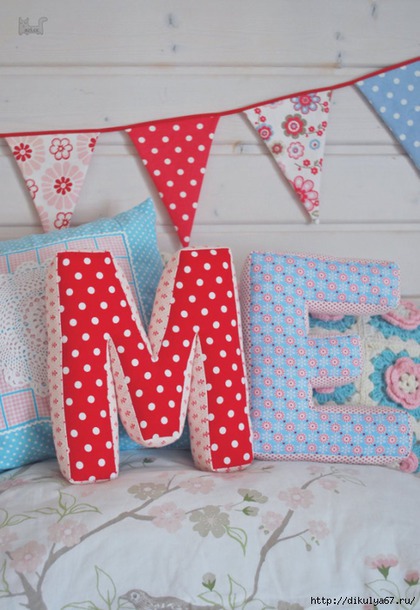
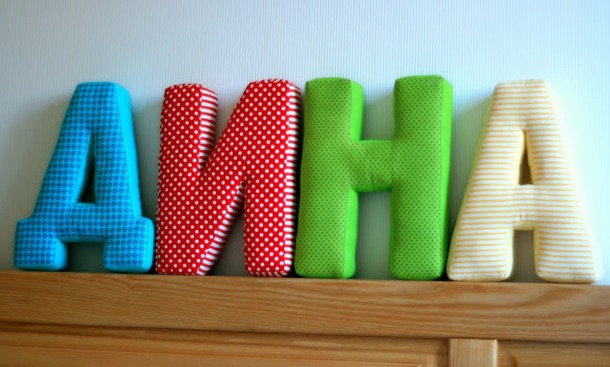
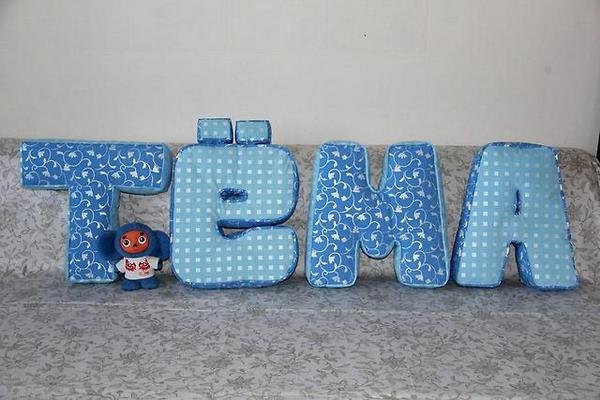
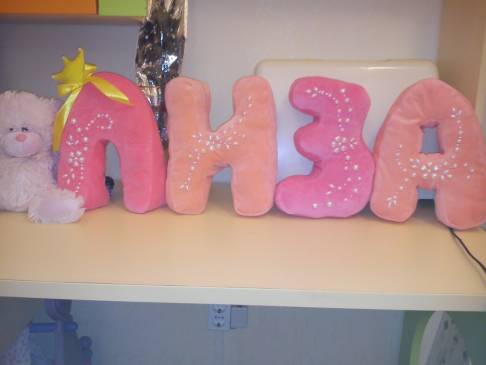
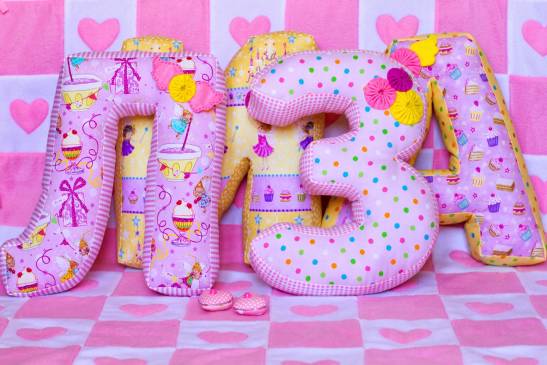
Examples of letter pillows
Beautiful personalized pillows are popular because they are rightfully considered an original decoration in the interior of any room, and with their help the room becomes cozy. Needlewomen share the results of their work, as evidenced by the photos.
Video on the topic of the article
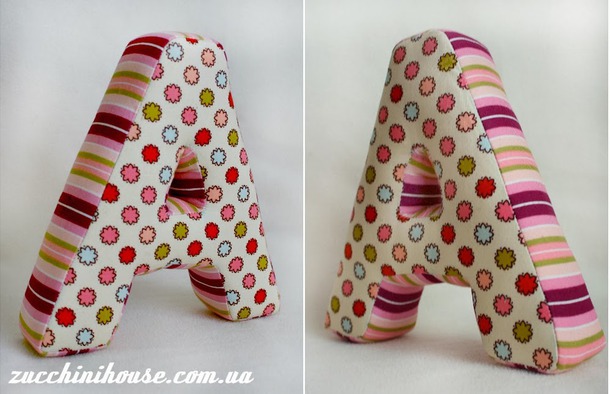
Volumetric soft pillows in the shape of letters - stylish and unusual decoration for your bedroom. They are very easy to sew with your own hands, and you only need a little material. Let's take a look step by step instructions on how to create letter pillows at home. As an example in our master class, we use the letter A, since the principle of creating other letters is no different.
Choosing fabric and filler for letters
Letter-shaped pillows must be voluminous, so it is advisable to prepare several types of fabric: for the base and for the sides. Choose the material from which you will sew pillows at your discretion. We recommend buying felt, fleece, felt or any other fabric whose edges will not roll out. If you choose a thin material, be sure to glue it with non-woven material. Pillows in the shape of letters can be either plain or bright.
Select the threads to match the selected fabric, otherwise you will end up with a sloppy and unattractive pillow.
Useful information: You can use cotton wool, padding polyester, synthetic padding polyester, holofiber or pieces of fabric as filler (if you don’t have suitable materials at hand). To sew a pillow according to our example, you will need at least 50 centimeters of double padding polyester.
Necessary tools for work
To sew a letter pillow you will need the following materials:
- Textile;
- Threads to match the fabric;
- Filler;
- Graph paper or regular A3 paper sheet;
- Scissors;
- Pins;
- For the pattern - chalk, a piece of soap or a pencil;
- Measuring tape or ruler.
You can stitch the letter fragments together by hand or on a sewing machine. The advantages of the second option are obvious: you will spend much less time, and all the seams will turn out smooth and neat. But with minimal experience, even in the absence sewing machine you can create a pillow letter in 4-5 hours.
Making stencils and patterns
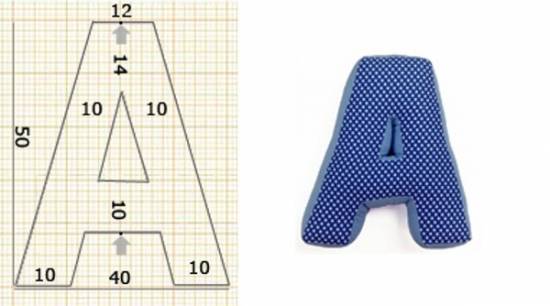
The stencil is best drawn on graph paper.
First you need to decide on the size. If you plan to sew one pillow, it can be large and voluminous. If you want to make a name out of letters, then it is better to make them small. In principle, the height and width of the pillow letter does not matter. The most important thing is not to make a mistake with its thickness. Remember that after you fill it with filler, the pillow will “lose weight” by about 2 centimeters.
Before making a pattern, cut out several letters of different sizes from prepared paper (before) and choose the most suitable option.
It is best to make a letter-shaped pillow pattern on graph paper - this way it will turn out perfectly smooth. Pay attention to the picture (top and bottom). The arrows indicate the central points that divide the letter into 2 equal parts. We recommend making similar markings for any letter, because most of them have a mirror image (C, O, L, M, T, F and others). It is enough to make only one pattern for the front part of the letter being made, the back side will be similar, just remember to turn it over when cutting the fabric.
There is no need to cut out the side parts that will connect the two halves of the letter into one whole. Select the width and cut out the appropriately sized strips of fabric marked with chalk or soap. Don't forget to allow seam allowances for all pattern pieces.
Calculation of the amount of fabric
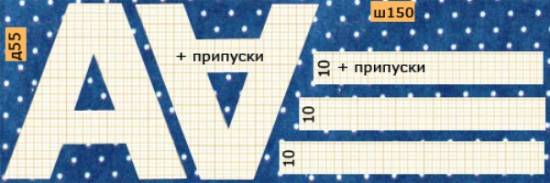
By marking the fabric as in the picture, you will use the material most economically
To pattern the letter A you will need a piece of fabric measuring 50 by 150 centimeters. To begin with, choose a simple font, without curls or monograms. For the side stripes, choose a width of 10 centimeters (not counting the allowance). If necessary, they can be assembled from several pieces of fabric sewn crosswise. If you buy cheap fabric, don’t skimp, buy with a reserve. Don't forget that you can use a companion fabric.
Before going to the store for fabric, lay out the pattern and mark the intended width. Then it will be easier for you to calculate its consumption. It is not at all necessary to cut the halves for the pillow in the form of a letter along the longitudinal line. The thing is that for most letters you will still have to cut the fabric in a circle. But you need to cut the strips in one direction, preferably along the grain thread. Remember about the allowances, they must be present inside the pillow (at least 1.5 centimeters).
Instructions for sewing a pillow
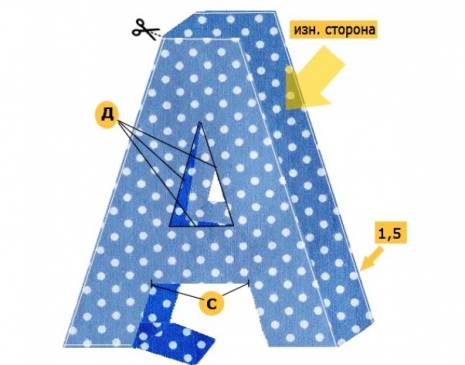
When assembling fragments, sections (C) and (D) must be left unsewn
The most difficult thing in the sewing process will be to understand the assembly sequence. When creating the letters T, M, E, C, etc., it will be enough to simply turn them out at the end. And, for example, the letter “A” needs to be sewn in 2 steps. First sew the seams, mark them with a white line. This will be the outer contour of the product.
Useful information: Please note that the inner side of the fabric is highlighted in color in the diagram. Remember that before sewing, the fragments must be folded with the right sides facing inward.
As a result, you will only have 2 sections (C) and one inner part(D). Get from area (C) to the unsewn side (D), pin it with pins or baste it with thread and stitch it on a sewing machine.
There will be an untreated area (C). It is needed in order to put the selected filler into the pillow. Stuff the product with it and sew section (C) in a way convenient for you - for example, with a hand blind seam. If you have previously practiced complex sewing, you can put a zipper on the pillow or sew a special Velcro. It will come in handy if you want to wash the cover of the product. You can also make an unusual button closure, which will serve as an additional decoration for the letter pillow.
During the sewing process, be sure to pay attention to the following points:
- In order for the fabric to be laid out easily, it must be carved at sharp edges, and notched at blunt edges. On the proposed diagram, scissors are drawn; when you turn the cover inside out, don’t forget about it. Die-cuts and notches are not necessary if you have chosen a soft fabric or left small seam allowances. However, if the material is dense and the length of the allowance is more than 2 centimeters, you won’t be able to do without them.
- Be sure to mark the side stripe in the places where it “turns”. If you sew one side of the strip completely along the contour, mark this connection (corner) with a parallel mark. When you begin the second strip, the marks will help you prevent the fabric from shrinking or stretching. This is especially important if the front and back of the letter are made of different materials.
- It is advisable to do markings for all letters. Let us especially highlight “O”. In it, instead of the proposed angles, notches should serve as marks. To make them, fold two pieces of blanks for the pillow letter and cut the fabric along the contour in several places with the edge of the scissors.
Decorating the product
To decorate the finished product, you can use stripes, bows, ribbons and other elements
An accurately constructed pattern of a letter-pillow, the correct cut and marking of joints, cutting and notching of corners will help you make a beautiful and neat pillow. Decorating a pillow can be considered the use of companion fabric. However, it can be decorated further. Try, for example, stitching the outer contour of a letter pillow. It will not only serve as a decoration for the product, but will also hide mistakes made during sewing.
The edging inserted into the outline also looks unusual. But we recommend using this decoration option only for people who have practice in sewing. But with the help of large loops and beautiful buttons, even beginners can give the letter pillow an original look.
You can also use different ribbons to decorate the pillow. Try tying them beautiful bow and attach to the product. Decide for yourself what type of decoration to choose - it all depends on your personal preferences!
Photo examples of decoration
Lace
Bow
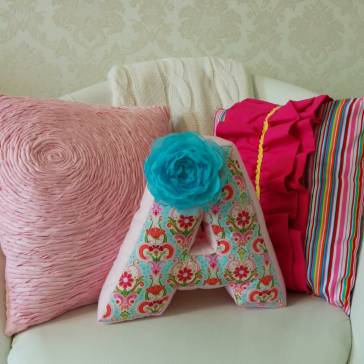
Volumetric flower
Beads

Original parts
Applications
Video. How to sew a pillow in the shape of a letter with your own hands?
Sewing a pillow in the shape of a letter with your own hands is much easier than soft toy. The main thing is to have the desire and very little free time. We hope our article will help you quickly understand all the intricacies of this process and create a beautiful product. And most importantly: if you fail, don’t be upset, because this is just your first experience! Just learn from the mistakes you made and the next letter will be perfect.


